For 1990-2009 cars only
Engine Front Cover Replacement With Oil Pump Assembly
Tools Required
| • | J 38122-A Crankshaft Pulley Holder |
| • | SA9105E Engine Support Fixture (3-Bar) |
| • | J 43405 Engine Support Fixture Adapter |
Removal Procedure
- Disconnect the negative battery cable.
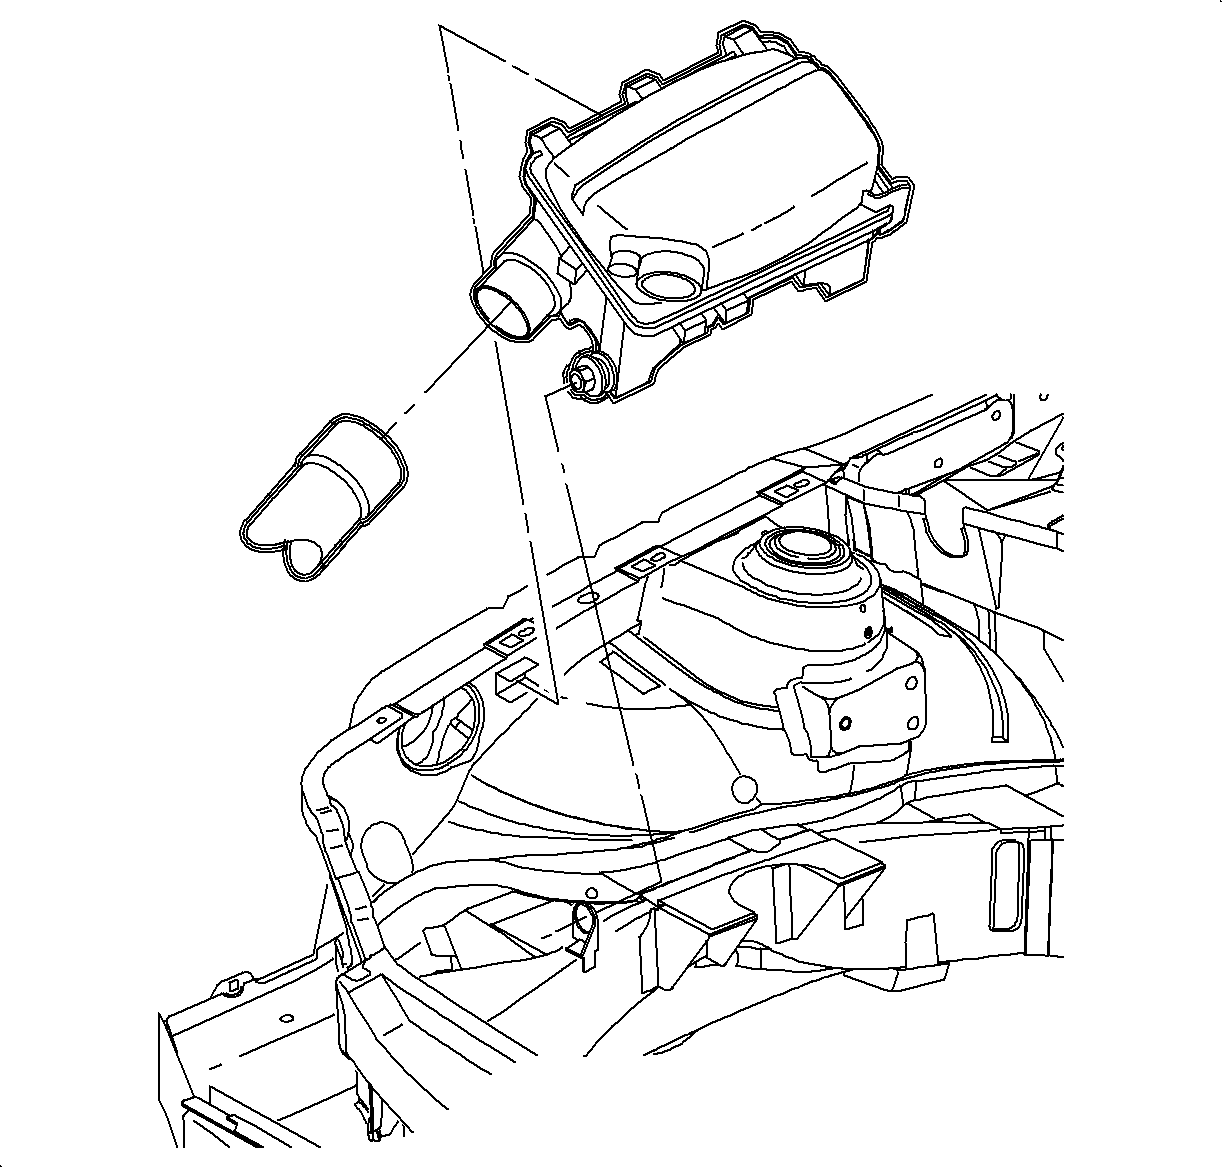
- Remove the air cleaner assembly. Refer to Air Cleaner Element Replacement in Engine Controls-2.2L (L61).
- Jack the vehicle or raise on a hoist.
- Drain the engine oil.
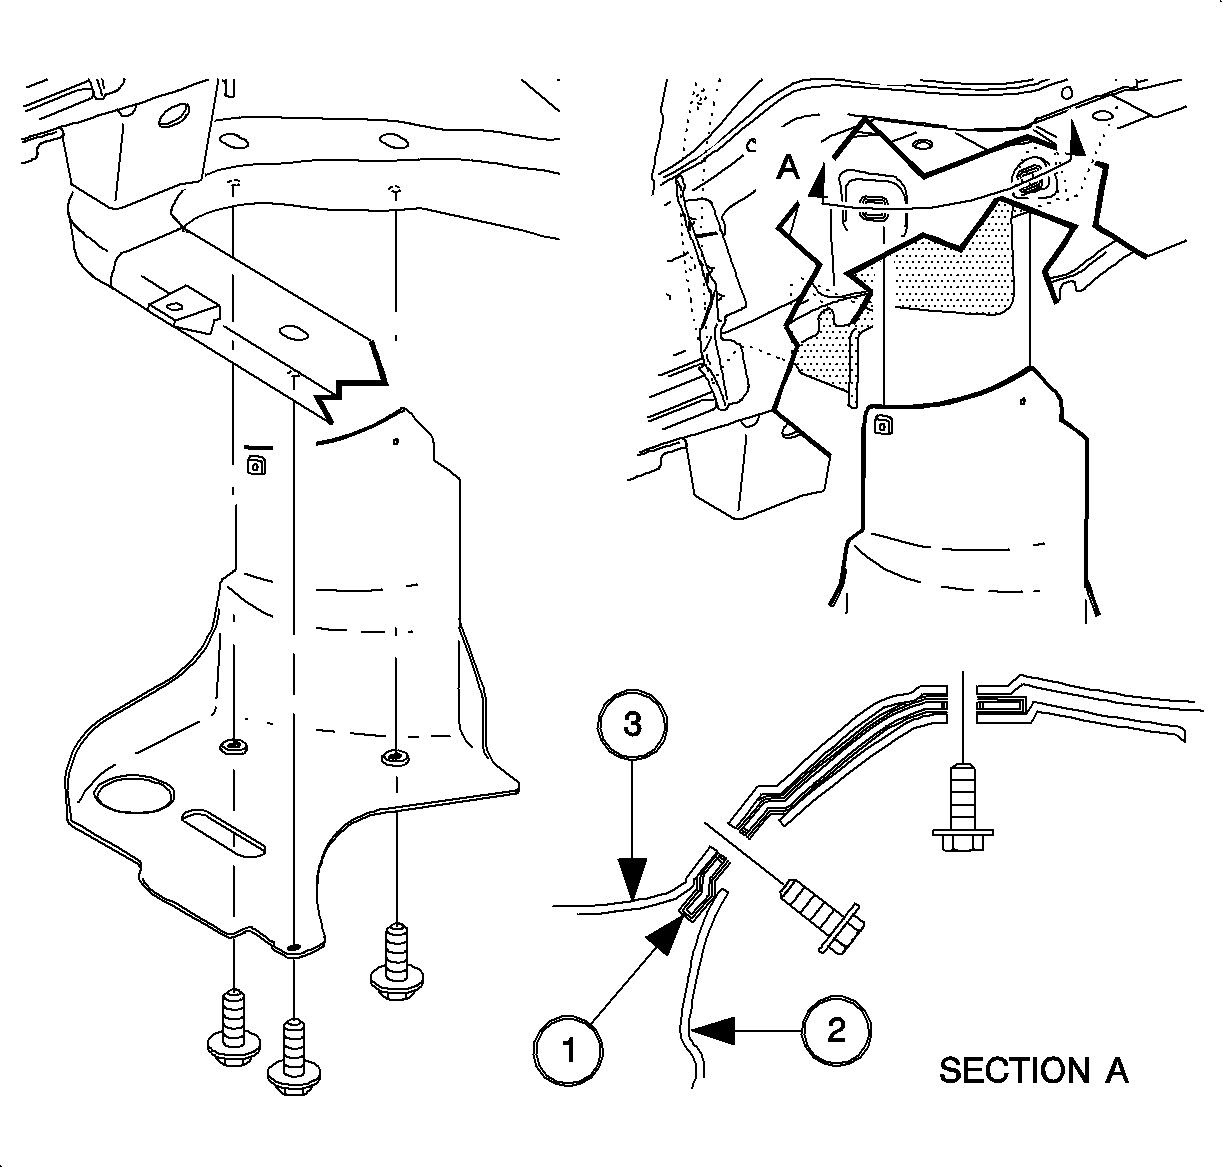
- Remove the right wheel and splash shield.
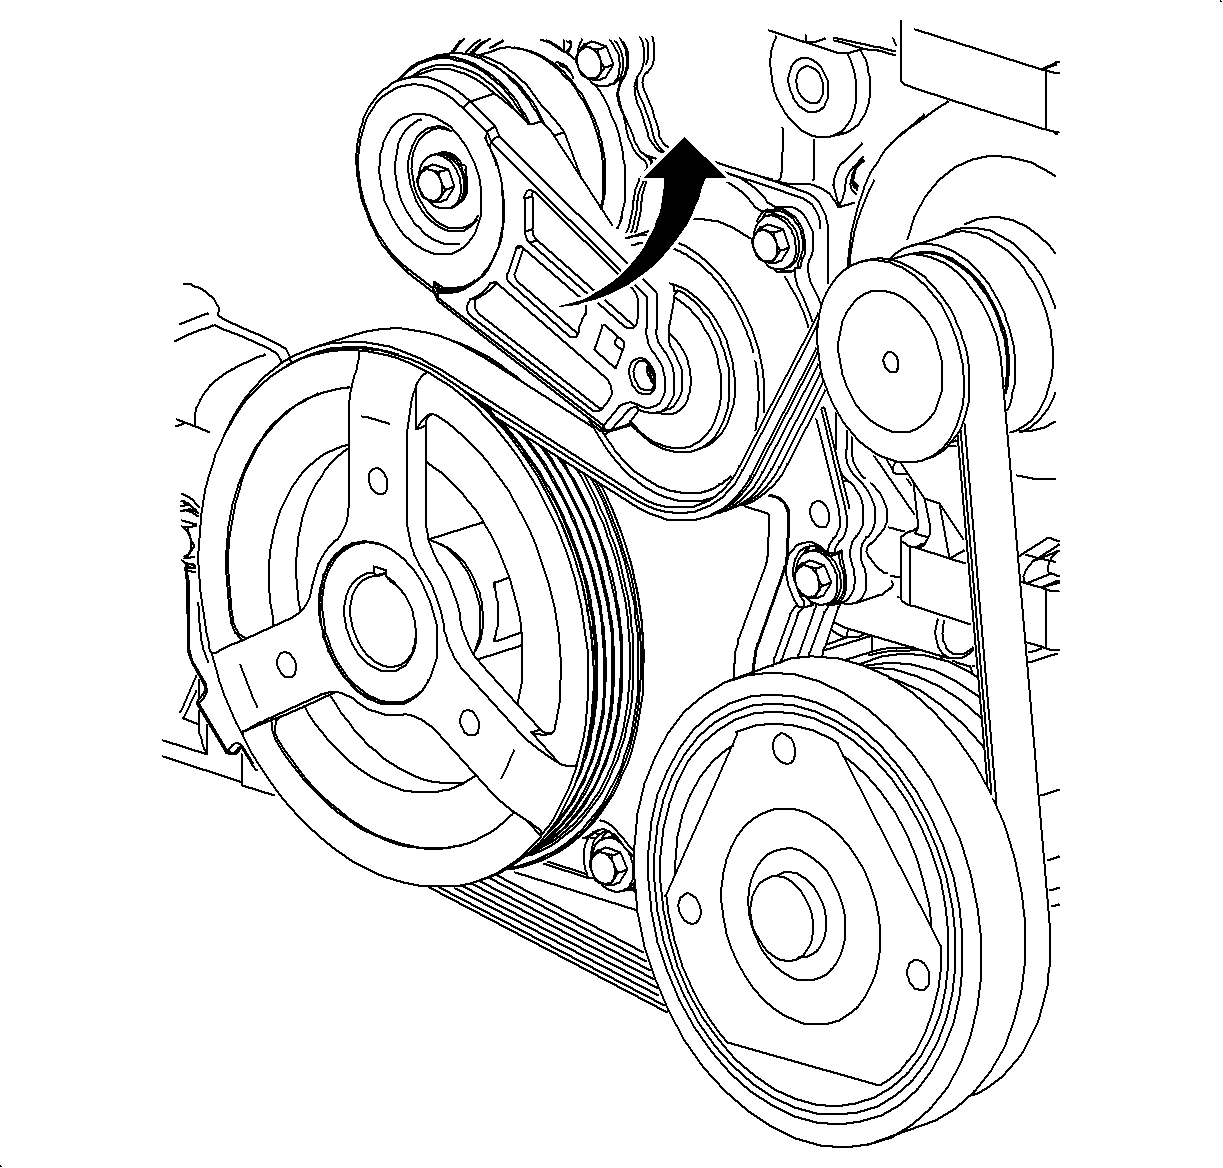
- Remove the engine accessory drive belt.
- Install the J 38122-A .
- Remove the crankshaft damper pulley and discard the bolt.
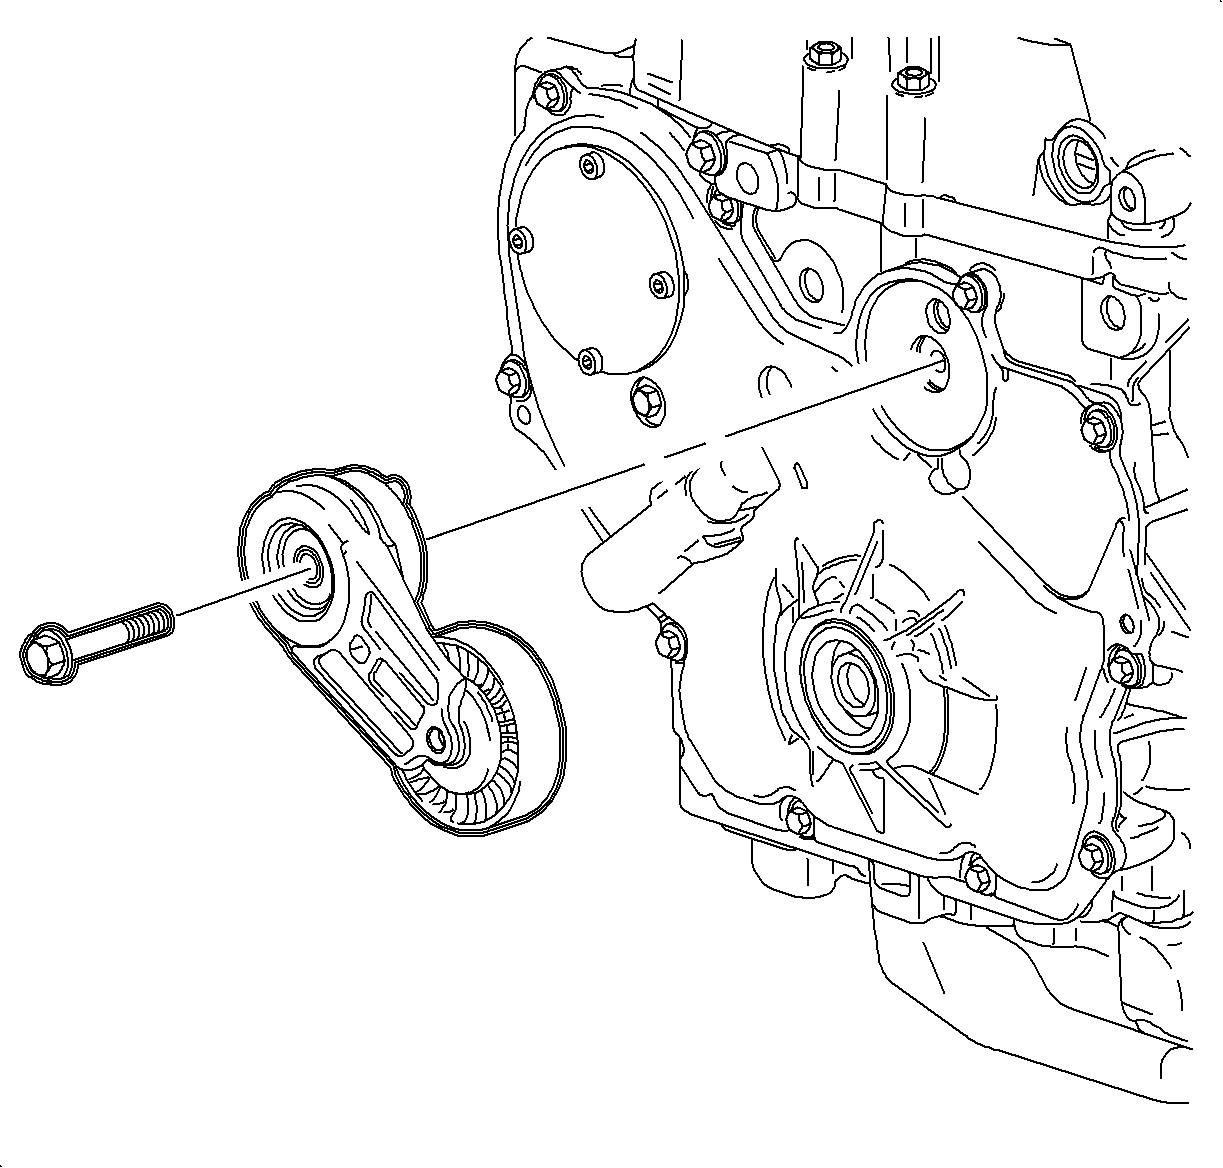
- Remove the belt tensioner.
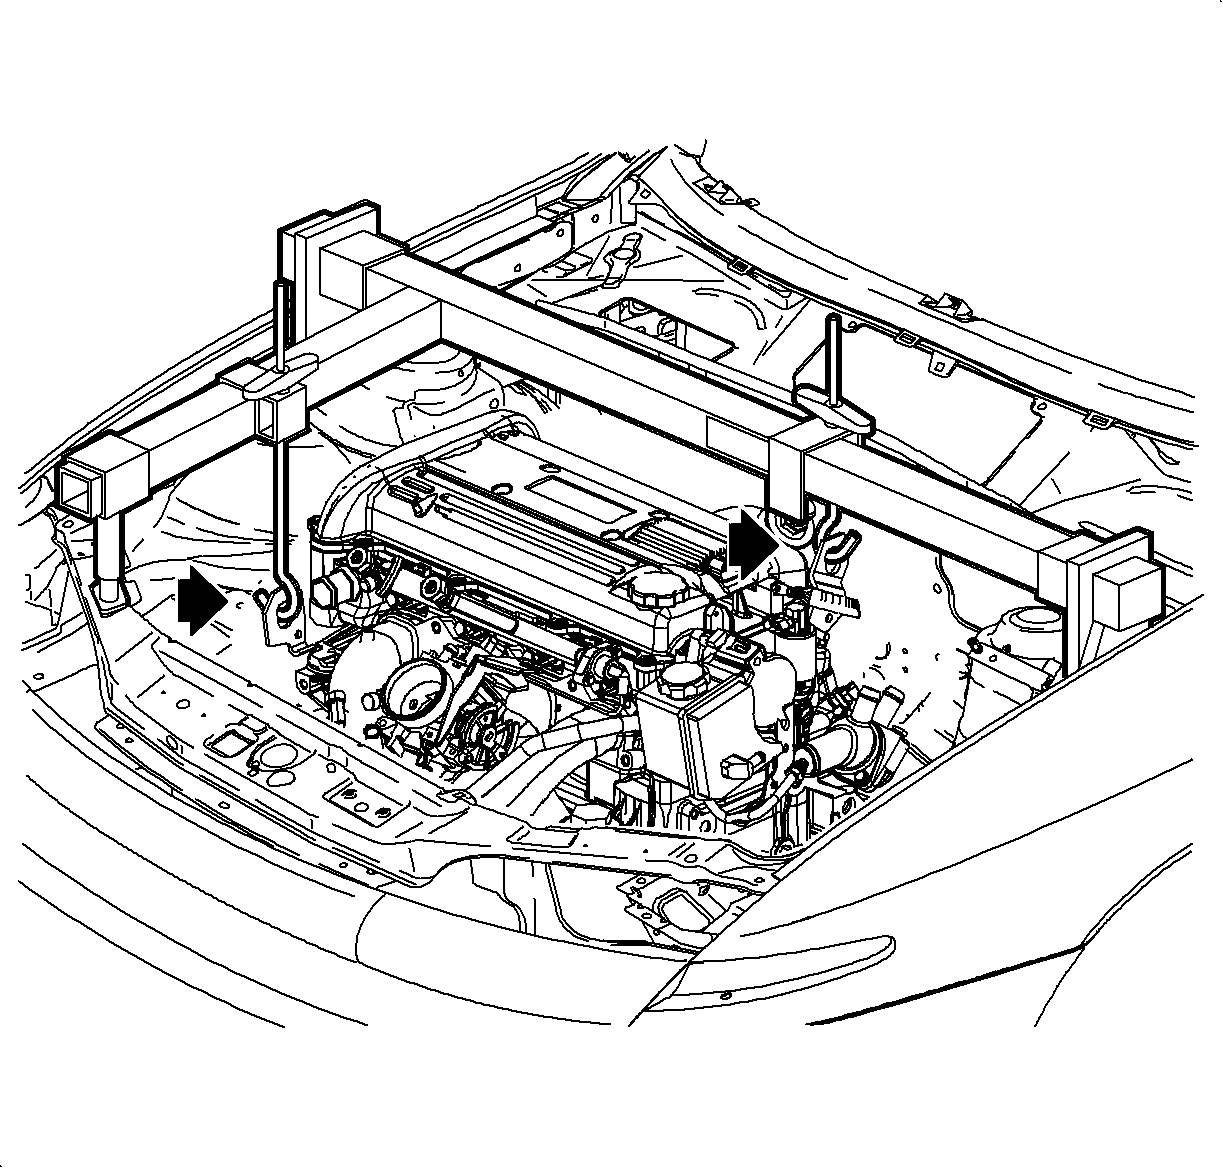
- Install the SA9105E and the J43405 respectively.
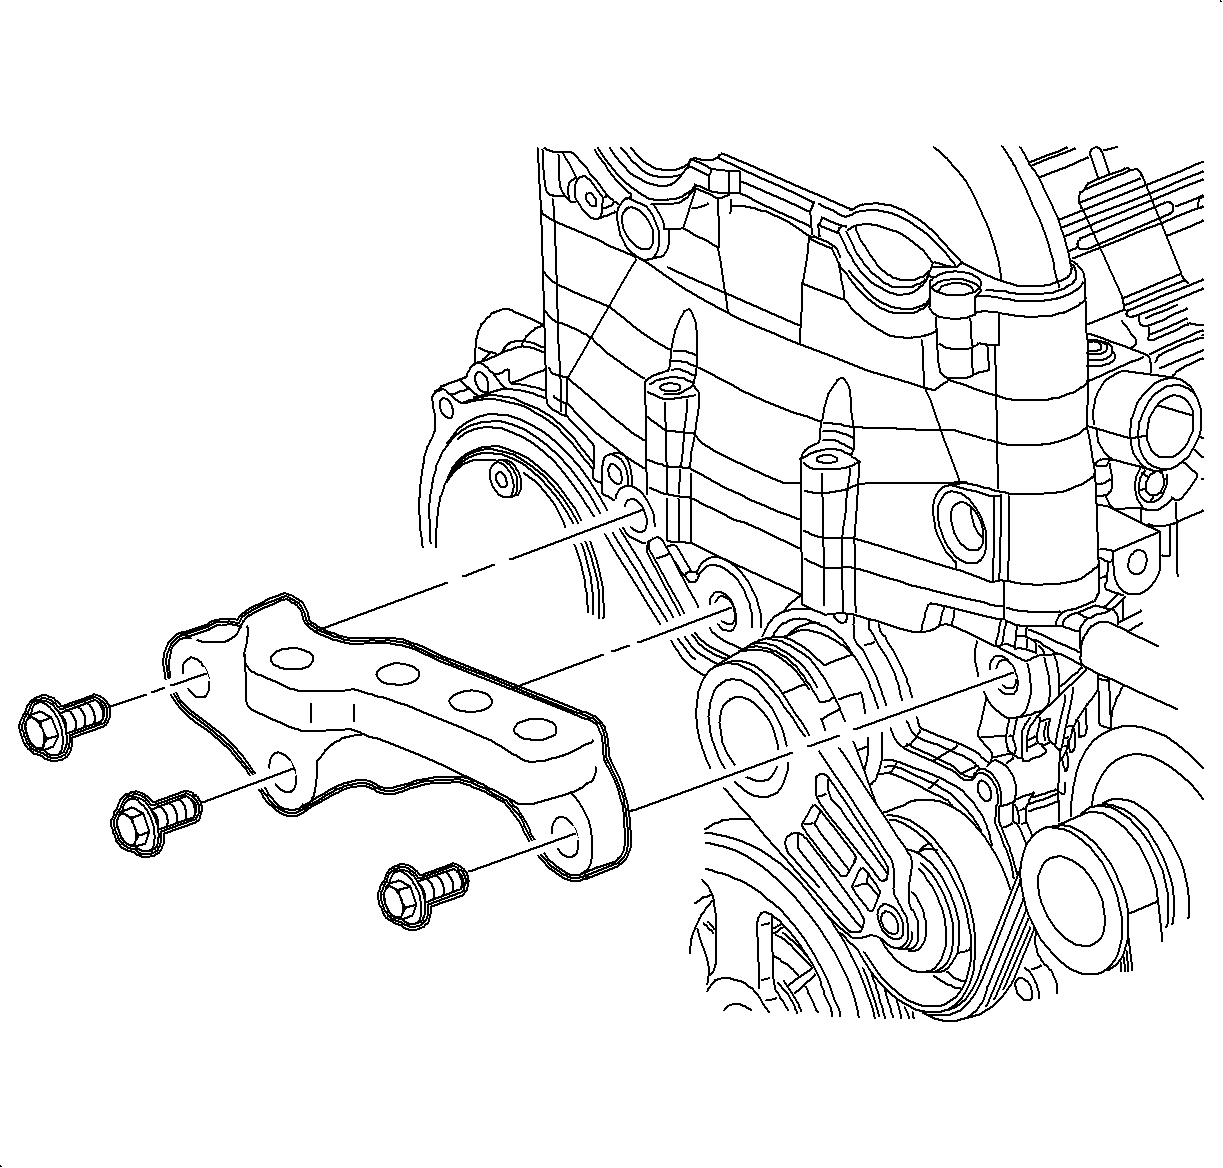
- Remove the right engine mount. Refer to Engine Mount and Bracket Replacement - Right Side .
- Remove the front cover assembly and gasket.
Caution: Refer to Vehicle Lifting Caution in the Preface section.
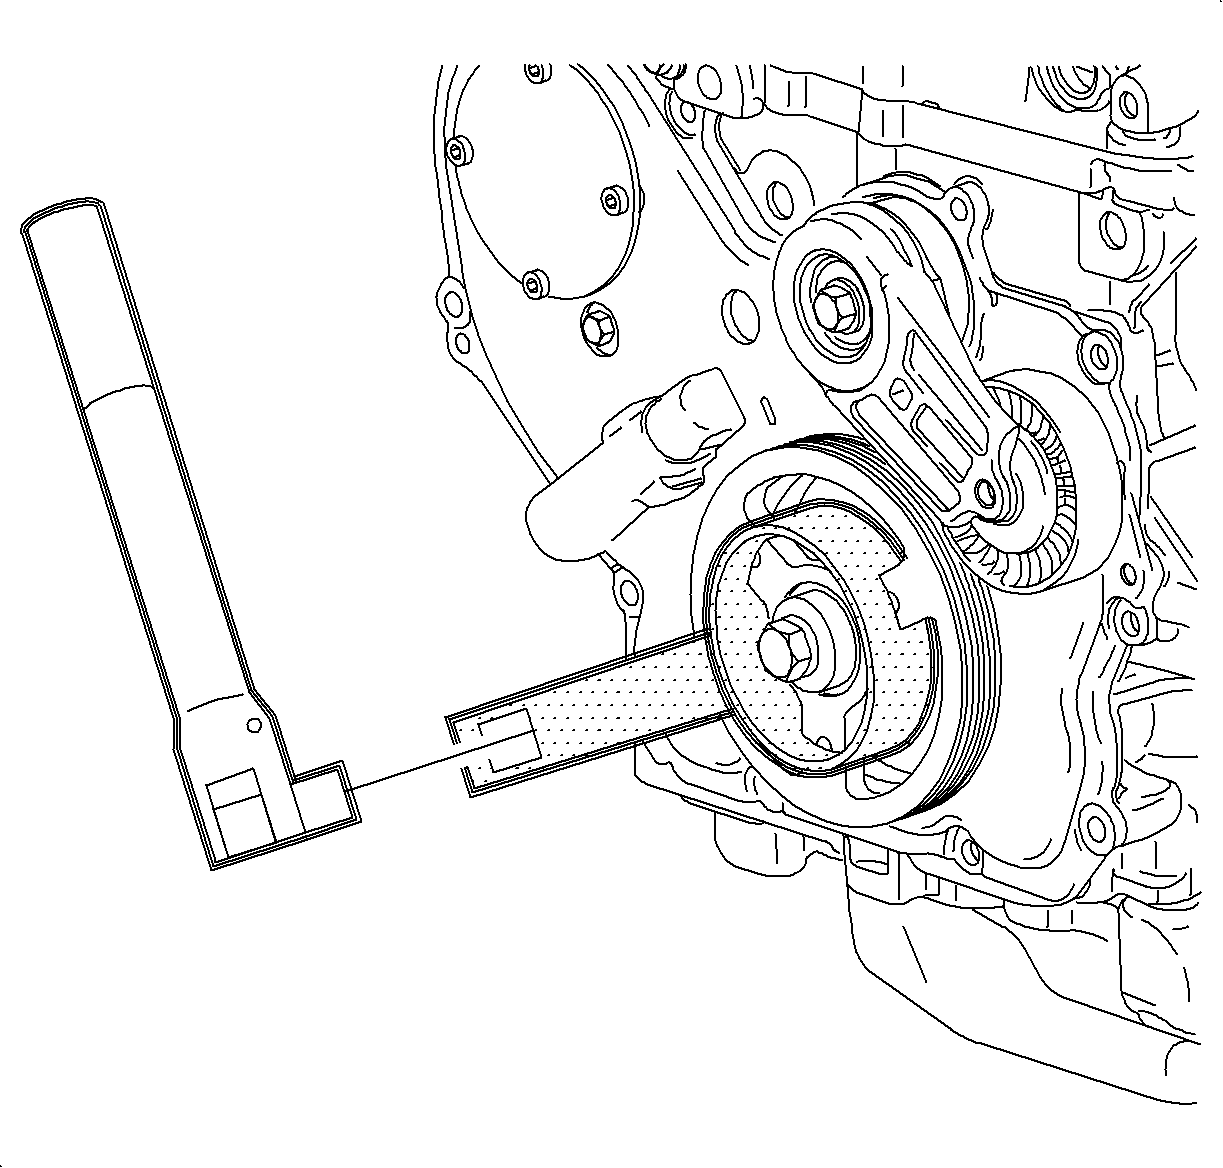
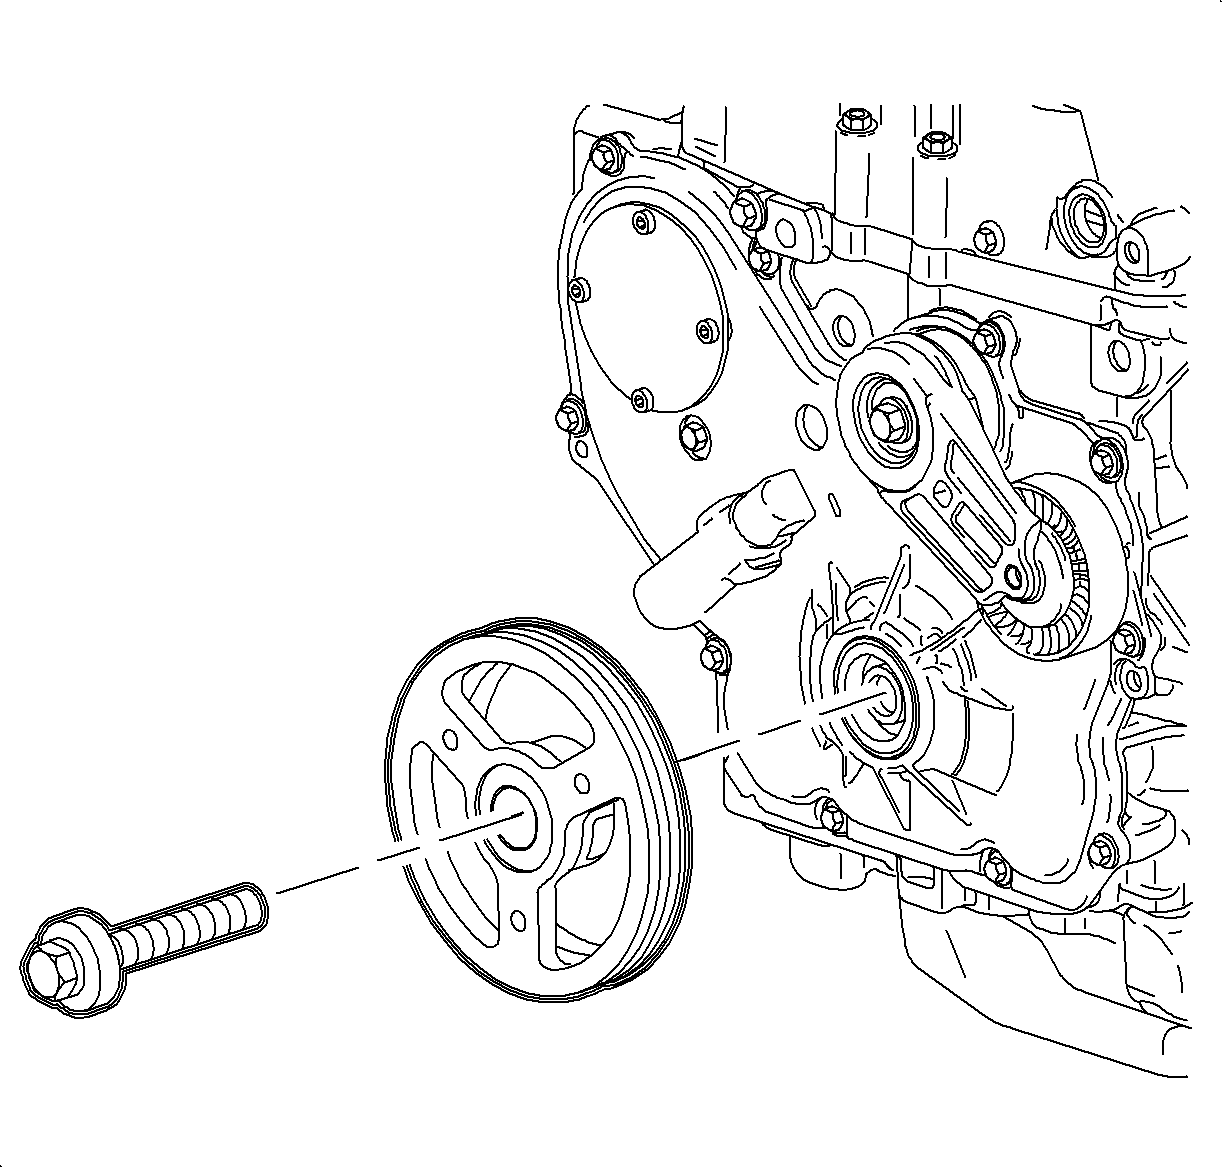
Important: The crankshaft damper pulley bolt head and washer assembly prevents oil leakage at the center of the pulley. Do not damage the sealing surfaces. If the pulley cannot be removed by pulling with your hand, use a three jaw puller.
Important: Do not pry against the cover.
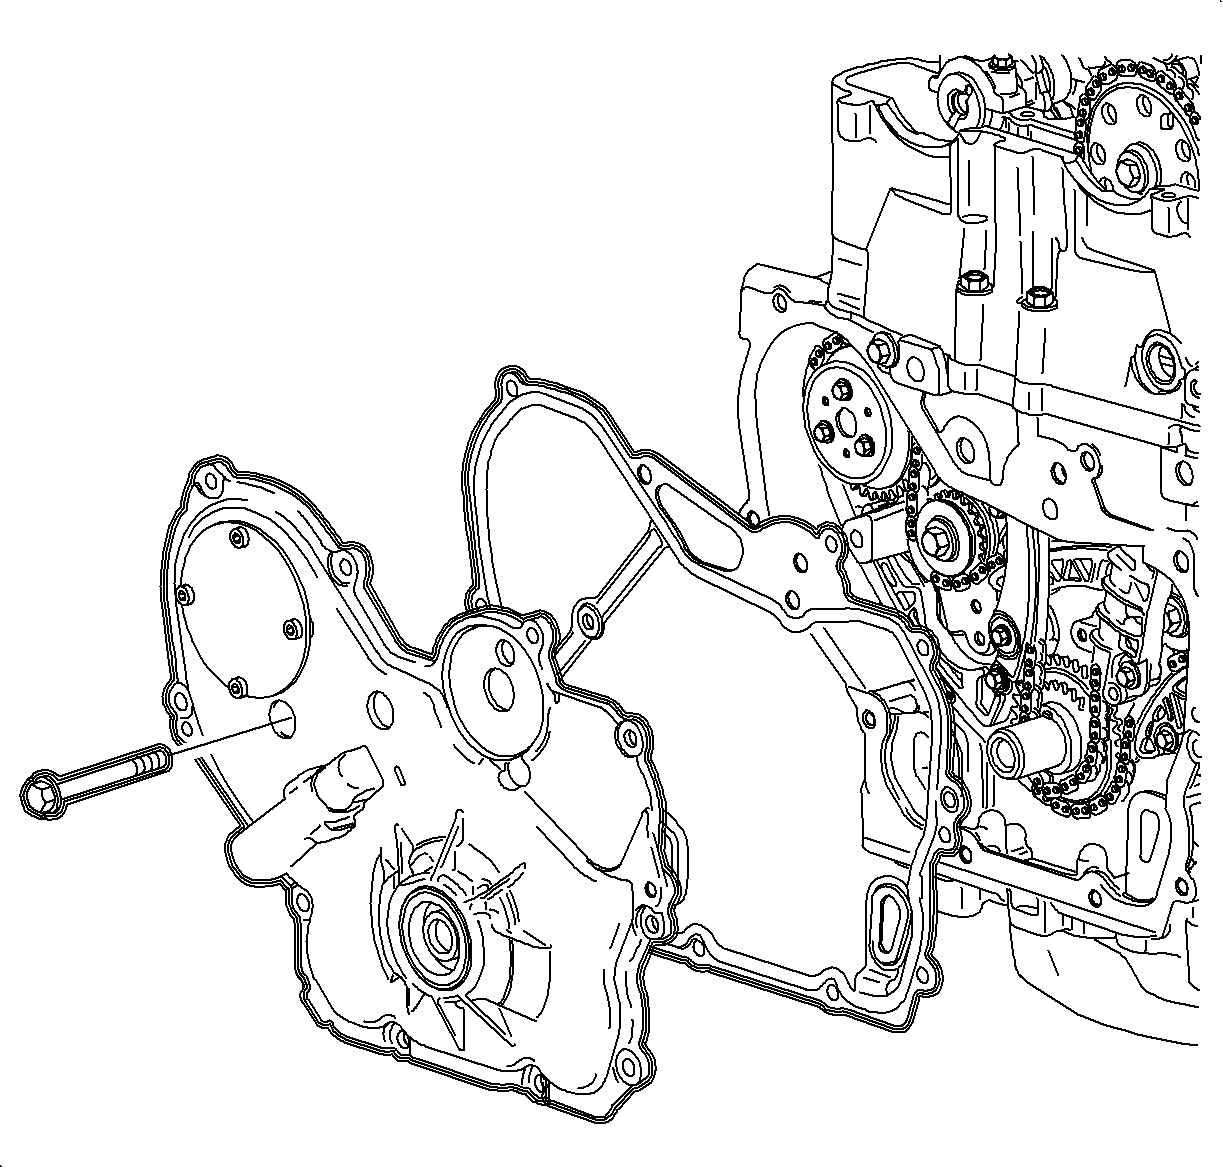
Installation Procedure
- Install the new front cover gasket and cover the assembly.
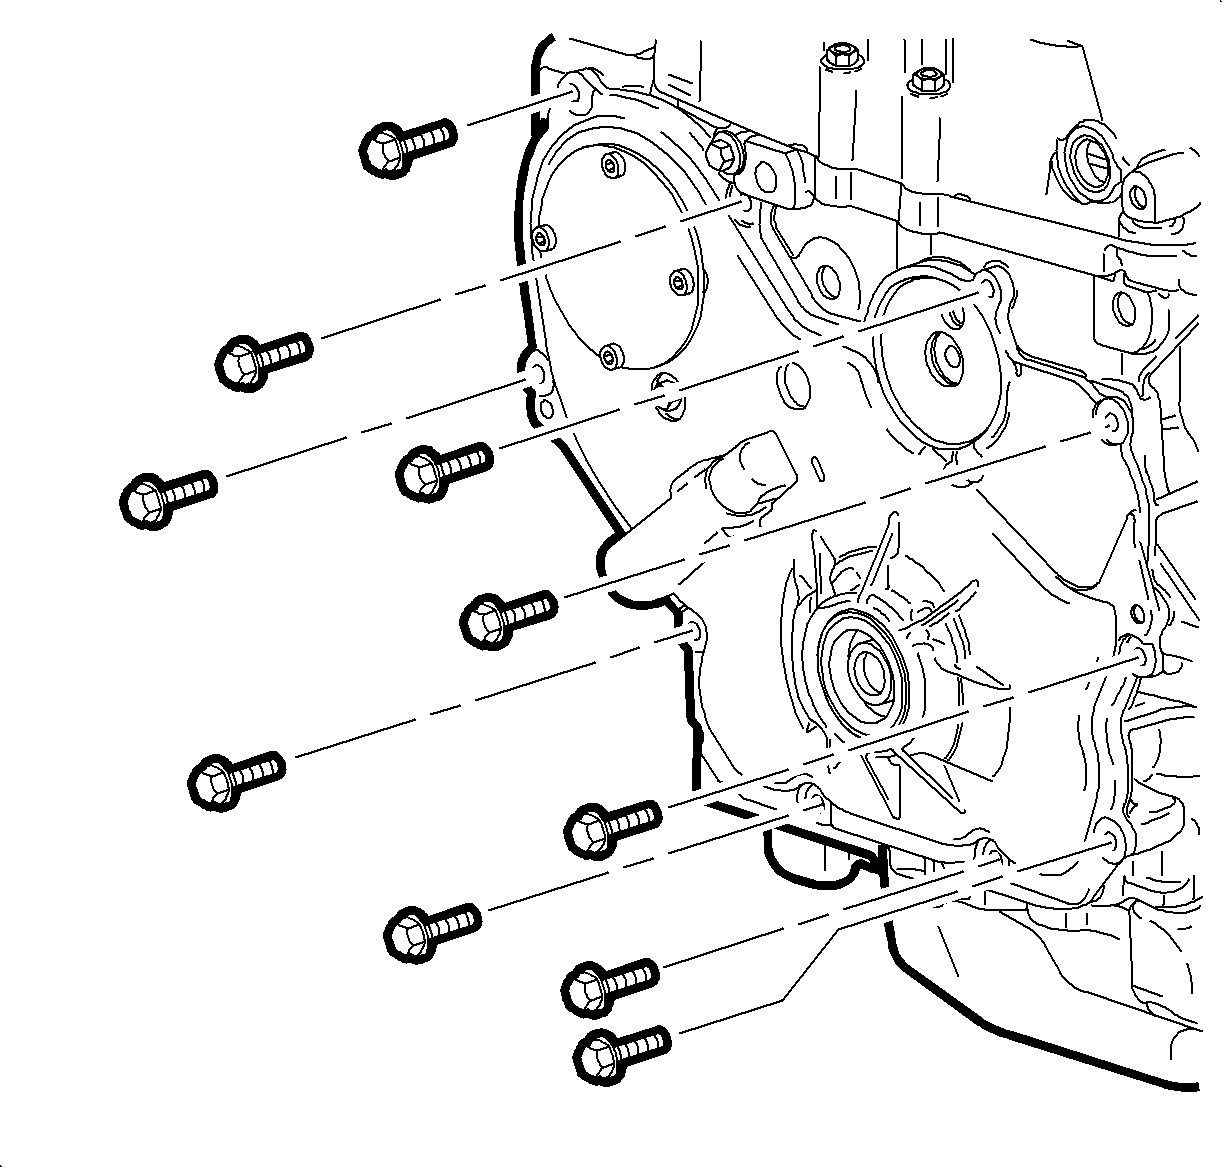
- Install the front cover bolts.
- Install the right side engine mount. Refer to Engine Mount and Bracket Replacement - Right Side .
- Remove the SA9105E and the J43405 respectively.
- Install the drive belt tensioner.
- Install the crankshaft damper pulley.
- Install the J 38122-A .
- Install the new damper pulley bolt and washer.
- Install the engine accessory drive belt.
- Install the right wheel and splash shield.
- Add the engine oil.
- Install the air cleaner assembly. Refer to Air Cleaner Element Replacement in Engine Controls-2.2L (L61).
- Connect the negative battery cable.
Notice: Refer to Fastener Notice in the Preface section.
Tighten
Tighten the front cover-to-block bolts to 25 N·m
(18 lb ft).


Tighten
Tighten the drive belt tensioner bolt to 45 N·m
(33 lb ft).

| 6.1. | Lubricate the front seal and sealing surface of the damper pulley with clean motor oil. |
| 6.2. | Install the damper onto the crankshaft indexing keyway. Use care to properly align the flats on the damper with the flats on the oil pump drive. |

Tighten
Tighten the crankshaft damper pulley bolt to 100 N·m
(74 lb ft) plus 75 degrees.


Tighten
Tighten the battery terminal bolts to 17 N·m
(13 lb ft).
