Removal Procedure
- Remove the headliner. Cut an opening in the roof.
- Remove the front windshield. Refer to Windshield Replacement in Stationary Windows.
- Remove the rear lift gate.
- Remove the roof load bar if equipped.
- Remove the headliner and weatherstrips.
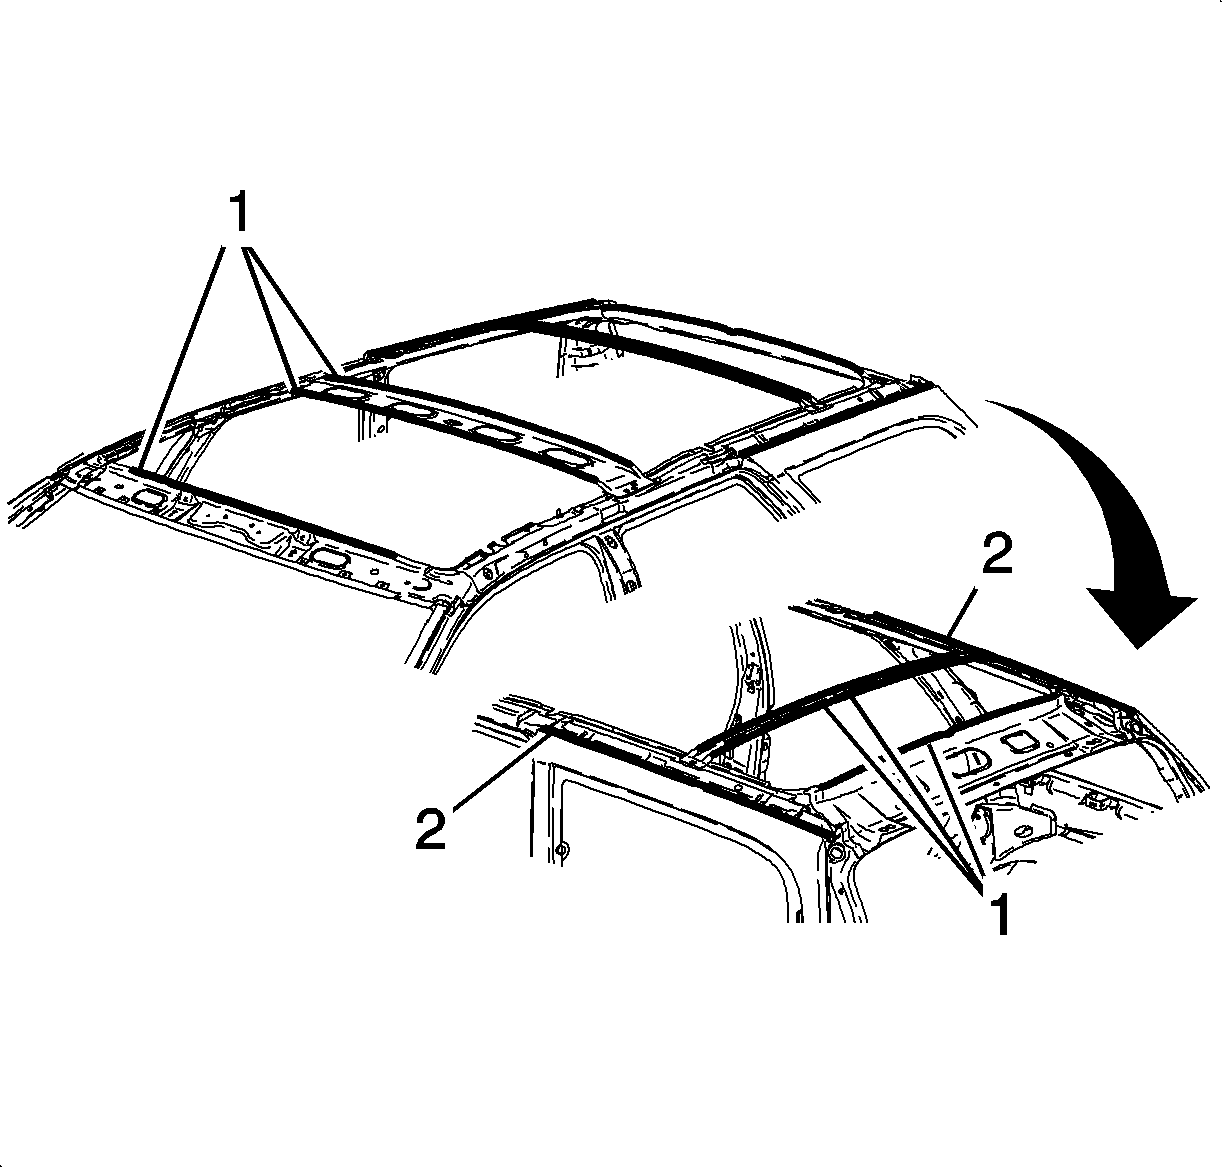
- Drill out the roof spotwelds and cut the adhesive area (shown in illustration).
- With the aid of a helper, remove the roof from the vehicle.

Caution: When using tools that may create smoke when cutting urethane sealant, work should be done in a well ventilated area and/or with a NIOSH/MSHA approved air supplied respirator to prevent possible harmful exposure. When the urethane adhesive is heated enough to give off smoke, high levels of methylene diisocyanate (MDI) may be present. Unprotected exposure to methylene diisocyanate may result in severe, chronic, debilitating respiratory problems.
Important: Some parts have structural weld-thru adhesive in the joint areas. It is necessary to replace this with additional spot welds at the attachment points. This can be accomplished by adding an additional weld between each factory weld in all areas.
Installation Procedure
- Using a razor knife, remove the loose adhesive. Also trim the high spots in the remaining urethane to provide for an even application of new urethane.
- Clean all the weld seams with a wire brush. Prime and seal all the repair areas.
- Apply permanent underbody sealant.
- Prime with two-part catalyzed primer.
- Apply the sealers and the corrosion protection materials according to information in the "Body Paint" section or the paint manufacturer's recommendations.
- Clean the entire roof with a clean lint free cloth dampened with alcohol and allow to dry.
- Apply structural adhesive in the area (2) shown in the illustration. Apply anti-flutter adhesive in the area (1) shown in the illustration. Place the roof panel on the vehicle at the proper location.
- Plug weld the roof to the spaceframe.
- Apply seam sealer by repeating the pattern on the removed roof. Apply seam sealer after the roof has been installed at the locations (2). The urethane bead must cover the entire flange in the corner to ensure proper seal (P/N 12345633) 8 mm (11/32 in) minimum.

Important: Some parts have structural weld-thru adhesive in the joint areas. It is necessary to replace this with additional spot welds at the attachment points. This can be accomplished by adding an additional weld between each factory weld in all areas.
Notice: Loose material and/or a rough surface on remaining urethane may cause sealing problems during installation.
Important: Ensure that proper corrosion protection processes are used on all repair areas.
Important: If there is any exposed bare metal it must be primed with 3M® Window Weld primer P/N 08693 or equivalent.
