For 1990-2009 cars only
Tools Required
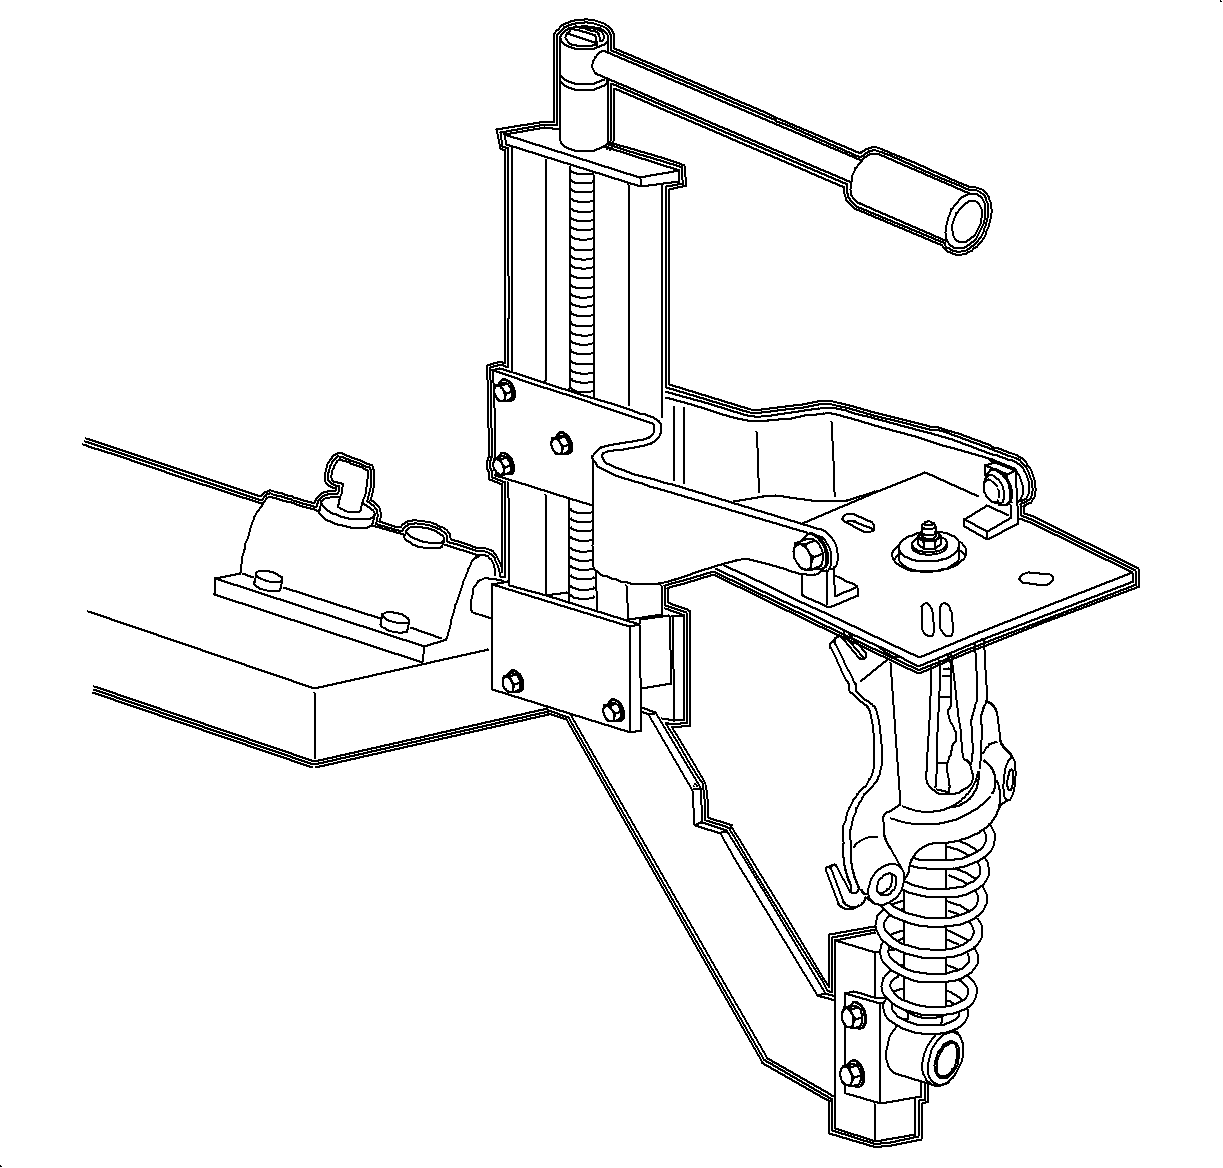
SA9155S Strut Spring Compressor
Removal Procedure
- Remove the shock carrier assembly. Refer to Shock Absorber Replacement .
- Mount the shock carrier assembly into the SA9155S .
- Mount the lower portion of the strut to the SA9155S .
- Compress the spring in order to unload the upper spring supports.
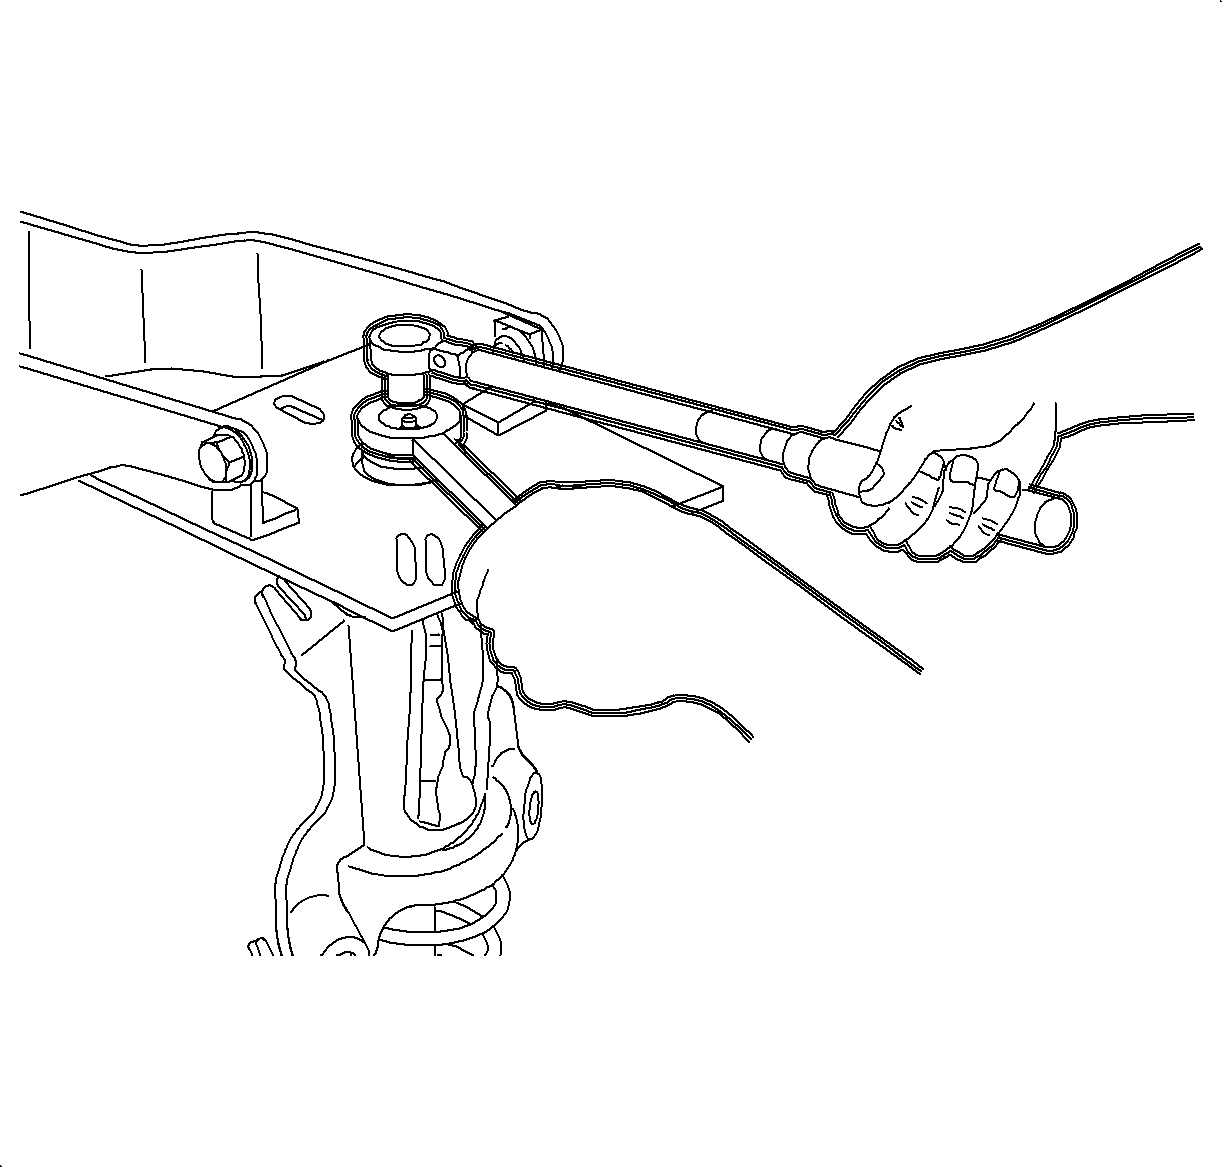
- Using a wrench and a socket, remove the upper shock shaft nut.
- Release the spring compressor tension from the spring in order to remove the shock suspension support carrier.
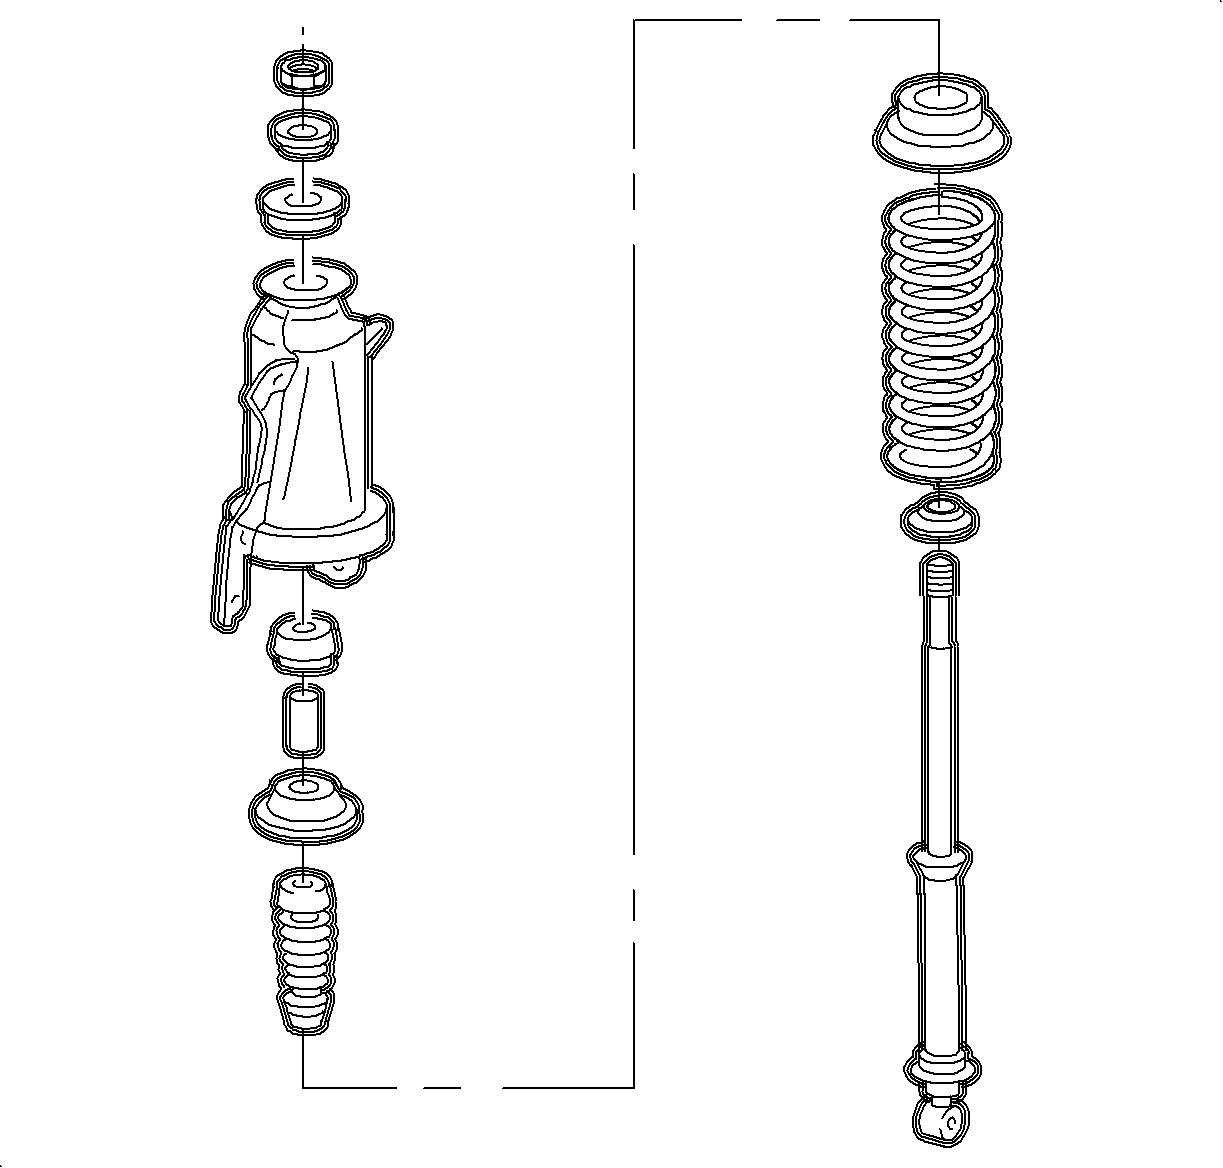
- Remove the remaining components from the shock absorber. Note there location for assembly.
- Inspect the inner and outer shock absorber bushings for damage or deterioration and replace if necessary.
- Inspect the shock bumper for damage or deterioration and replace if necessary.
- Inspect the spring upper insulator and replace if necessary.
- If replacing the shock, remove the shock from the SA9155S .


Installation Procedure
- If replacing the shock, mount the shock on the SA9155S .
- Extend the shock to its travel limit.
- Install the shock components as noted during removal.
- Compress the spring while guiding the shock absorber shaft through the upper mount. The spring is properly compressed when the upper washer and shaft nut can be installed.
- Using a wrench and a socket, install the upper washer and shaft nut.
- Release the spring tension.
- Remove the shock carrier assembly from the SA9155S .
- Install the shock carrier assembly. Refer to Shock Absorber Replacement .

Important: Make sure that the spring is located in the correct position.
Notice: Refer to Fastener Notice in the Preface section.

Tighten
Tighten the Upper shaft nut to 20 N·m
(15 lb ft).

