For 1990-2009 cars only
Tools Required
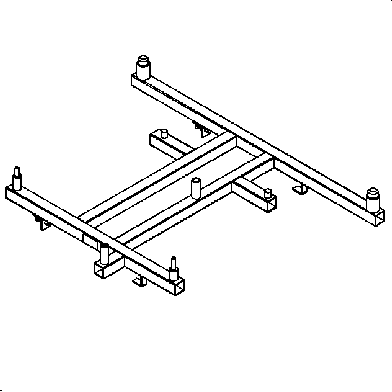
| • | J 43628 Frame Alignment fixture |
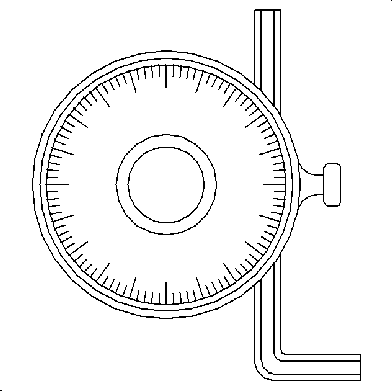
| • | SA9140E Torque Angle Gage |
Removal Procedure
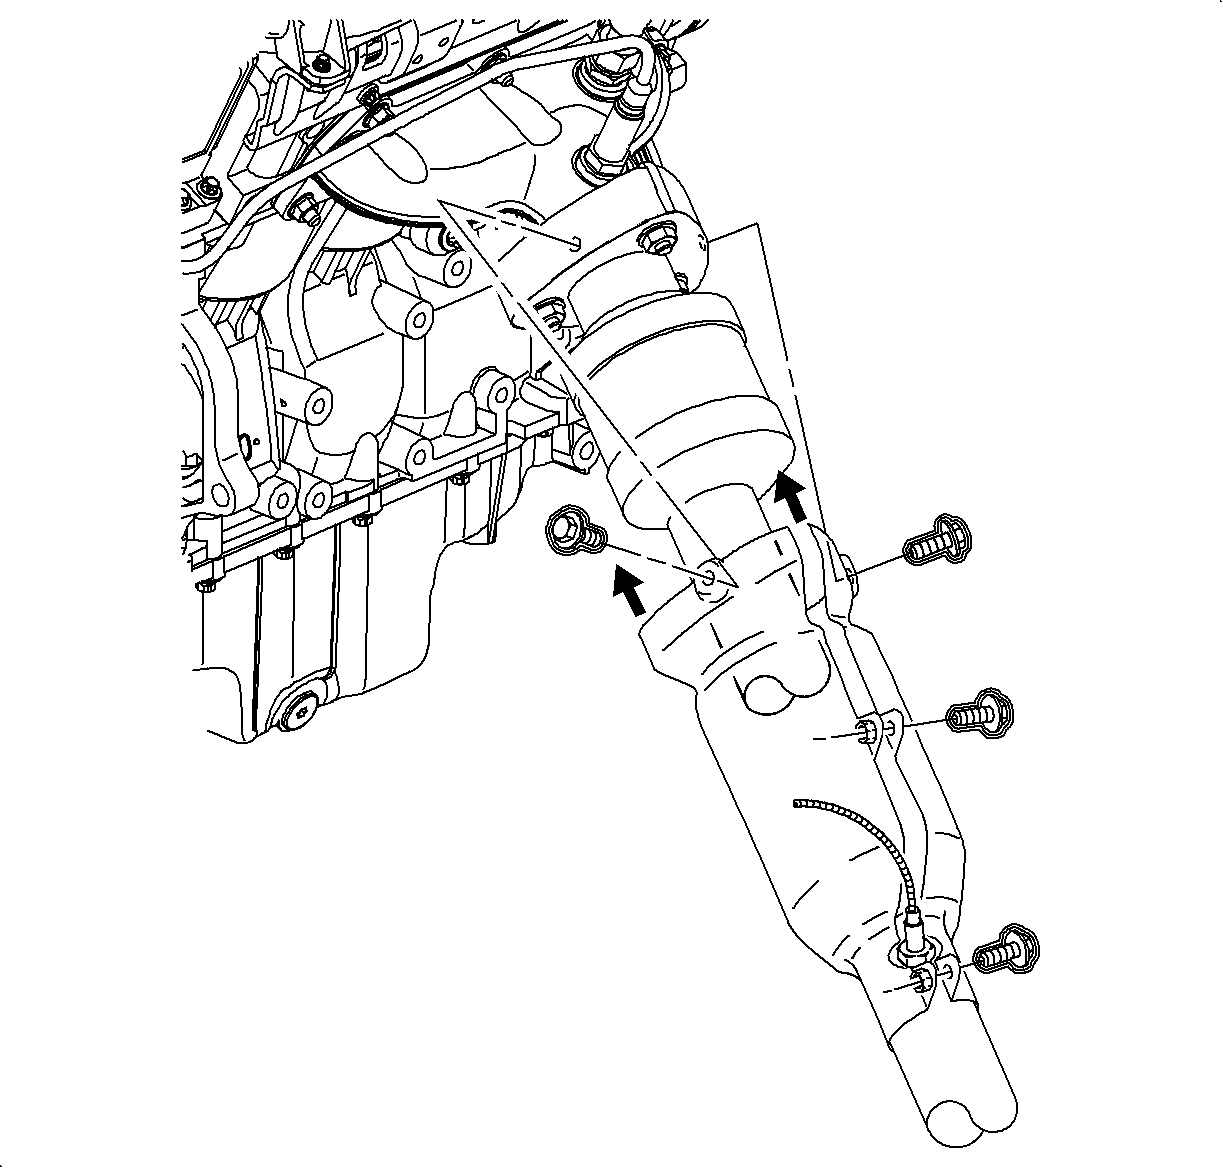
- If equipped with a L81 engine, remove the rear exhaust manifold pipe heat shield. Refer to Exhaust Pipe Heat Shield Replacement in Engine Exhaust.
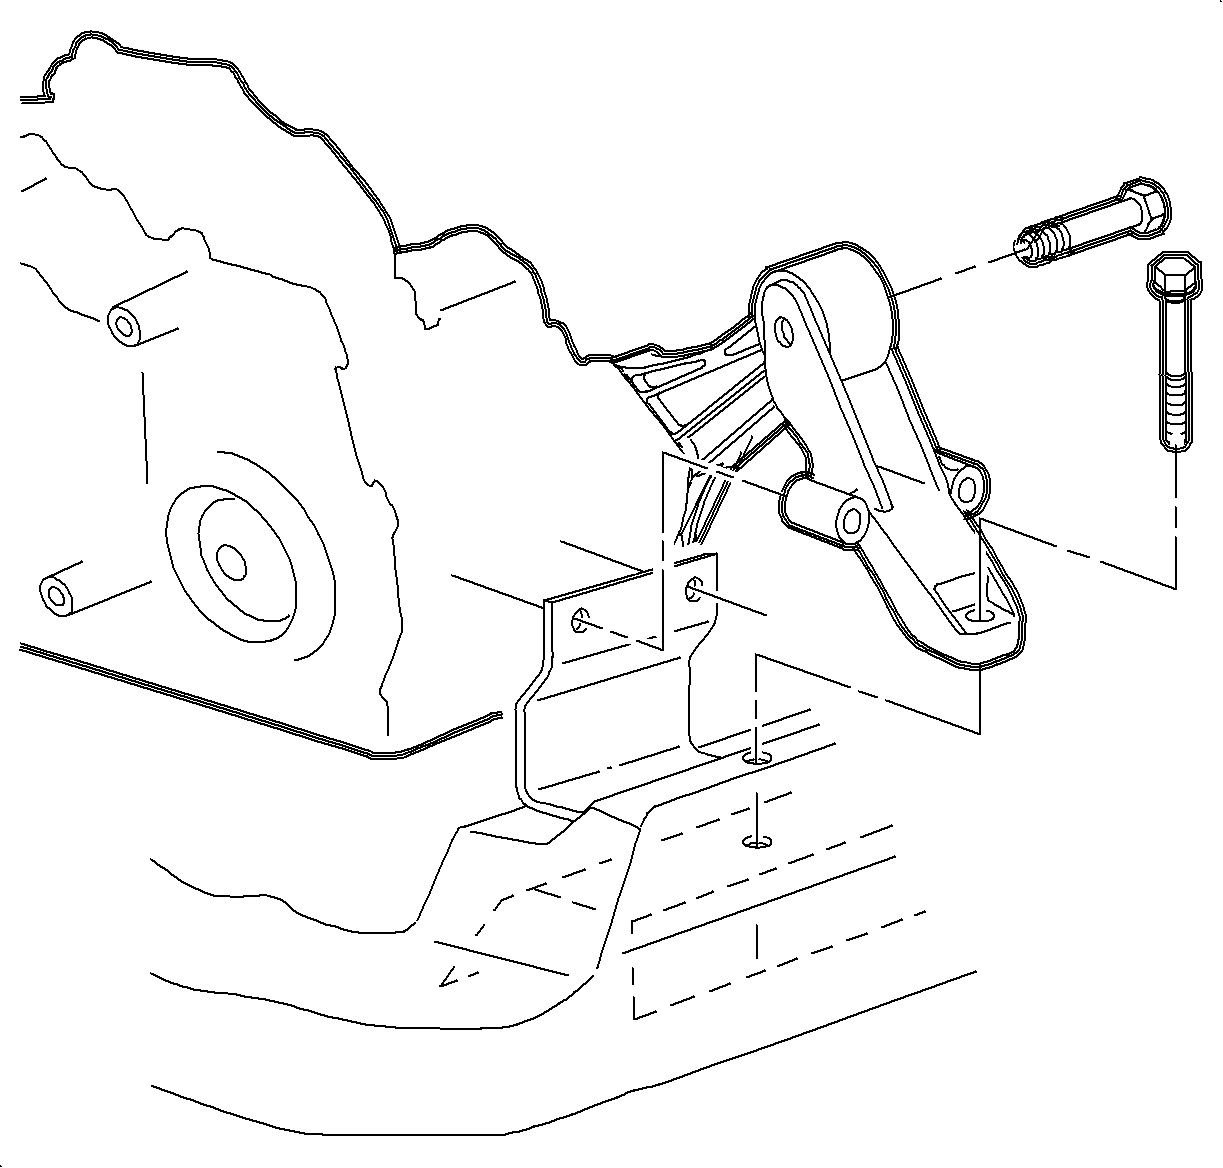
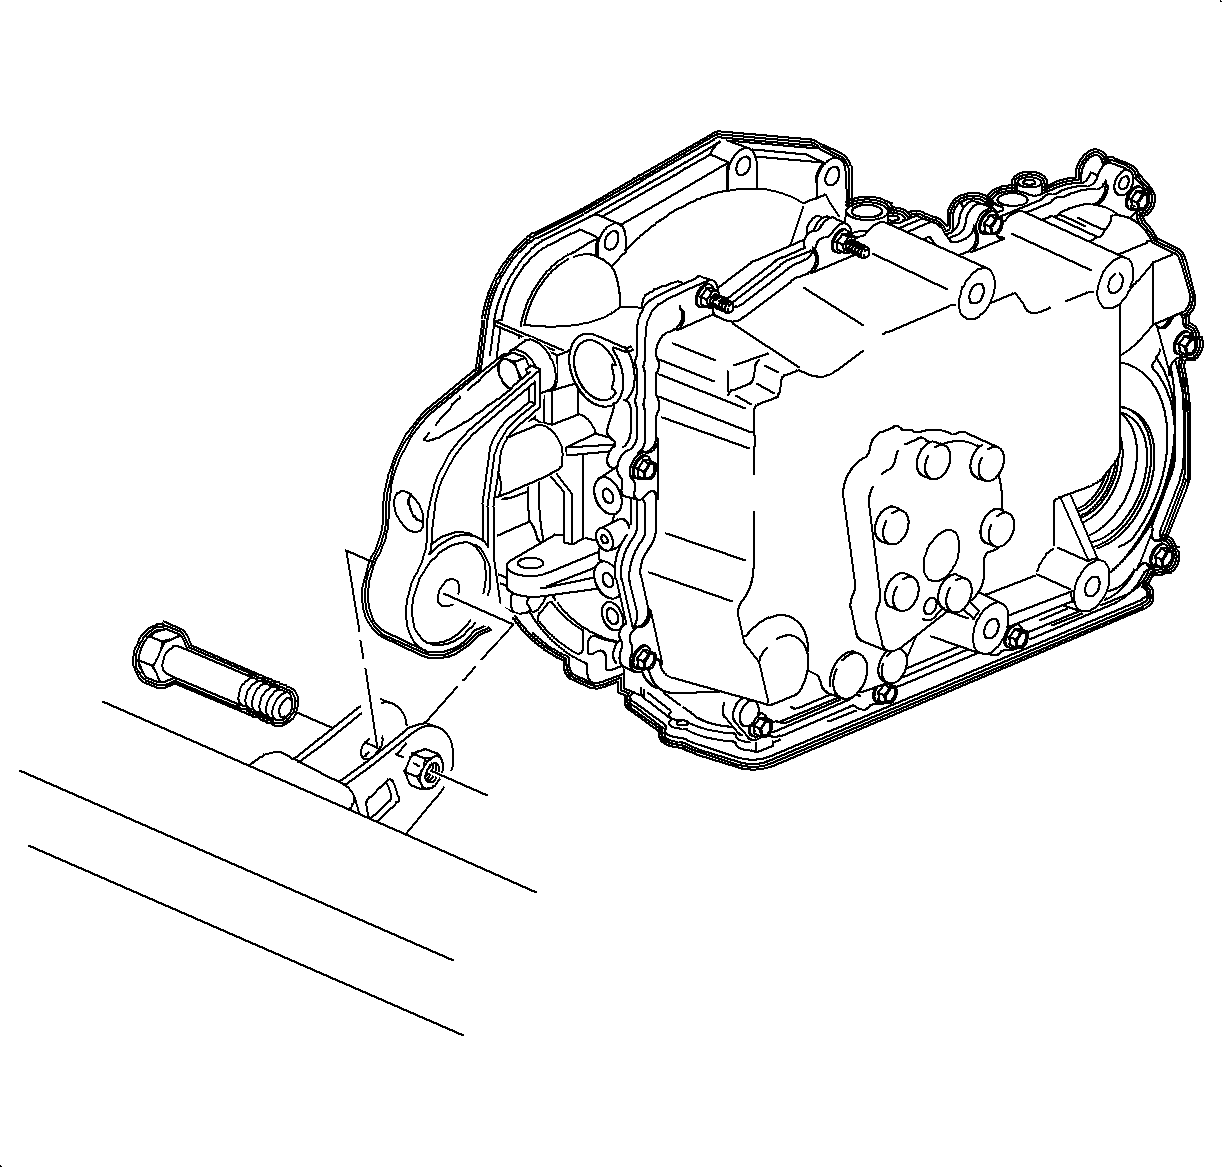
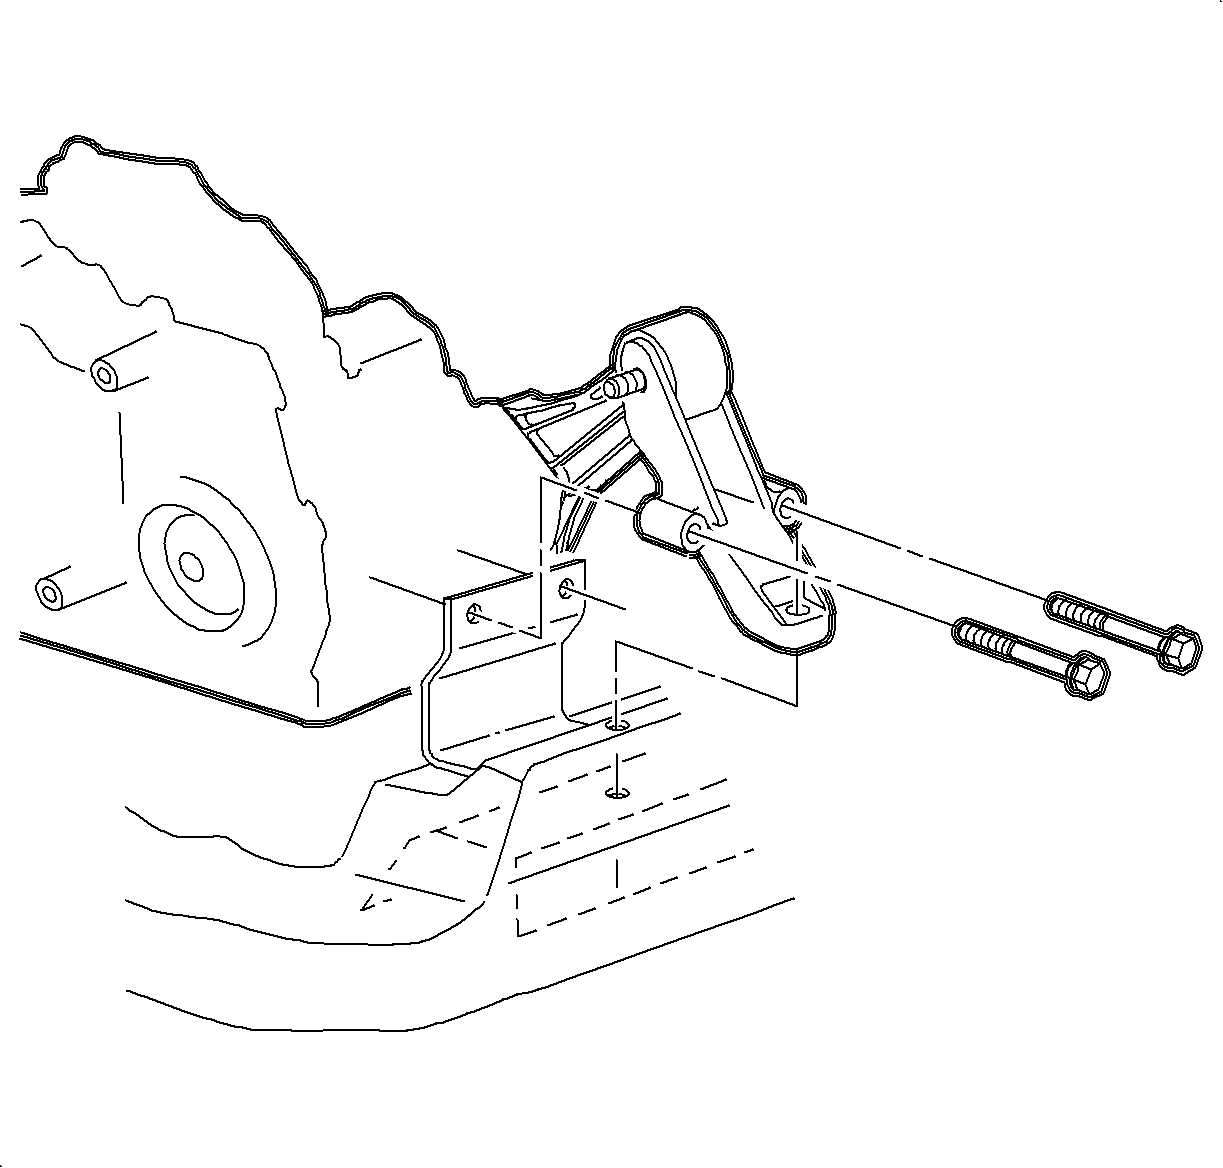
- Remove the rear transaxle mount through bolt and transaxle mount to frame bolt.
- Secure the radiator to the upper radiator support.
- Raise and support the vehicle. Refer to Lifting and Jacking the Vehicle in General Information.
- Remove the front tires and wheels. Refer to Tire and Wheel Removal and Installation in Tires and Wheels.
- Remove the right front lower splash shield (2).
- Remove the left front wheel liner push pin from the frame.
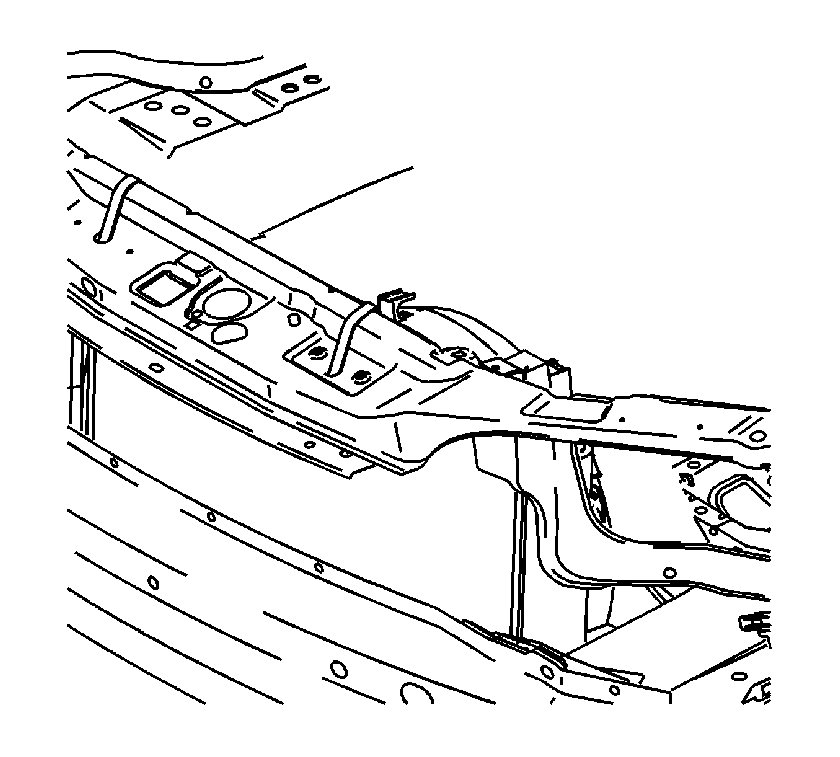
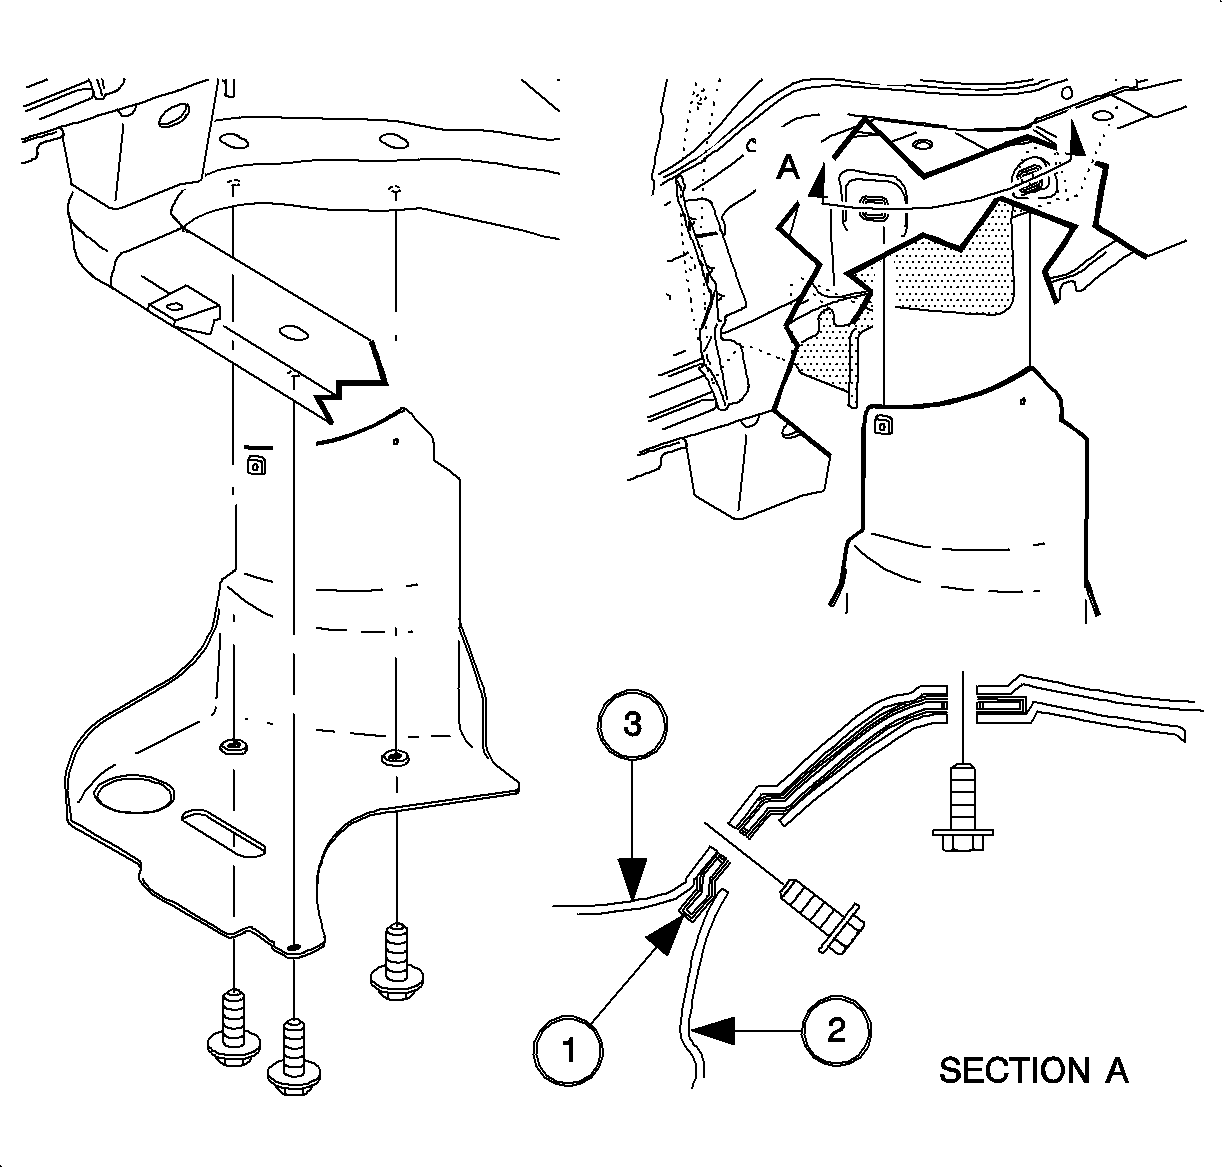
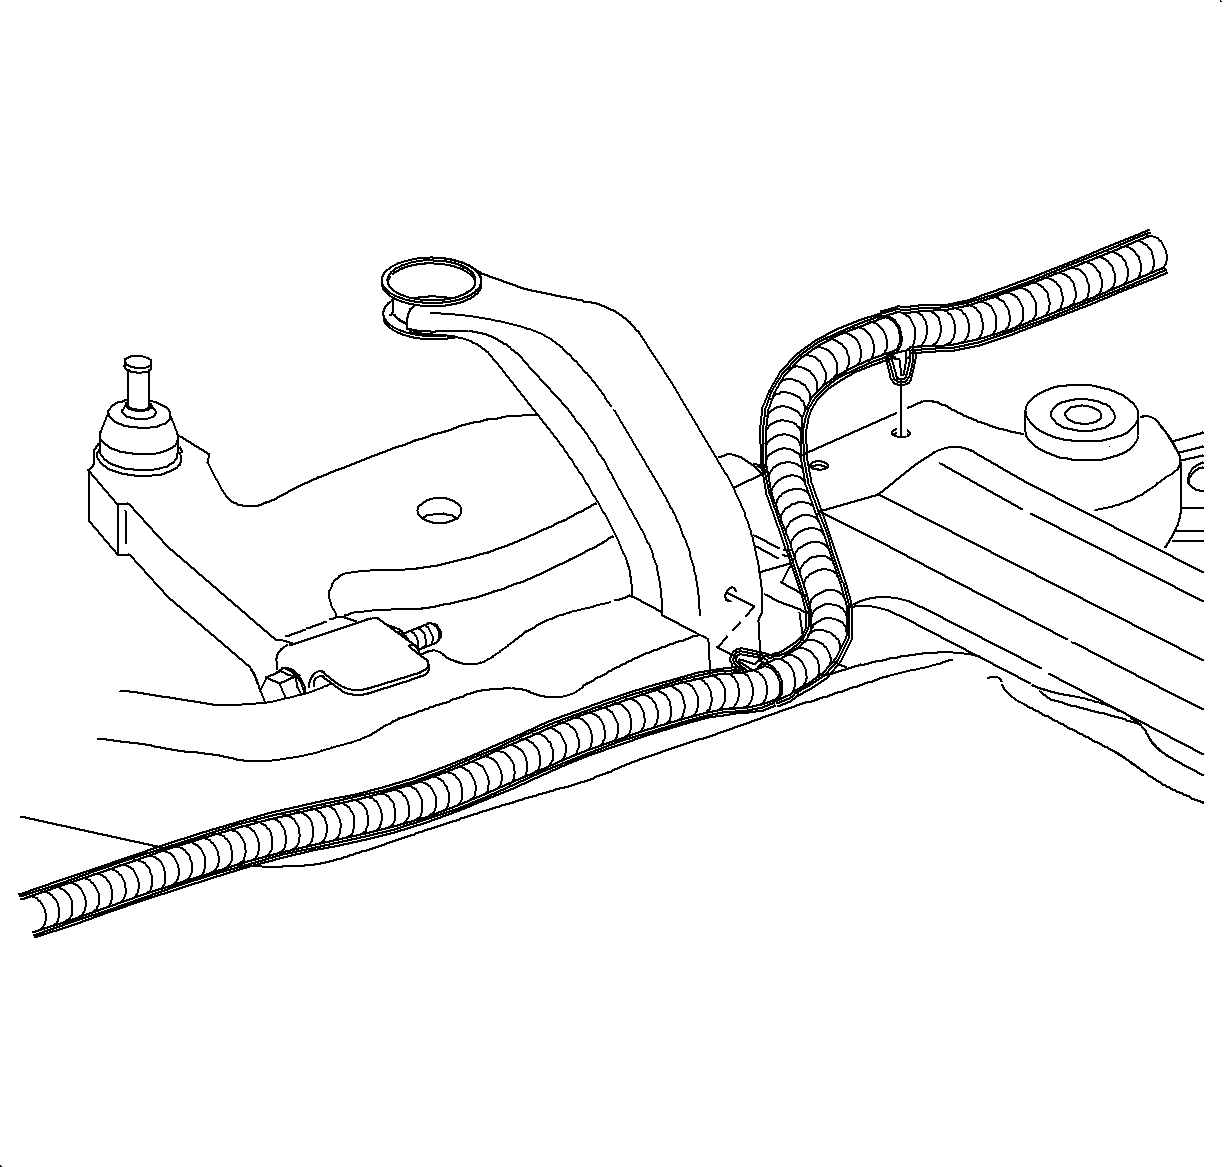
- Disconnect the rear oxygen (O2) sensor harness push pins from the frame.
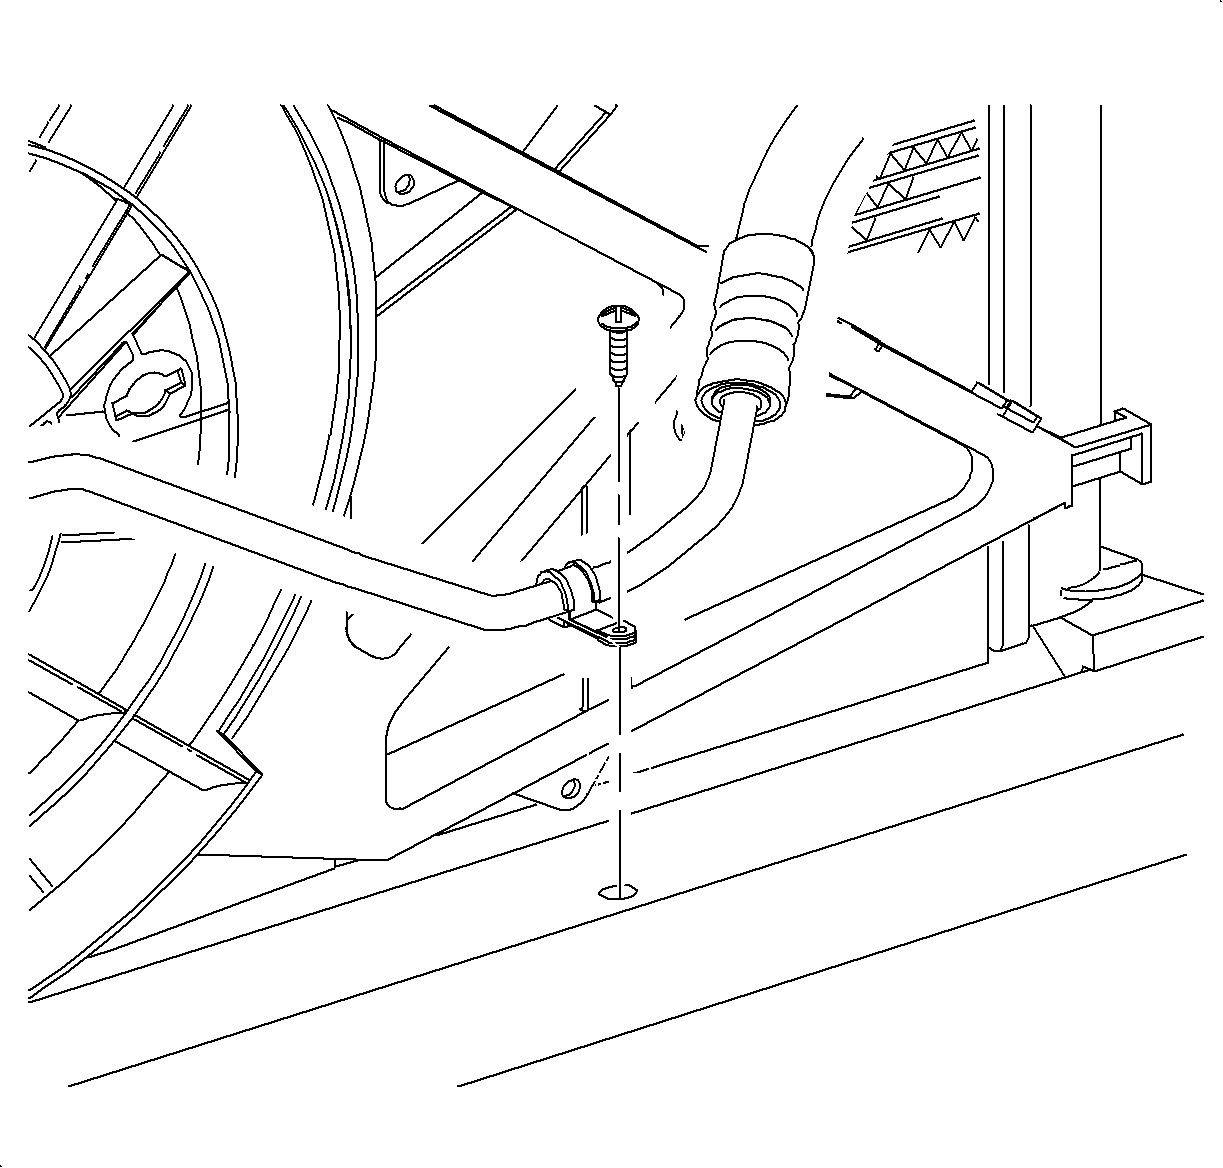
- If equipped with a L61 engine, remove the O2 sensor harness to underbody clamp attachment nut.
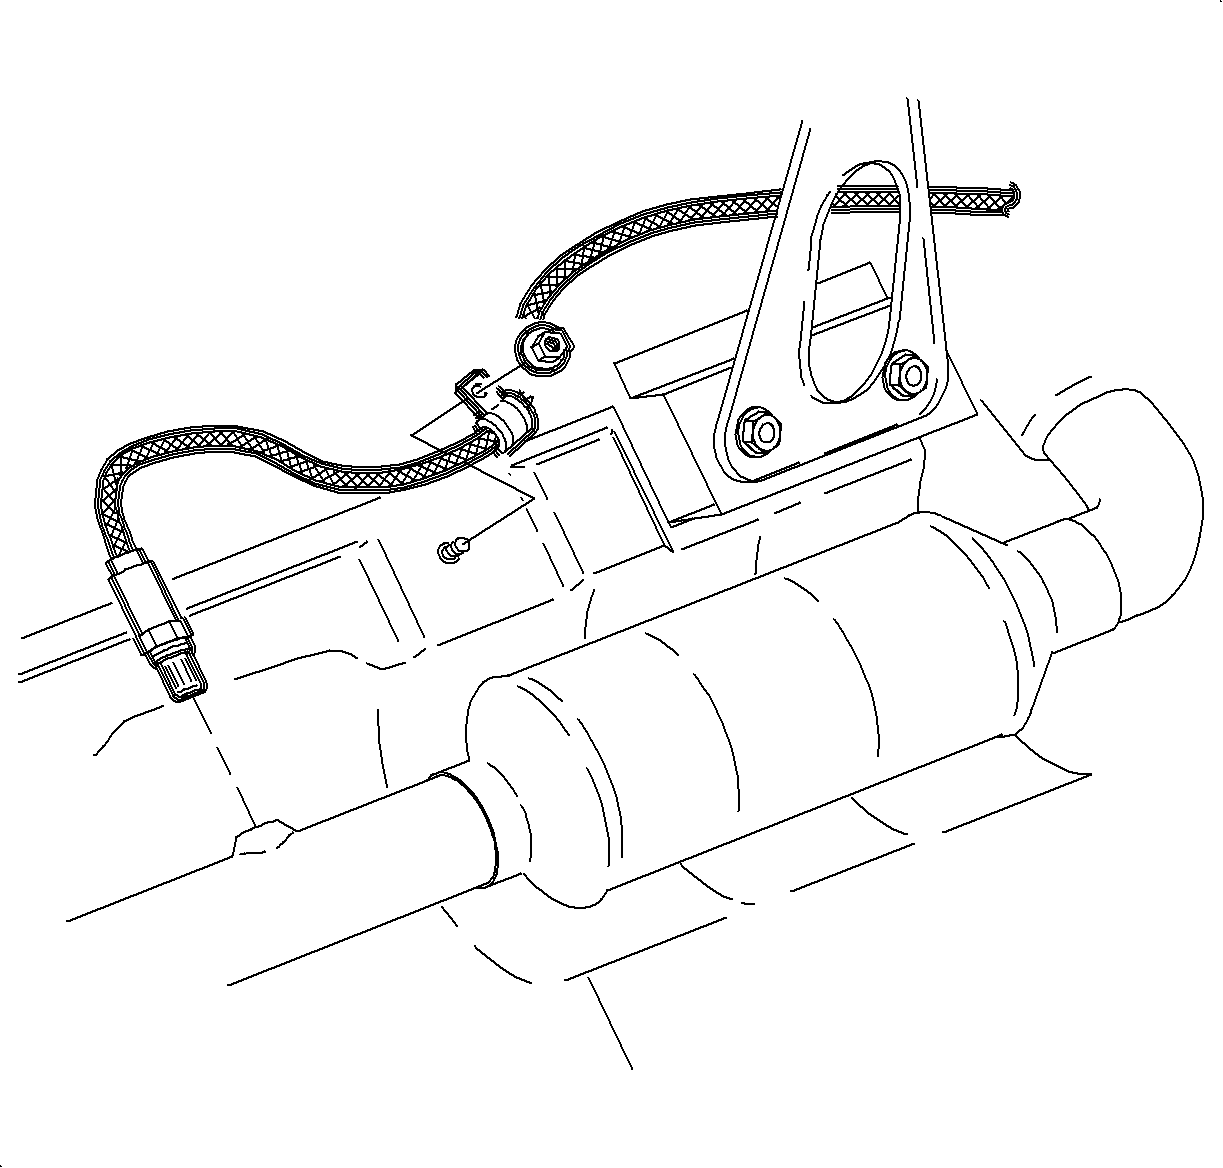
- Disconnect the exhaust manifold pipe from the exhaust manifold on L61 engine or manifolds on the L81 engine. Refer to Exhaust Manifold Pipe Replacement in Engine Exhaust .
- Remove the front transaxle mount through bolt.
- Remove the remaining rear transaxle mount to frame bolts.
- Remove the rear transaxle mount from the vehicle.
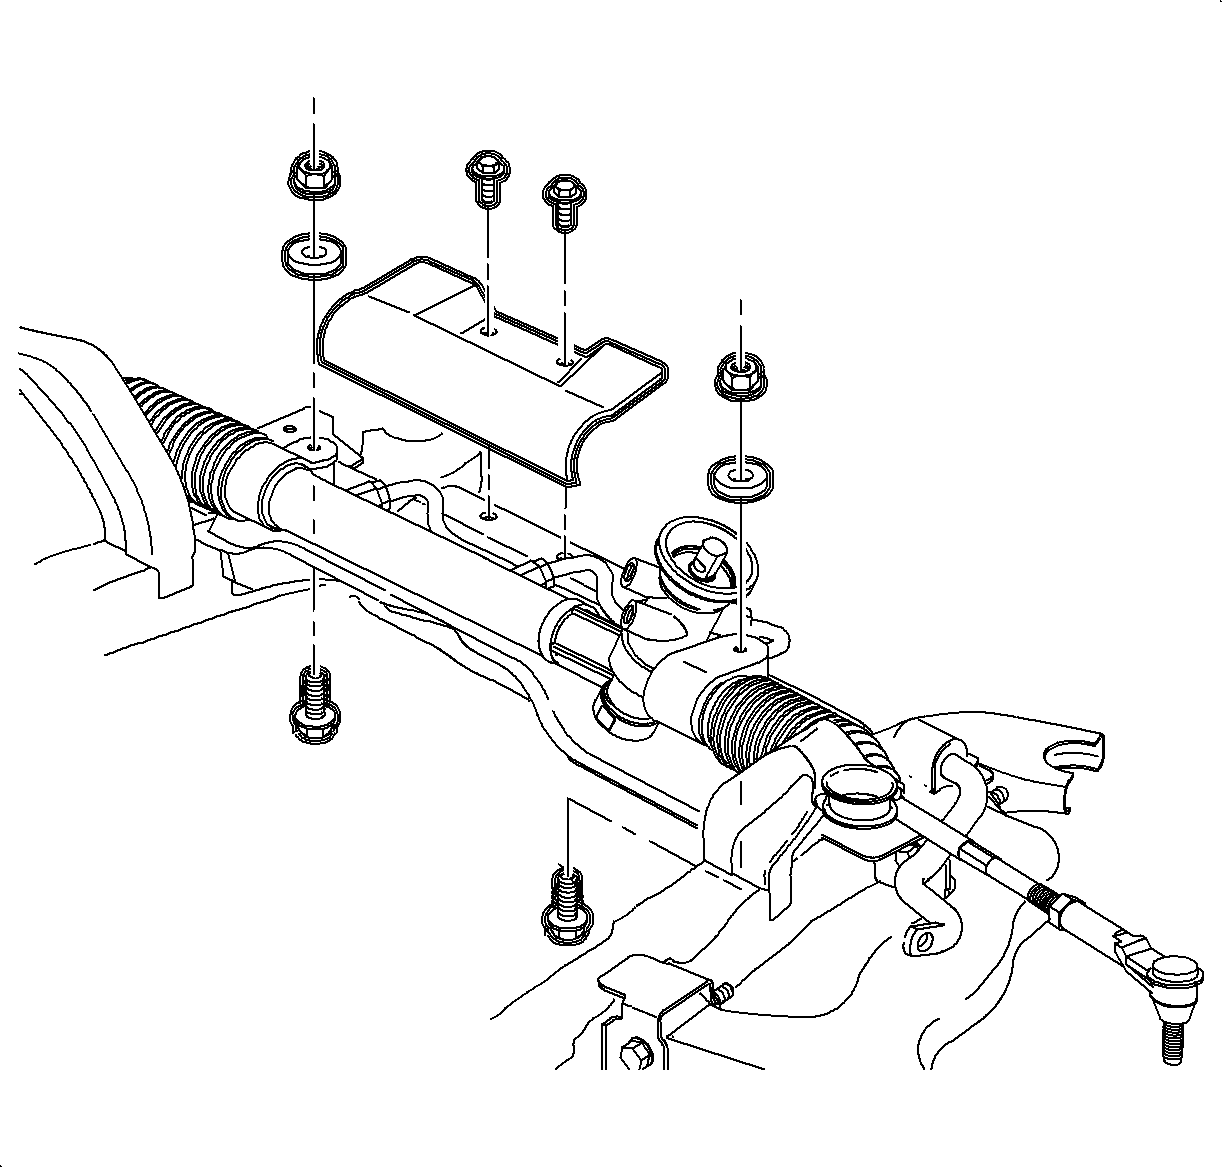
- Remove the steering gear to frame bolts and nuts. Discard the bolts and nuts.
- If equipped with a L61 engine, remove the steering gear heat shield. Refer to Steering Gear Heat Shield Replacement in Power Steering System.
- Using mechanics wire, secure the steering gear to the vehicle body.
- If equipped with a manual transmission, disconnect the frame to shiftier link pivot pin clip.
- Disconnect the A/C pipe to frame clip at the front of the vehicle.
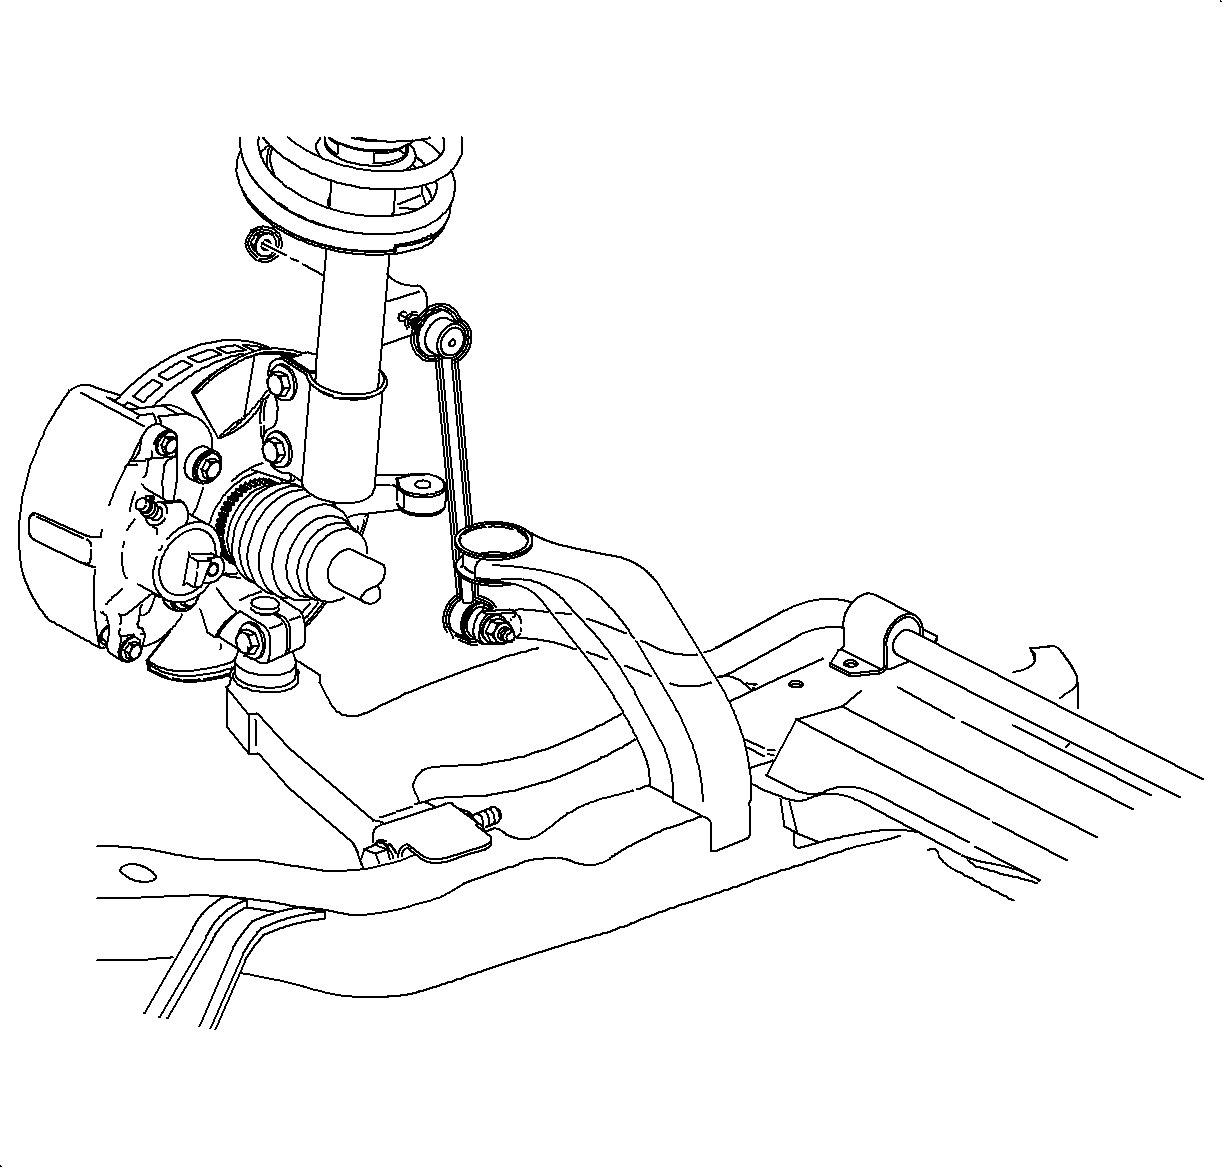
- Disconnect the stabilizer bar link from the struts. Discard the nuts.
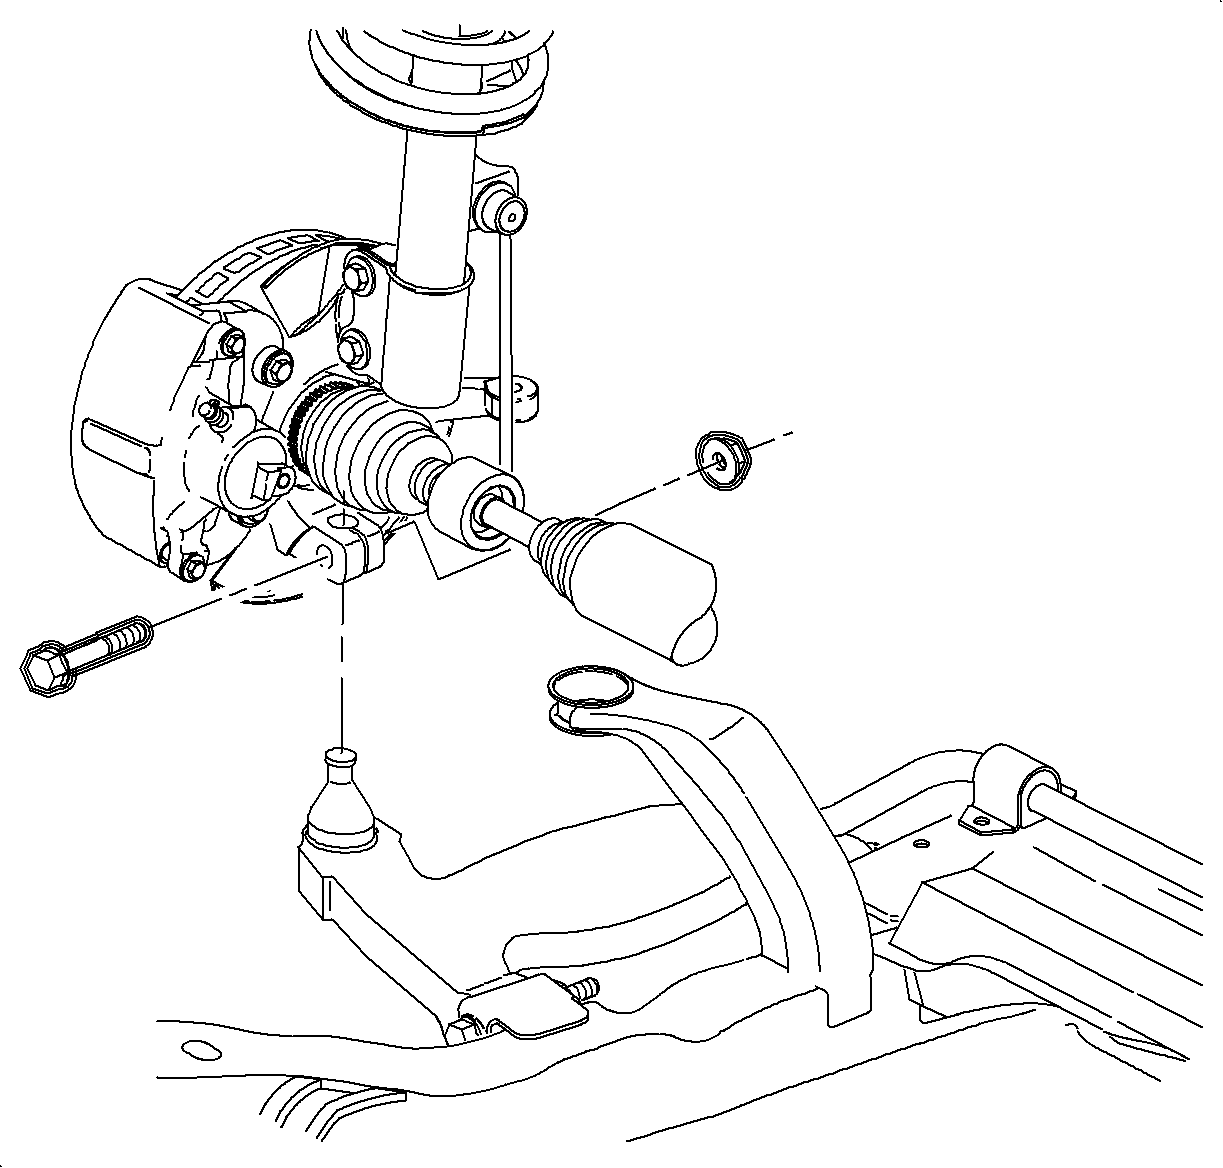
- Disconnect the lower control arms from the steering knuckle. Refer to Lower Control Arm Replacement in Front Suspension.
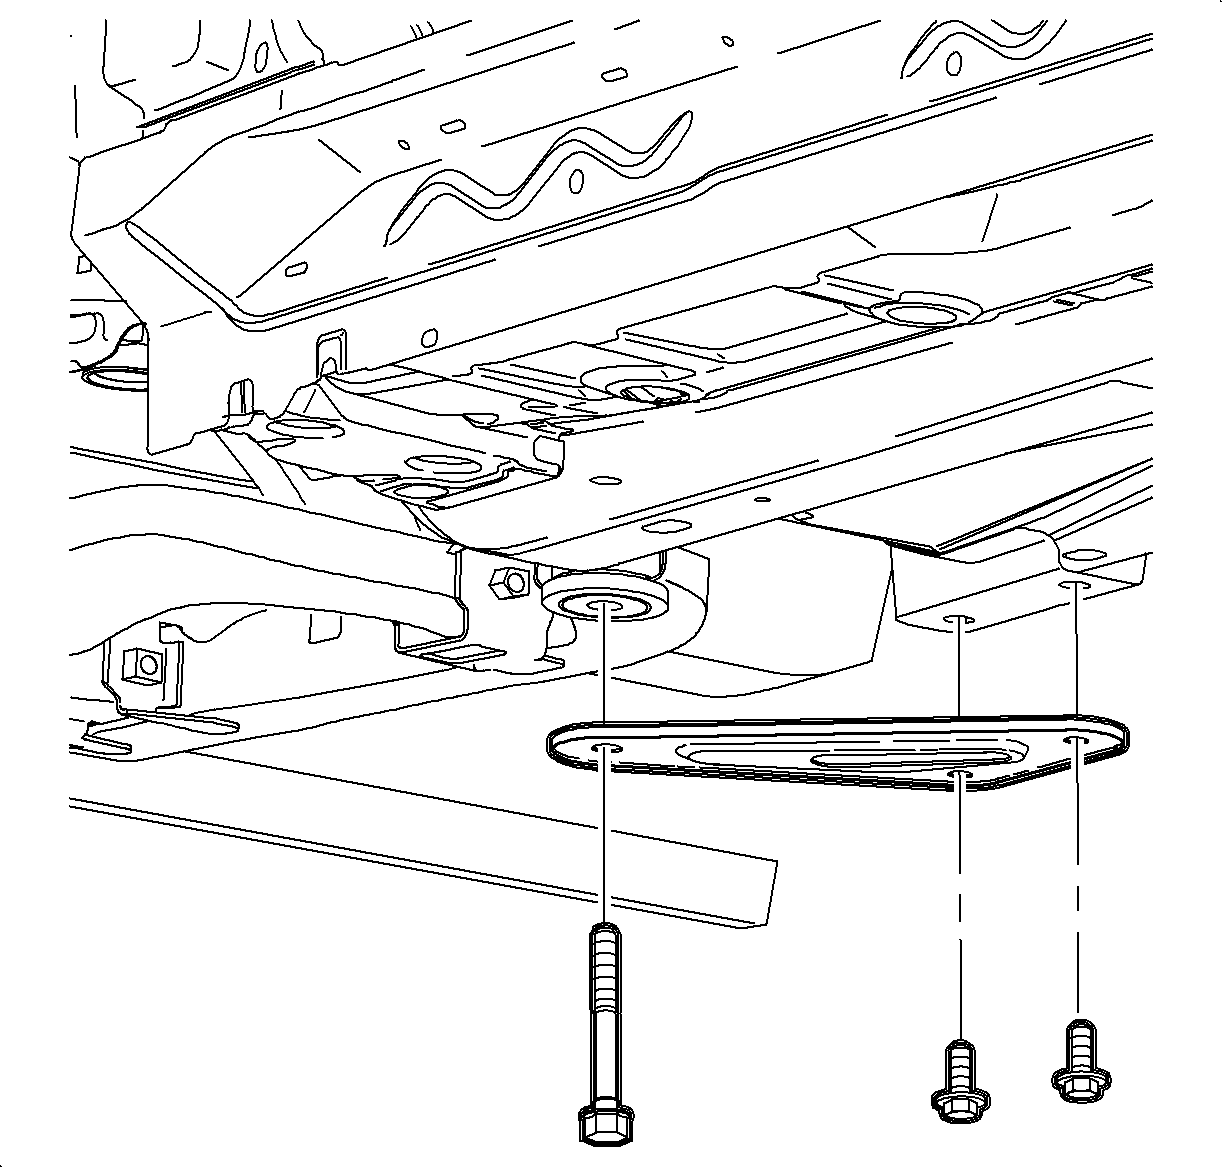
- Remove the suspension support assemblies. Discard the bolts.
- Remove the suspension support cage nuts from the body. Discard the nuts.
- Use a powertrain lifting table and the J 43628 to support the frame assembly.
- Remove the remaining frame to body bolts. Discard the frame to body bolts.
- Lower the frame from the vehicle.
- Remove all frame assembly cage nuts from the body and discard.
- Remove the stabilizer shaft assembly. Refer to Stabilizer Shaft Replacement in Front Suspension.
- Remove the lower control arms. Refer to Lower Control Arm Replacement in Front Suspension.
- Remove the frame assembly from the powertrain lifting table and the J 43628 .

Installation Procedure
- Install new frame cage nut and support cage nuts to the vehicle body.
- Install the lower control arms. Refer to Lower Control Arm Replacement in Front Suspension.
- Install the stabilizer shaft assembly to the frame . Refer to Stabilizer Shaft Replacement in Front Suspension.
- Install the frame assembly to the powertrain lifting table and the J 43628 .
- Raise the frame assembly to the body.
- Loosely install new frame to body bolts.
- Install the suspension supports using new bolts.
- Tighten the suspension support bolts and frame mounting bolts using a SA9140E .
- Connect the lower control arm to the steering knuckle. Refer to Lower Control Arm Replacement in Front Suspension.
- On vehicles equipped with a manual transmission, install the frame to shifter link pivot pin clip.
- Install the steering gear to the frame using new frame to steering gear bolts.
- If equipped with a L61 engine, install the steering gear heat shield. Refer to Steering Gear Heat Shield Replacement in Power Steering System.
- Using new nuts, connect the stabilizer bar link to the struts. Refer to Stabilizer Shaft Link Replacement in Front Suspension.
- Place the rear transaxle mount to the frame and install 2 mount to frame bolts.
- Install the front transaxle mount through bolt.
- Connect the exhaust manifold pipe to the manifold on the L61 engine or manifolds on the L81 engine. Refer to Exhaust Manifold Pipe Replacement in Engine Exhaust.
- If equipped with a L61 engine, install the O2 sensor clamp to underbody nut.
- Secure the A/C pipe clip to the front frame assembly.
- Install the right front lower splash shield.
- Install the left front wheel liner push pin to the frame assembly.
- Attach the O2 sensor harness to the frame assembly.
- Install the front tires and wheels. Refer to Tire and Wheel Removal and Installation in Tires and Wheels.
- Lower the vehicle.
- Install the remaining rear mount to frame bolt.
- Install the rear transaxle mount through bolt.
- If equipped with a L81 engine, install the rear exhaust manifold pipe heat shield. Refer to Exhaust Pipe Heat Shield Replacement in Engine Exhaust.
- Align the front end. Refer to Wheel Alignment Measurement in Wheel Alignment.
Important: The J 43628 must fully engage in all frame gage holes.
Notice: Refer to Fastener Notice in the Preface section.
Tighten
Tighten the bolts to 90 N·m (66 lb ft)
plus an additional 45-60 degrees.
Tighten
Tighten the bolts to 45 N·m (33 lb ft)
plus 90 degrees.
Tighten
Tighten the bolts to 60 N·m (44 lb ft).
Tighten
Tighten the bolt to 55 N·m (41 lb ft).
Tighten
Tighten the nut to 4 N·m (35 lb in).
Tighten
Tighten the splash shield to body bolts to 5 N·m
(45 lb in).
Tighten
Tighten the bolt to 60 N·m (44 lb ft).
Tighten
Tighten the bolt to 90 N·m (66 lb ft).
