Tools Required
| • | SA9137T Servo Piston Seal Installer |
| • | SA9143T Input Shaft Seal Installer |
Removal Procedure
- Remove the end cover. Refer to End Cover Replacement .
- Remove the 1st clutch, 1st drive gear, and 1st driven gear. Refer to 1st Clutch, 1st Drive Gear and 1st Driven Gear Replacement - On Vehicle .
- Remove the valve body. Refer to Control Valve Body Assembly Removal .
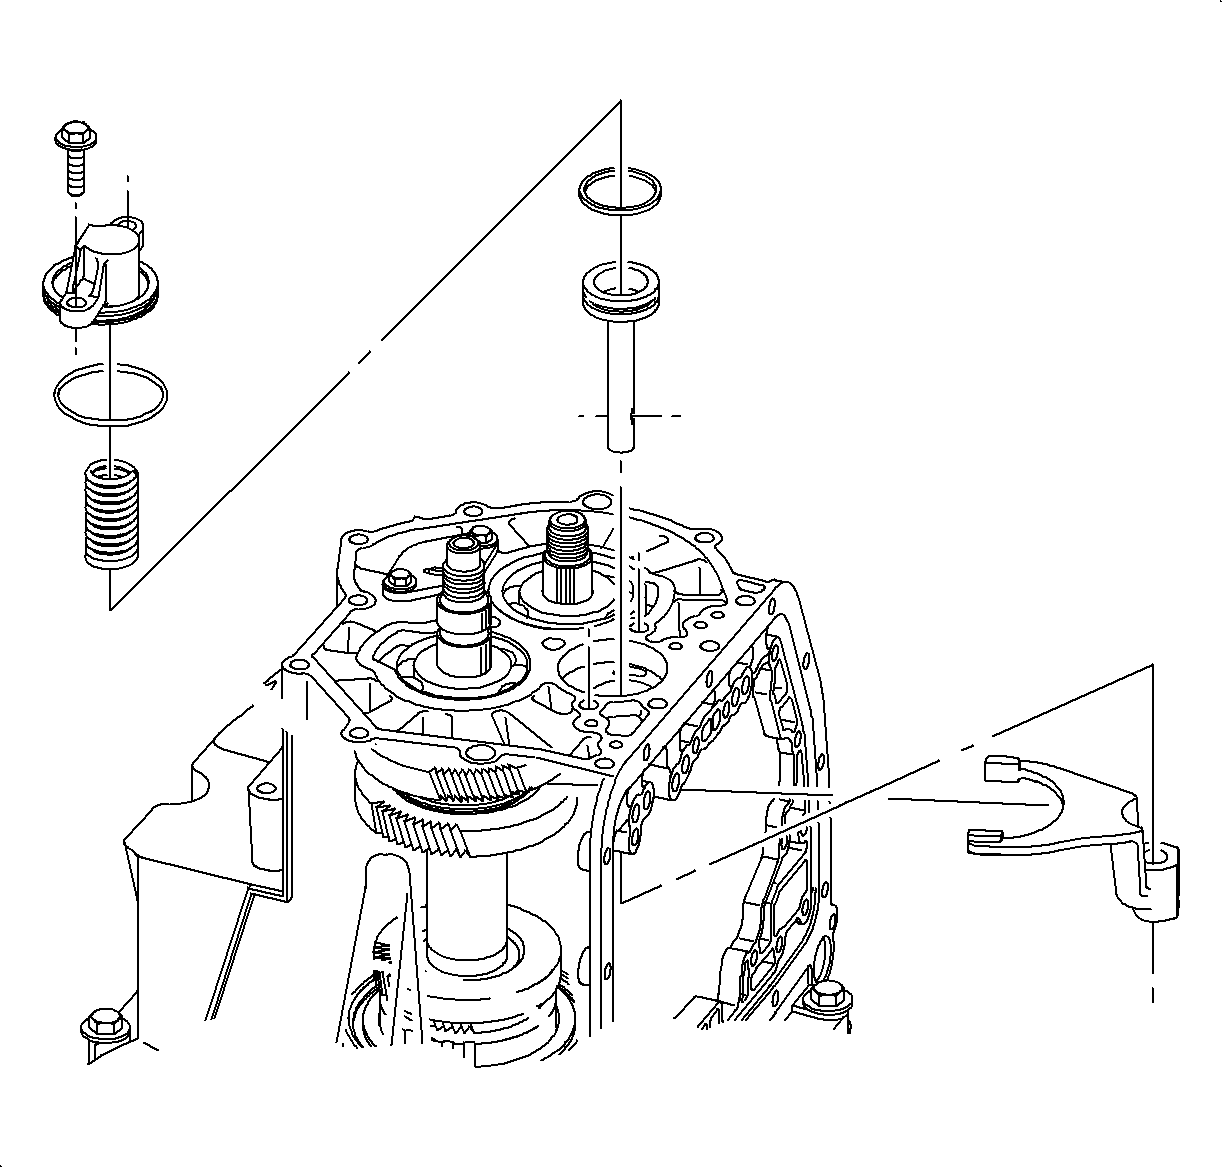
- Remove the forward/reverse servo piston cover bolts, remove cover, servo piston spring, servo piston bolt, and shift fork.

Installation Procedure
- Obtain tool SA9137T .
- Install the forward/reverse servo piston seal if necessary.
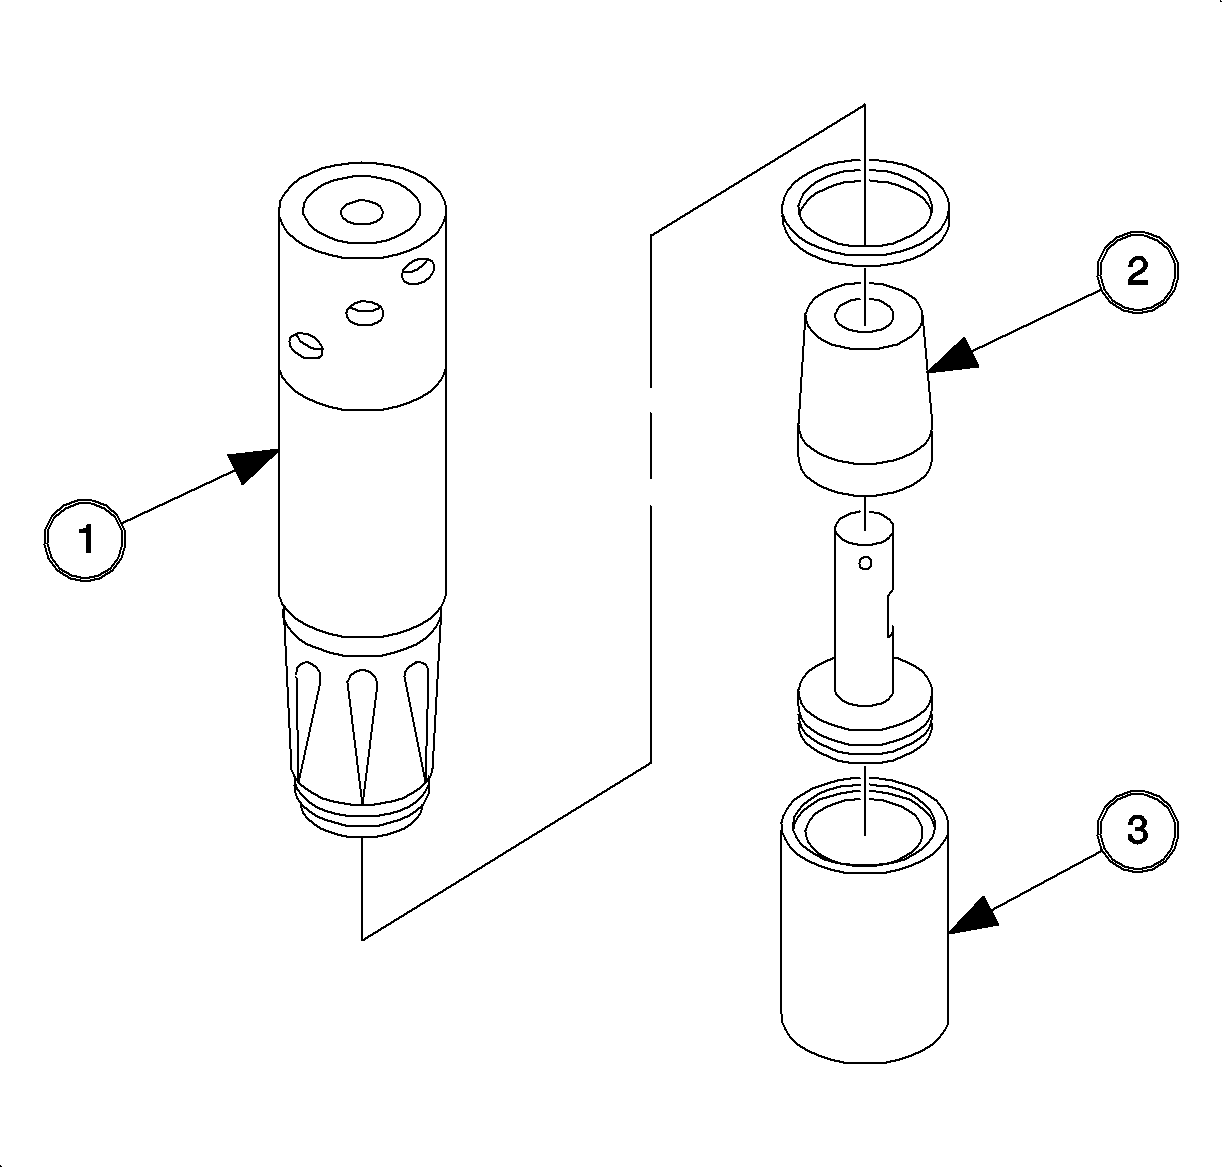
- Place the servo piston on the SA9137T-2 (3).
- Install the SA9137T-1 (2) to the servo piston.
- Lube the seal and position it on the expander cone.
- Use the seal pusher SA9143T (1) to install seal.
- Place the servo piston on seal sizer Holding Base SA9137T-4 (2).
- Size the seal by placing the SA9137T-3 (1) over the piston, with large the internal diameter down, until it bottoms out on the work table.
- Lube the inside diameter of the Forward/Rev fork and slide the Forward/Rev fork onto the Forward/Reverse Dog clutch sleeve.
- Insert the Forward/Rev servo piston into the bore and line up fork and servo shaft as servo is pushed in. Before pushing the servo all the way in, align bolt hole in servo with hole in fork. The chamfered hole should face towards the case opening.
- Clean the bolt threads and apply Loctite 242® Threadlocker P/N 21485277, or equivalent on the bolt threads.
- Install the fork to servo piston bolt and tighten.
- Install the servo spring.
- Install the servo cover O-ring to the cover and install the cover. Tighten the 2 bolts.
- Install the valve body. Refer to Control Valve Body Assembly Removal .
- Install the 1st clutch, 1st drive gear, and 1st driven gear. Refer to 1st Clutch, 1st Drive Gear and 1st Driven Gear Replacement - On Vehicle .
- Install the end cover. Refer to End Cover Replacement .

Important: Prior to using Servo Piston Seal Installer SA9143T, inspect the tool for any nicks or burrs that could damage the forward/reverse servo piston seal.
Important: Lube seal with Saturn Transaxle Fluid before installation.
Important: Be sure not to install the Forward/Rev fork upside down. Refer to illustration for reference.
Important: Prior to installing the servo piston, thoroughly lube the following components
with Saturn Transaxle Fluid:
• The servo piston shaft • The case bore where the piston will be installed

Tighten
Tighten the forward/reverse shift fork-to-forward/reverse servo piston bolt
to 10 N·m (89 lb in).
Important: Clean and lubricate fasteners with Saturn Transaxle Fluid. Wipe off excess fluid and install.
Tighten
Tighten the forward/reverse servo piston cover-to-case bolts to 20 N·m
(15 lb ft).
