Windshield Wiper Motor Replacement 1st Design
Removal Procedure
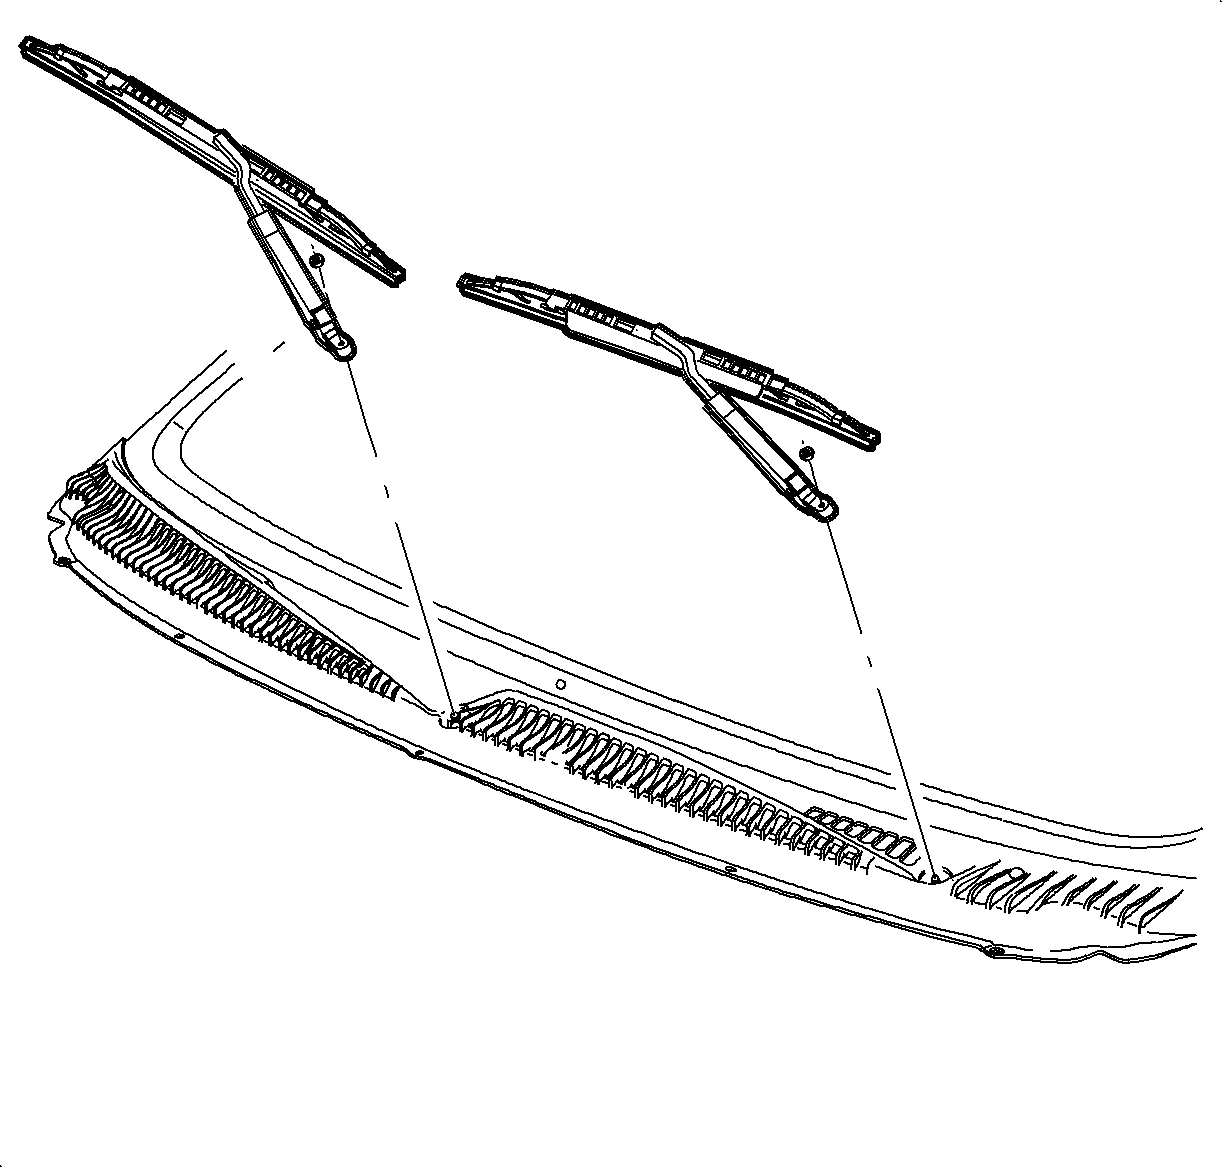
- Remove the wiper arm finish cap by pulling upward on the cap at the pivot location.
- Remove the wiper arm fastener.
- Lift the wiper arm away from the windshield and remove the wiper arm from the pivot shaft.
- Remove the air inlet. Refer to Air Inlet Grille Panel Replacement in Body Front End.
- Disconnect the windshield washer hose from the inlet grille.
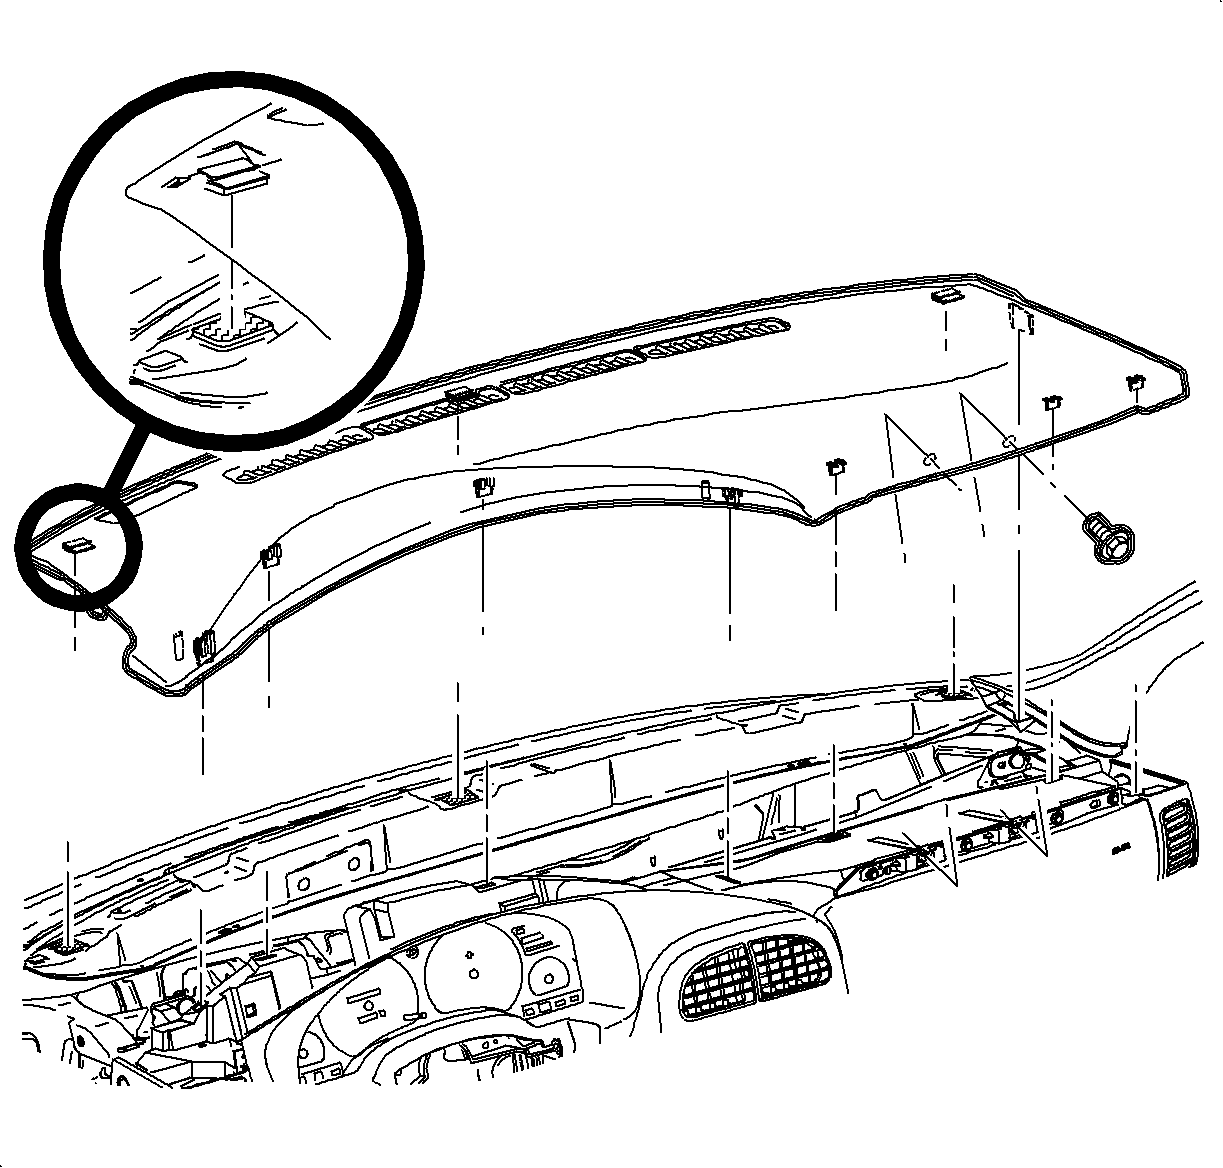
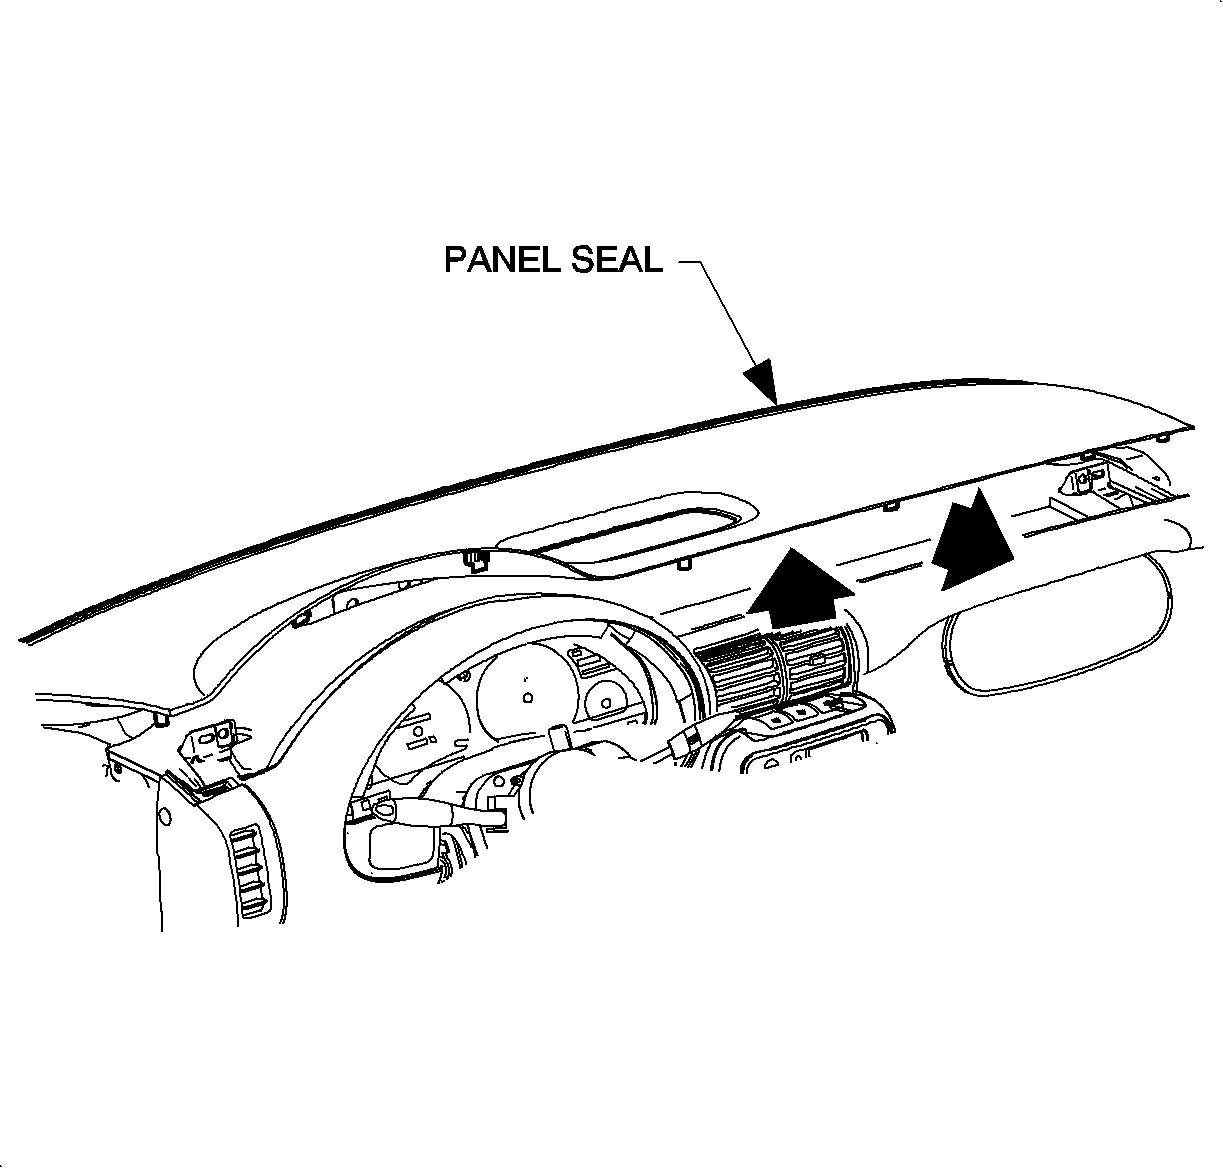
- Remove the instrument panel top cover. Refer to Instrument Panel Upper Trim Plate Replacement in Instrument Panel, Gages, and Console.
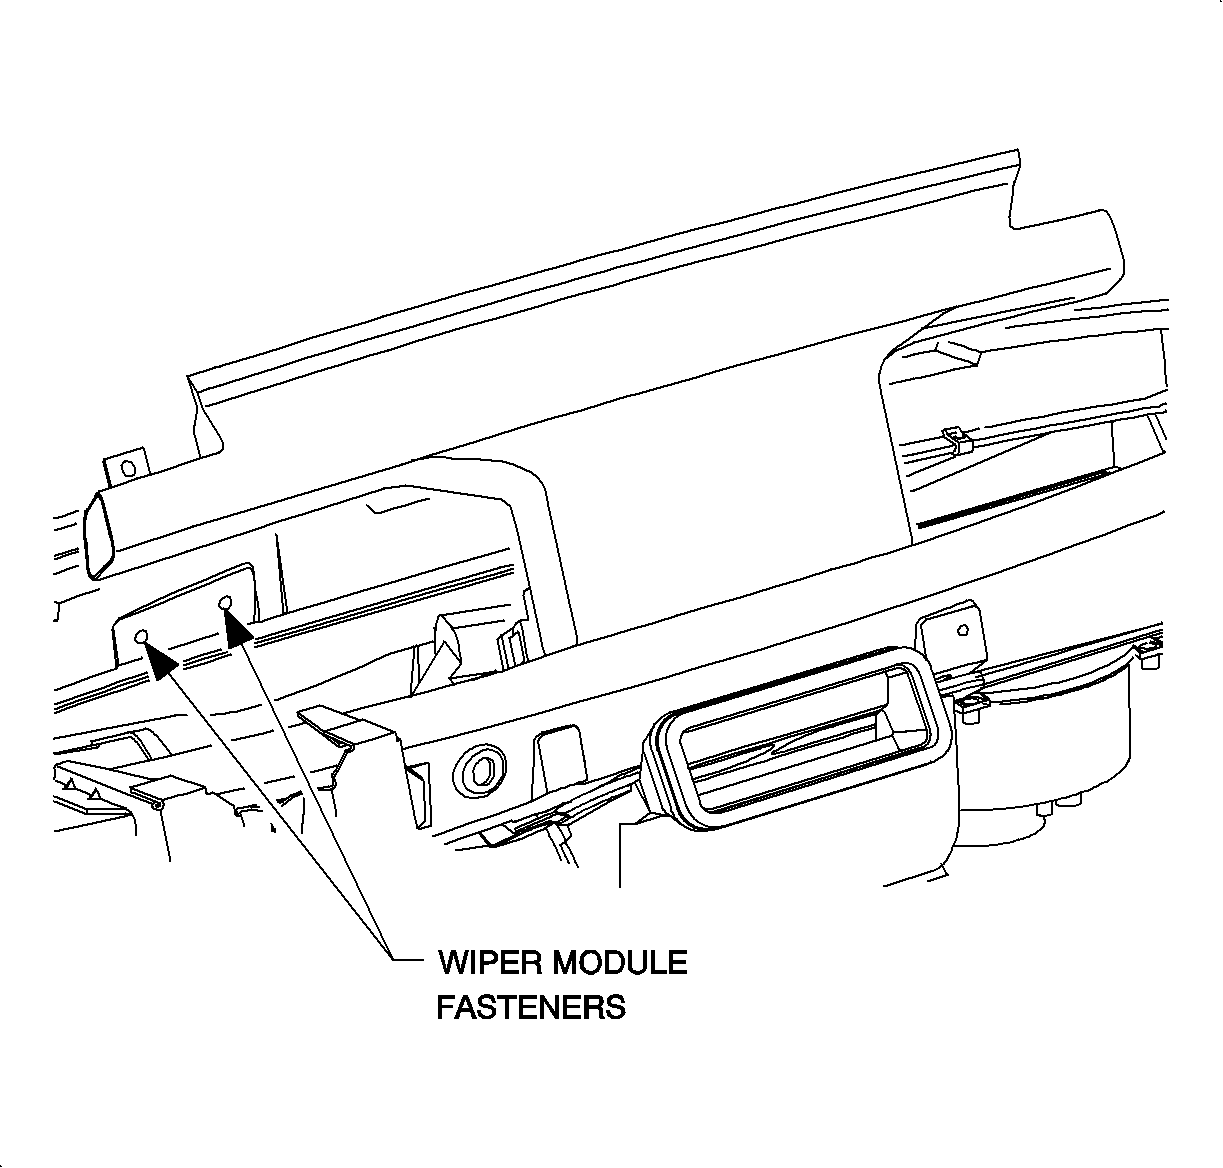
- Loosen the A/C defroster duct and move it to the right to expose the wiper module fasteners.
- Position the wiper motor crank arm at the 12 o'clock position to ease the removal of the wiper module.
- Remove the wiper module fasteners.
- Partially remove the wiper module.
- Disconnect the wiring from the motor and the module frame.
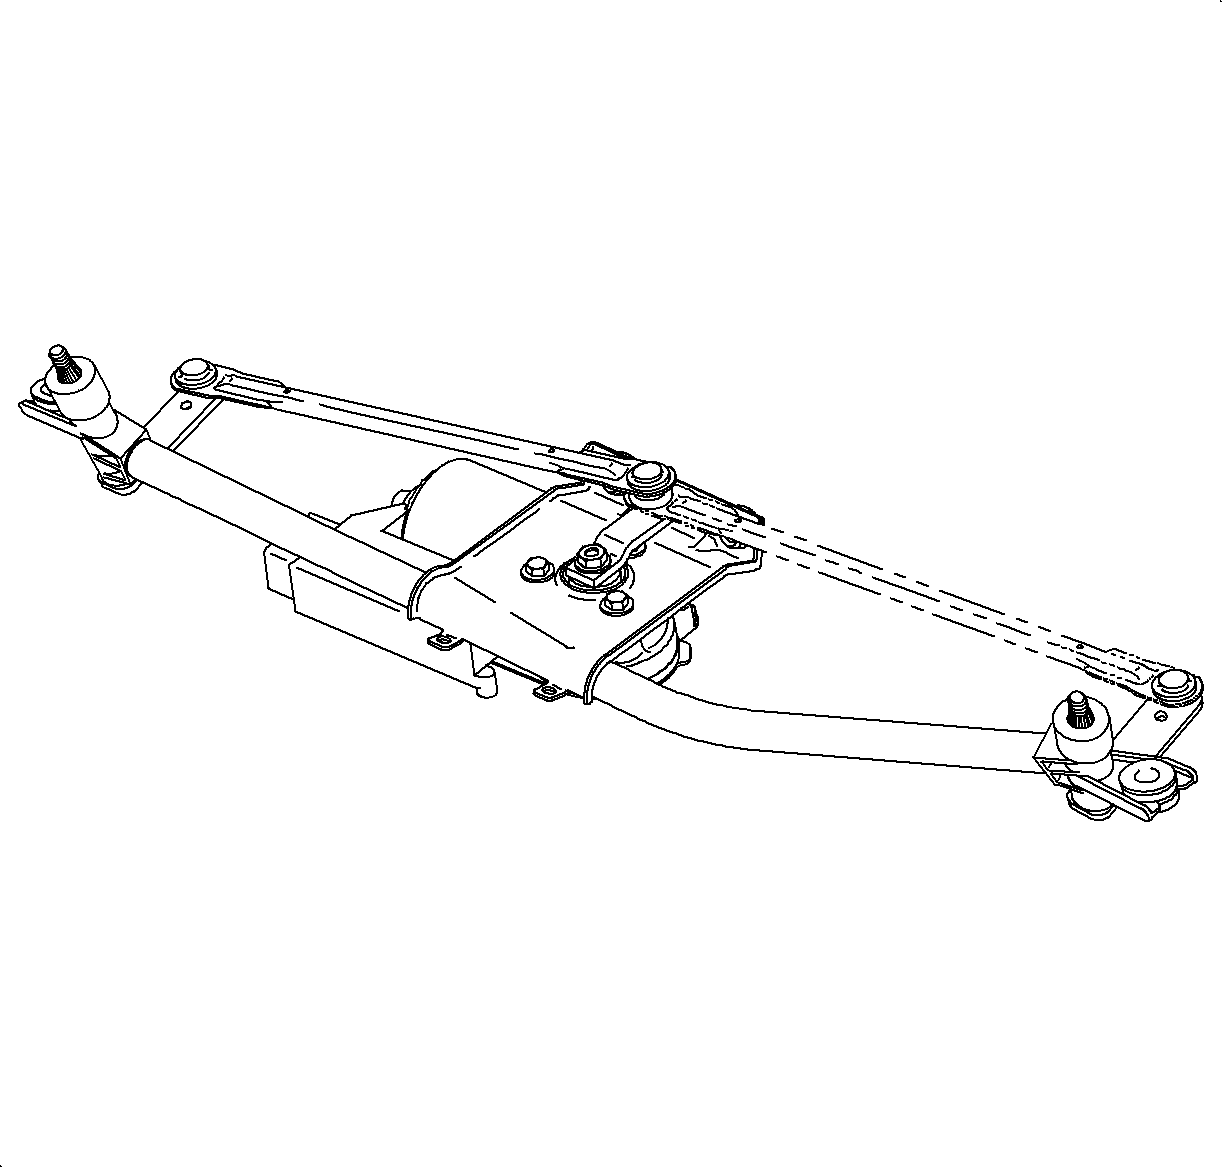
- Remove the wiper module.
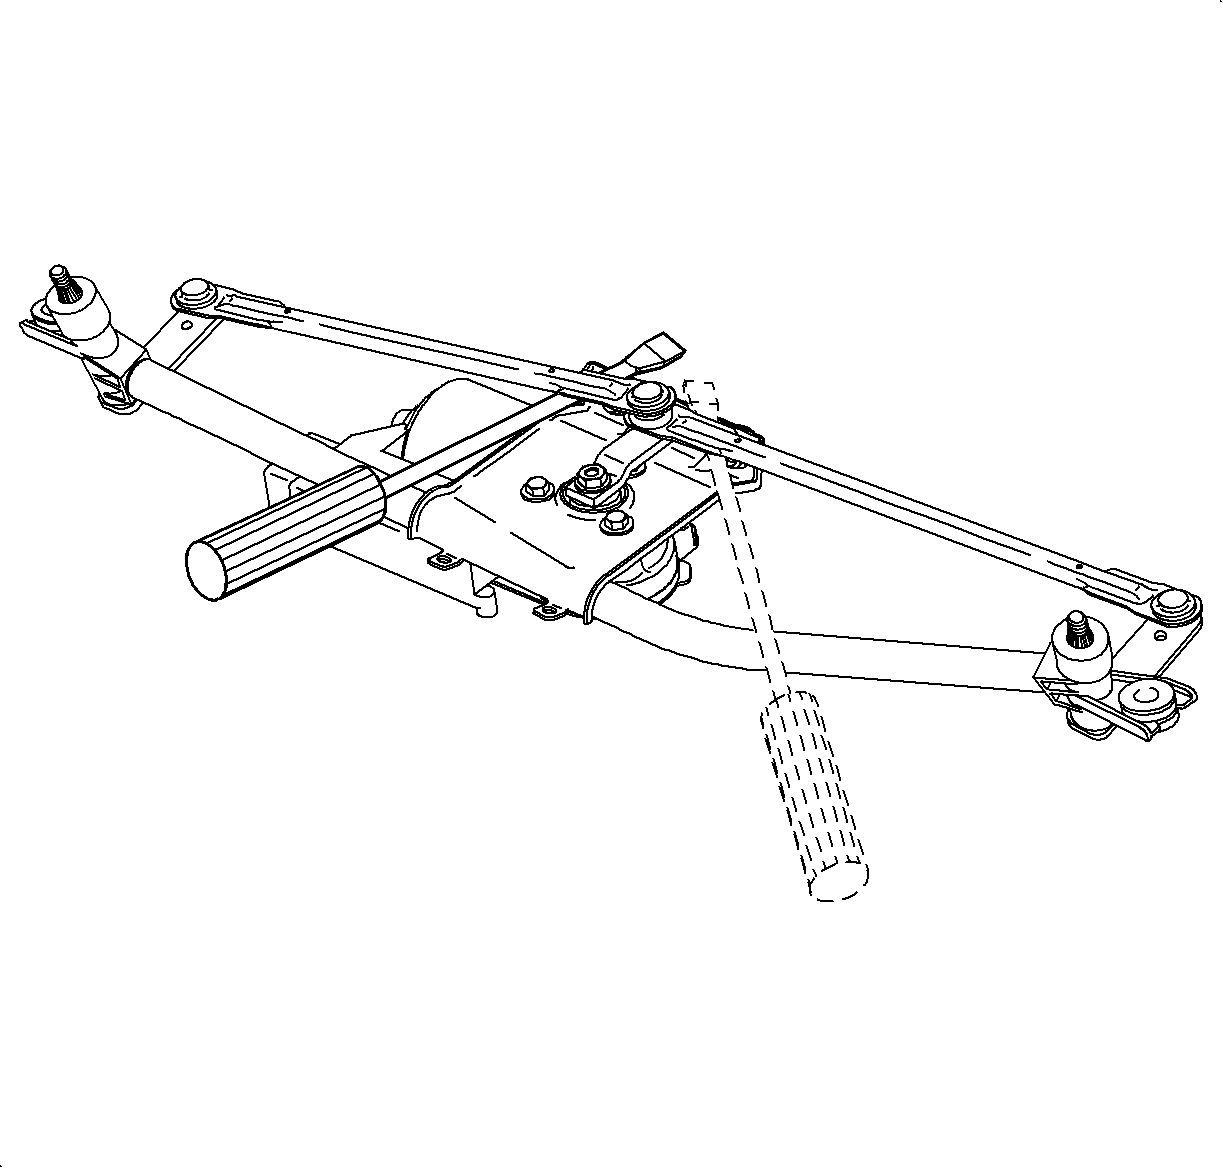
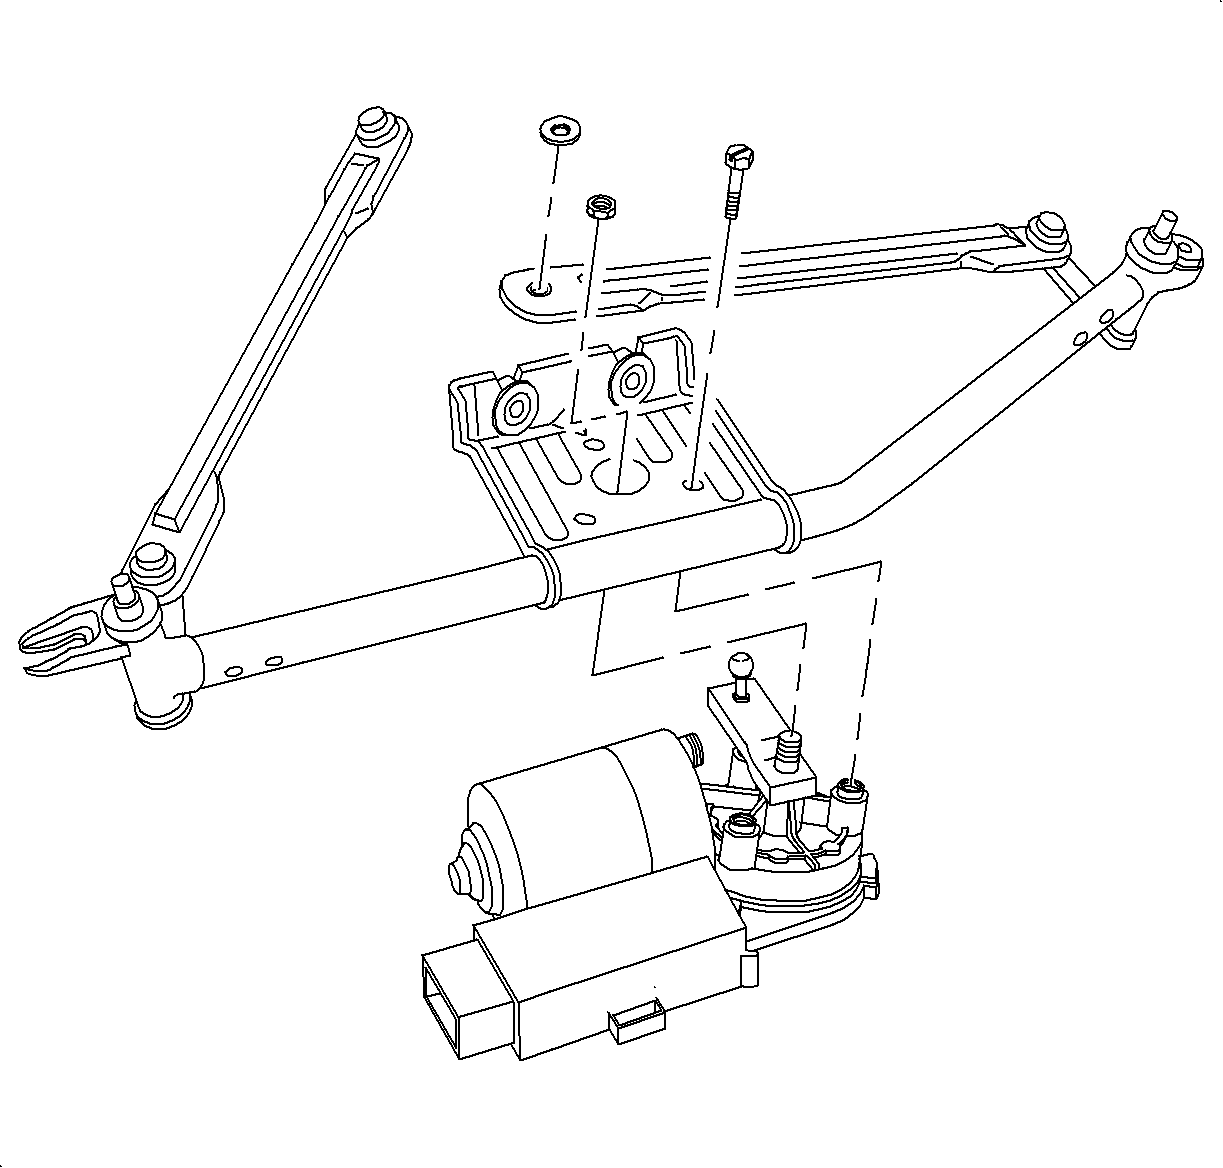
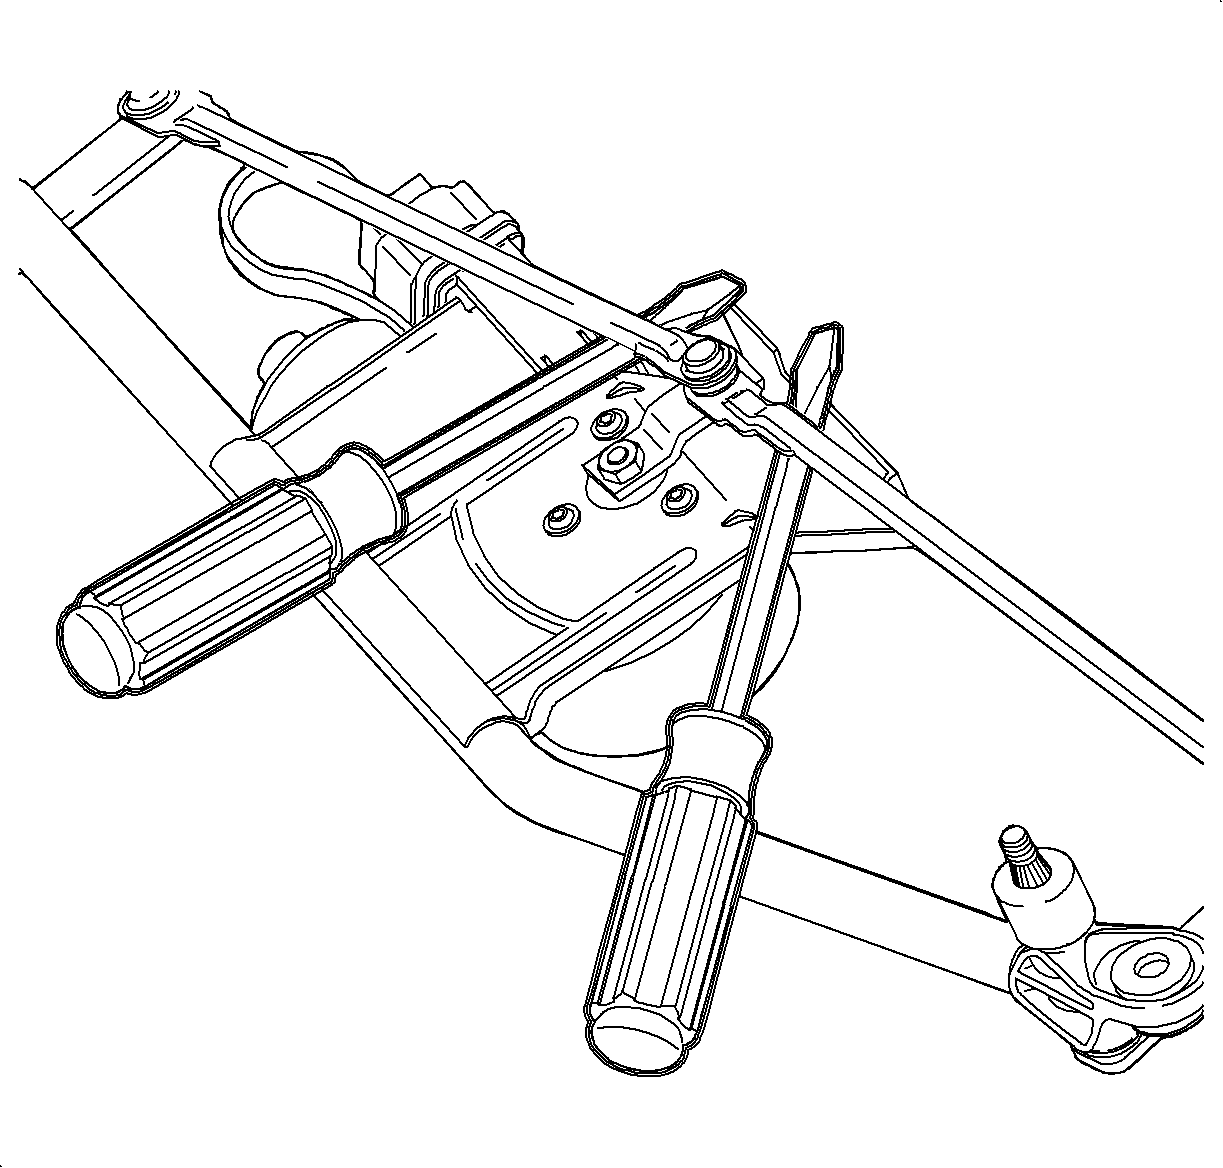
- Place the wiper module in a vise or on a secured surface. Pry between the frame assembly and the wiper links to free the wiper links from the crank arm.
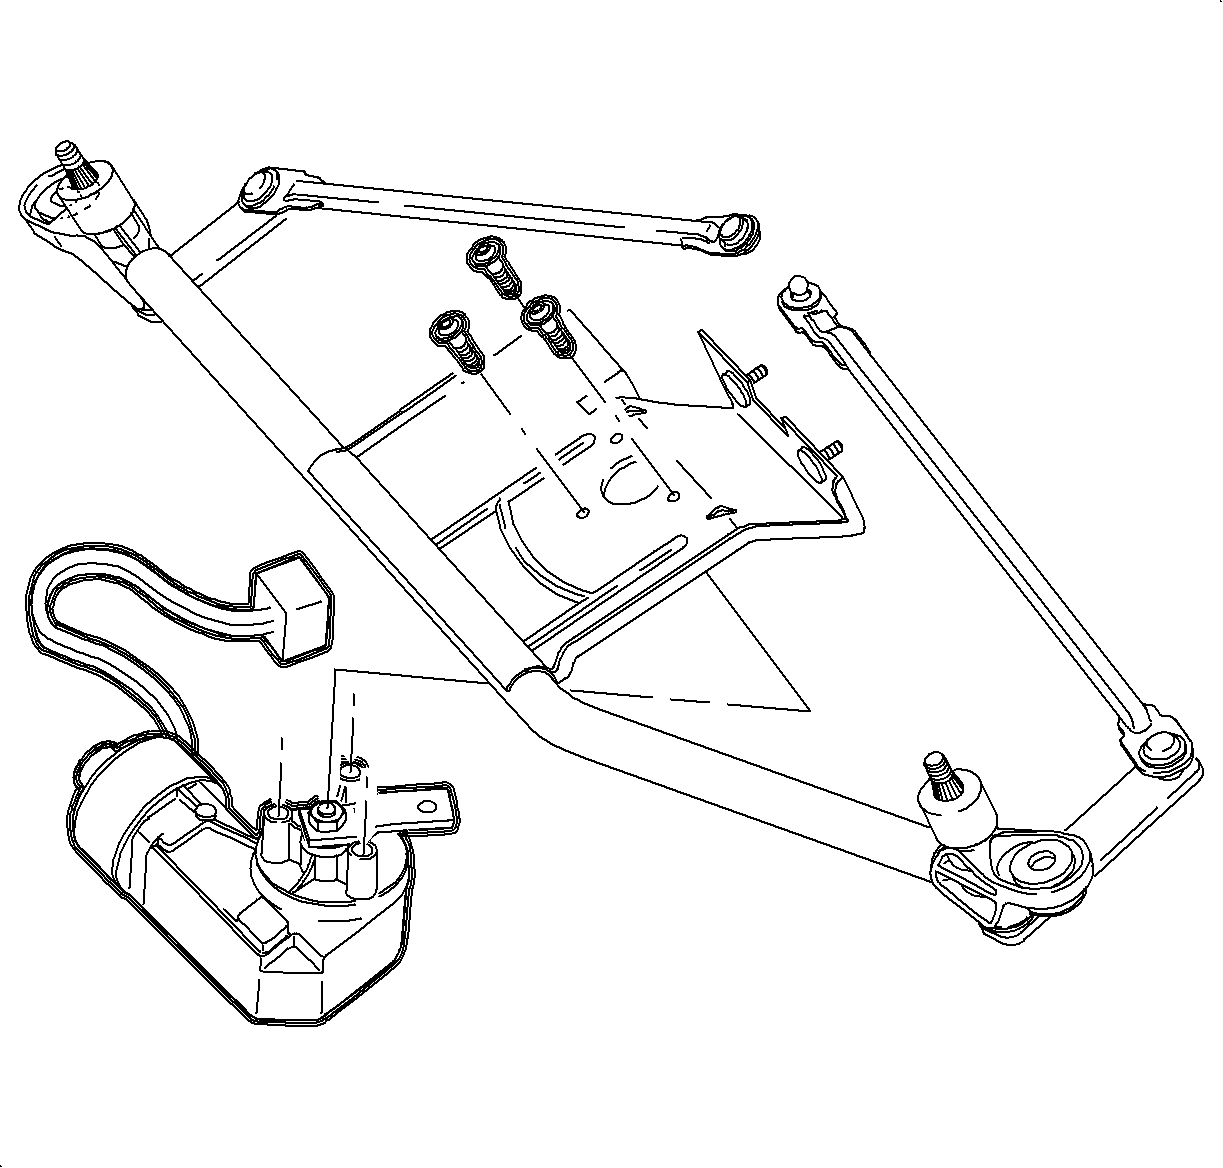
- Remove the wiper motor fasteners and remove the wiper motor from the wiper module.
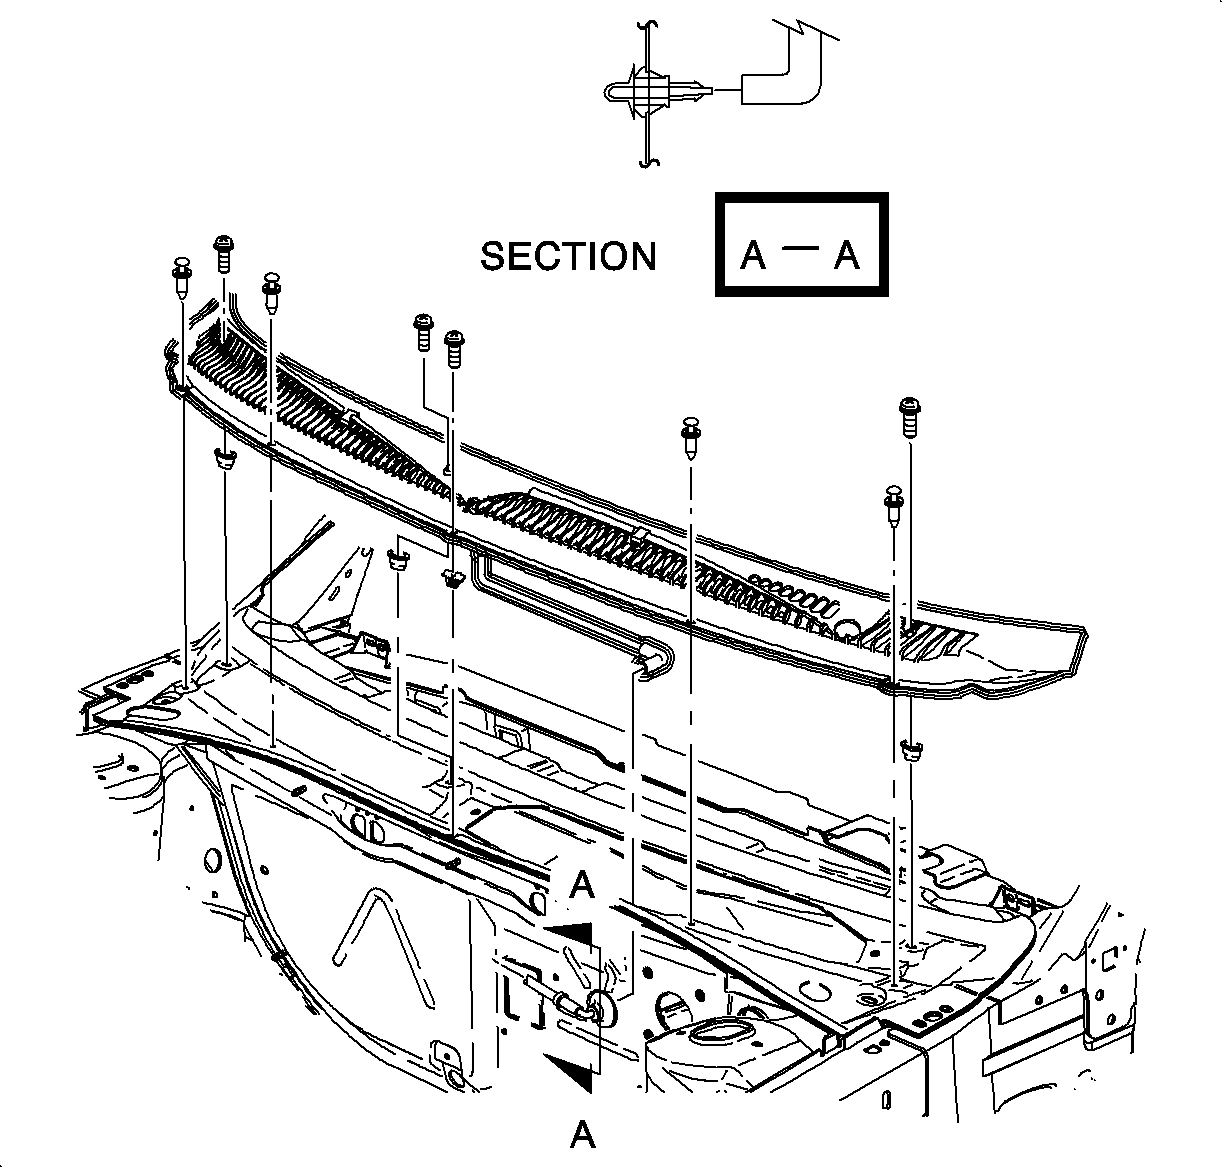
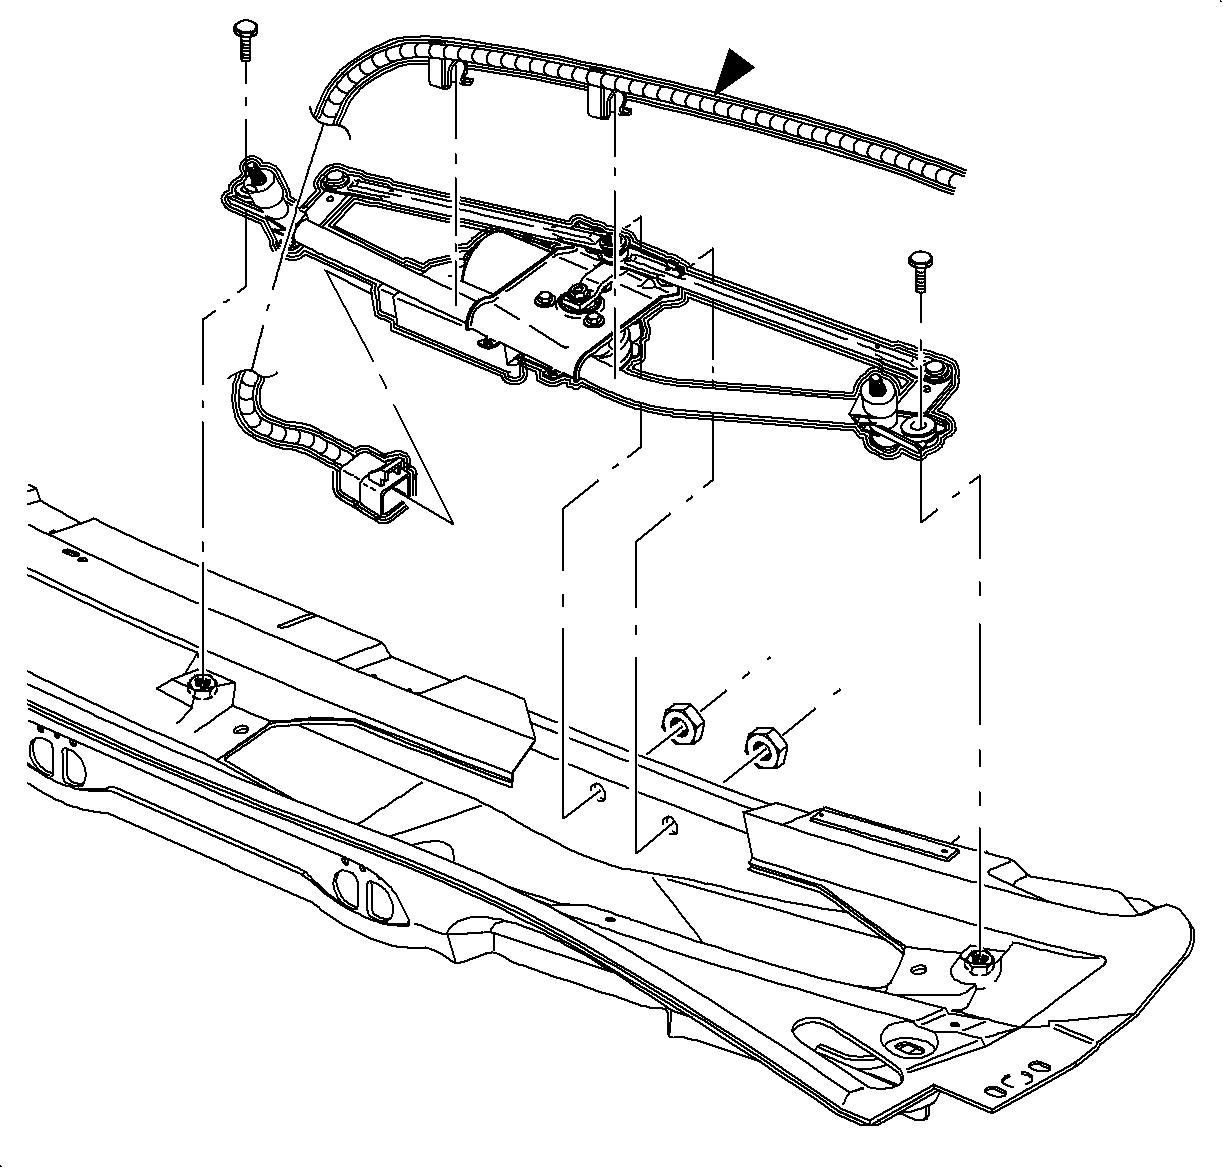
Notice: Use care when removing wiper module from cowl to avoid pivots contacting windshield and to keep from scratching windshield.
Installation Procedure
- Install the wiper motor onto the wiper module.
- Press the transmission links onto the wiper motor crank arm firmly by hand. Ensure that the position of the transmission links are not bottomed on the crank arm ball.
- Partially install the wiper module assembly.
- Connect the wiring to the wiper motor and to the module frame.
- Install the wiper module assembly with the fasteners.
- Tighten the outboard bolt first, the inboard second, and the nuts last.
- Turn the wiper switch ON momentarily. Once the wiper switch is turned OFF, the wiper mechanism should be in the PARK position with the wiper motor crank arm in the 9 o'clock position.
- Connect the washer hose to the washer nozzle.
- Install the cowl trim panel.
- Install the wiper arms and fasteners. Refer to Windshield Wiper Blade Replacement .
- Install the A/C defroster duct assembly.
- Install the instrument panel top cover. Refer to Instrument Panel Upper Trim Plate Replacement in Instrument Panel, Gages, and Console.
Notice: Refer to Fastener Notice in the Preface section.

Tighten
Tighten the wiper motor-to-wiper module fasteners to 11 N·m (8 lb ft).
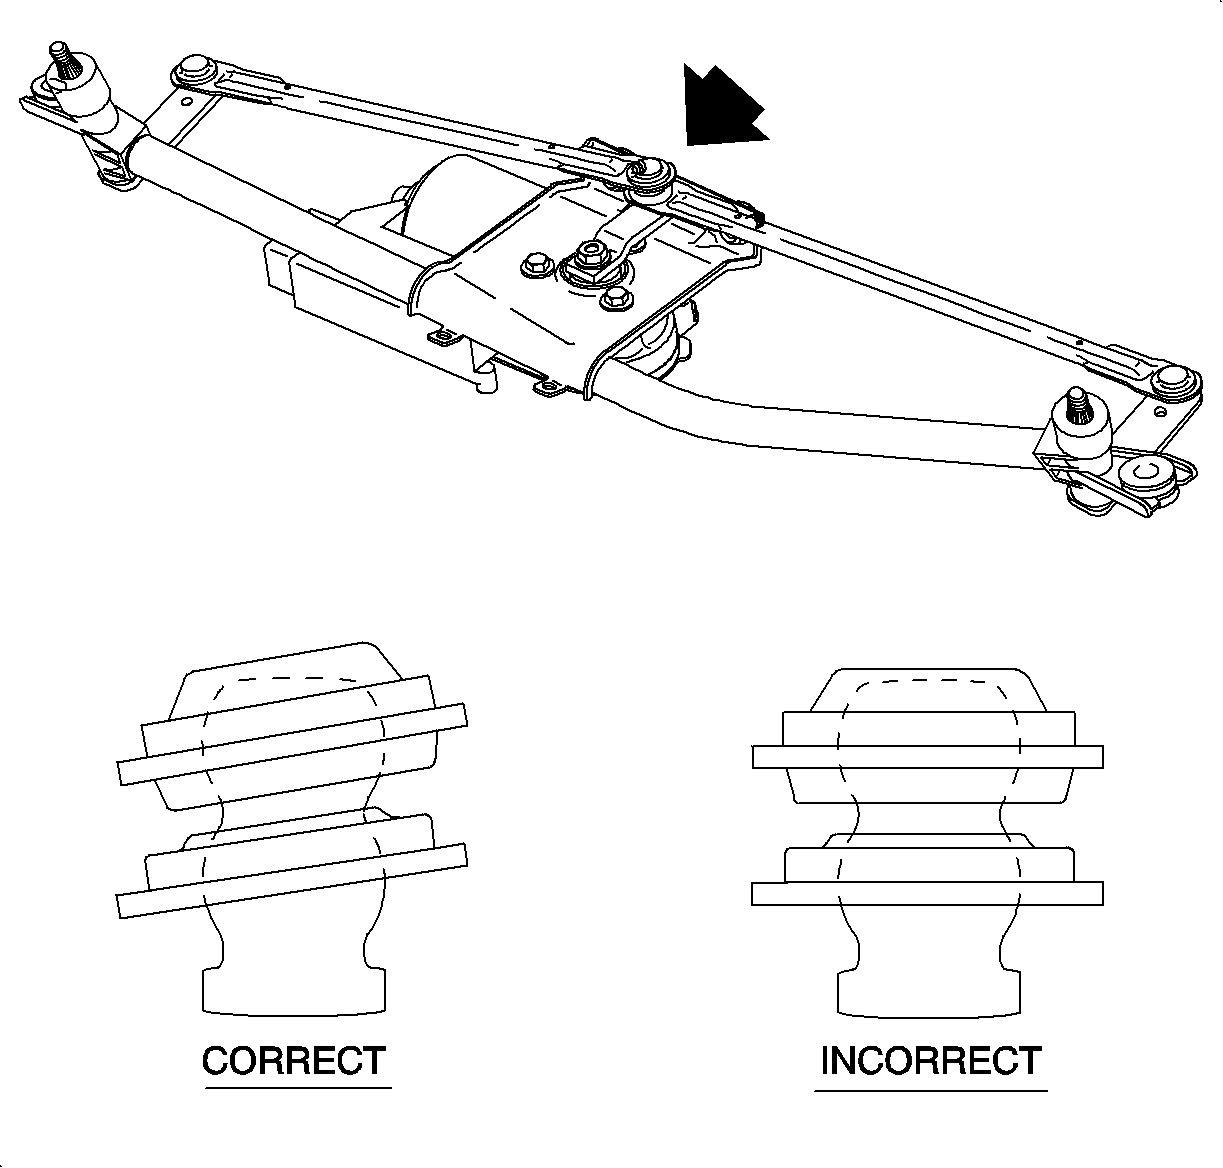
Important: Be certain the new wiper motor crank arm is at the 12 o'clock position just as the old crank arm. If the wiper motor crank arm is not at the 12 o'clock position, installation in the cowl will be difficult.

Tighten
| • | Tighten the wiper module-to-cowl bolts to 18 N·m (13 lb ft). |
| • | Tighten the wiper motor-to-wiper module fasteners to 8 N·m (71 lb in). |

Tighten
Tighten the wiper arm retaining nuts to 30 N·m (22 lb ft).


Windshield Wiper Motor Replacement 2nd Design
Removal Procedure
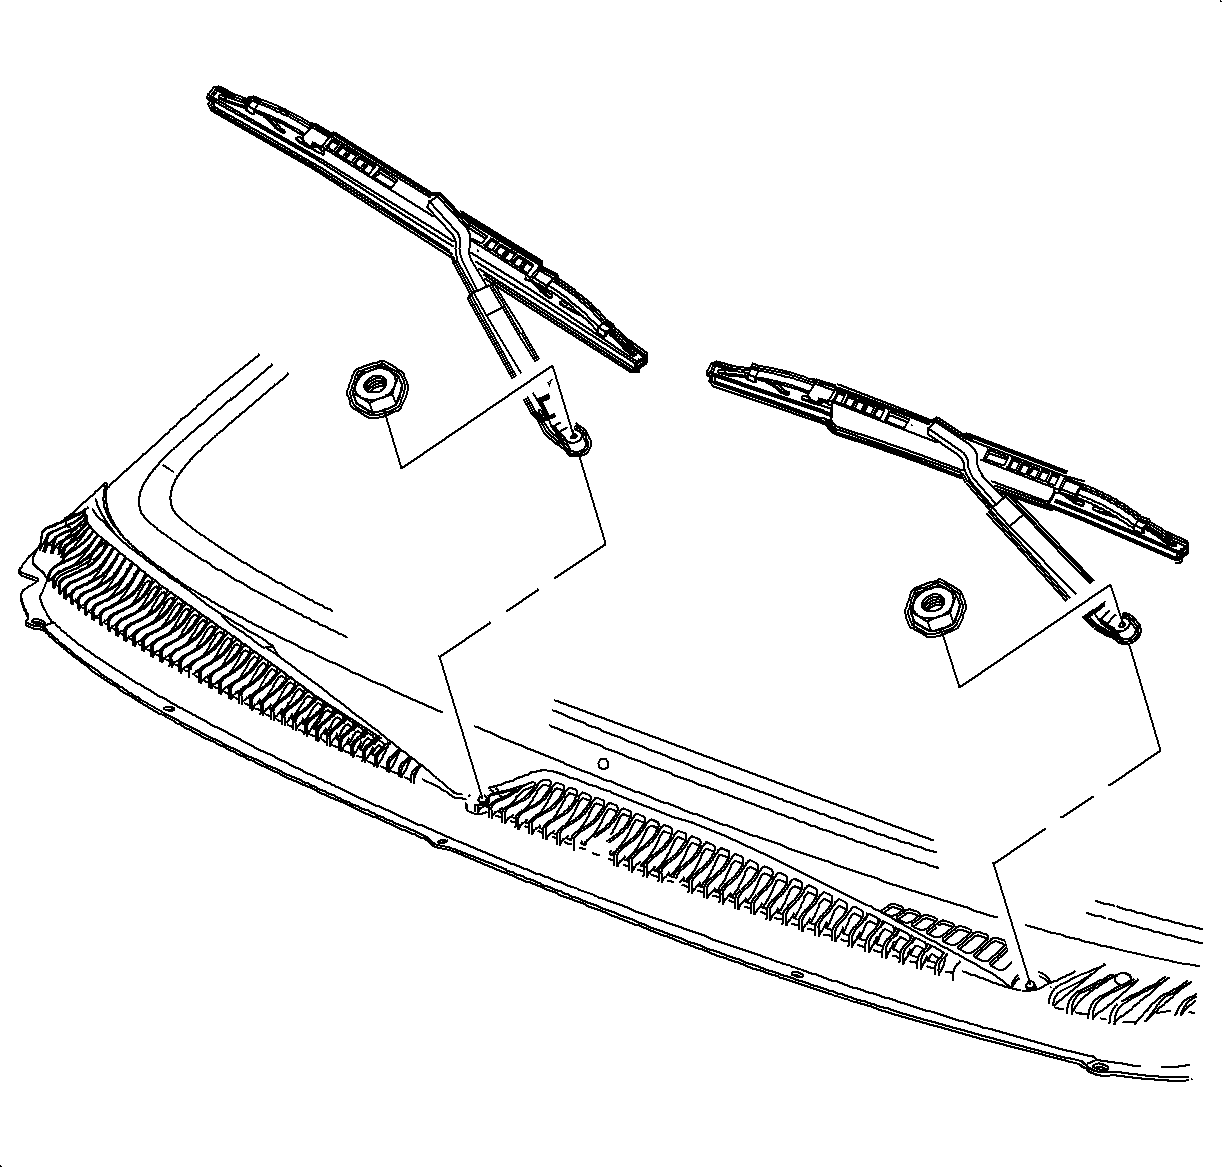
- Remove the wiper arms. Refer to Windshield Wiper Arm Replacement .
- Remove the air inlet grill. Refer to Air Inlet Grille Panel Replacement in Body Front End.
- Disconnect the windshield washer hose from the inlet grille.
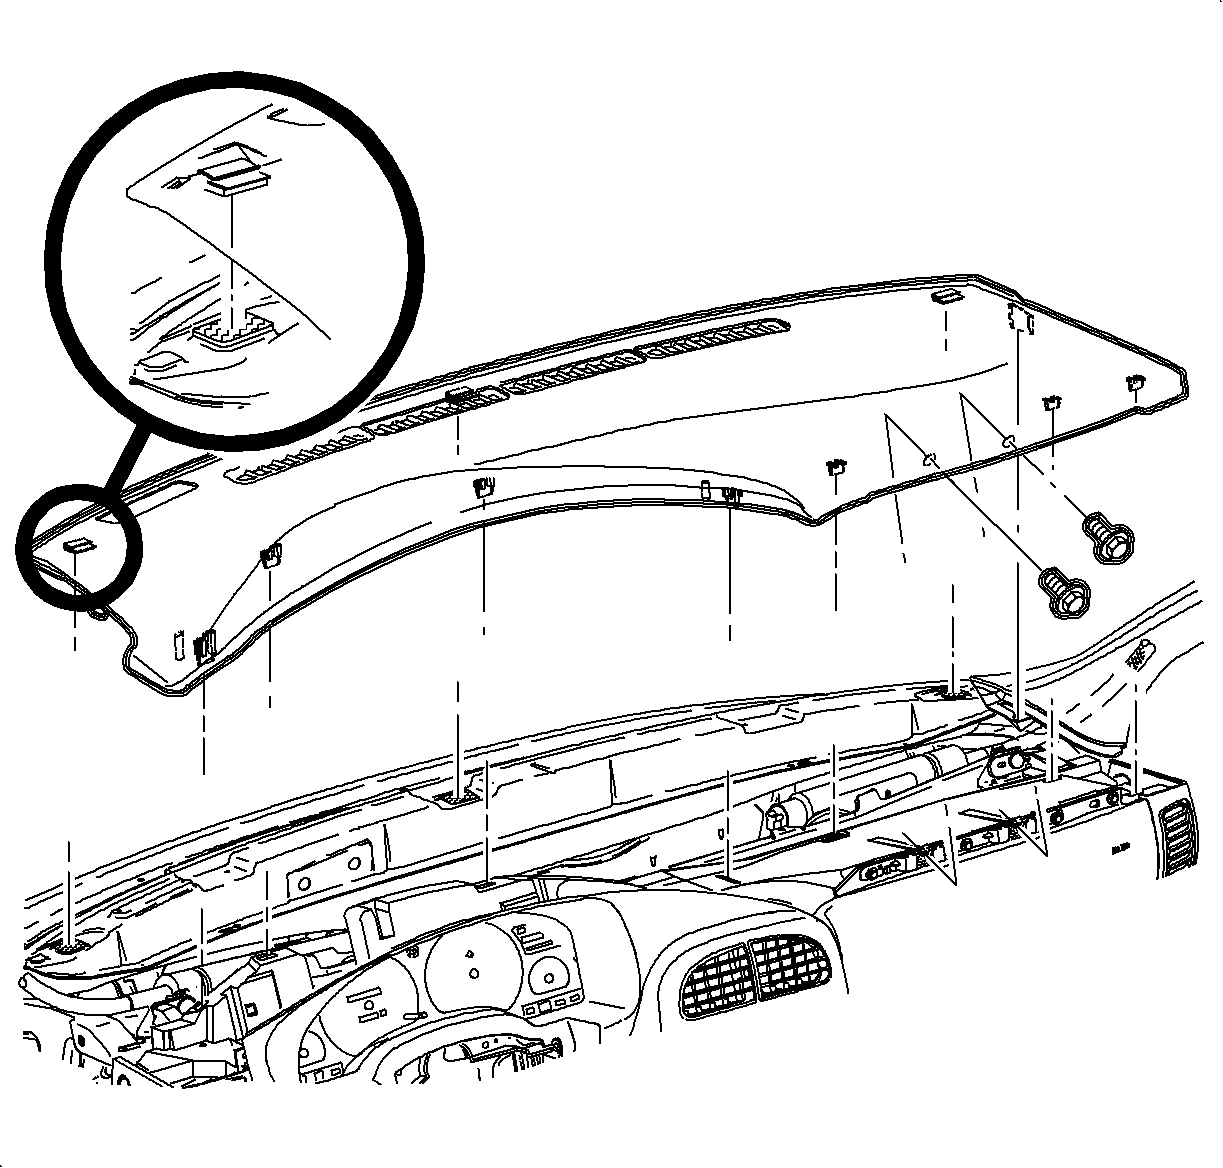
- Remove the instrument panel top cover. Refer to Instrument Panel Upper Trim Plate Replacement in Instrument Panel, Gages, and Console.
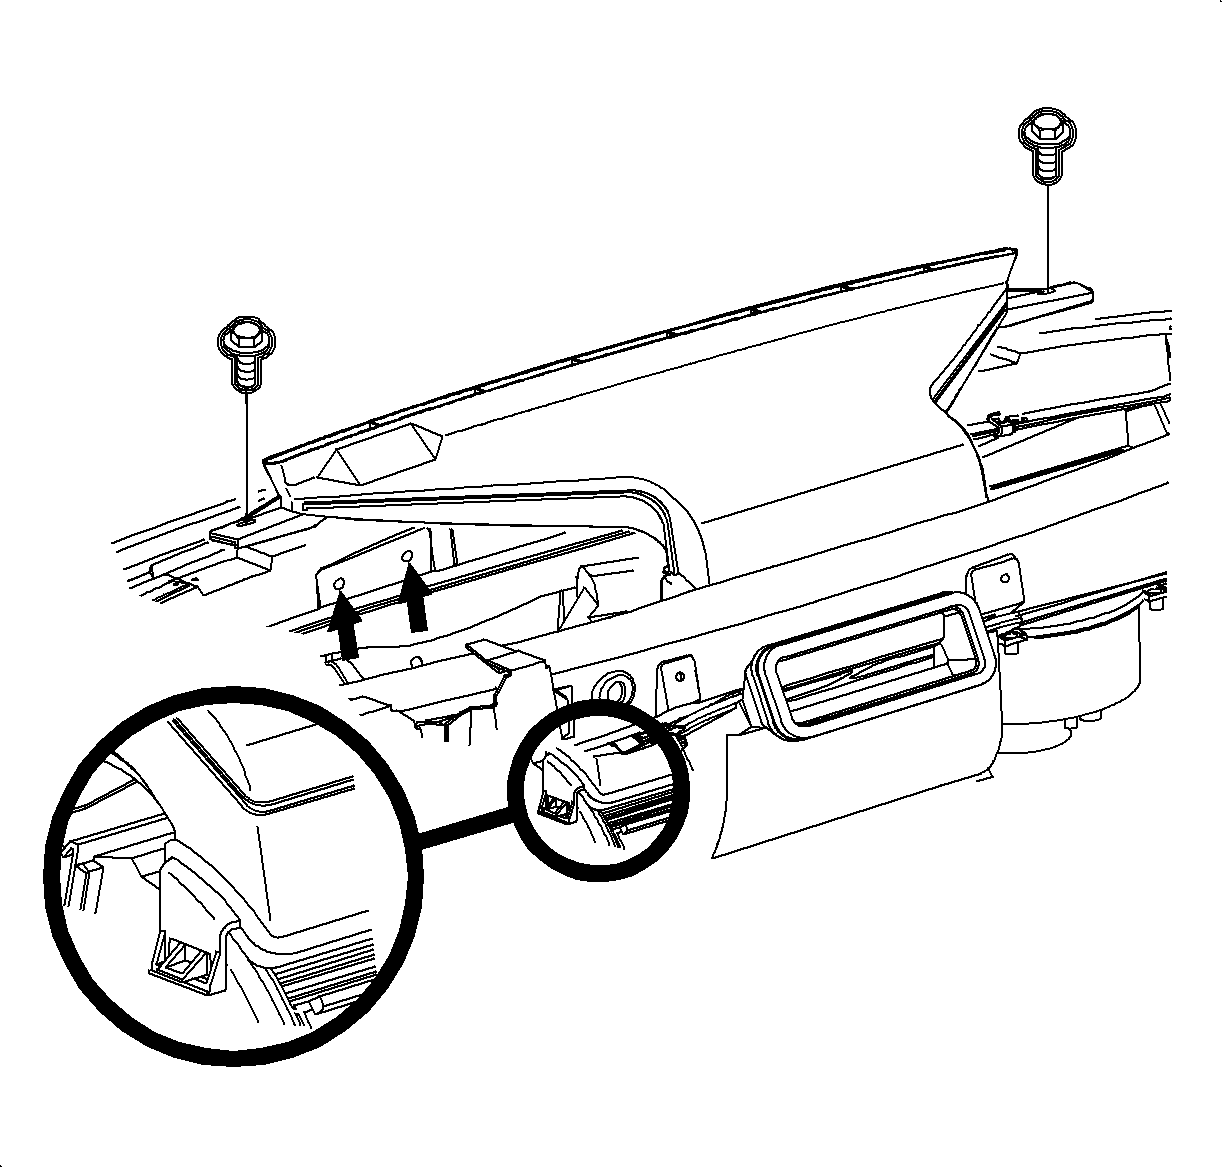
- Remove the A/C defroster duct fasteners.
- Loosen the A/C defroster duct and move it to the right to expose the wiper module fasteners.
- Remove the fasteners.
- Push the motor crank arm in a clockwise direction to position the wiper motor crank arm at the 12 o'clock position. This will ease the removal of the wiper module. Refer to the illustration for proper orientation.
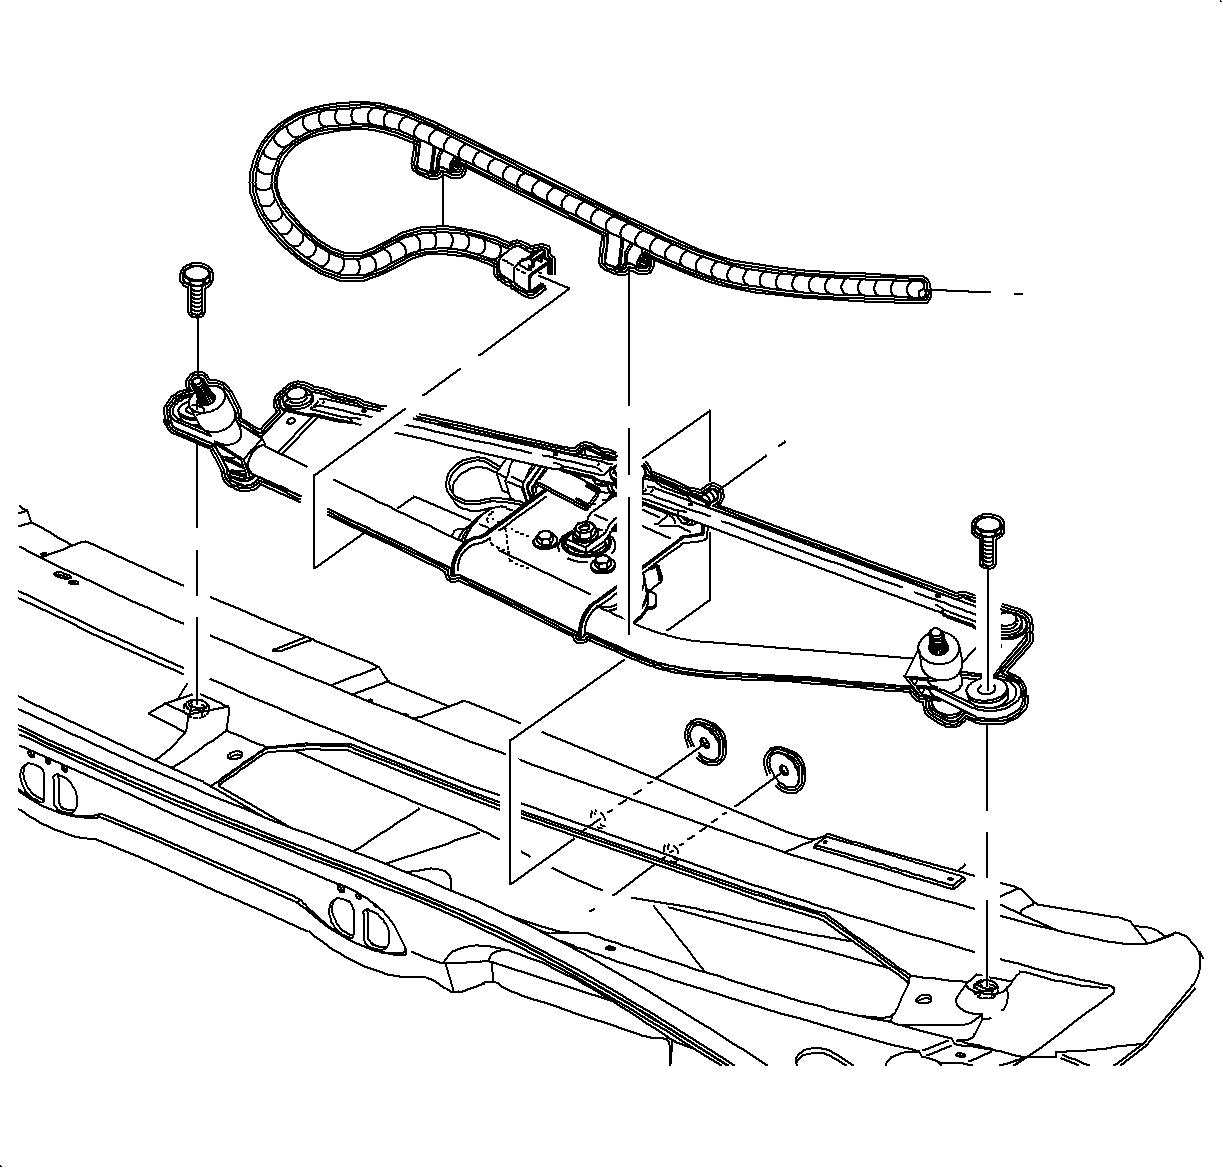
- Remove the wiper module fasteners.
- Partially remove the wiper module.
- Disconnect the wiring from the motor controlled and the module frame.
- Remove the wiper module from the vehicle.
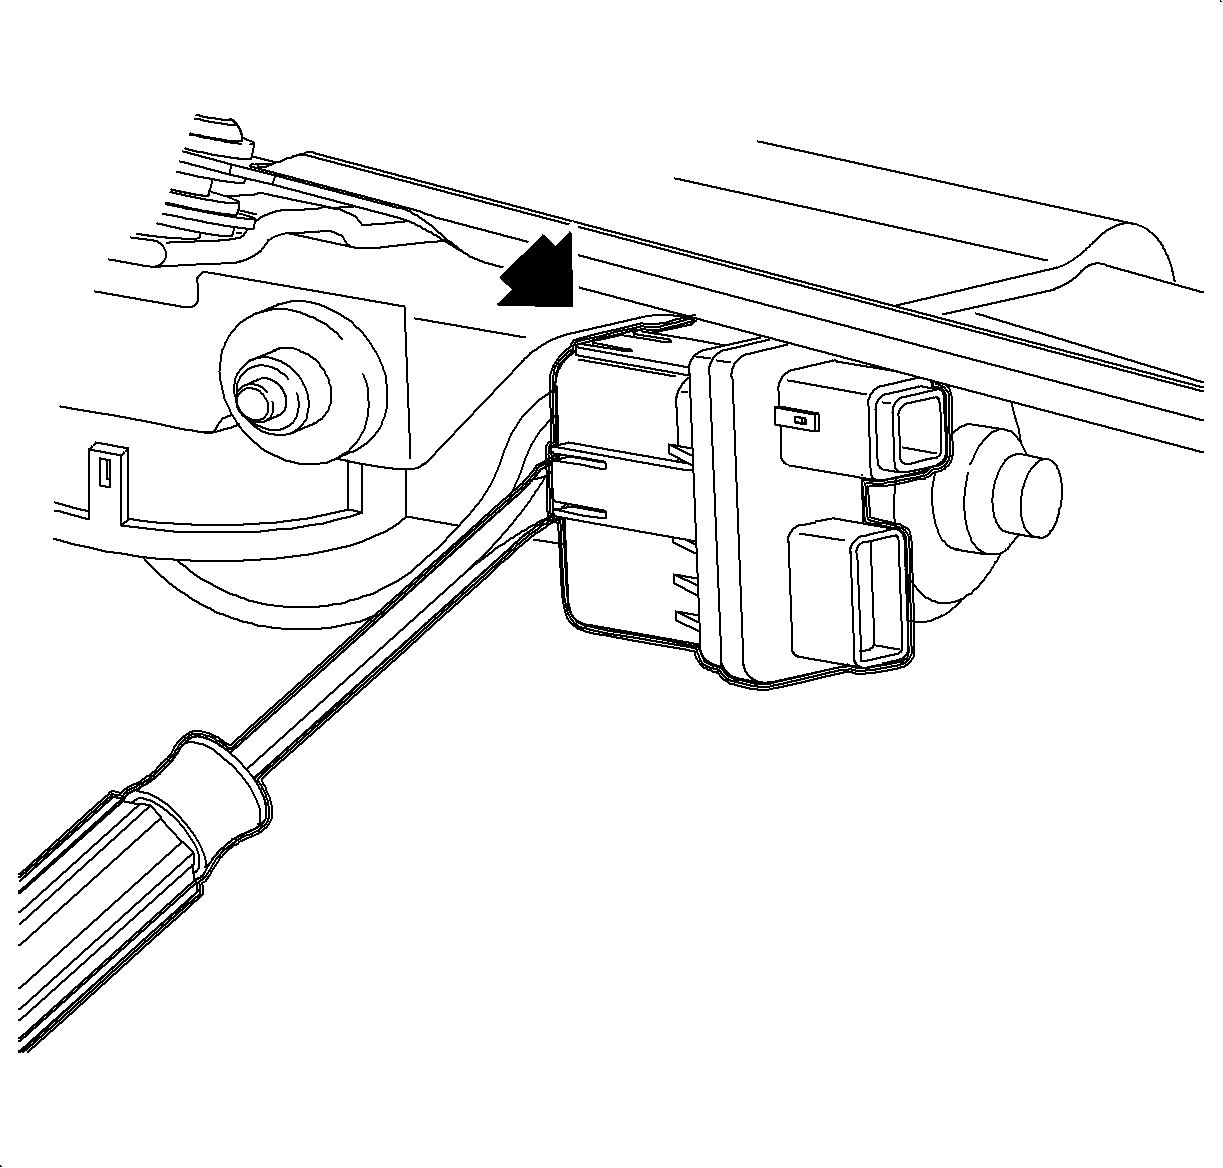
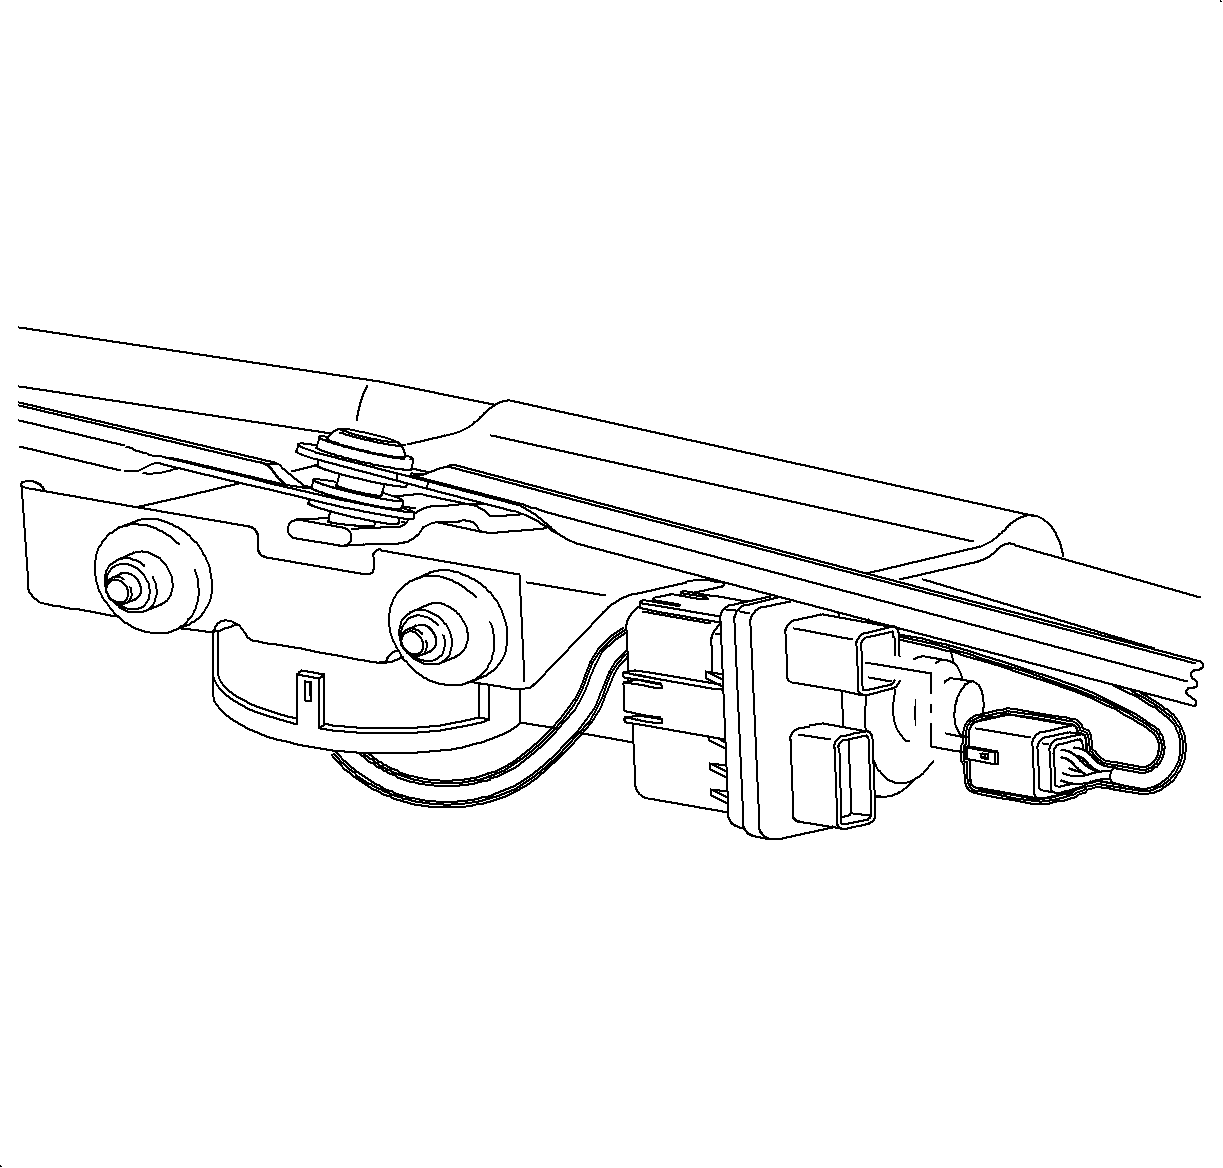
- Using a thin bladed screwdriver, gently pry the center tabs of the wiper controller retainer arms.
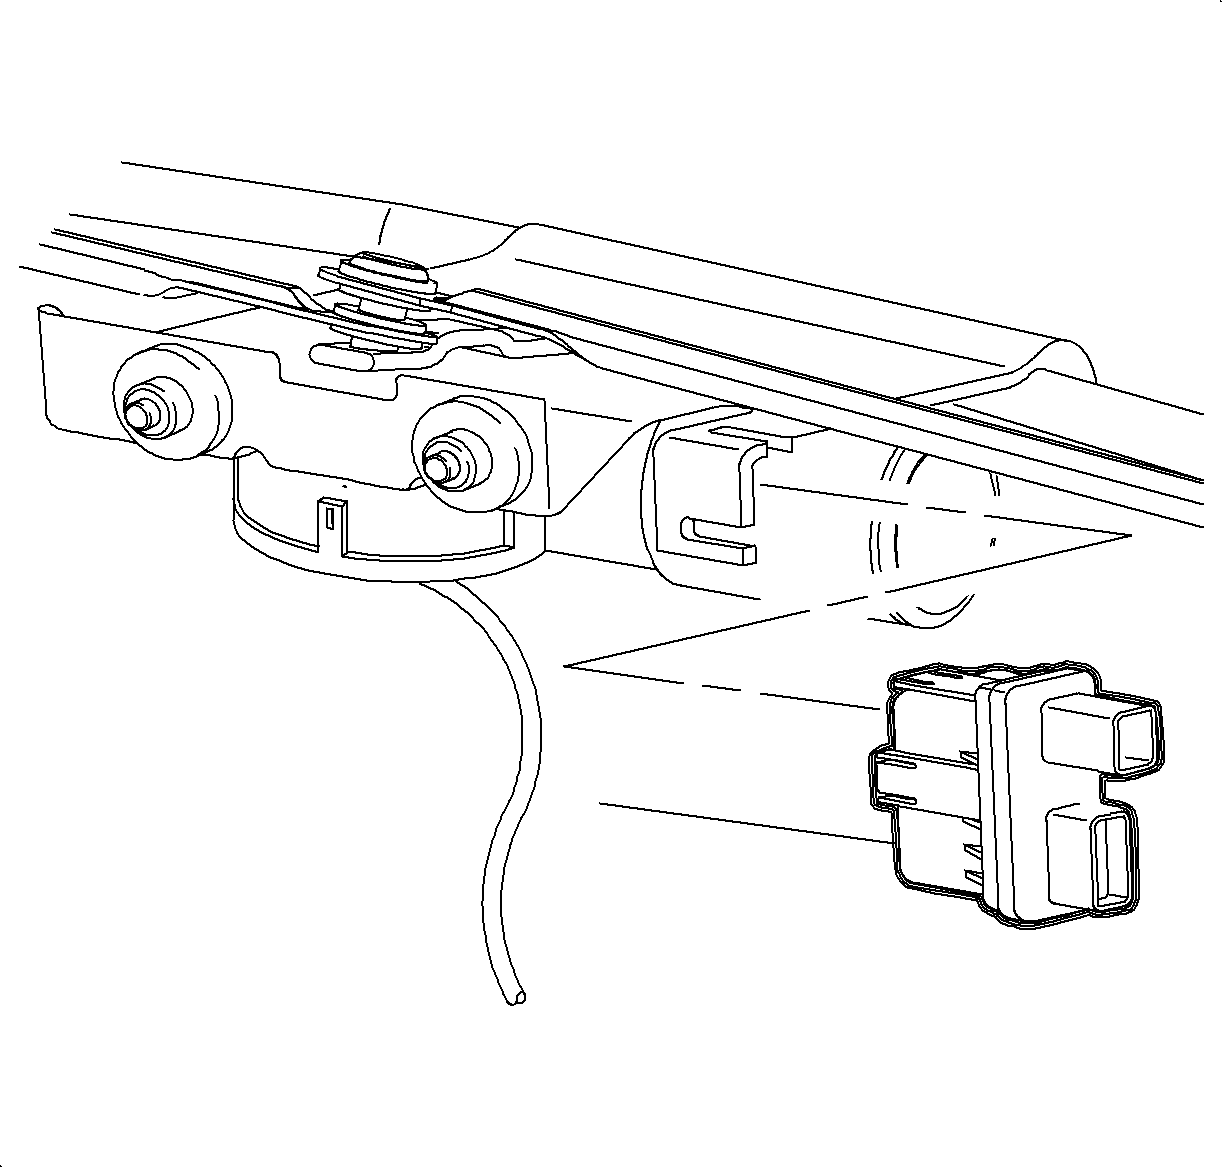
- Remove the wiper controller from the wiper module.
- Place the wiper module in a vise or on a secured surface. Pry between the frame assembly and the wiper links to free the wiper links from the crank arm.
- Remove the wiper motor fasteners and remove the wiper motor from the wiper module.


Notice: Use care when removing wiper module from cowl to avoid pivots contacting windshield and to keep from scratching windshield.
Installation Procedure
- Install the wiper motor onto the wiper module.
- Press the transmission links onto the wiper motor crank arm firmly by hand. Ensure that the position of the transmission links are not bottomed on the crank arm ball.
- Install the wiper controller to the wiper module.
- Reconnect the wiper control module electrical connector.
- Partially install the module assembly.
- Connect the wiring to the wiper motor controller and to the module frame.
- Install the wiper module assembly with the fasteners.
- Tighten the outboard bolt first, the inboard second, and the nuts last.
- Turn the wiper switch ON momentarily.
- Once the wiper switch is turned OFF, the wiper mechanism should be in the PARK position with the wiper motor crank arm in the 9 o'clock position.
- Connect the washer hose to the washer nozzle.
- Install the air inlet grill.
- Install the wiper arms and fasteners. Refer to Windshield Wiper Arm Replacement .
- Install the A/C defroster duct assembly.
- Install the instrument panel top cover. Refer to Instrument Panel Upper Trim Plate Replacement in Instrument Panel, Gages, and Console.


Important: Be certain the new wiper motor crank arm is at the 12 o'clock position just as the old crank arm. If the wiper motor crank arm is not at 12 o'clock position, installation in the cowl will be difficult.
Correct (1)
Incorrect (2)


Notice: Refer to Fastener Notice in the Preface section.
Tighten
| • | Tighten the wiper module-to-cowl bolts to 18 N·m (13 lb ft). |
| • | Tighten the wiper motor-to-wiper module fasteners to 8 N·m (71 lb in). |
Notice: Wiper system must be put into the PARK position before arms are installed. If wiper system is not parked, arm may contact painted surfaces.

Important: Use new wiper arm nuts. New wiper arm nuts have thread locking adhesive applied.
Tighten
Tighten the wiper arm retaining nuts to 30 N·m (22 lb ft).

