- Install the valves, new gaskets, and ball check valves according to the figures.
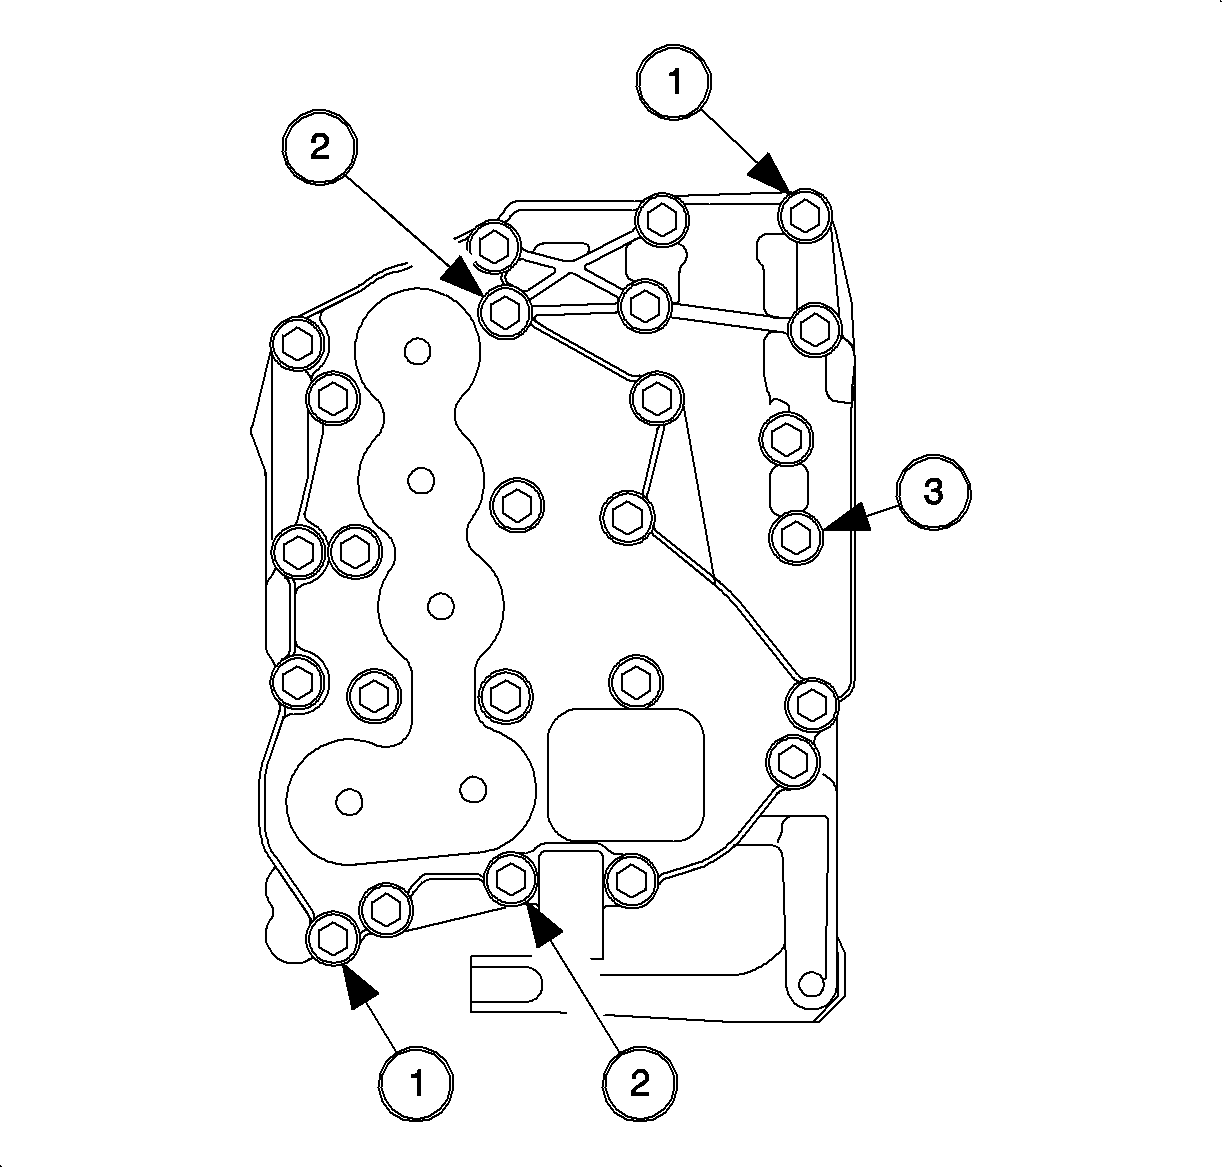
- Install the 2 halves of the valvebody and install the 1 bolt holding the 2 halves together (3) .
- Lube the solenoid O-rings.
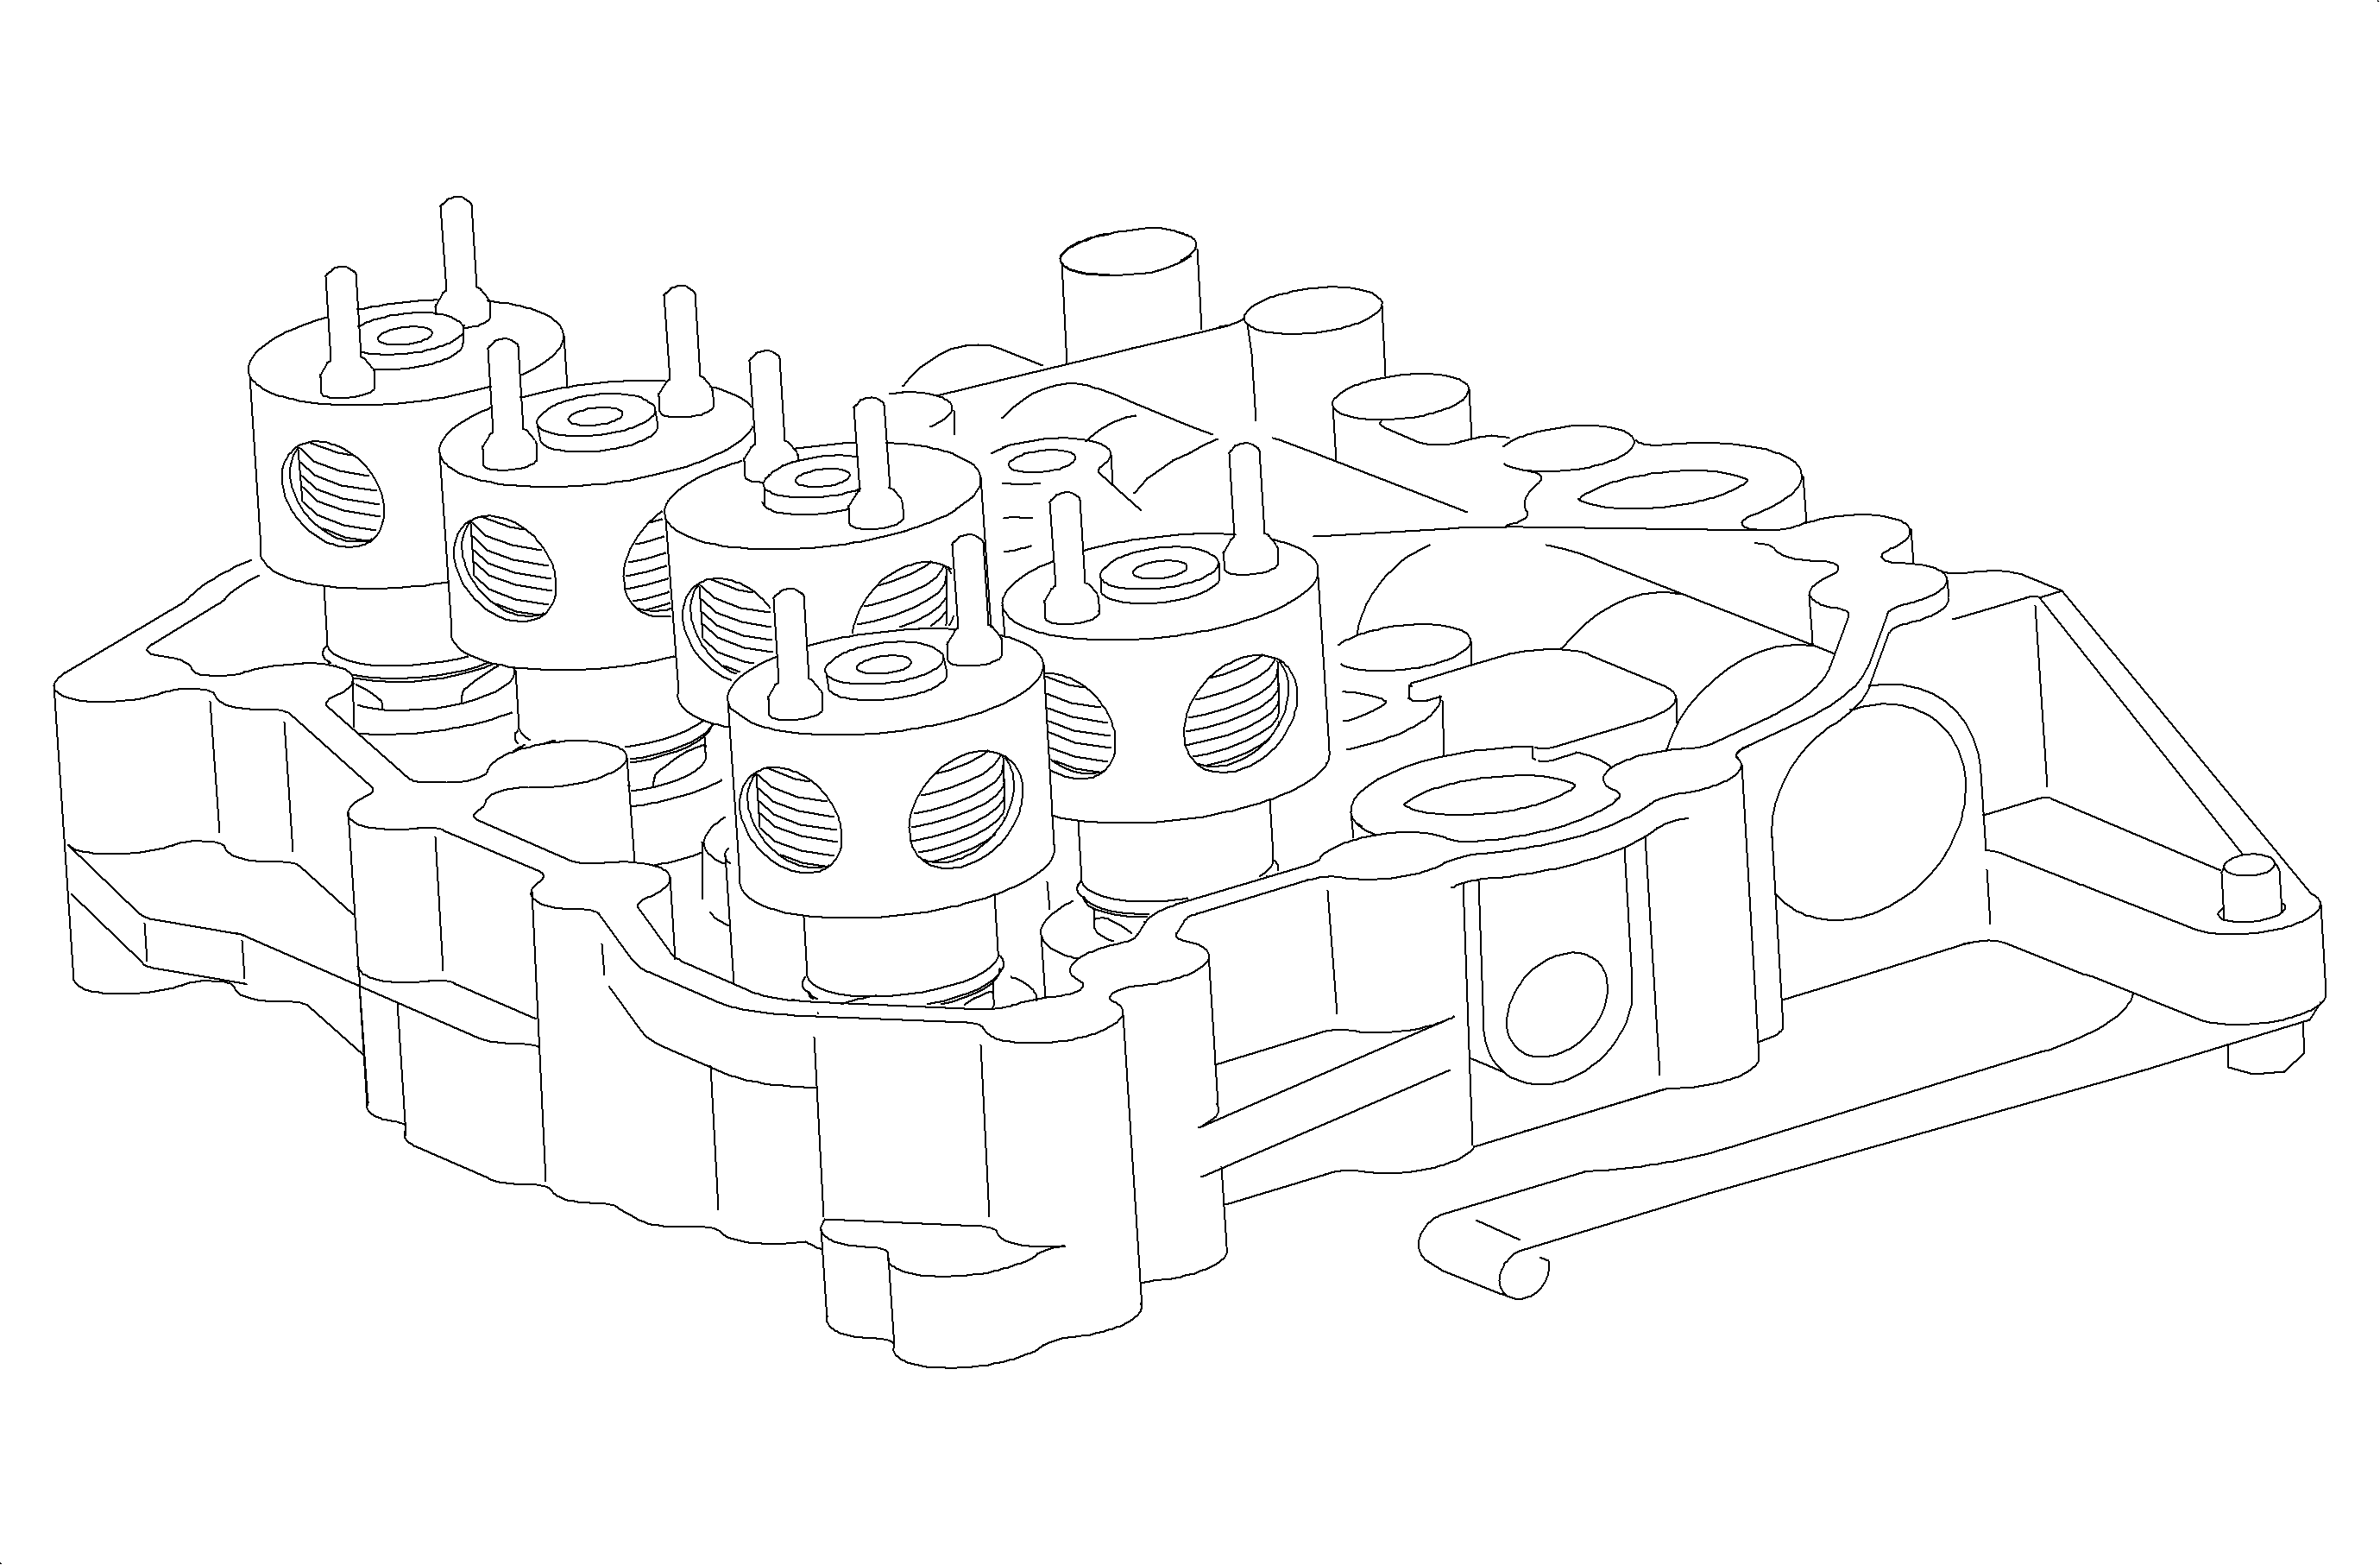
- Install the solenoids with a twisting motion.
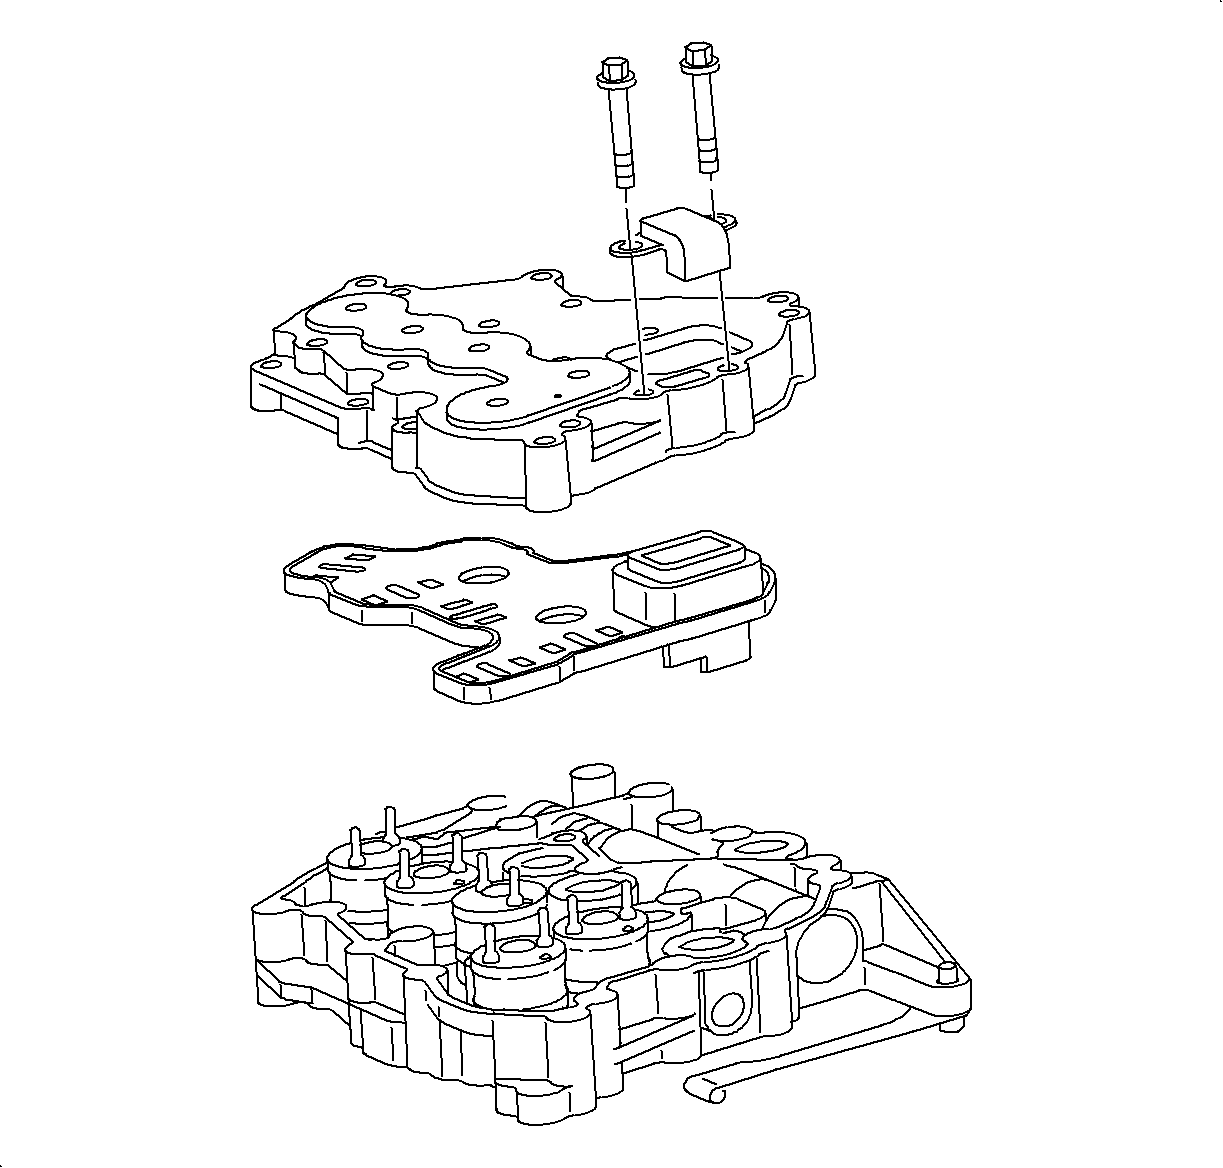
- Install the detent arm and bolt.
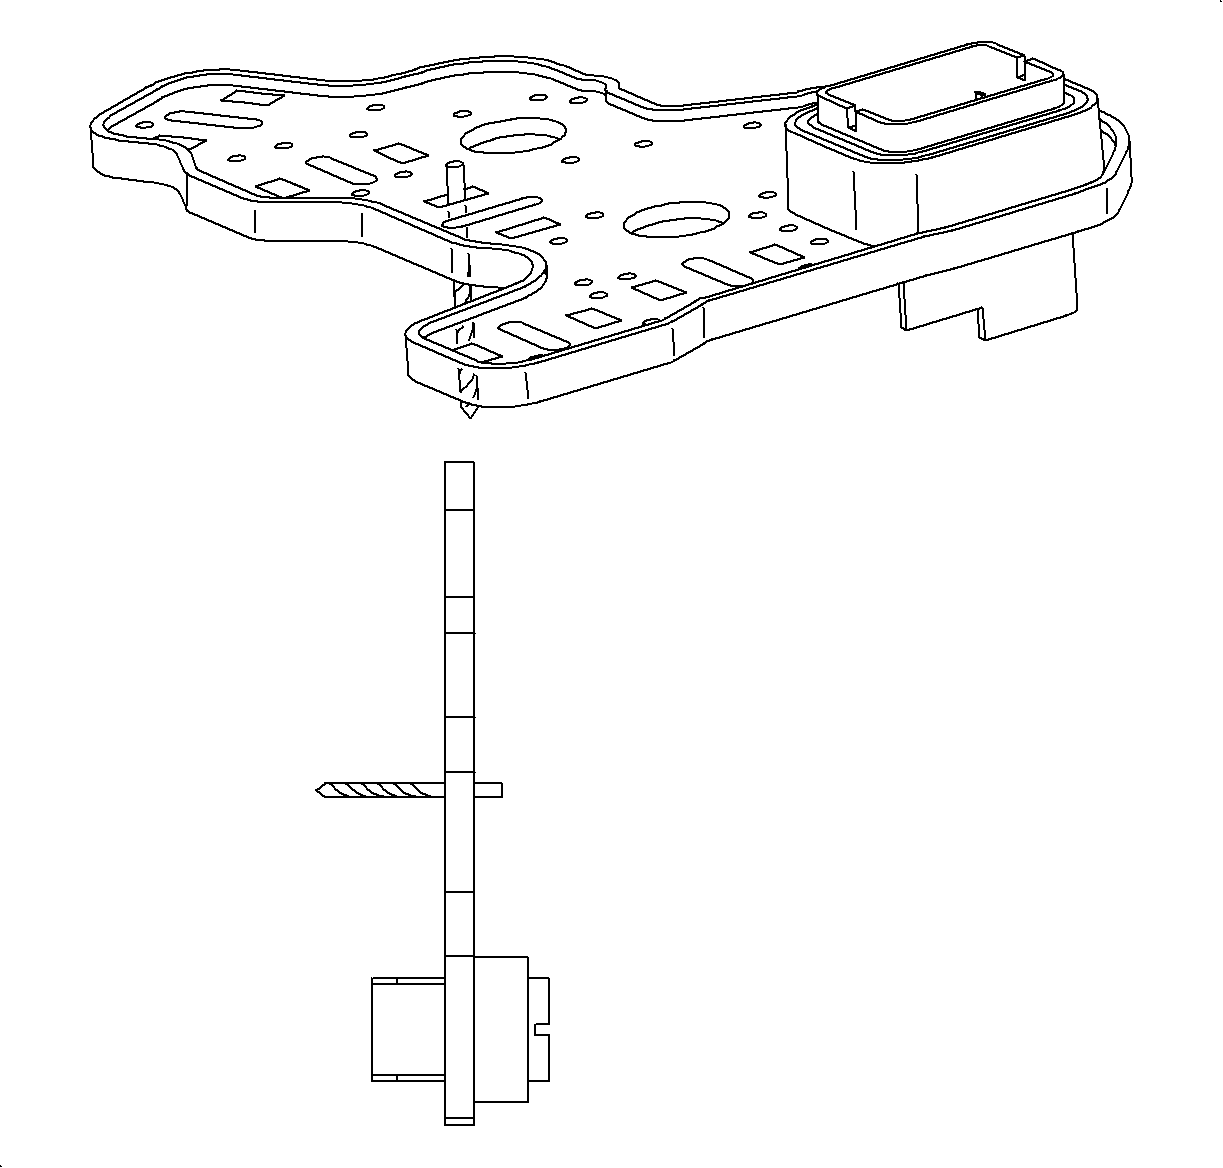
- Check the connector plate terminals with a #43 (2.25 mm) drill bit. There should be a slight drag on the shank. If there is no drag replace the connector plate.
- Align the solenoid valve pins to the connector plate.
- Install the connector plate.
- Install the solenoid cover.
- Install the solenoid cover bolts and finger tighten. Refer to Control Valve Body Assembly Installation . For reference, the solenoids are identified below:
- Clean and lubricate the fasteners with Saturn Transaxle Fluid. Wipe off excess fluid and install.
- Ensure the dowel bolts are placed in the holes shown to align the upper valvebody to the lower valvebody.
- Tighten the solenoid cover bolts using the tightening sequence shown in illustration.
Important: Be sure all parts are clean and free of lint and dirt. The valvebody should be assembled in a clean area.
Important: The dowel bolts must be placed in the holes shown to align the upper valvebody
to the lower valvebody.
• The valvebody-to-case dowel bolts (1) • The upper to lower valvebody dowel bolts (2) • The bolt holding upper and lower valvebody (3)
Notice: Use the correct fastener in the correct location. Replacement fasteners must be the correct part number for that application. Fasteners requiring replacement or fasteners requiring the use of thread locking compound or sealant are identified in the service procedure. Do not use paints, lubricants, or corrosion inhibitors on fasteners or fastener joint surfaces unless specified. These coatings affect fastener torque and joint clamping force and may damage the fastener. Use the correct tightening sequence and specifications when installing fasteners in order to avoid damage to parts and systems.
Tighten
Tighten the valvebody assembly bolts to 11 N·m (8 lb ft)
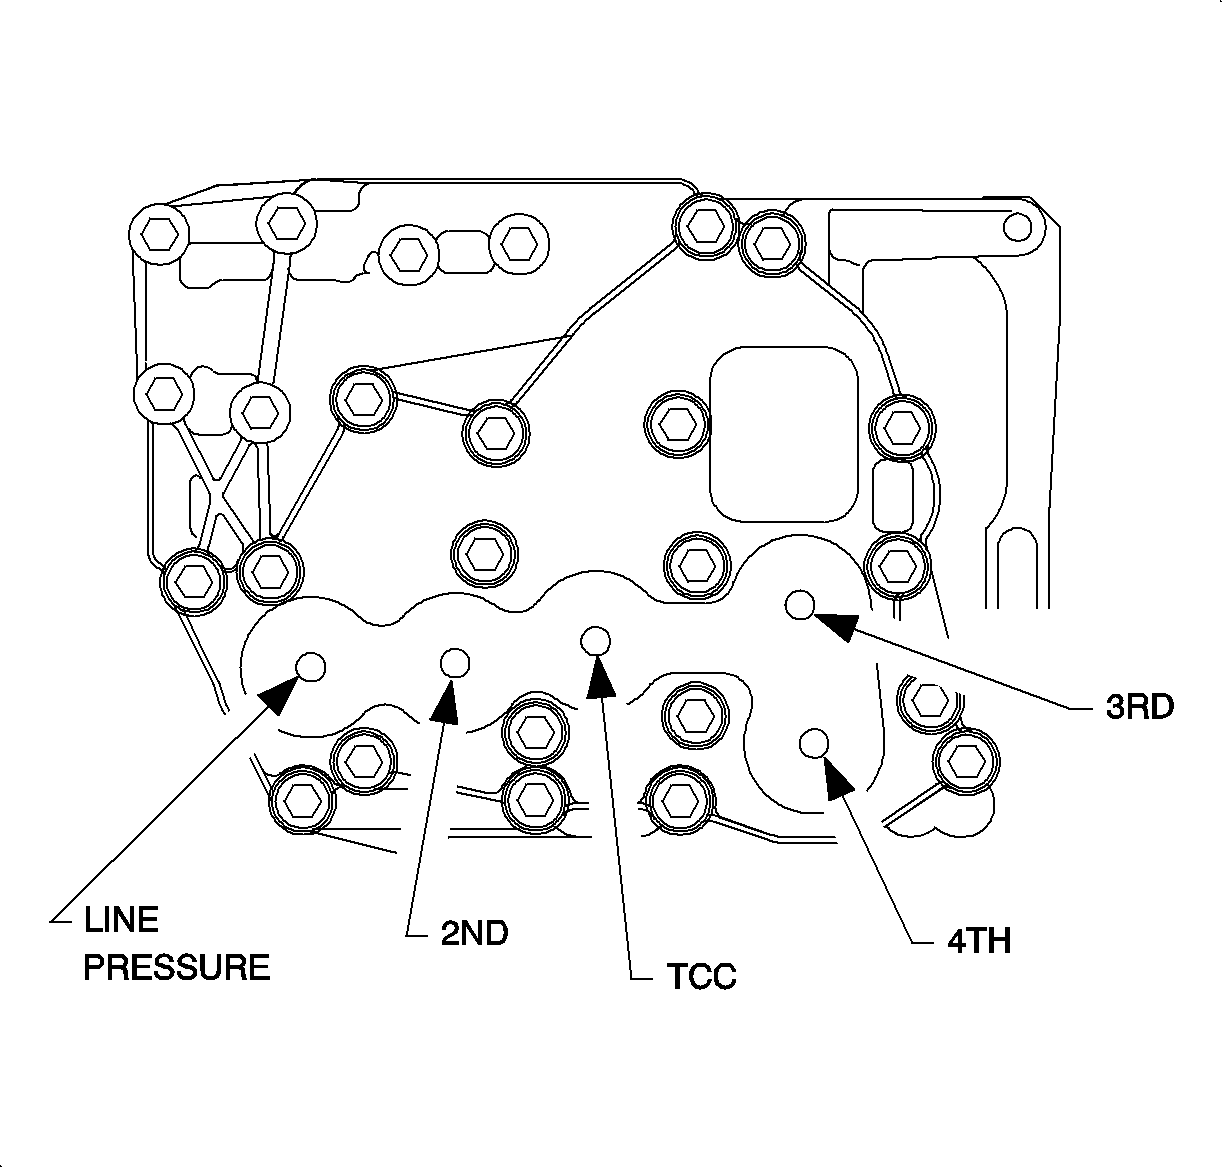
| • | The pressure control solenoid |
| • | The shift solenoid 2 |
| • | The TCC solenoid |
| • | The shift solenoid 4 |
| • | The shift solenoid 3 |
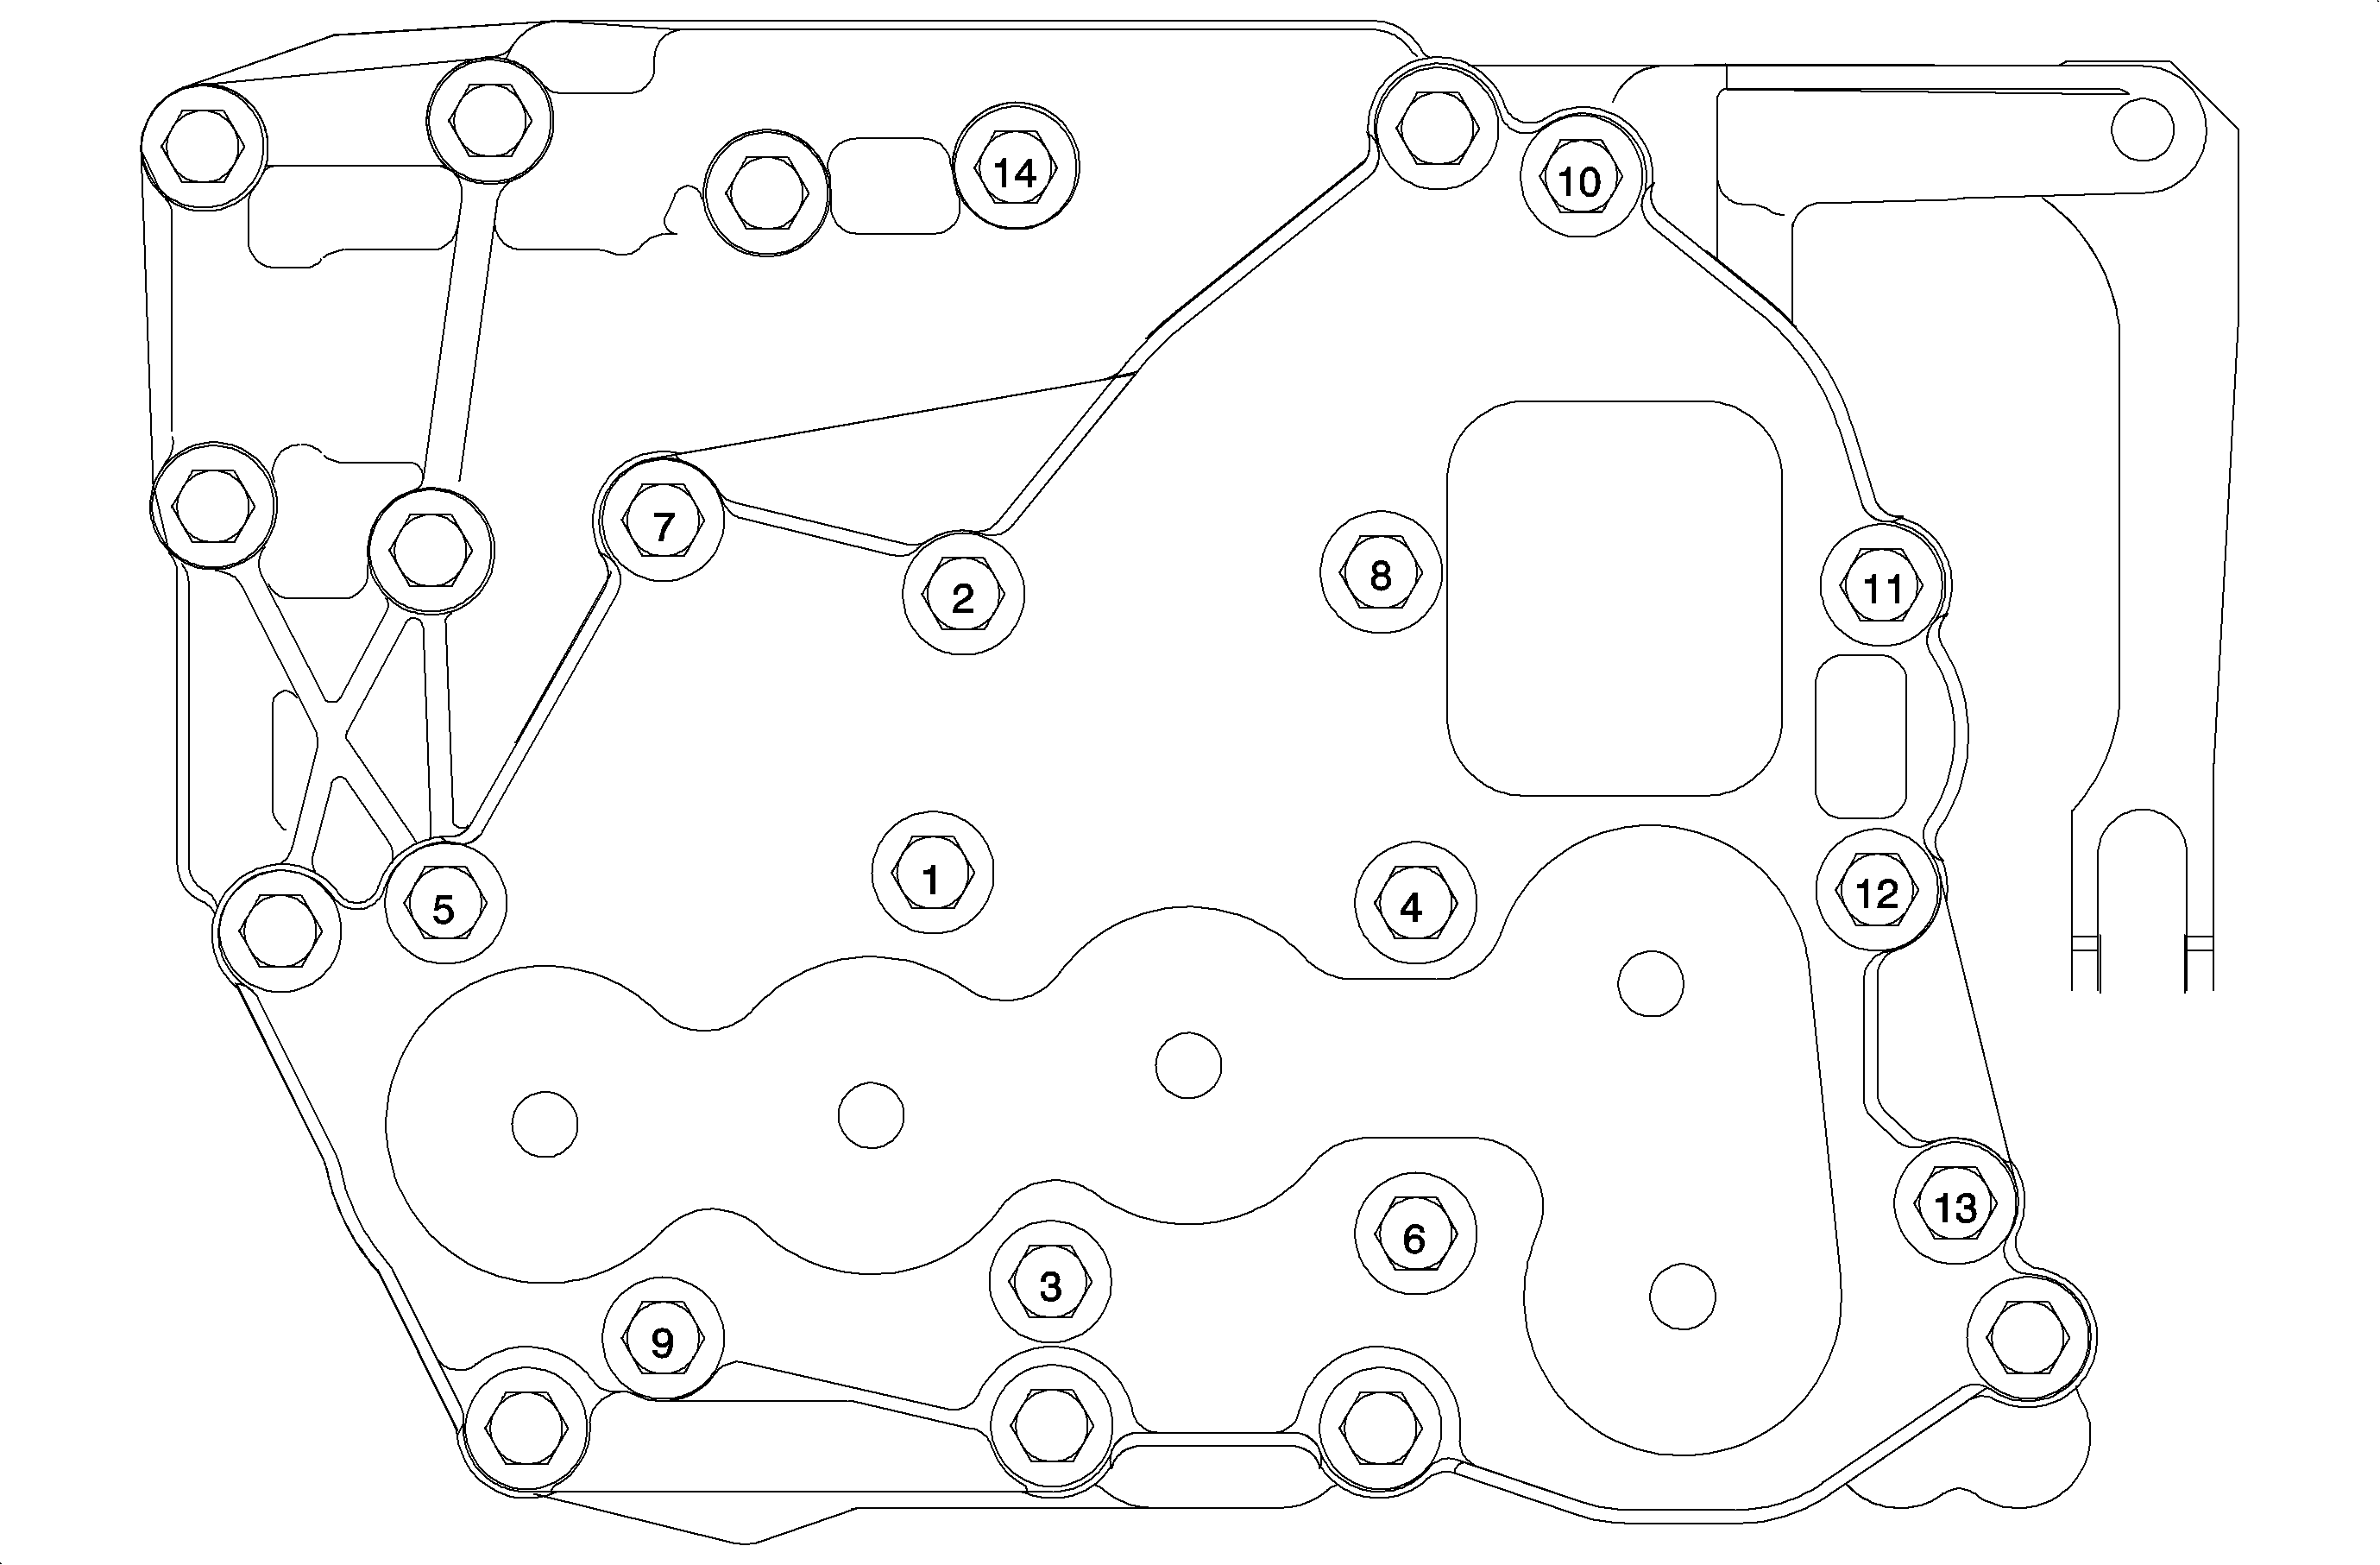
Notice: Over-torqueing bolts can cause valves to bind.
Tighten
Tighten the valvebody assembly bolts to 11 N·m (8 lb ft).
