Front Seat Adjuster Replacement Driver Seat - SL, SL1, SC1, SW1
Removal Procedure
Important: LHD shown, RHD similar
- Remove the seat from the vehicle. Refer to Front Seat Replacement - Bucket .
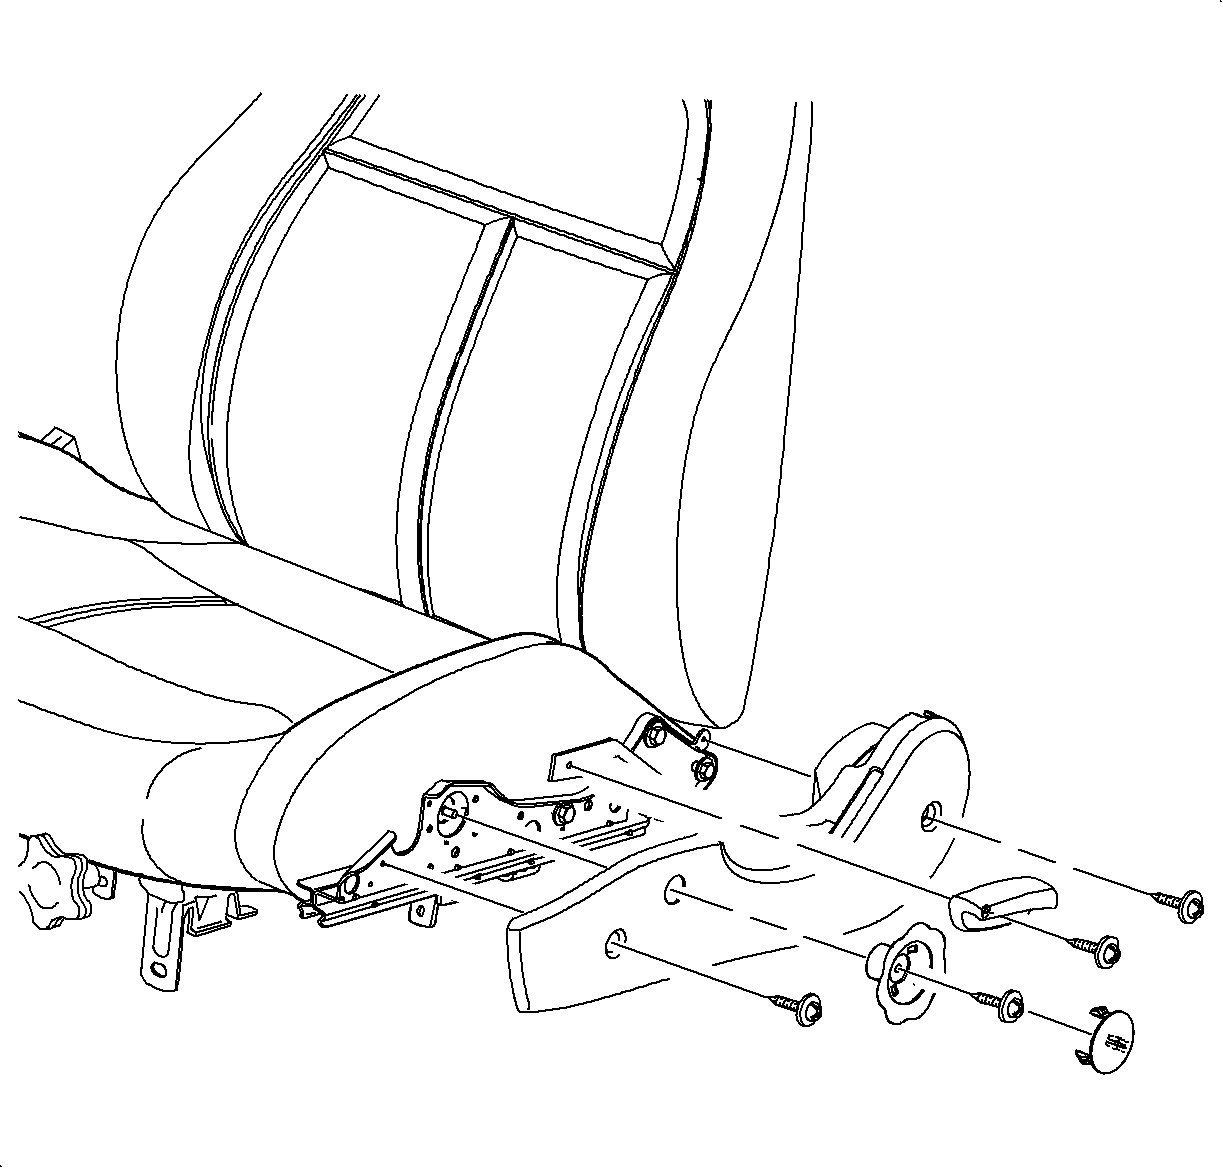
- Remove the recliner handle.
- Remove the seat adjuster side cover.
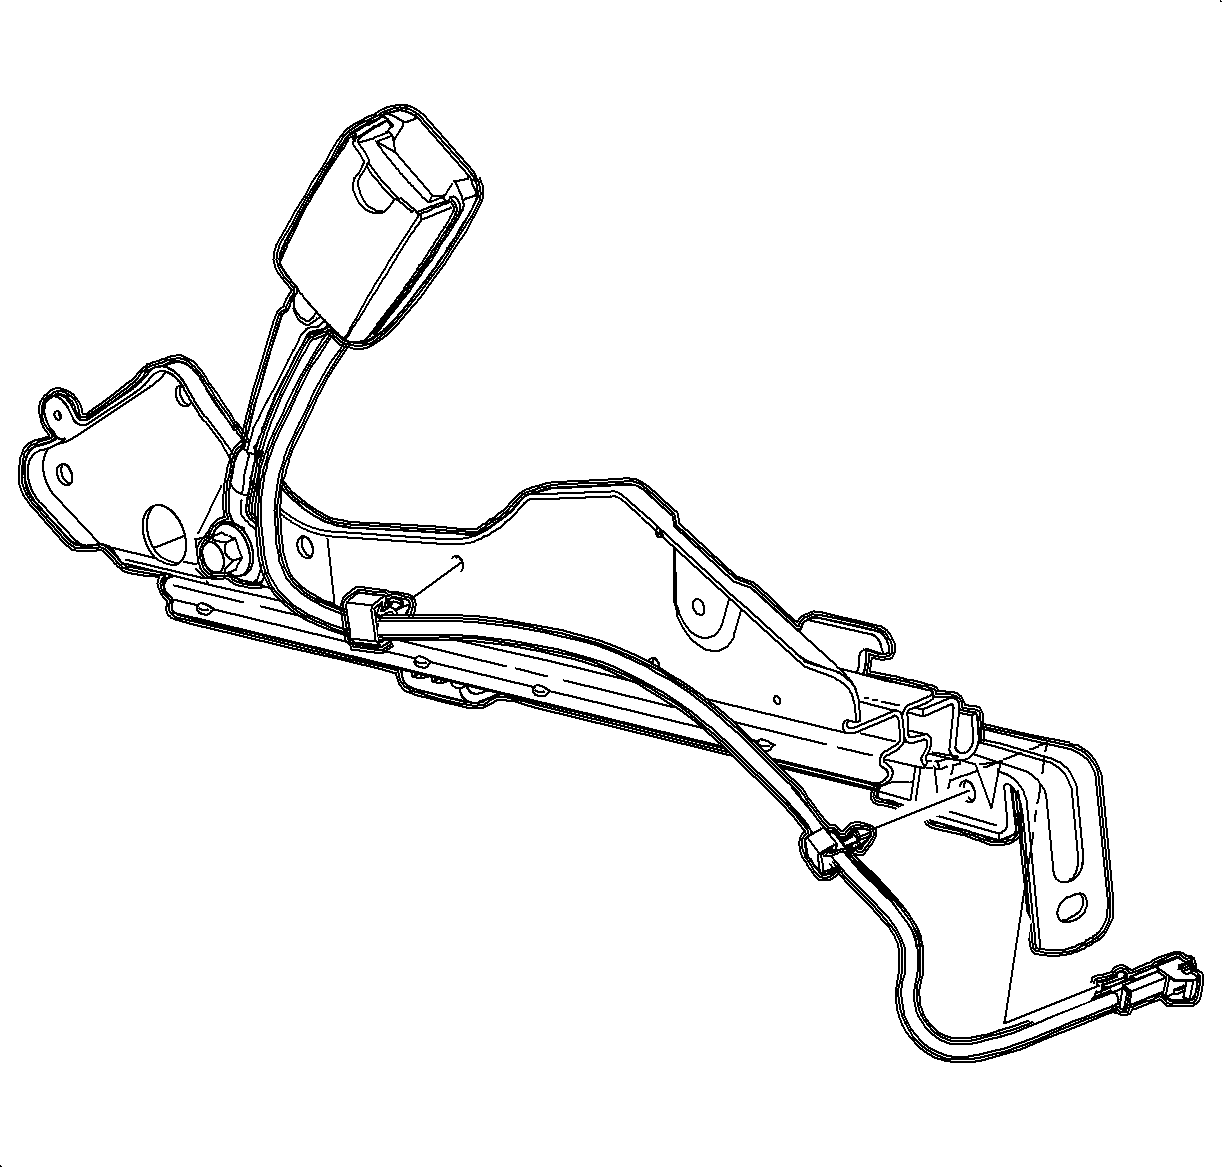
- Remove the seat belt harness.
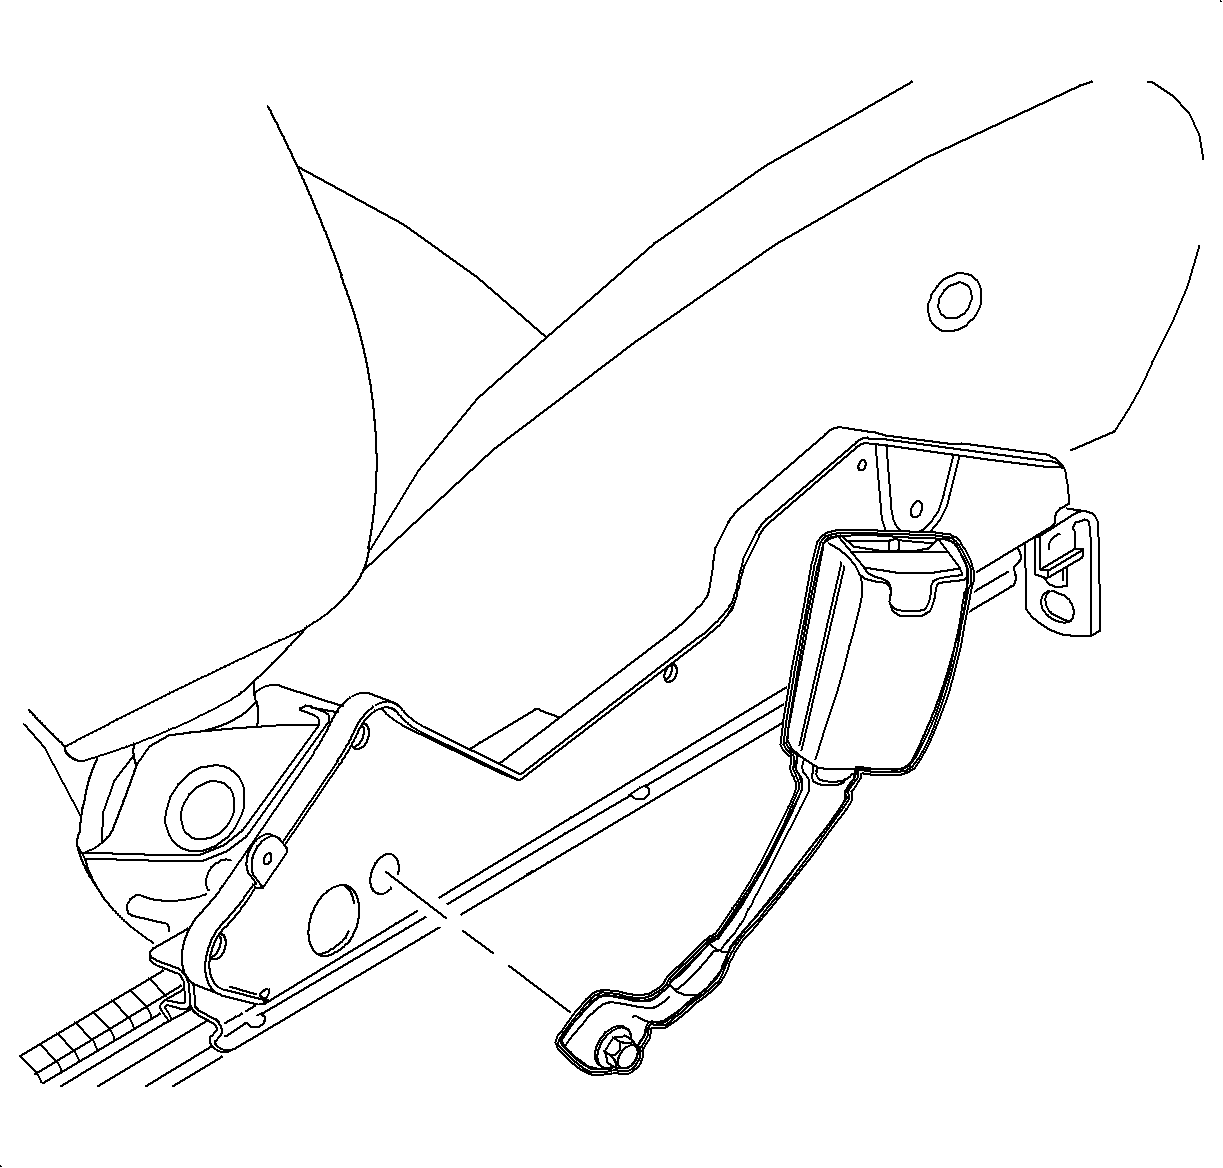
- Remove the seat belt buckle.
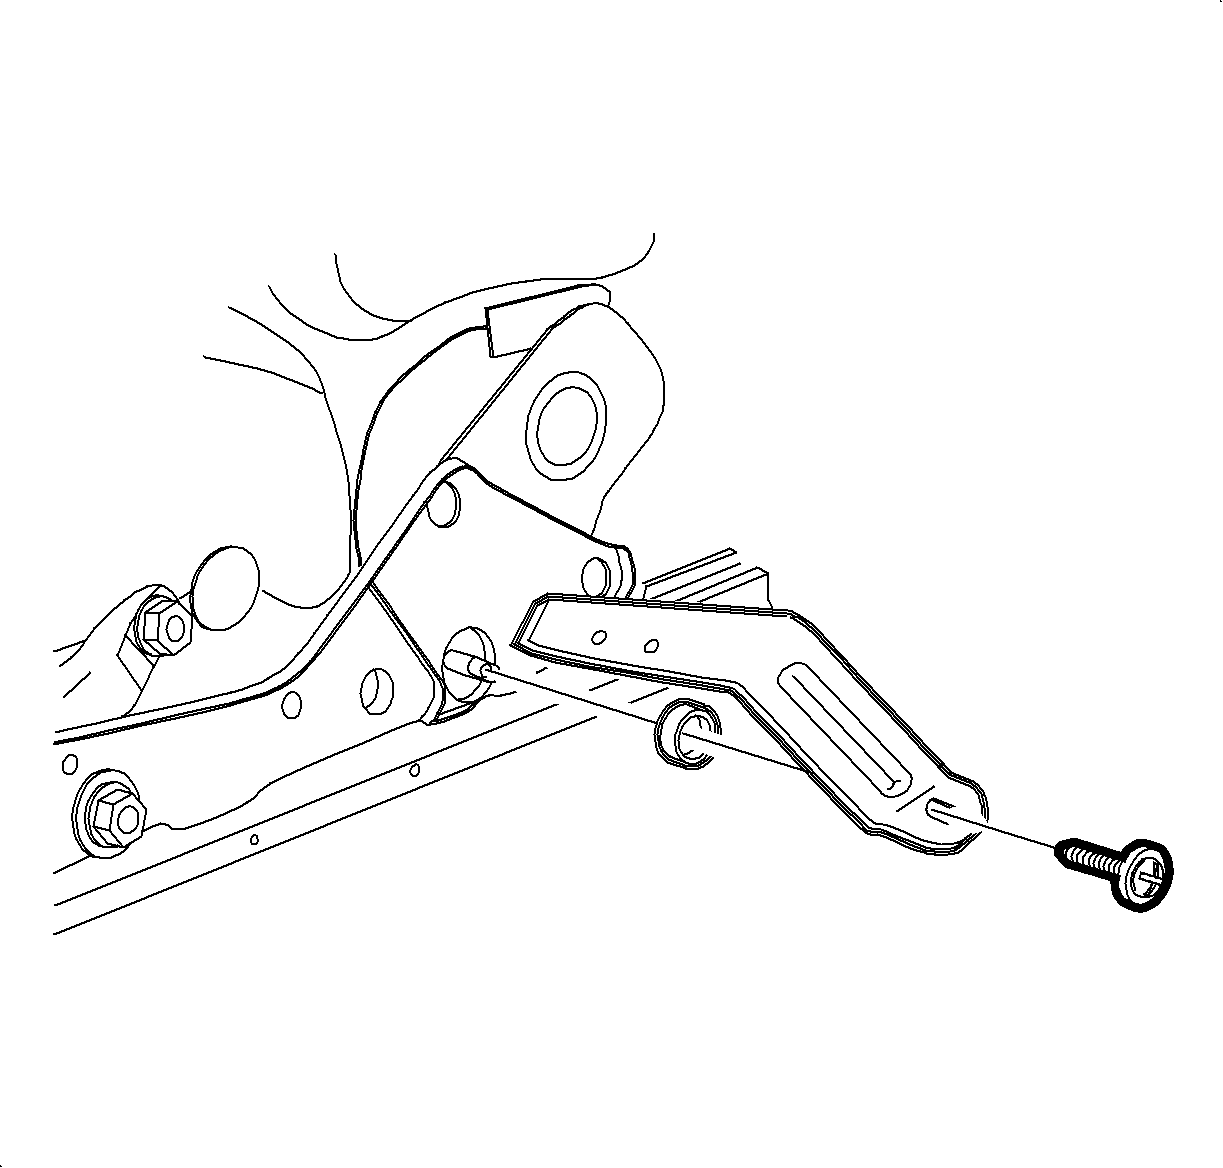
- Remove the recliner lever and nylon spacer.
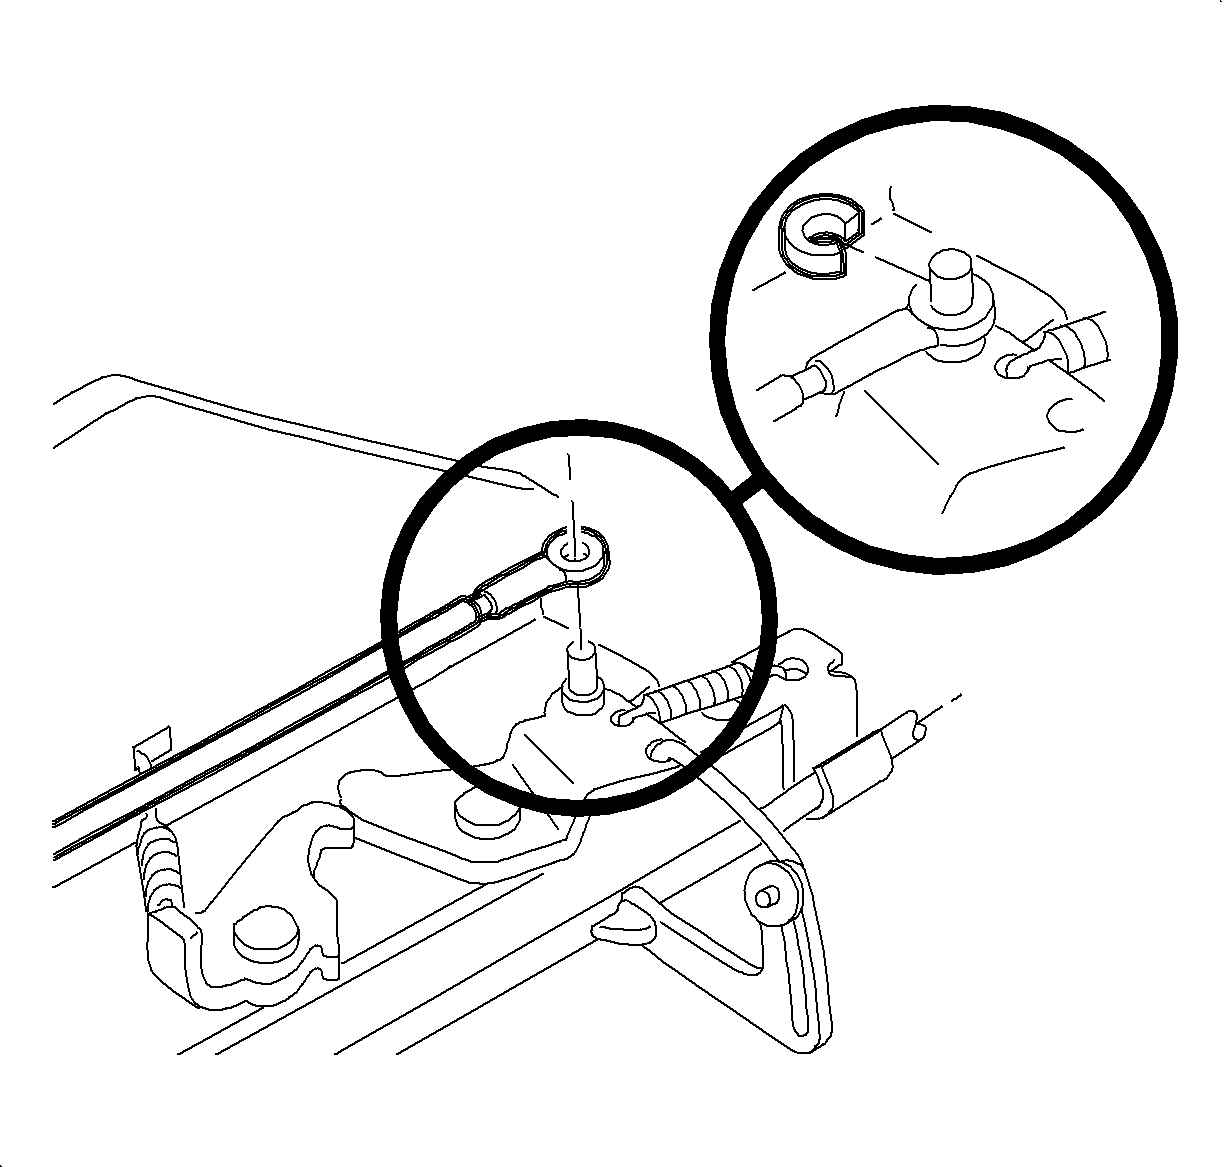
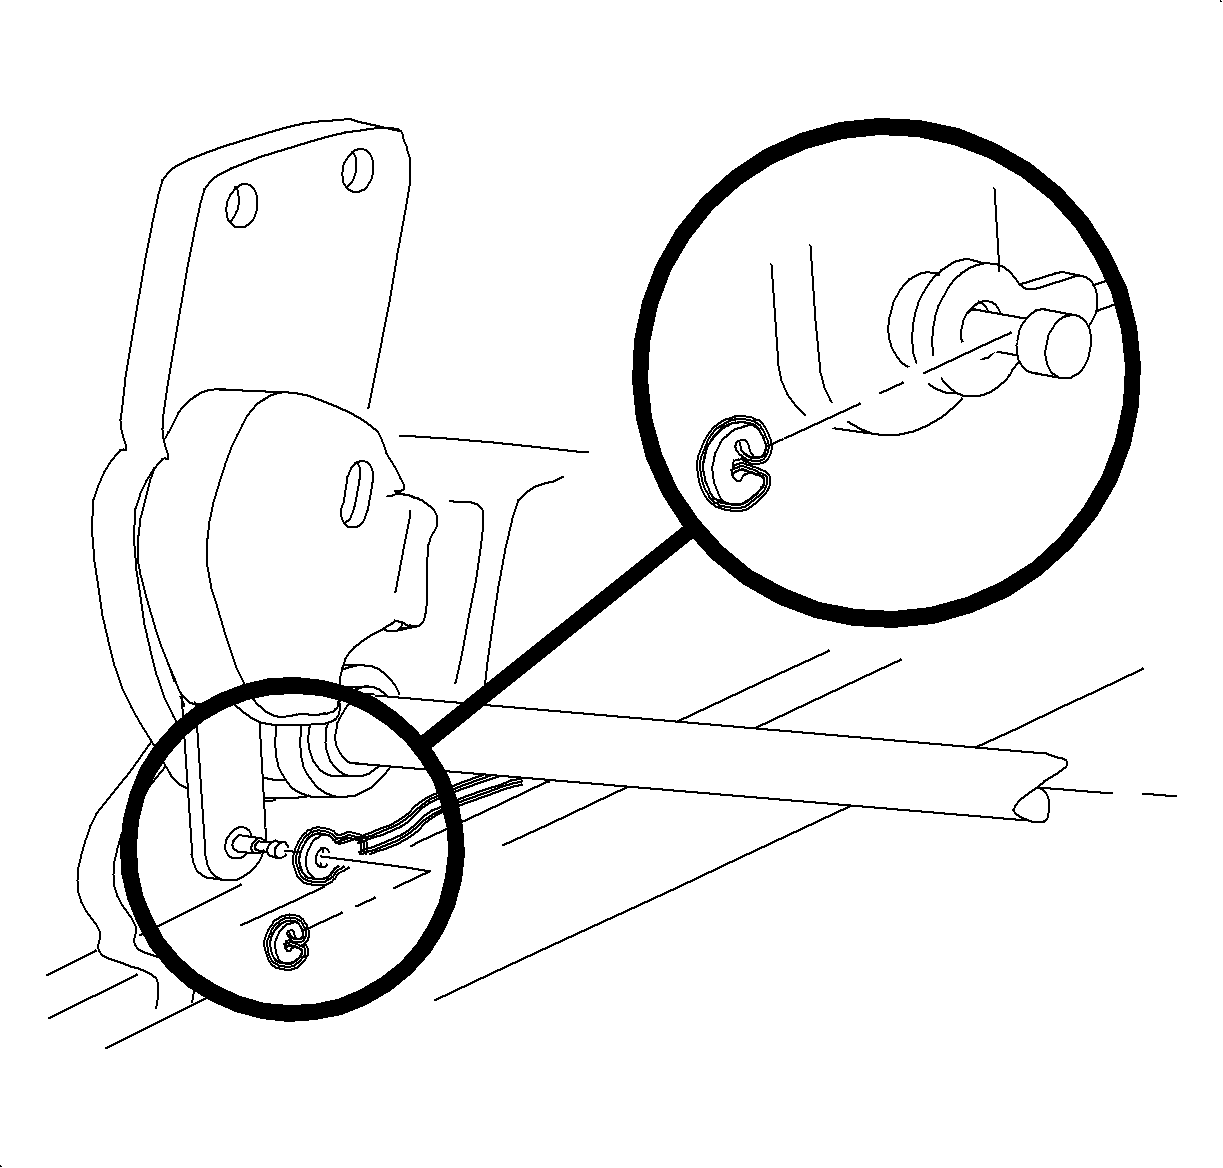
- On the coupe passenger seat, remove the clip attaching the E-Z entry cable to the inboard recliner, and separate the cable from the recliner.
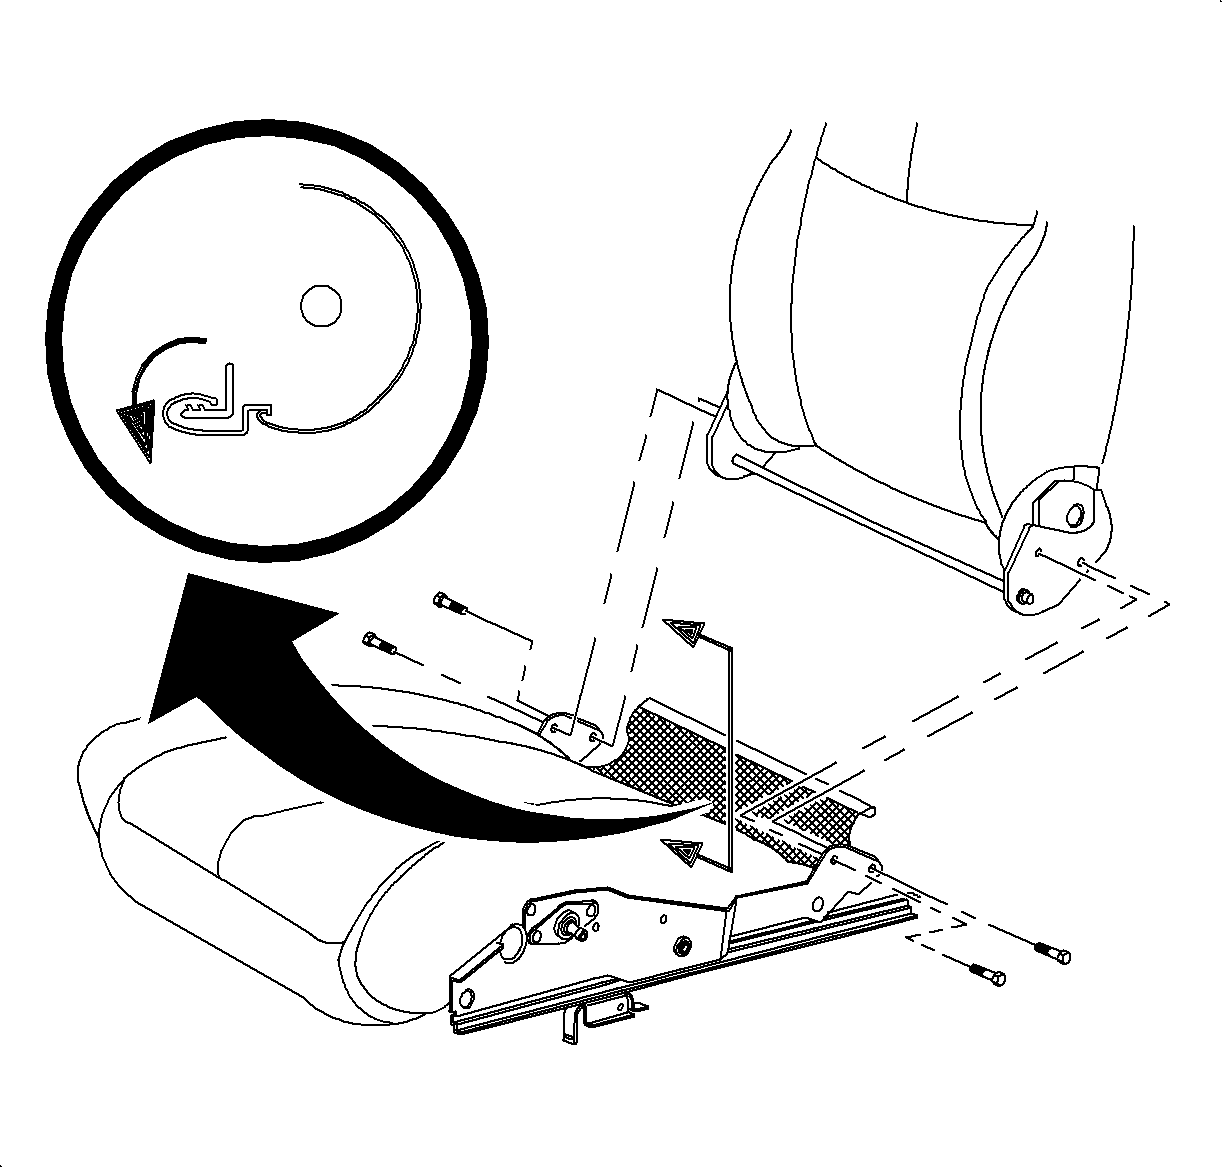
- Disengage the seat cushion cover rear J-strip. Refer to the following:
- Loosen the adjuster seat bolts to assist in removal of the seatback.
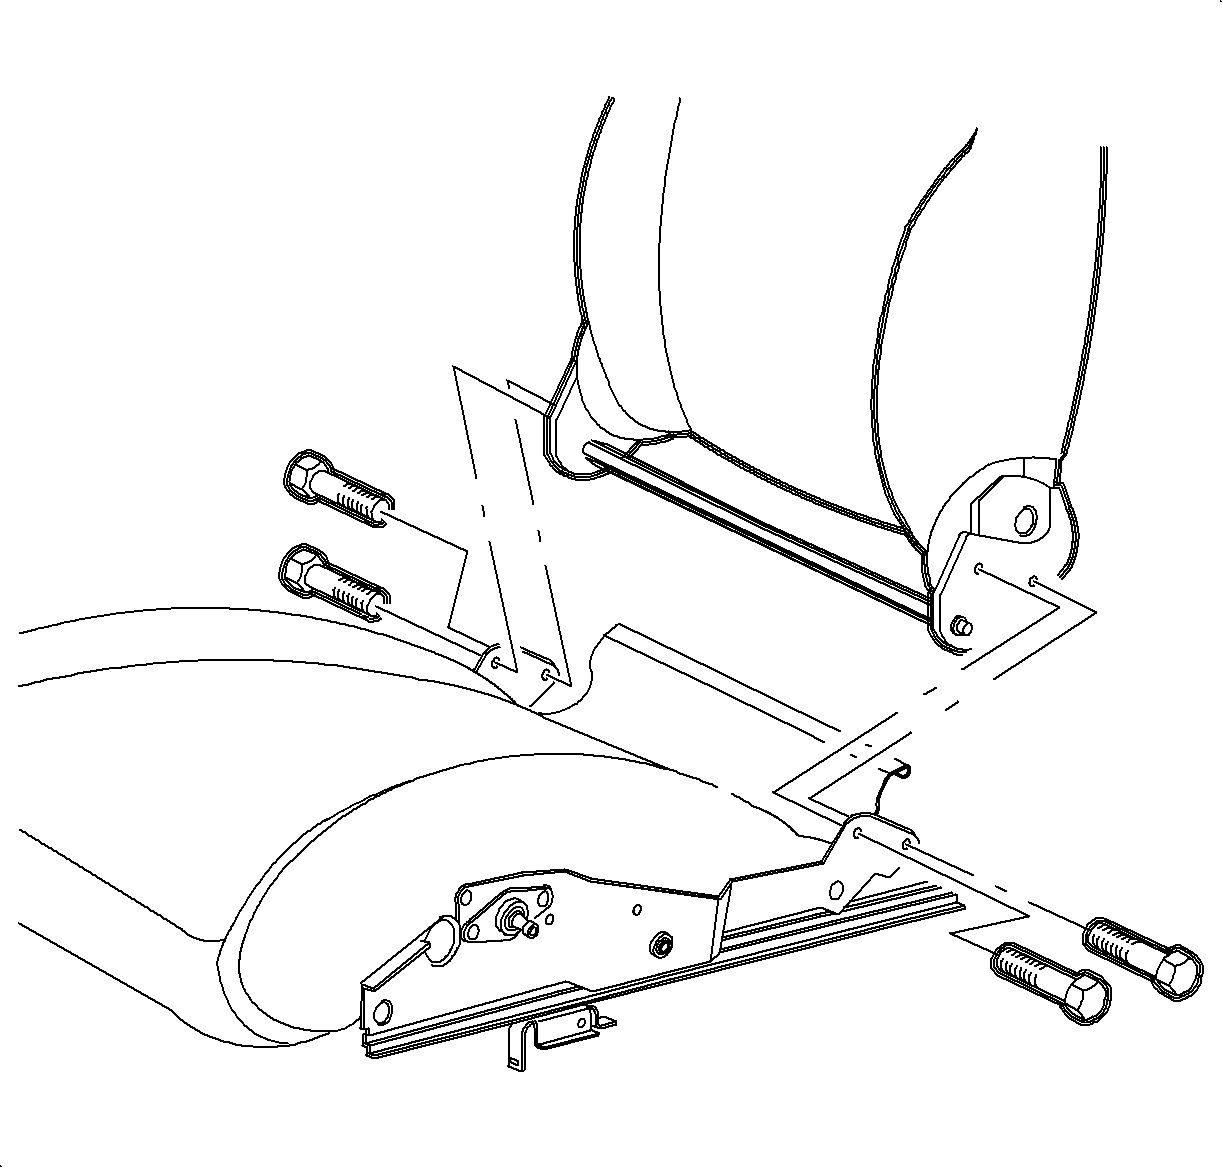
- Remove the recliner bolts from the seat back assembly with the recliner mechanisms and the cross tube attached to the seat back.
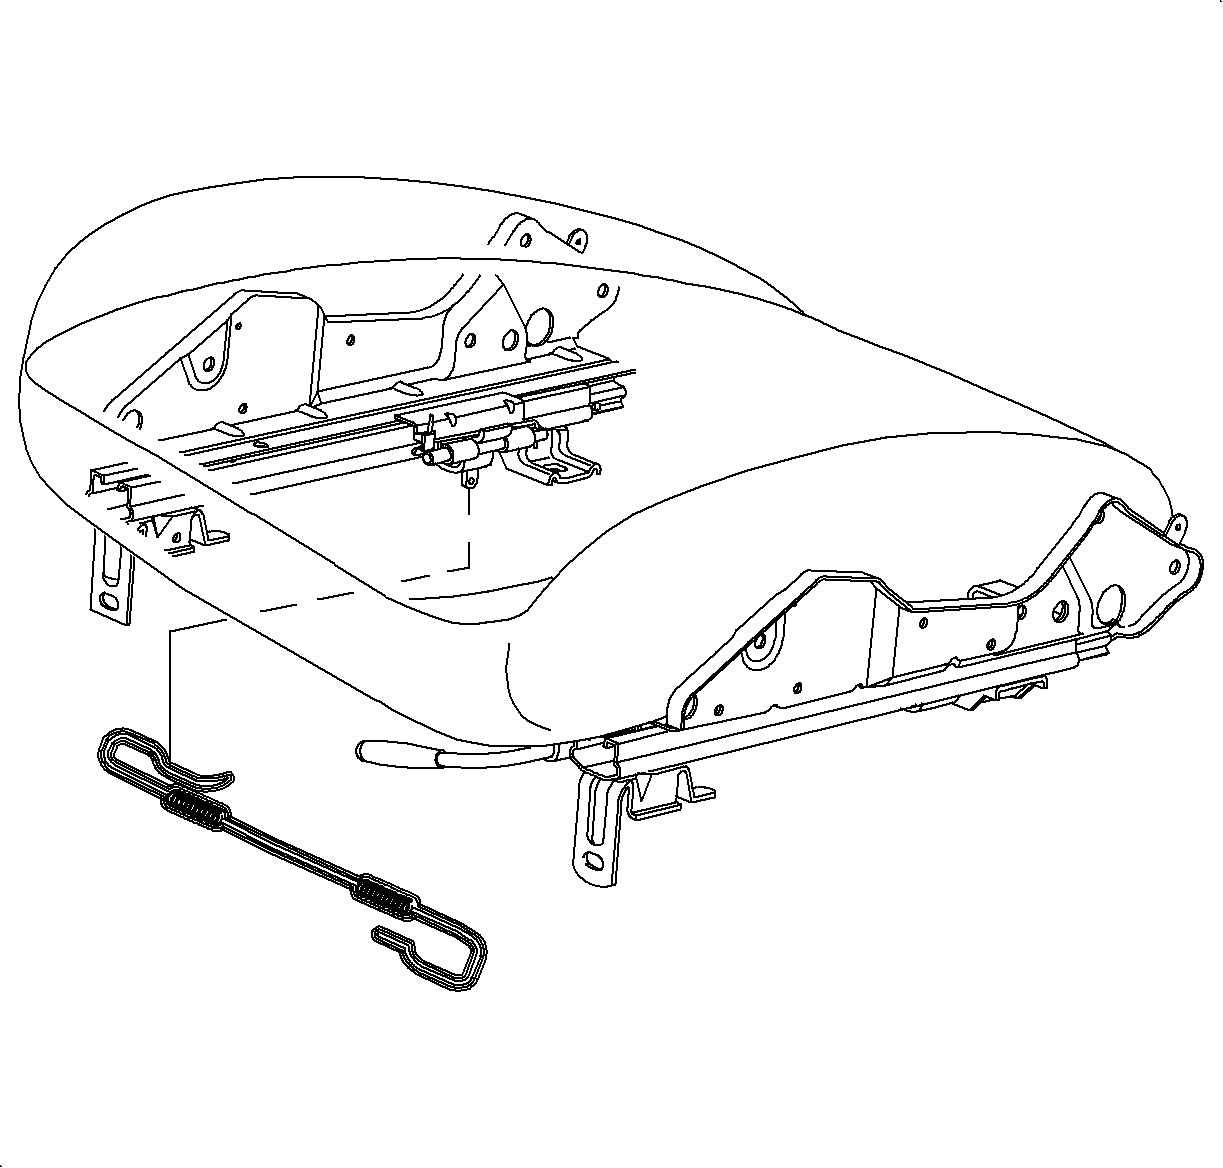
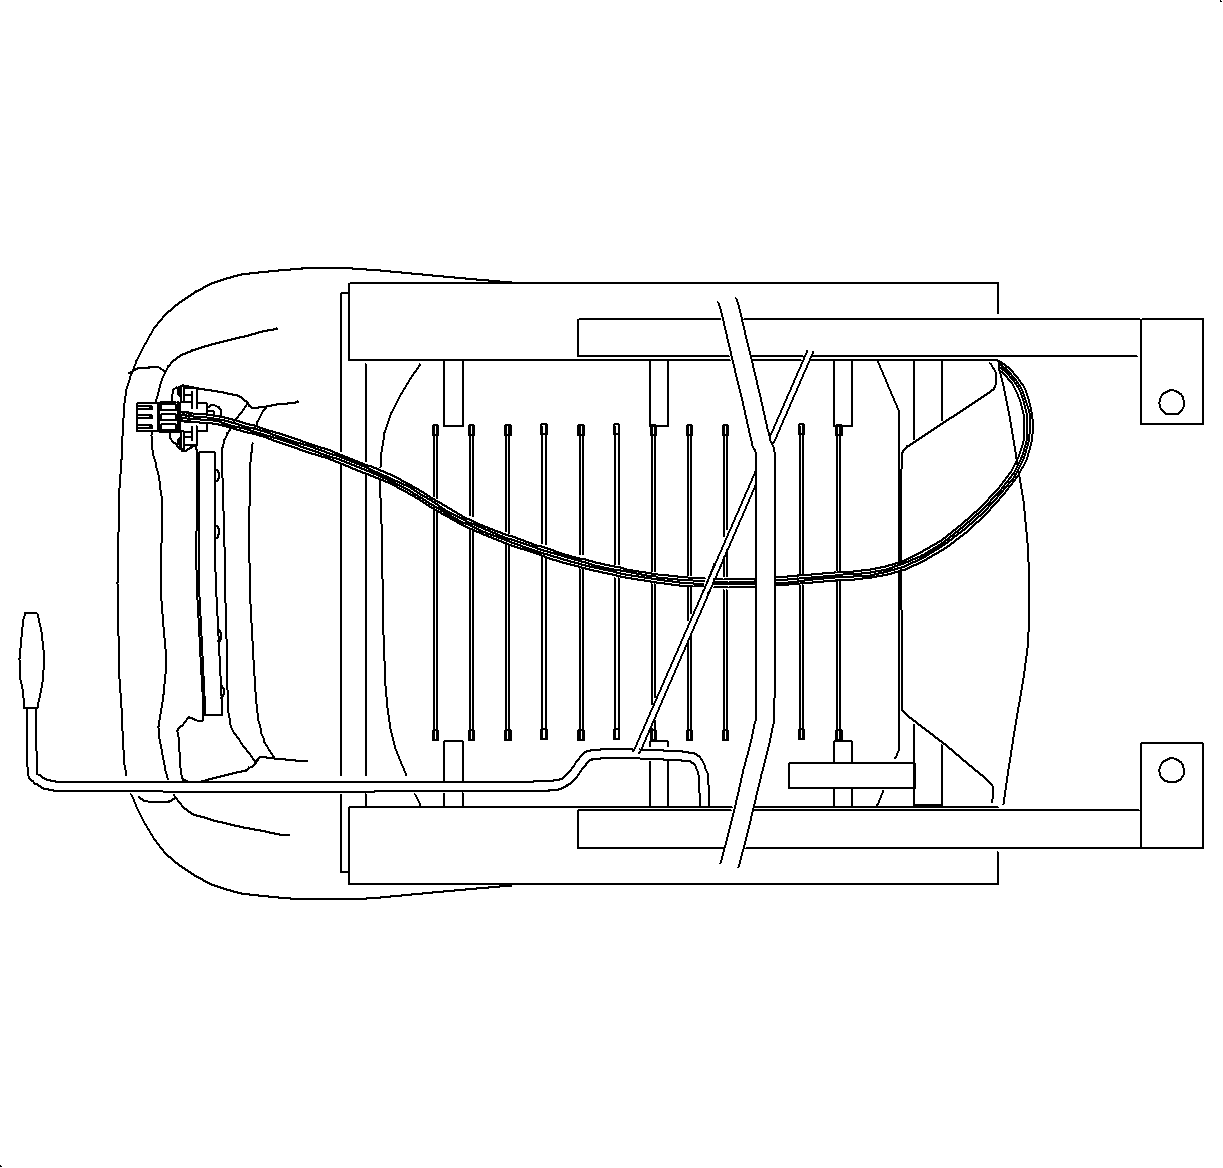
- Disconnect the seat adjuster cross wire.
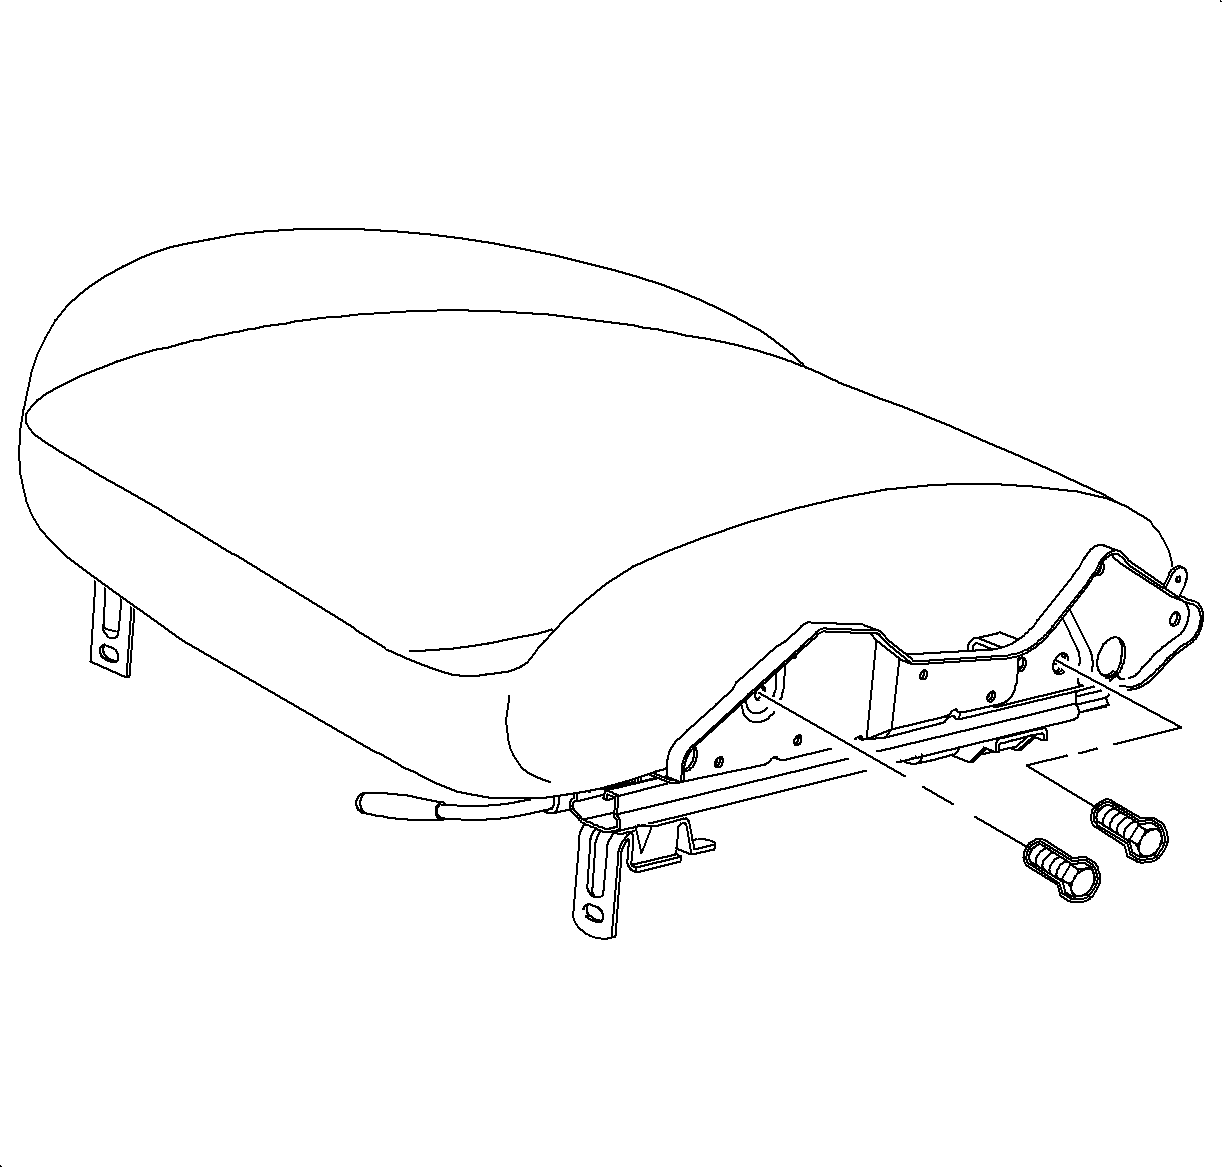
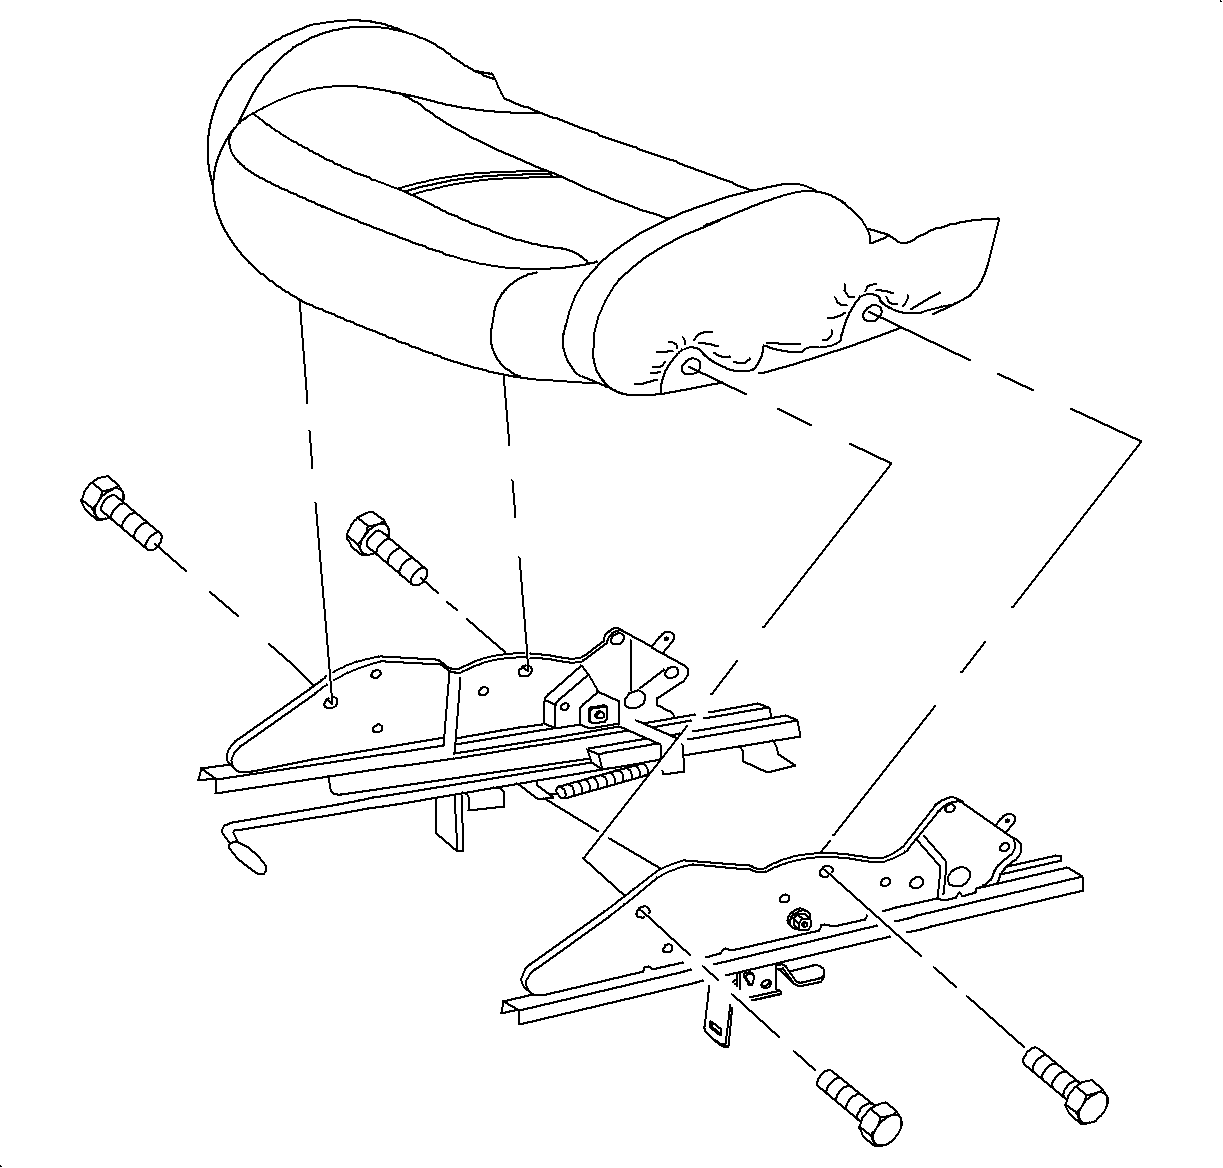
- Remove the seat adjusters from the seat cushion assembly.
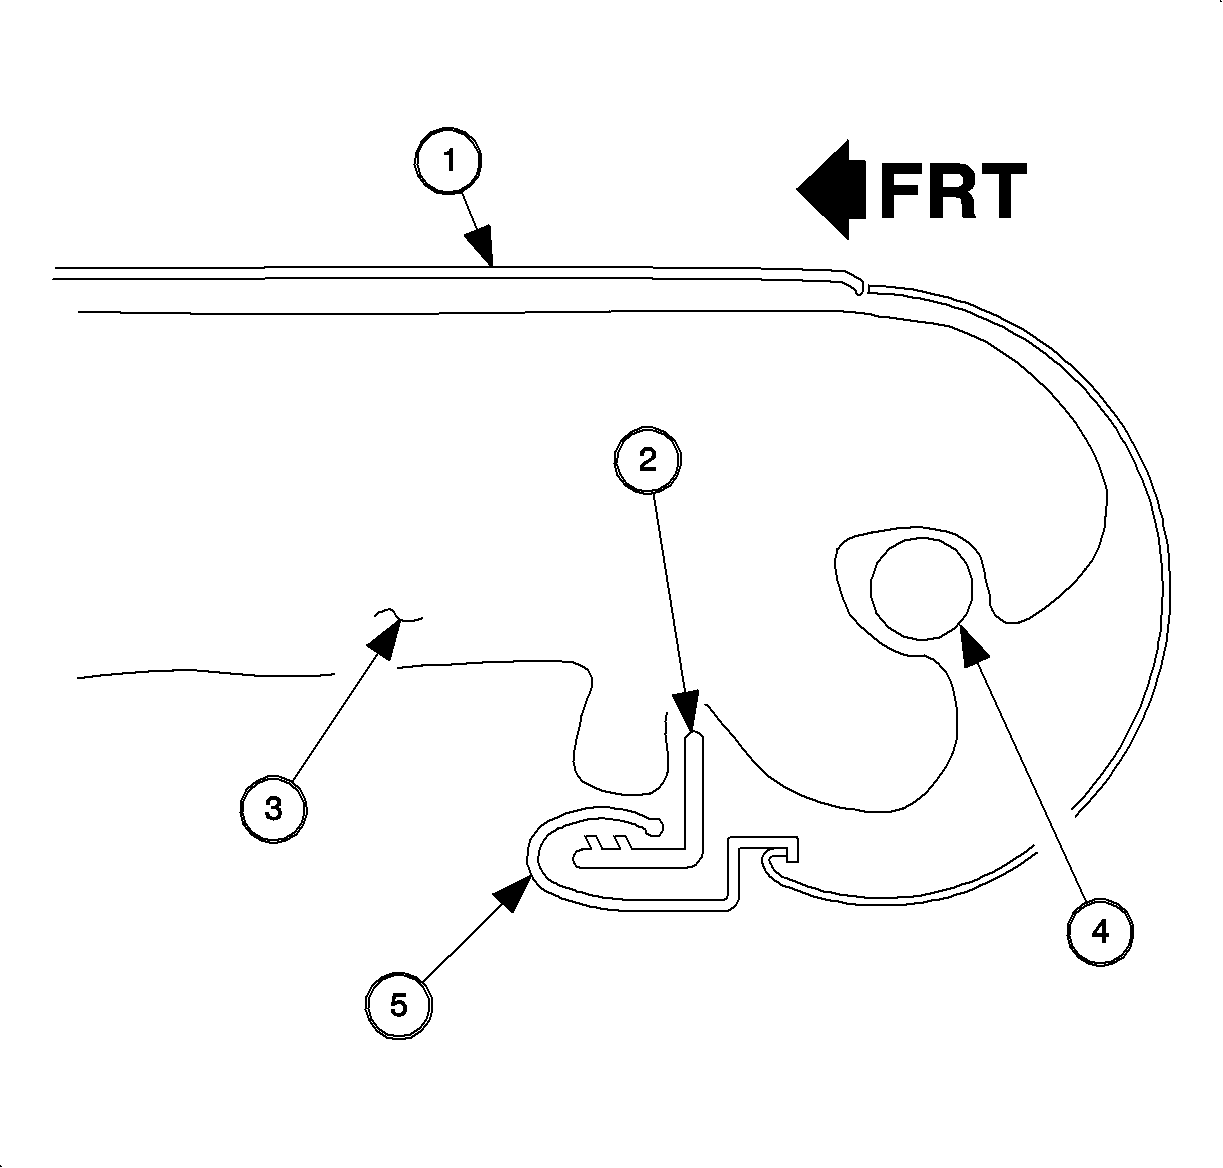
| • | Seat Cover (1) |
| • | Cushion Frame (2) |
| • | Foam Pad (3) |
| • | Cross Tube (4) |
| • | Seat Cover J-Strip (5) |
Installation Procedure
Important: LHD shown, RHD similar.
- If a new seat adjusters is to be installed, transfer the adjuster return spring from the old adjuster to the new adjuster.
- On the coupe, if a new seat adjusters is to be installed, transfer the E-Z entry cable to the new inboard seat adjuster.
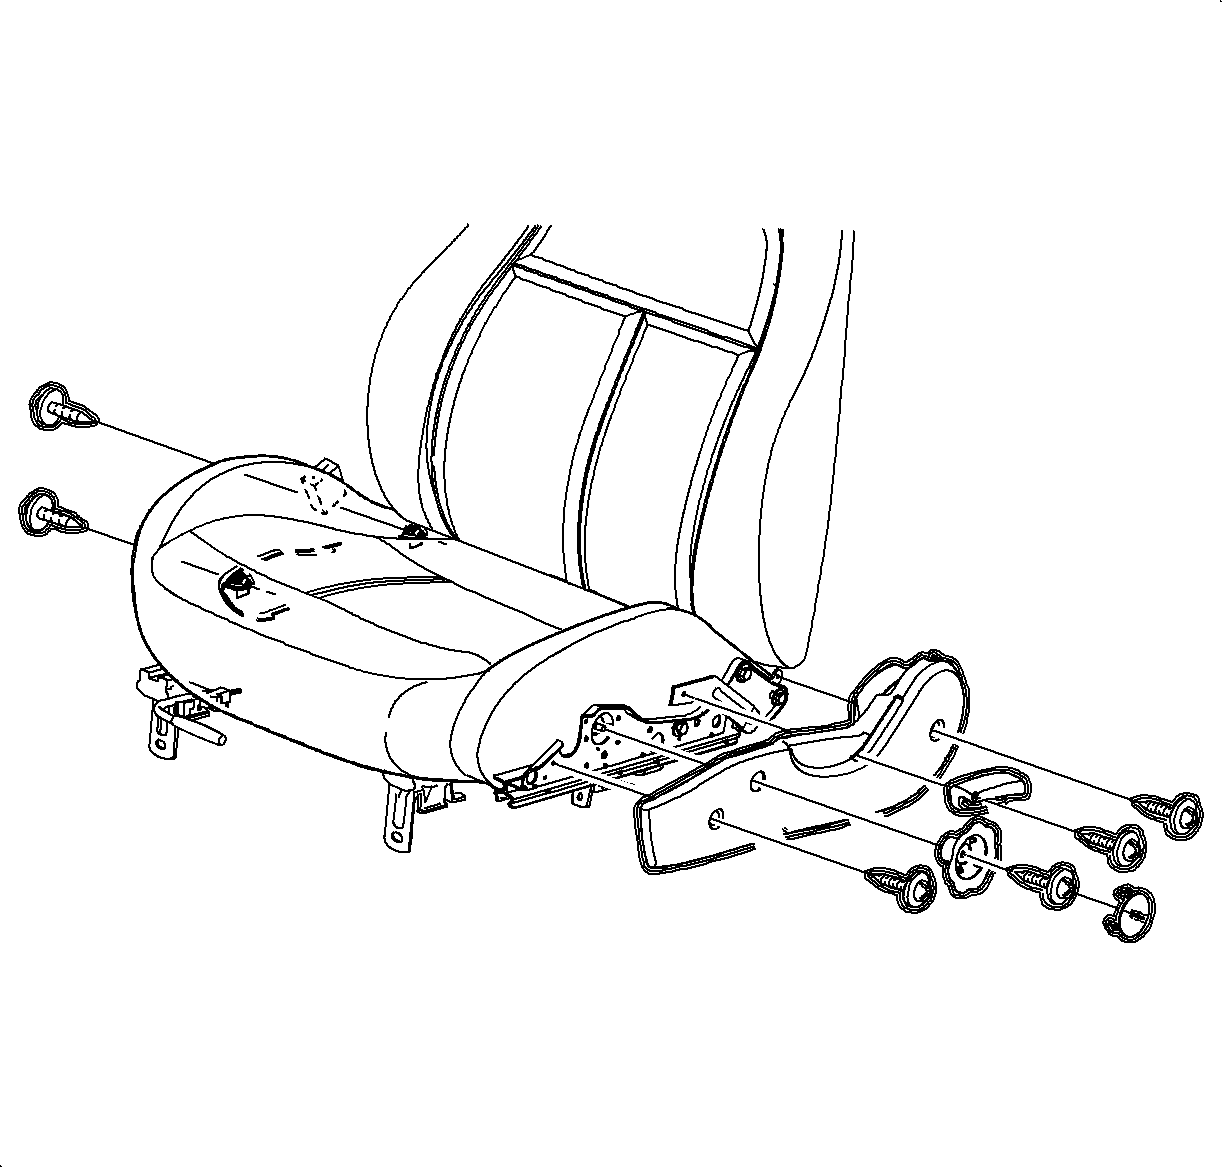
- Install the new seat adjusters to the cushion assembly using four adjuster bolts. Do not tighten at this time.
- Connect the seat adjuster cross wire.
- Install the seat back assembly, with recliners and cross tube attached, to the seat adjusters.
- Install the recliner with the seat adjuster bolts.
- Wrap the seat cushion cover rear flap to the cover up recliner cross tube and engage the seat cushion cover rear J-strip to the seat cushion frame.
- Tighten the seat adjuster bolts.
- On the coupe passenger seat, attach the E-Z entry cable to the inboard recliner and install the cable retaining clip.
- Install the recliner lever and nylon spacer.
- Apply Loctite 242® Threadlocker (or equivalent) to the seat belt buckle fastener. Position the side seat mount buckle unit 25 degrees forward from vertical to the side of the seat and install the bolt.
- On the drivers side, route the seat belt buckle wire to the seat adjuster and secure the wire to the adjuster with the seat belt wire attaching clips.
- Install the seat adjuster side cover.
- Install the recliner handle.
- Install the seat into the vehicle. Refer to Front Seat Replacement - Bucket .

Notice: Refer to Fastener Notice in the Preface section.
Tighten
Tighten the front seatback recliner bolts to 27 N·m (20 lb ft).

Tighten
Tighten the front seat adjuster bolts to 27 N·m (20 lb ft).

Caution: Apply Loctite 242® Threadlocker, or equivalent, on recliner lever fasteners before installing.
Tighten
Tighten the recliner lever fastener to 3 N·m (27 lb in).
Caution: Apply Loctite 242® Threadlocker US P/N 12345382 (Canadian P/N 10953489), or equivalent, on all restraint bolts/nuts before installation. Failure to use such threadlocker correctly may result in personal injury.
Tighten
Tighten the seat belt buckle seat adjuster bolt to 75 N·m (55 lb ft).

Tighten
Tighten the seat side cover fasteners to 2.5 N·m (22 lb in).
Tighten
Tighten the recliner handle fastener to 3 N·m (27 lb in).
Front Seat Adjuster Replacement Driver Seat - SL2, SC2, SW2
Removal Procedure
Important: LHD shown, RHD similar
- Remove the seat from the vehicle. Refer to Front Seat Replacement - Bucket .
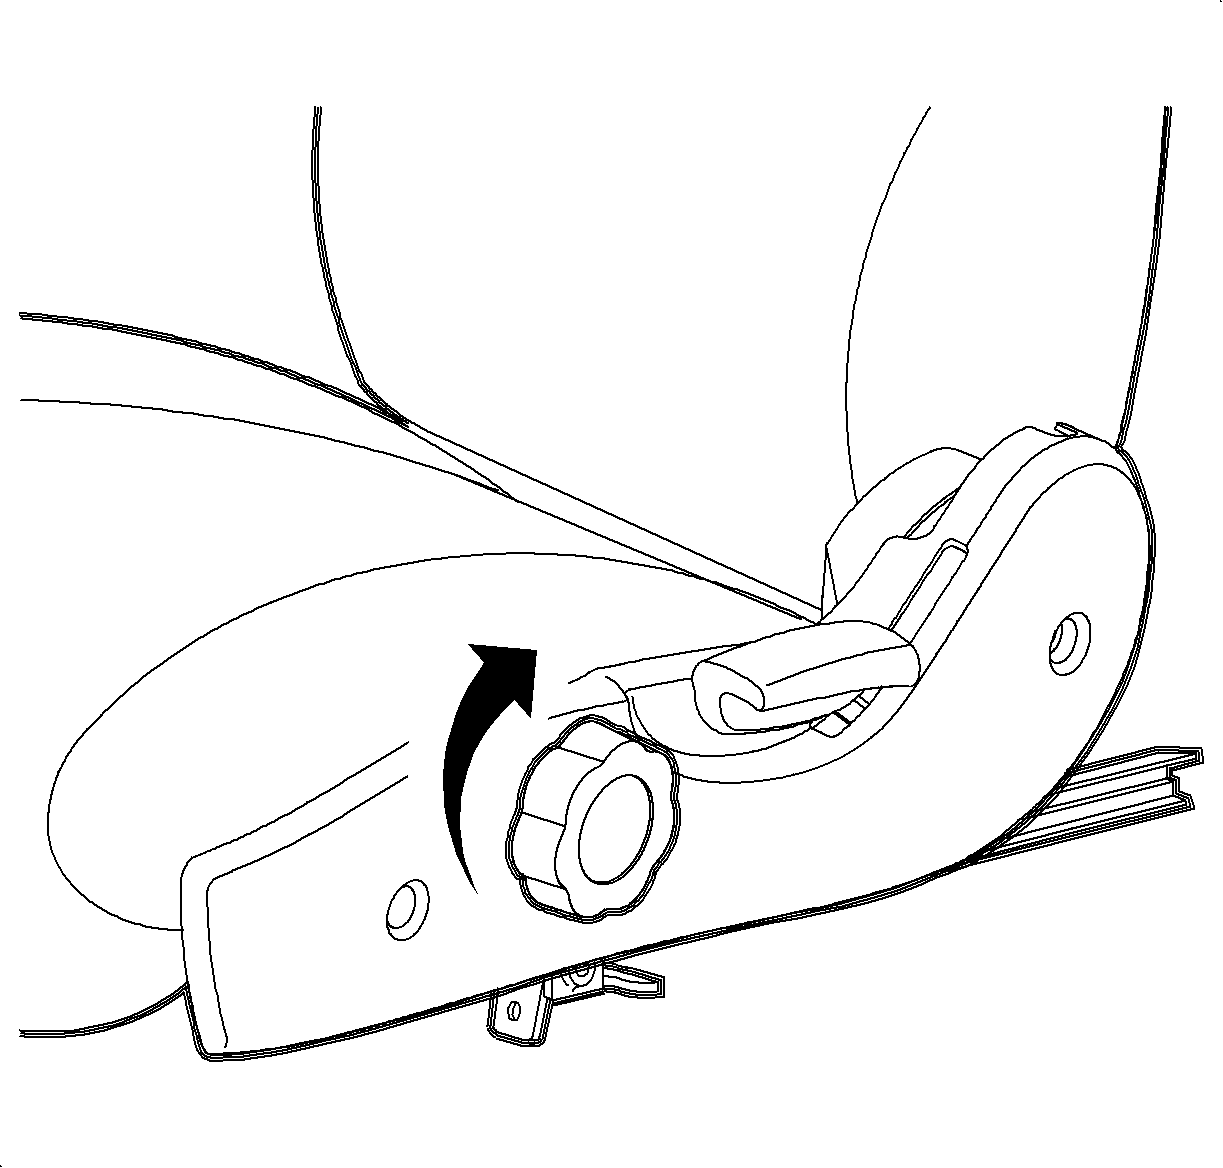
- Rotate the seat riser knob to the full up position.
- Remove the recliner handle.
- Remove the seat riser knob.
- Remove the seat adjuster side cover.
- Remove the seat belt buckle.
- Remove the recliner lever and nylon spacer.
- Remove the lumbar knob retaining clip.
- Remove the lumbar knob by pulling.
- Remove the lumbar actuator fasteners.
- Thread the lumbar cable back above the riser bar to the side of the seat back.
- Thread the lumbar cable back above the riser bar to the side of the seat back.
- Install the riser knob without the screw, lower the seat cushion, and remove the riser knob.
- Release the cushion cover rear J-strip from the seat cushion frame. Refer to the following:
- Remove the recliner bolts, the seat back assembly with recliner mechanism, and the cross tube attached to the seat back.
- Install the riser knob without the screw, raise the seat cushion and remove the riser knob.
- Remove the seat adjuster assembly from the seat cushion assembly by removing the four bolts at the sides of the seat cushion.



| • | Seat Cover (1) |
| • | Cushion Frame (2) |
| • | Foam Pad (3) |
| • | Cross Tube (4) |
| • | Seat Cover J-Strip (5) |

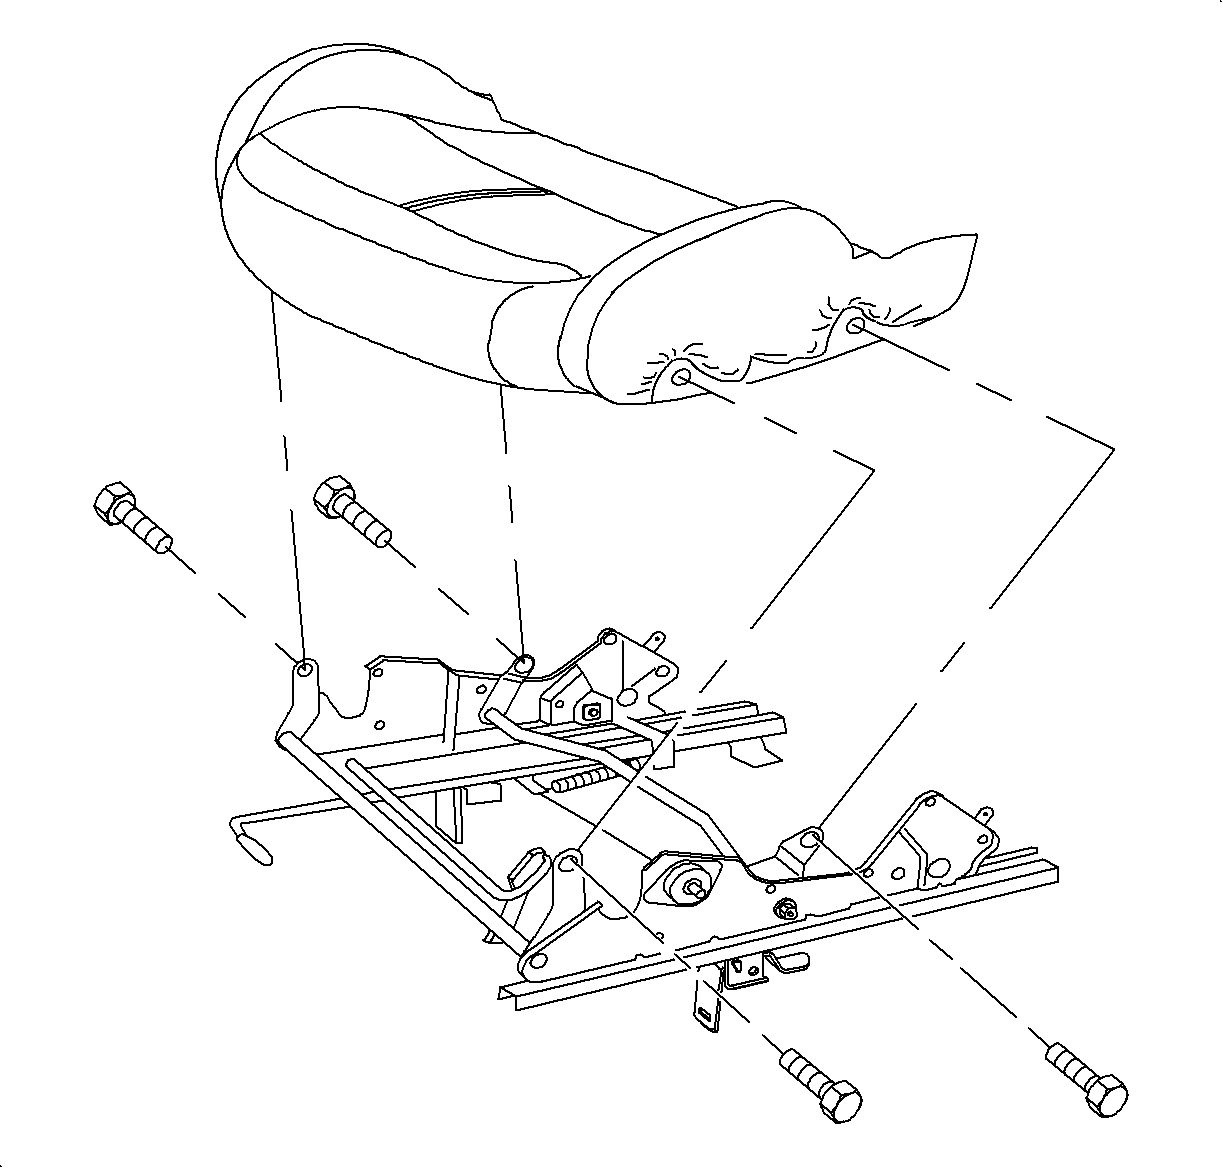
Installation Procedure
Important: LHD shown, RHD similar.
- Install the seat adjuster assembly to the cushion assembly. Install the seat adjuster fasteners.
- Install the seat back assembly, with the recliners and cross tube attached, to the seat adjusters.
- Install the recliner to the seat adjuster bolts and install the riser knob without the screw. Lower the seat cushion, and install the riser knob.
- Thread the lumbar cable between the riser bar and the seat cushion bottom towards the lumbar actuator plate.
- Align the lumbar actuator cable assembly guide with the slot in the actuator plate.
- Install the lumbar actuator fasteners.
- Align the grooves on the lumbar knob with the grooves on the lumbar actuator cable assembly and push to install.
- Install the lumbar knob retaining clip.
- Wrap the seat cushion cover rear flap to cover up the recliner cross tube, and engage the seat cushion cover rear J-strip to the seat cushion frame. Refer to the following:
- Install the recliner lever and nylon spacer.
- Apply Loctite 242® Threadlocker (or equivalent) to the seat belt buckle fastener. Position the seat side mount buckle unit 25 degrees forward from vertical to the side of the seat and install the bolt.
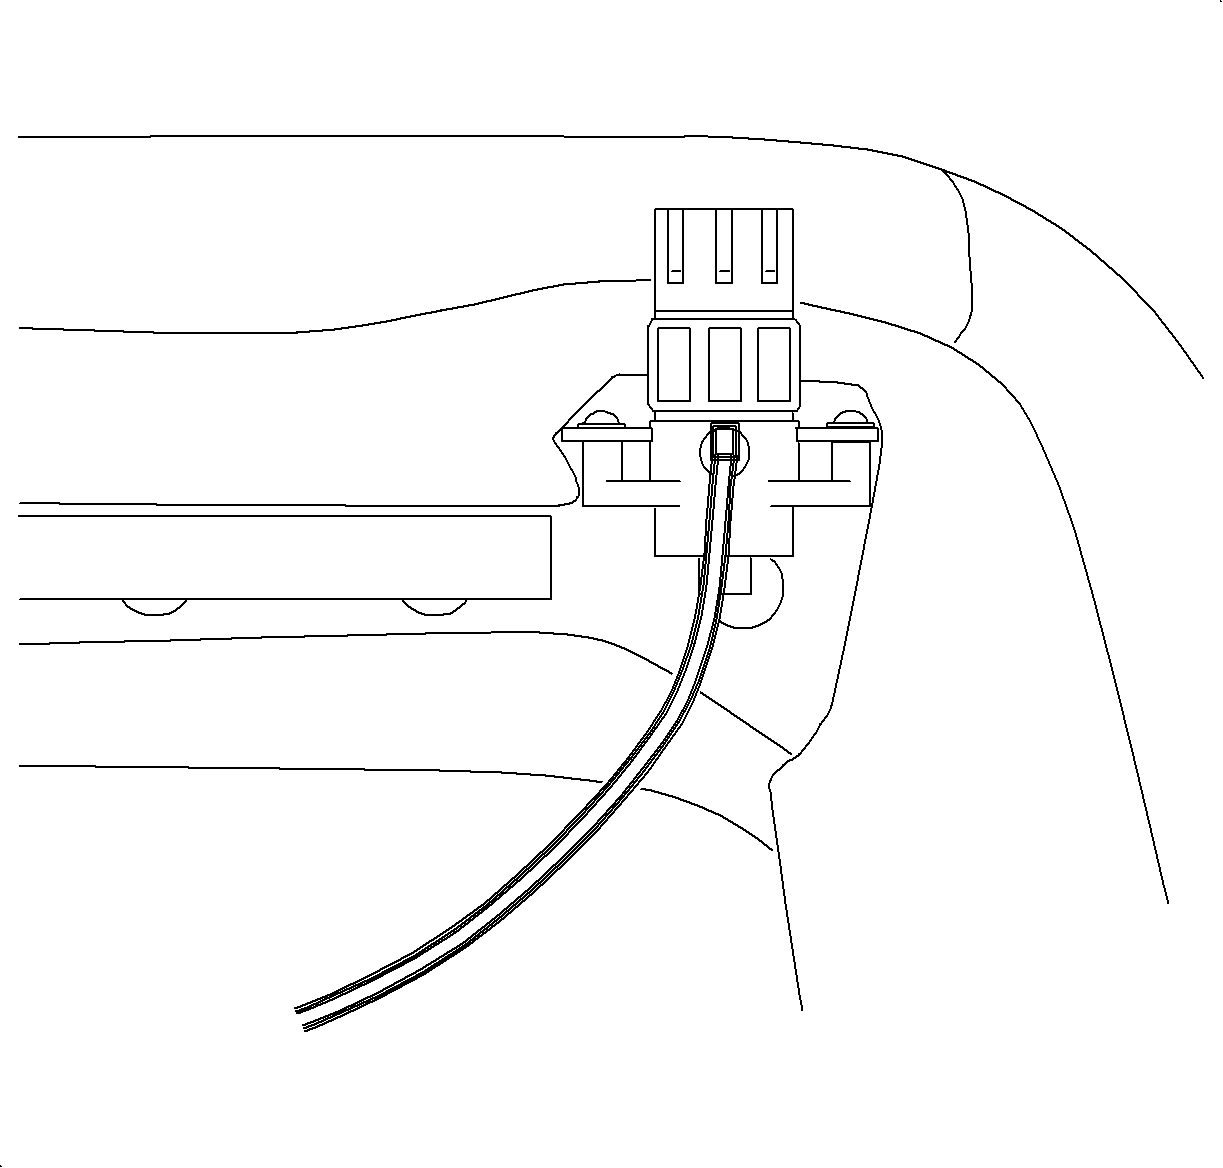
- On the drivers side, route the seat belt buckle wire to the seat adjuster and secure the wire to the adjuster with the seat belt wire attaching clips.
- Install the seat adjuster side cover.
- Install the recliner handle.
- Install the seat riser knob.
- Install the seat into the vehicle. Refer to Front Seat Replacement - Bucket .
Notice: Refer to Fastener Notice in the Preface section.

Tighten
Tighten the front seat adjuster seat bolts to 27 N·m (20 lb ft).
Tighten
Tighten the front seatback recliner bolts to 27 N·m (20 lb ft).


Tighten
Tighten the lumbar actuator fasteners to 3 N·m (27 lb in).

| • | Seat Cover (1) |
| • | Cushion Frame (2) |
| • | Foam Pad (3) |
| • | Cross Tube (4) |
| • | Seat Cover J-Strip (5) |

Caution: Apply Loctite 242® Threadlocker, or equivalent, on recliner lever fasteners before installing.
Tighten
Tighten the recliner lever fastener to 3 N·m (27 lb in).

Caution: Apply Loctite 242® Threadlocker US P/N 12345382 (Canadian P/N 10953489), or equivalent, on all restraint bolts/nuts before installation. Failure to use such threadlocker correctly may result in personal injury.
Tighten
Tighten the seat belt buckle seat adjuster bolt to 75 N·m (55 lb ft).

Tighten
Tighten the seat side cover fasteners to 2.5 N·m (22 lb in).
Tighten
Tighten the recliner handle fastener to 3 N·m (27 lb in).
Tighten
Tighten the seat riser knob fastener to 2.5 N·m (22 lb in).
