For 1990-2009 cars only
Special Tools
J 42069 Timing Belt Alignment Kit
Removal Procedure
- Disconnect the negative battery cable.
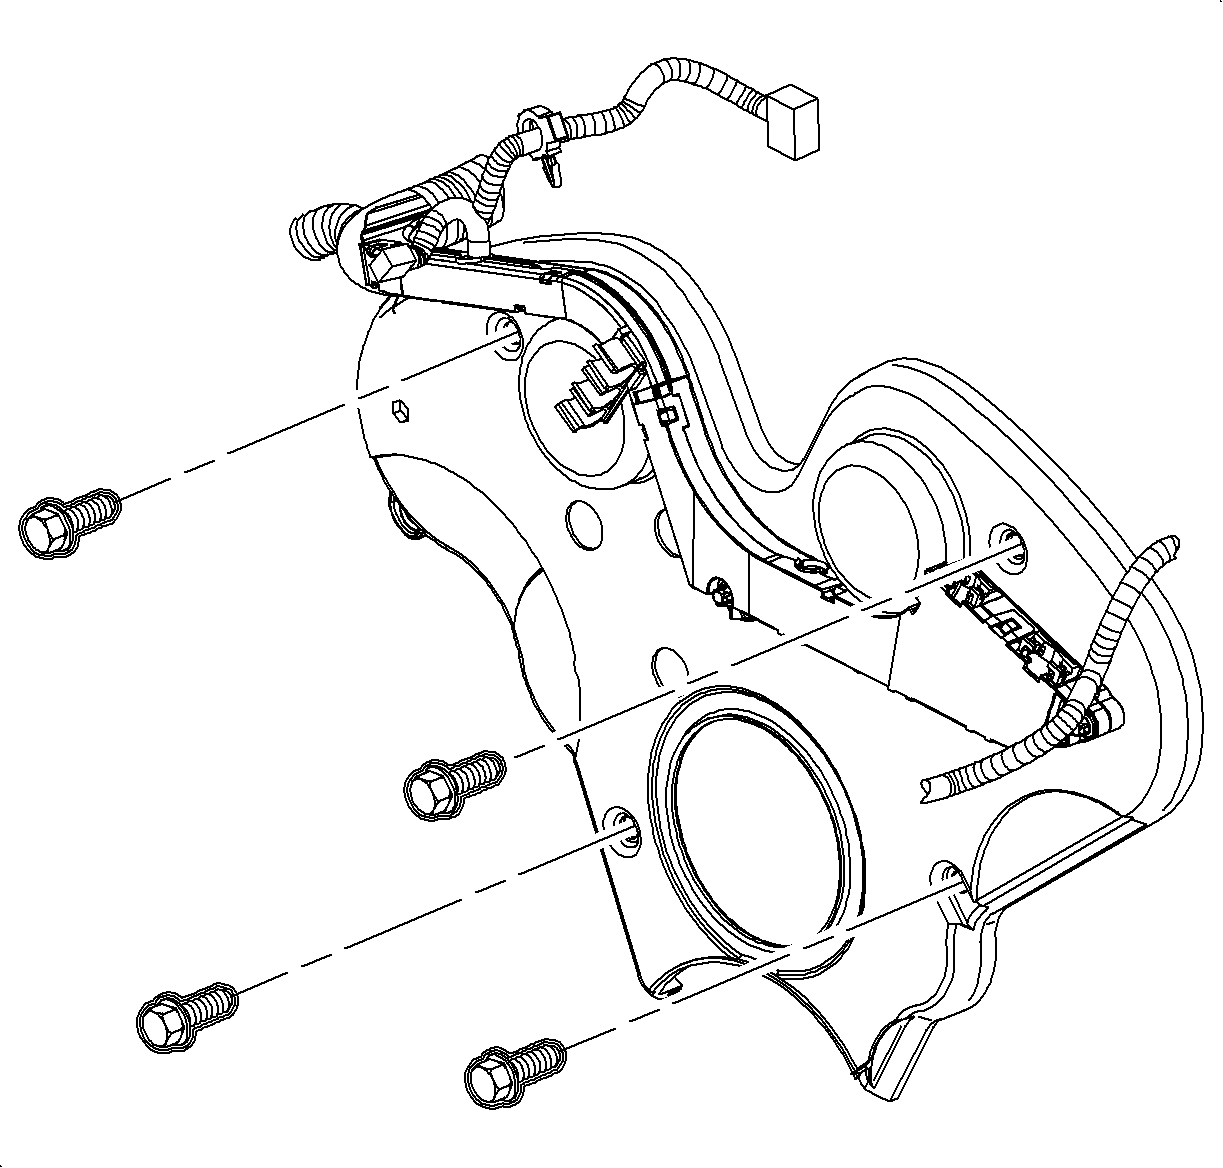
- Remove the timing belt cover. Refer to Timing Belt Front Cover Replacement
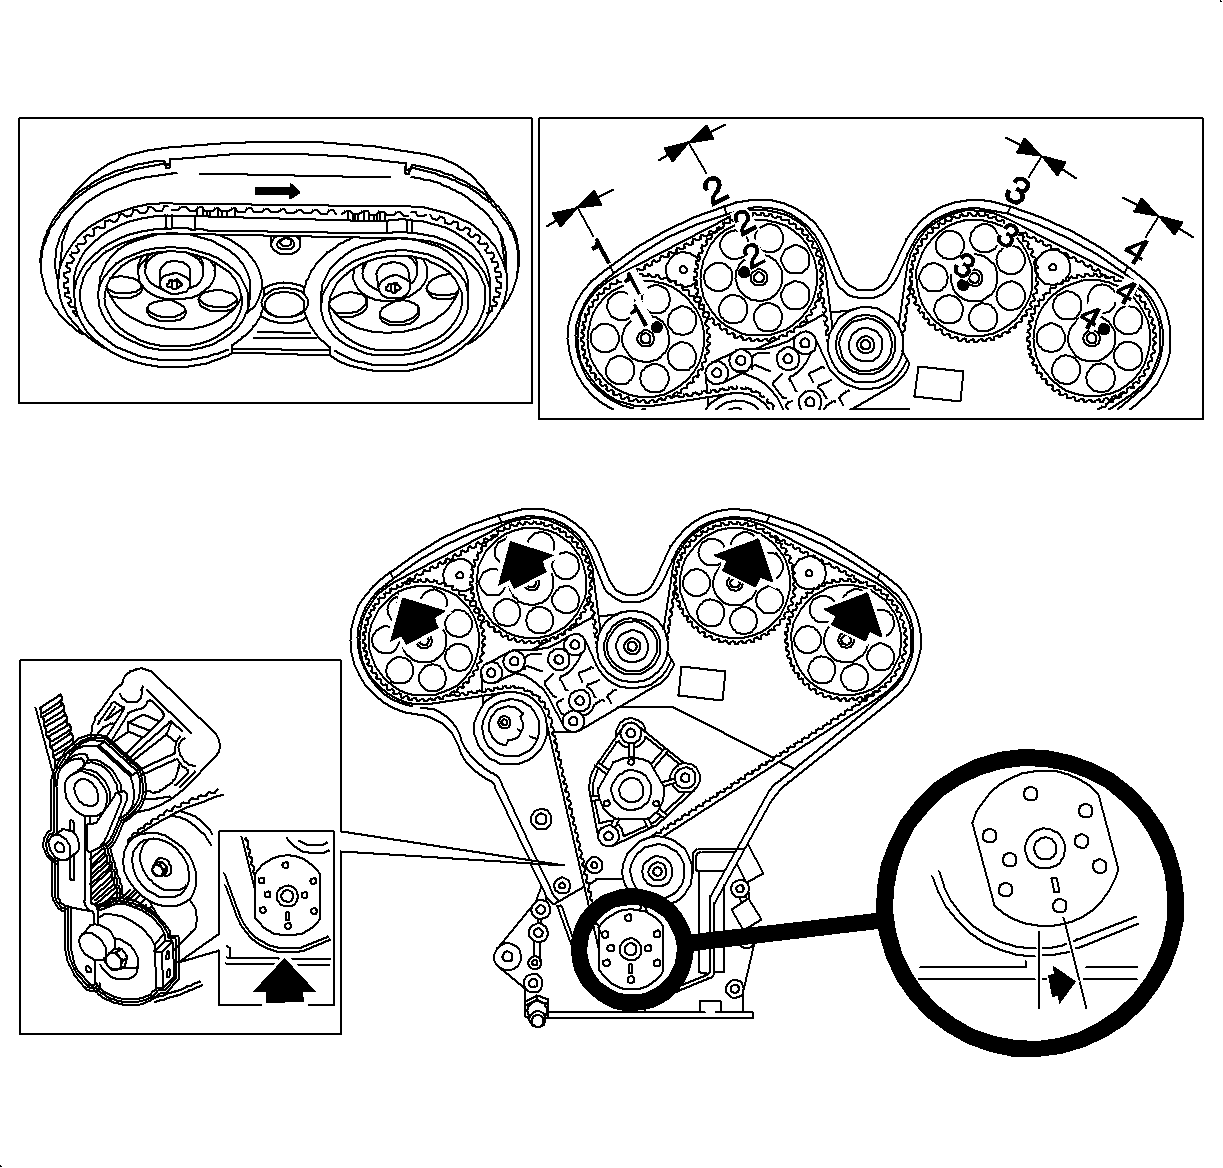
- Remove the timing belt. Refer to Timing Belt Replacement .
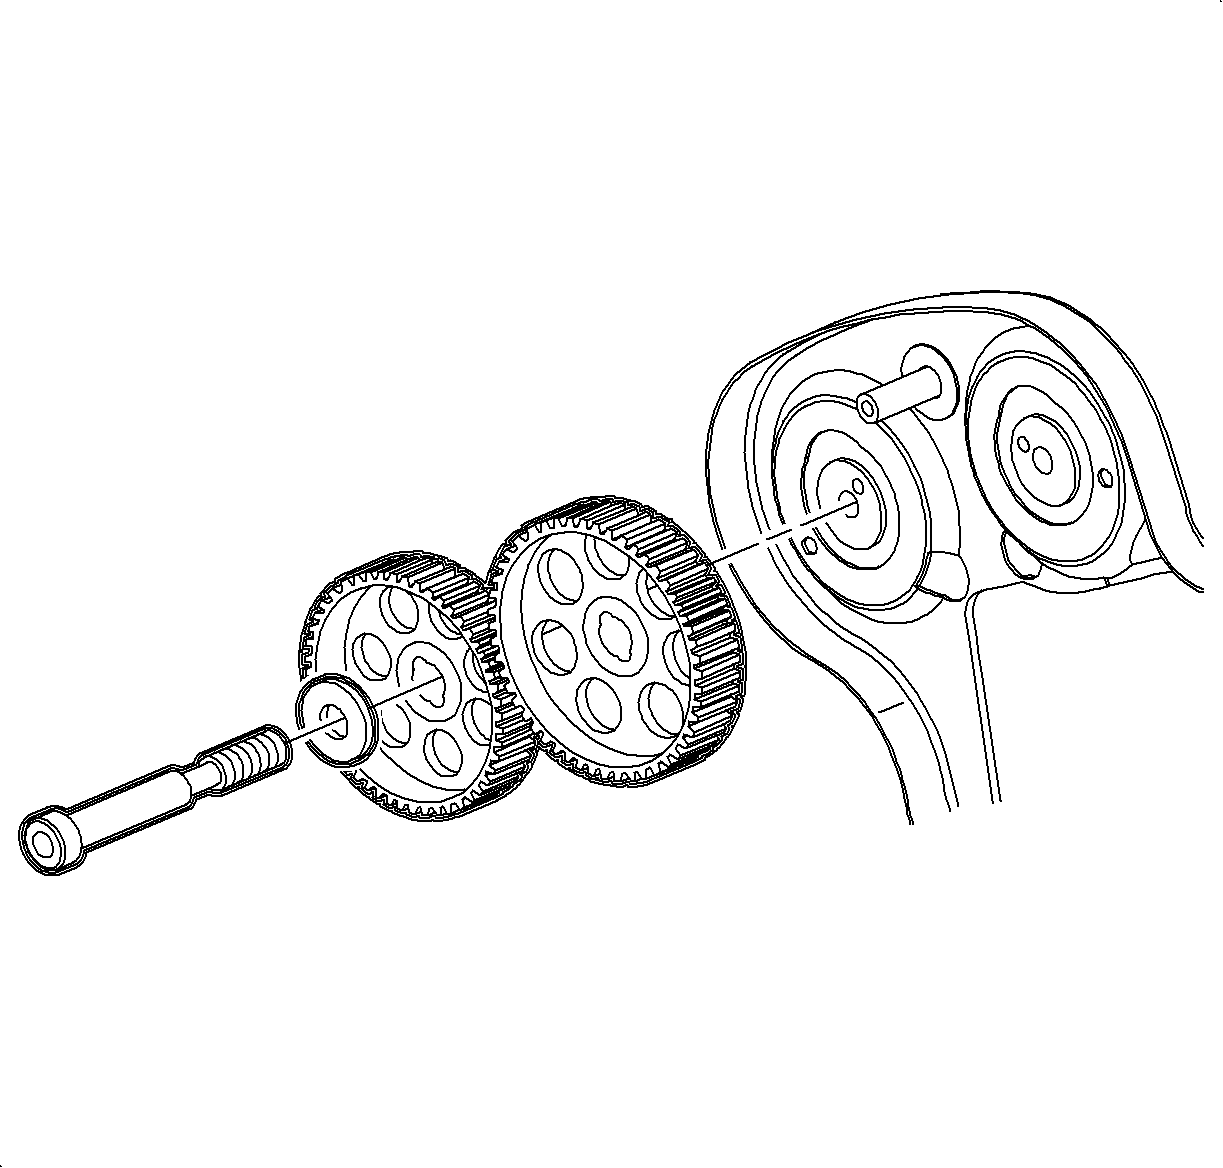
- Remove the camshaft sprocket bolts.
- Remove the camshaft drive sprocket.


Notice: Set crankshaft to 60 degrees before top-dead center or after TDC to prevent valve to piston contact.

Important: When removing the camshaft sprockets, use the J42069-1 and J42069-2 camshaft locks to lock the sprockets when initially loosening the camshaft sprocket bolts.
Installation Procedure
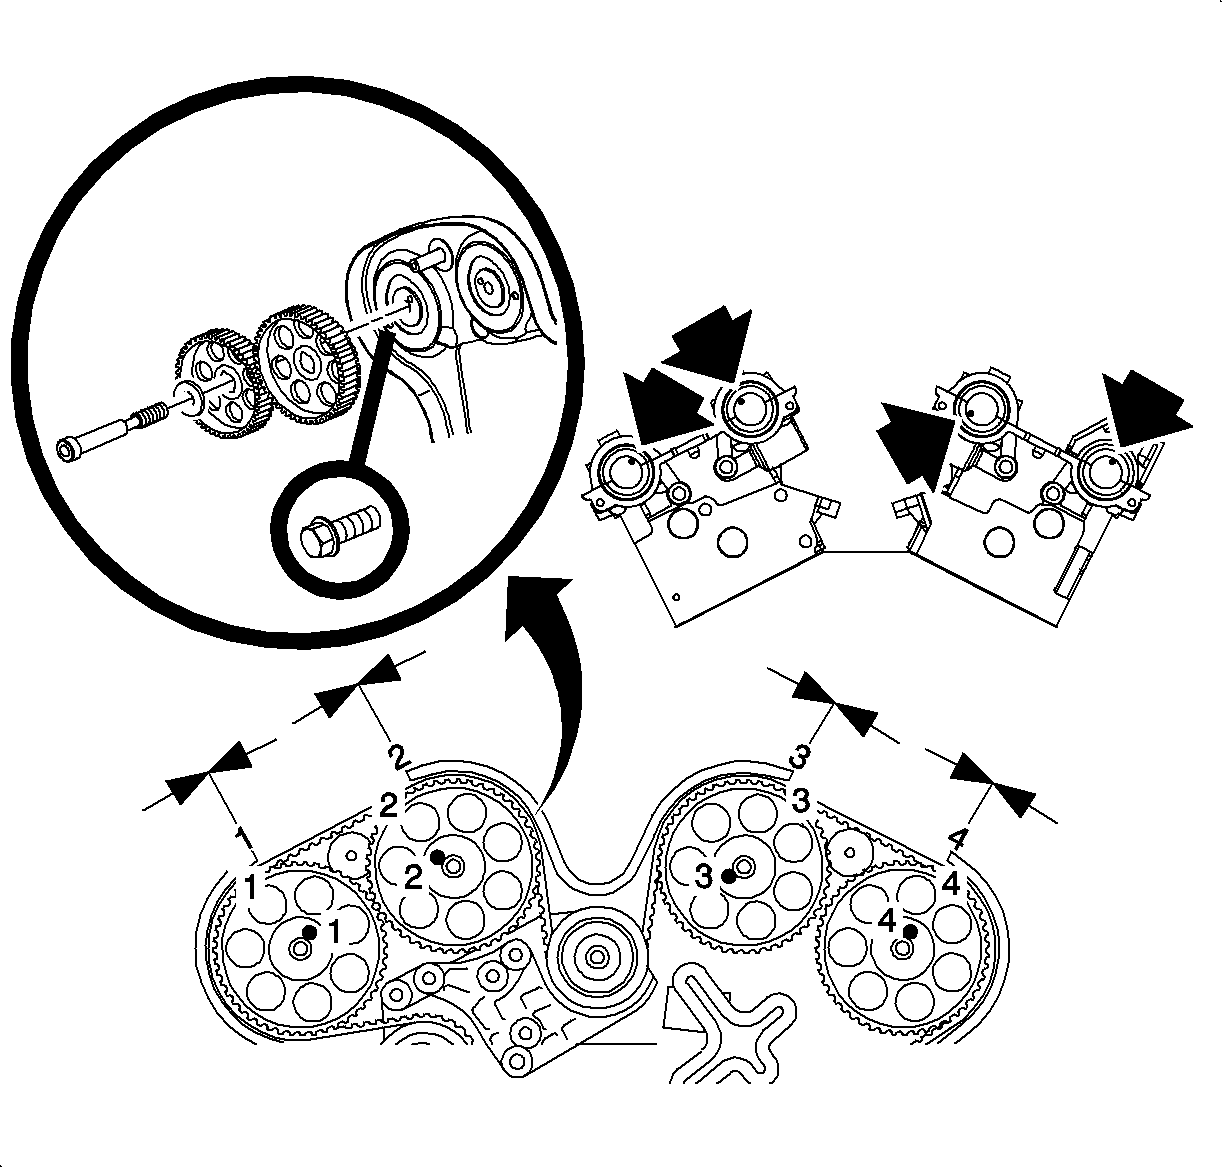
- Install the camshaft sprockets and new bolts.
- Align the camshaft sprocket with the pin on the camshaft.
- Use the timing belt alignment kit J42069-1 and J42069-2 camshaft locks to lock sprockets when torquing camshaft sprocket bolts.
- Install and adjust the timing belt. Refer to Timing Belt Replacement .
- Install the front cover. Refer to Timing Belt Front Cover Replacement .
- Reconnect the negative battery cable.

Notice: The camshaft sprocket bolts are not reusable, it is a torque-to-yield (TTY) bolt, and must be discarded to prevent premature failure.
| • | Align the correct camshaft with the corresponding number on the sprocket. |
| • | Camshaft sprockets 1 and 2 are interchangeable and camshaft sprockets 3 and 4 are interchangeable. |
Notice: Refer to Fastener Notice in the Preface section.
Tighten
Tighten the camshaft sprocket bolt to 50 N·m (37 lb ft)
+ 60° +15°.


Tighten
Tighten the battery terminal bolt to 17 N·m (13 lb ft).
