For 1990-2009 cars only
Removal Procedure
- Remove the Air Cleaner Assembly. Refer to Air Cleaner Assembly Replacement in Engine Controls - 3.0L (L81).
- Install the engine support fixture. Refer to Engine Support Fixture .
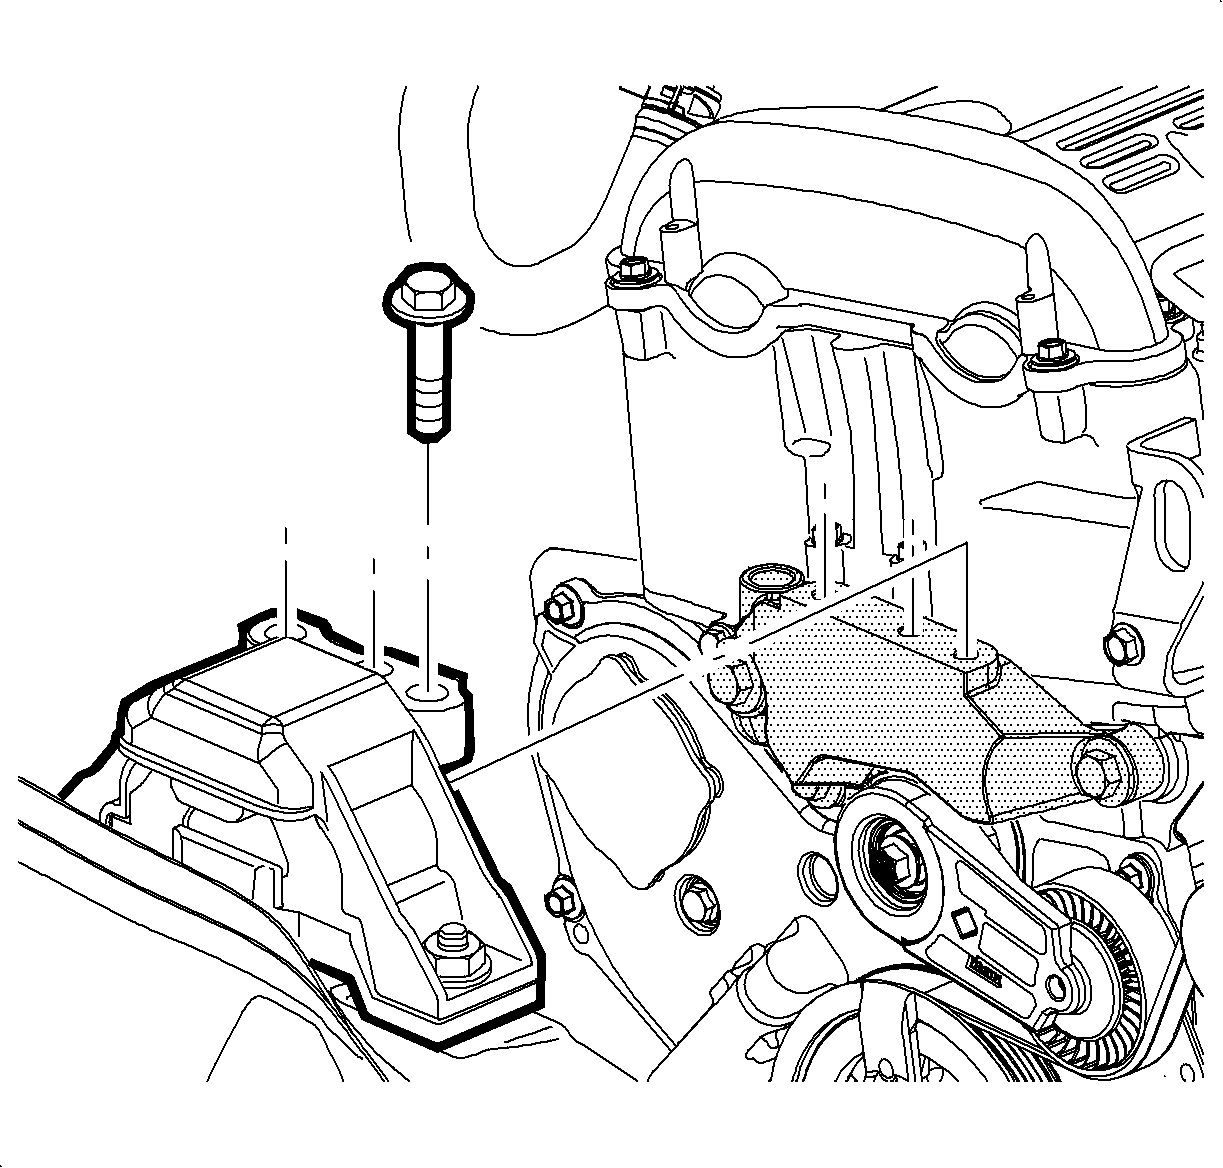
- Remove the mount to mount bracket bolts.
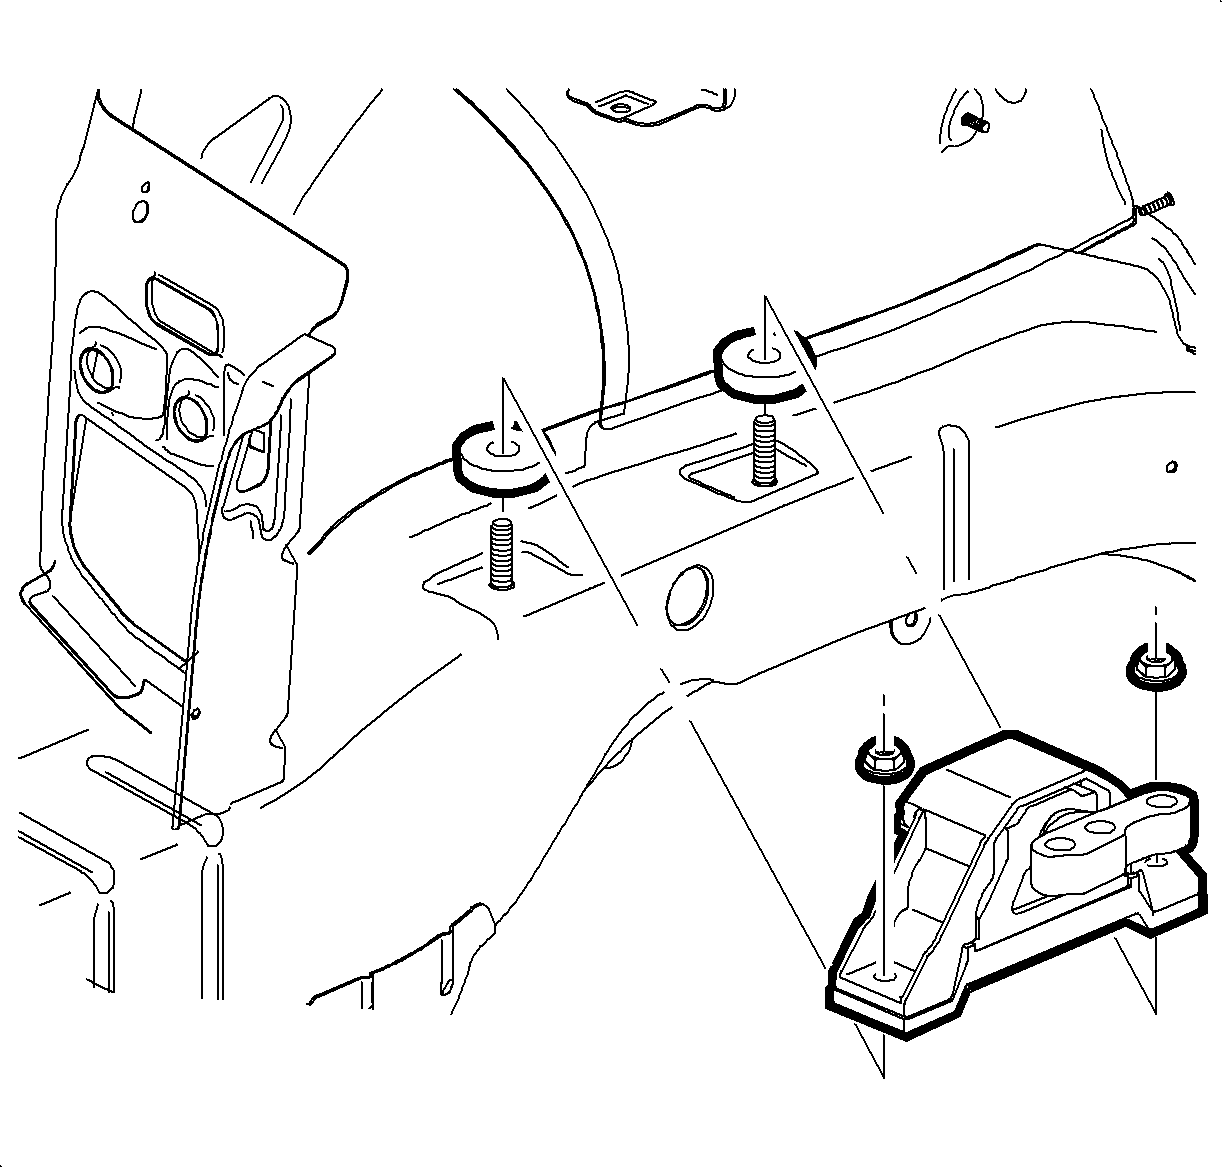
- Remove the mount to frame rail nuts.
- Remove the RH mount.
- Remove the two spacers under the engine mount in order to clean the spacers and surface area.
Important: Use the engine support fixture to properly support the engine assembly during the engine mount removal and installation. DO NOT use a floor jack and block of wood to support the engine assembly.


Installation Procedure
- Install the two spacers to the engine mount studs, replace the spacers if necessary.
- Install the RH mount to the frame rail studs.
- Install the RH mount to frame rail nuts.
- Hand start the RH mount to bracket bolts.
- Remove the engine support fixture. Refer to Engine Support Fixture .
- Install the Air Cleaner Assembly. Refer to Air Cleaner Assembly Replacement in Engine Controls - 3.0L (L81).

Notice: Refer to Fastener Notice in the Preface section.
Tighten
Tighten the nuts to 110 N·m (81 lb ft).

Tighten
Tighten the bolts to 50 N·m (37 lb ft).
