Tools Required
J 36346 Fascia Retainer Remover
Removal Procedure
- Move the control assembly into the N - Neutral position.
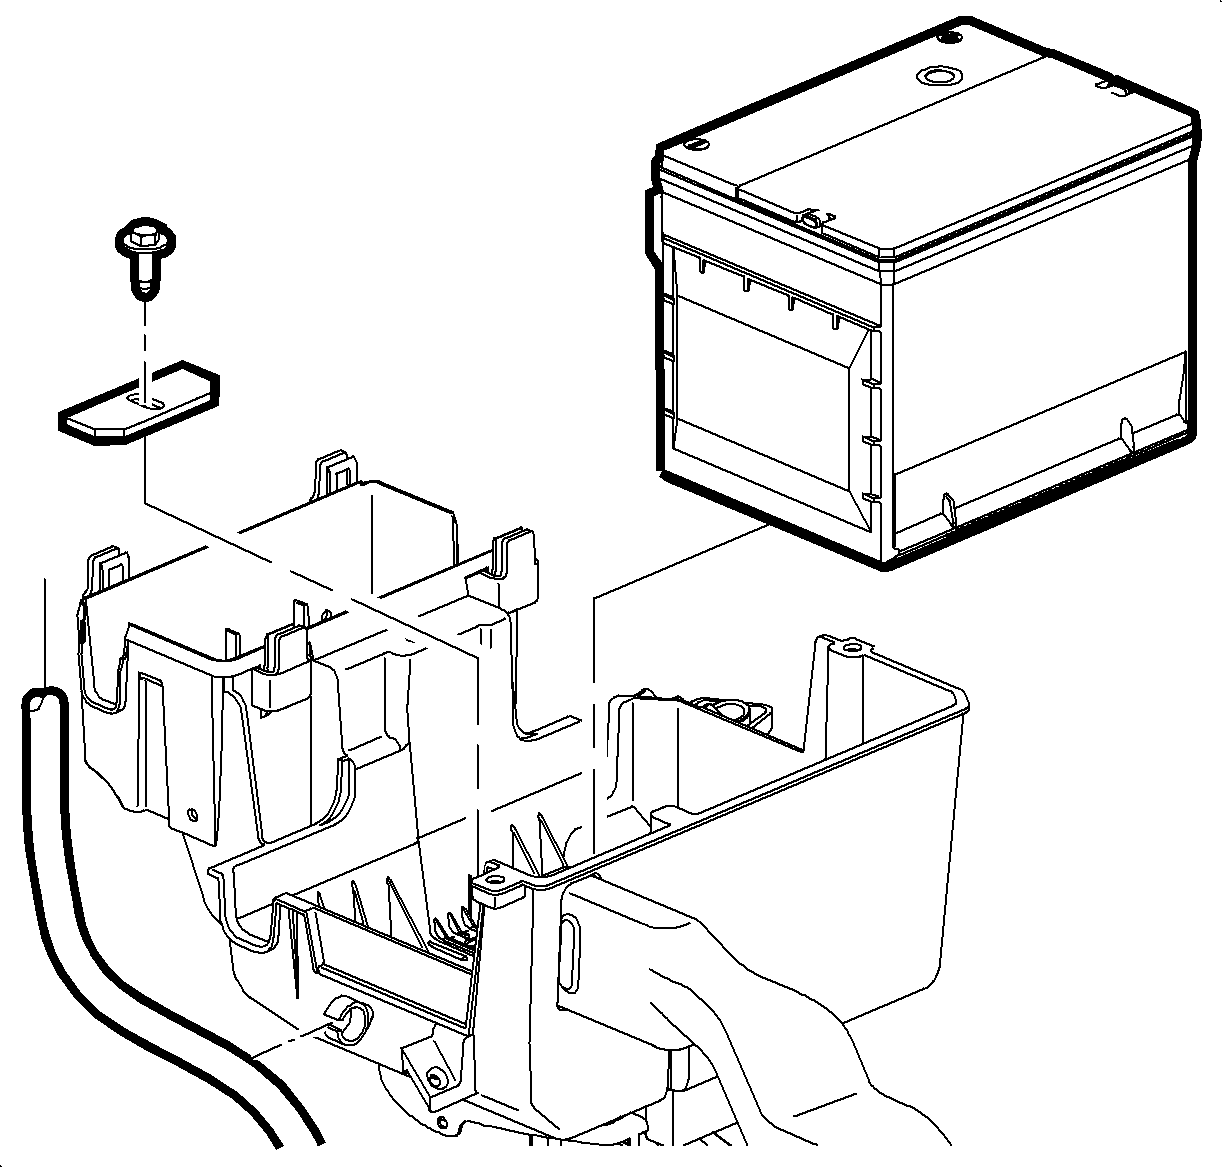
- Remove the battery. Refer to Battery Replacement in Engine Electrical.
- Remove the battery cooling box. Refer to Battery Box Replacement removal procedure in Engine Electrical.
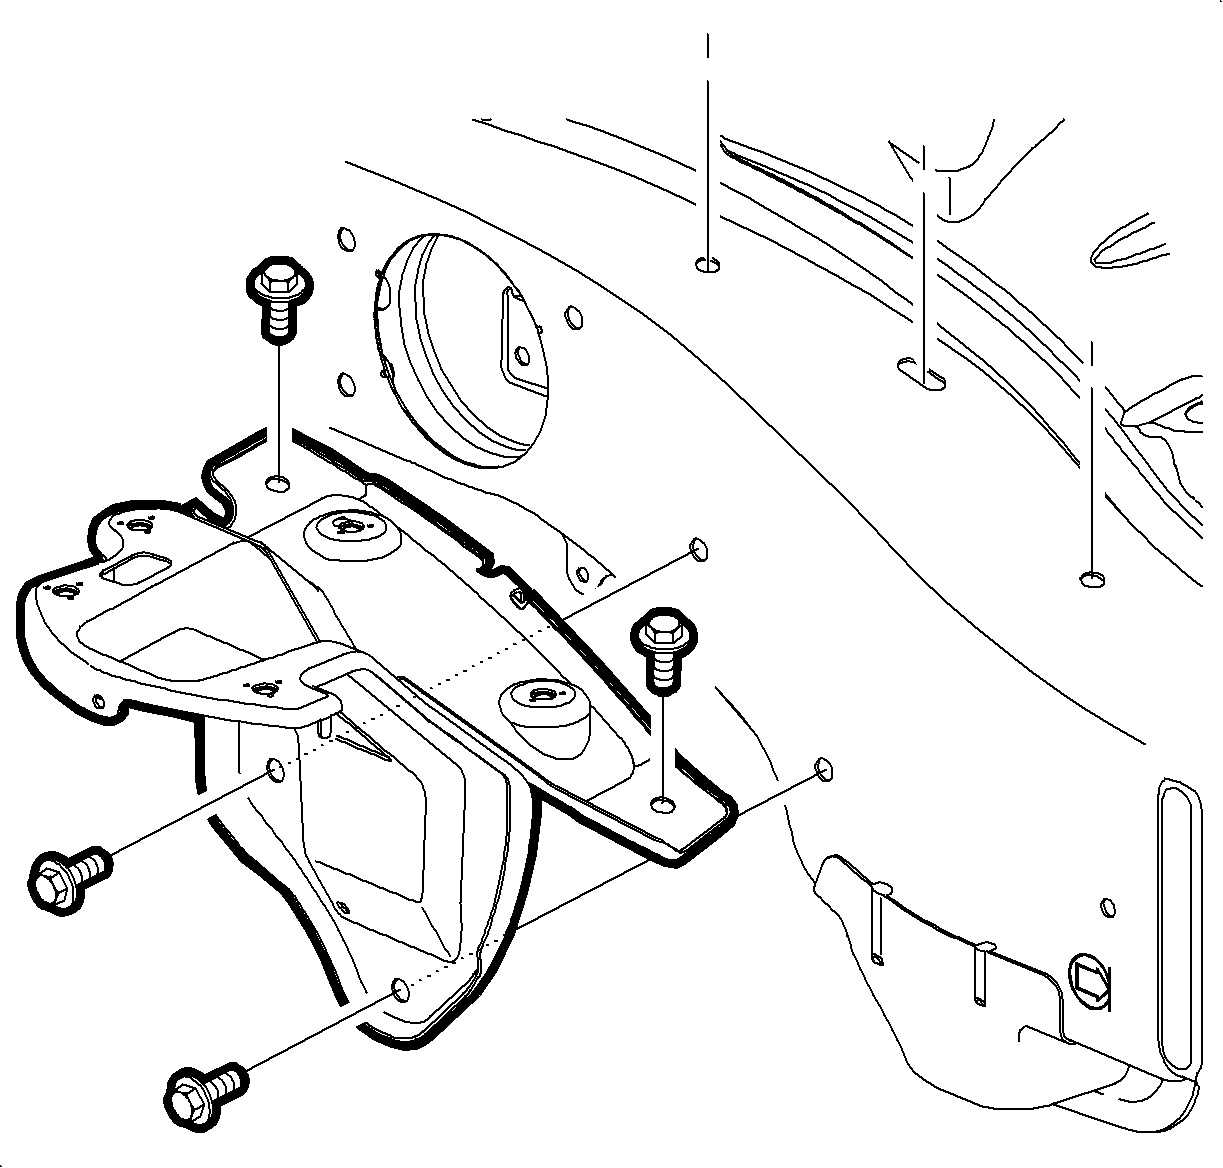
- Remove the battery tray bracket.
- Loosen the battery tray bracket screws and remove the bracket.
- Remove the console. Refer to Console Replacement procedure in Body and Accessories.
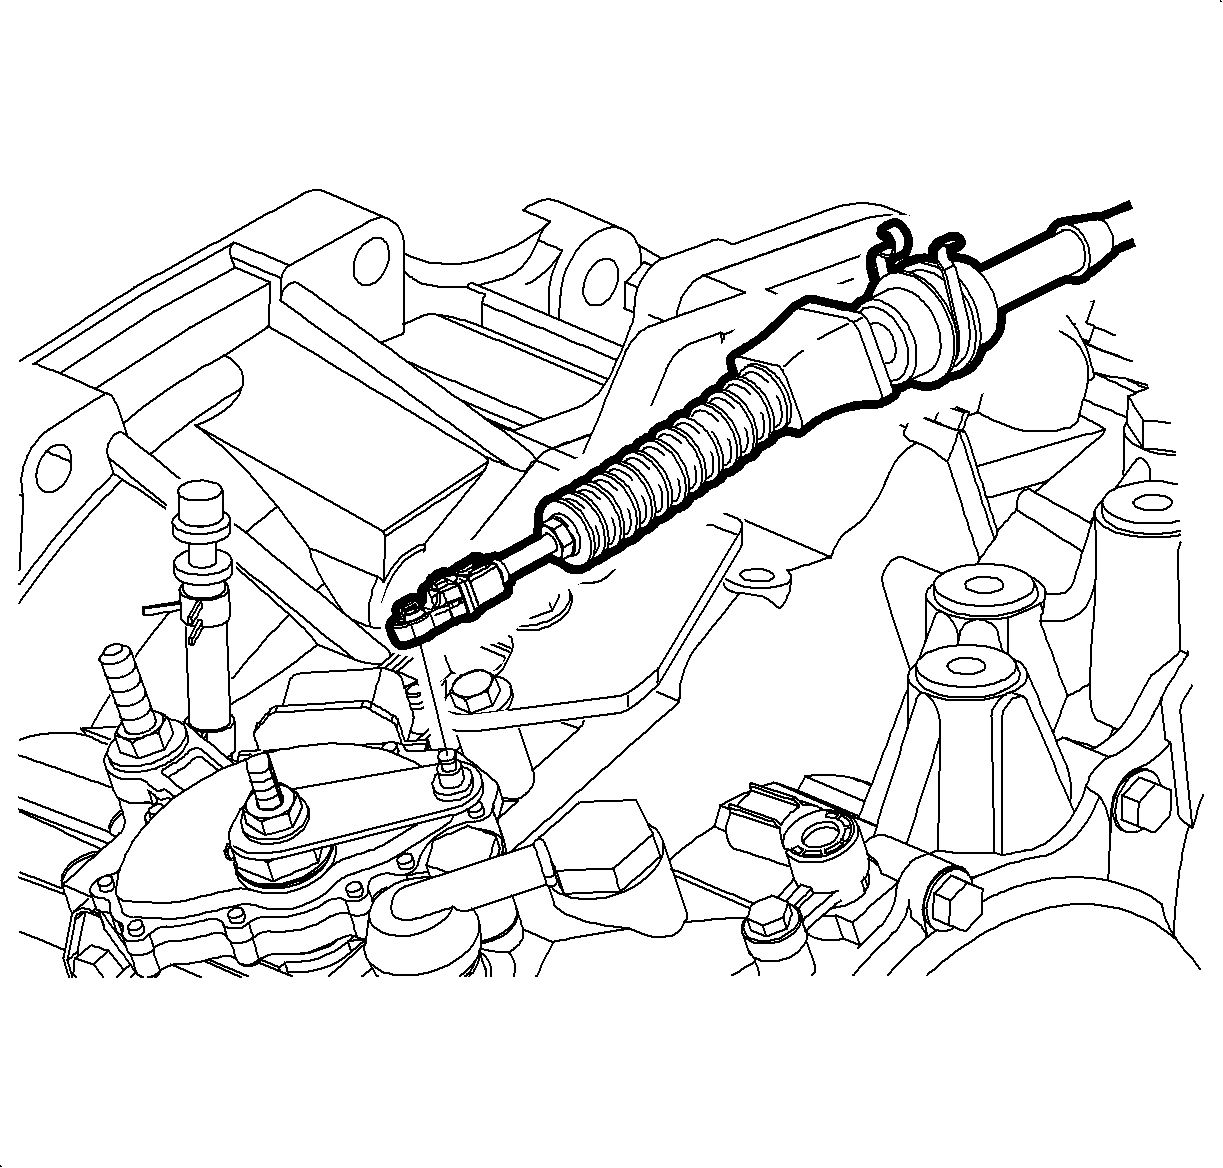
- Using the Fascia Retainer Remover J 36346 , disconnect the control cable from the control assembly lever.
- Depress the control cable retainer clip tabs and remove the cable from the control assembly. Discard the clip.
- Using the Fascia Retainer Remover J 36346 , disconnect the control cable from the transaxle range switch lever.
- Depress the control cable retainer clip tabs and remove the cable from the control cable bracket. Discard the clip.
- Position the vehicle on the hoist and raise the vehicle.
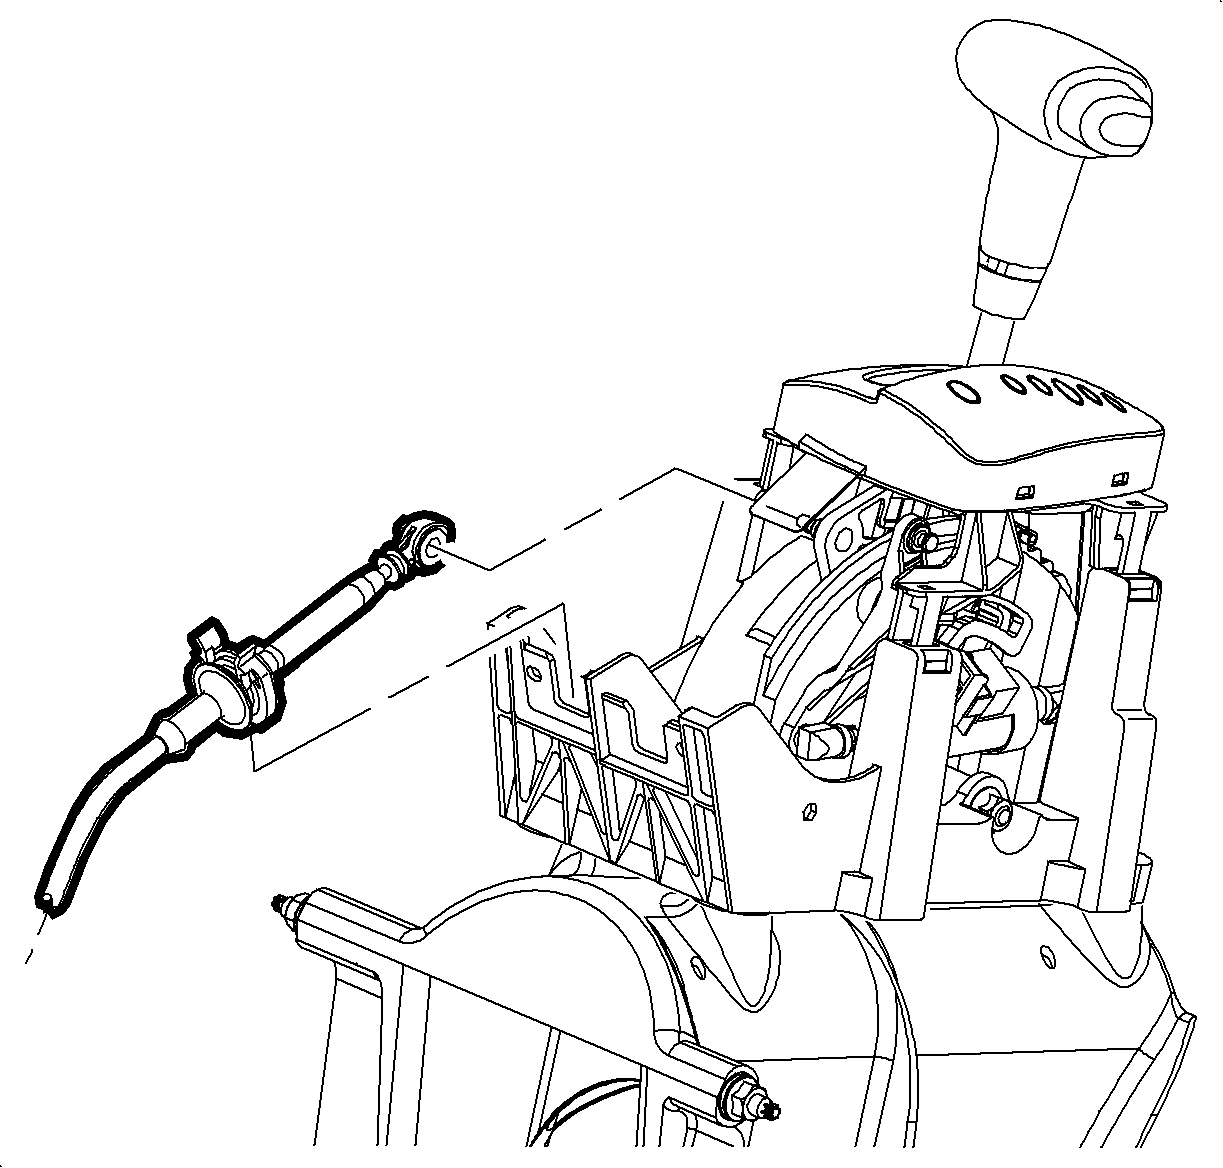
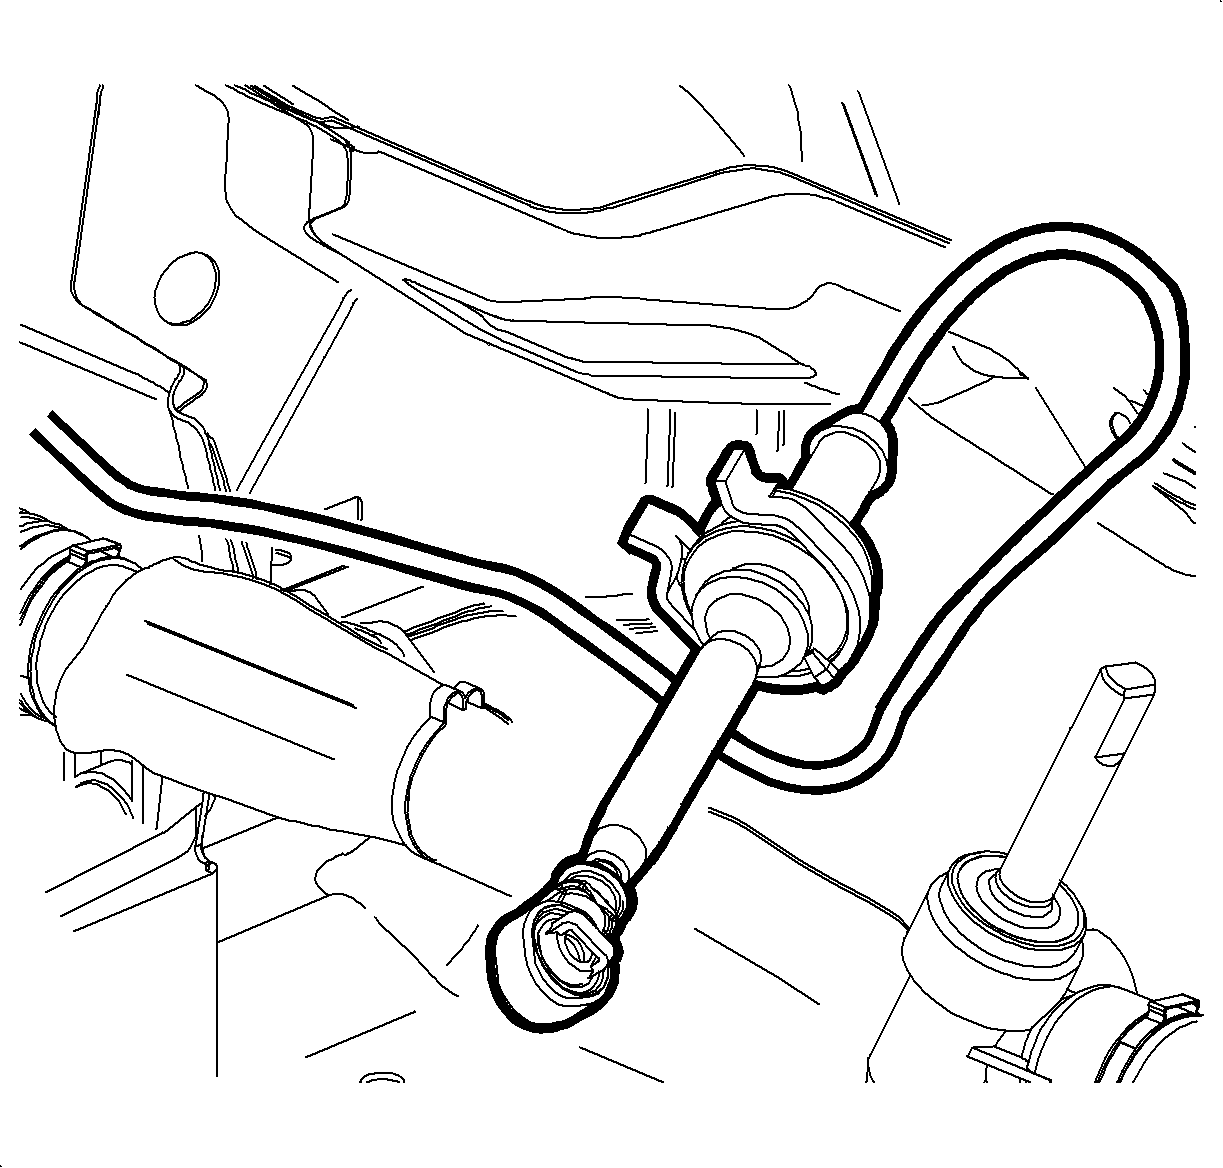
- Remove the control cable from the cable-to-steering gear assembly retaining clip.
- Lower the vehicle
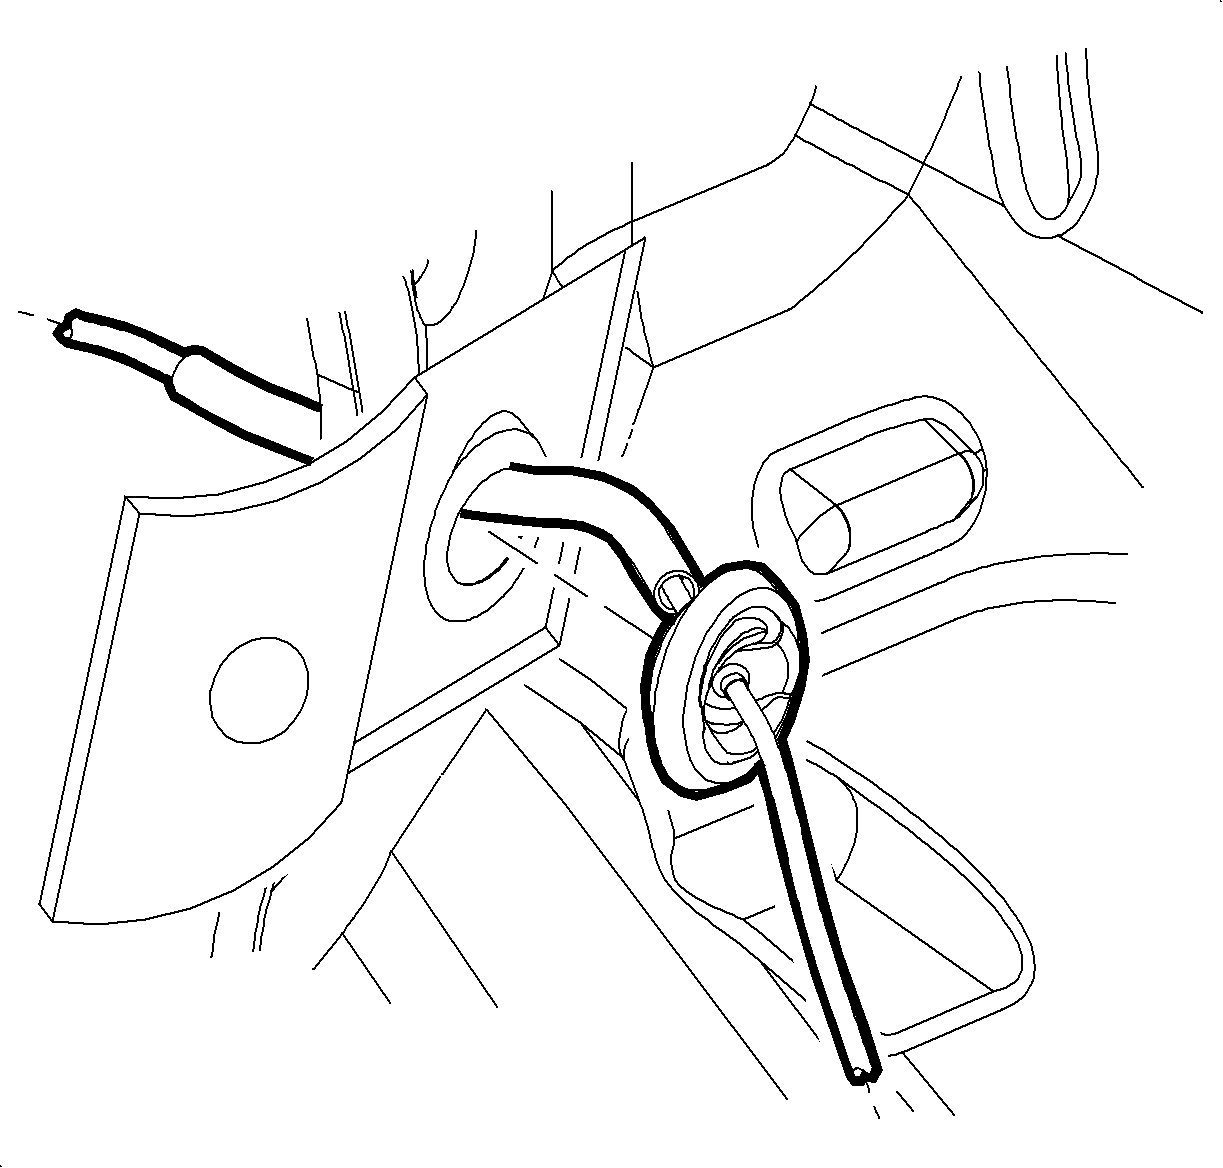
- Remove the control cable grommet from the dash panel.
- Remove the control cable from the vehicle.
Caution: Ensure that the vehicle is properly supported and squarely positioned. To help avoid personal injury when a vehicle is on a hoist, provide additional support for the vehicle on the opposite end from which the components are being removed.
Important: All shifter cable and park lock cable clips are one time usage only. Any service repair requiring cables to be disconnected from the transaxle control cable bracket or shifter assembly will require a cable clip replacement.
Important: Record all pre-set radio stations.
| 2.1. | Remove the battery cover. |
| 2.2. | Disconnect the negative battery cable. |
| 2.3. | Disconnect the positive battery cable. |
| Caution: Do not touch the cooling fan. Serious personal injury may result. |
| 2.4. | Loosen the battery hold-down screw and remove the battery. |
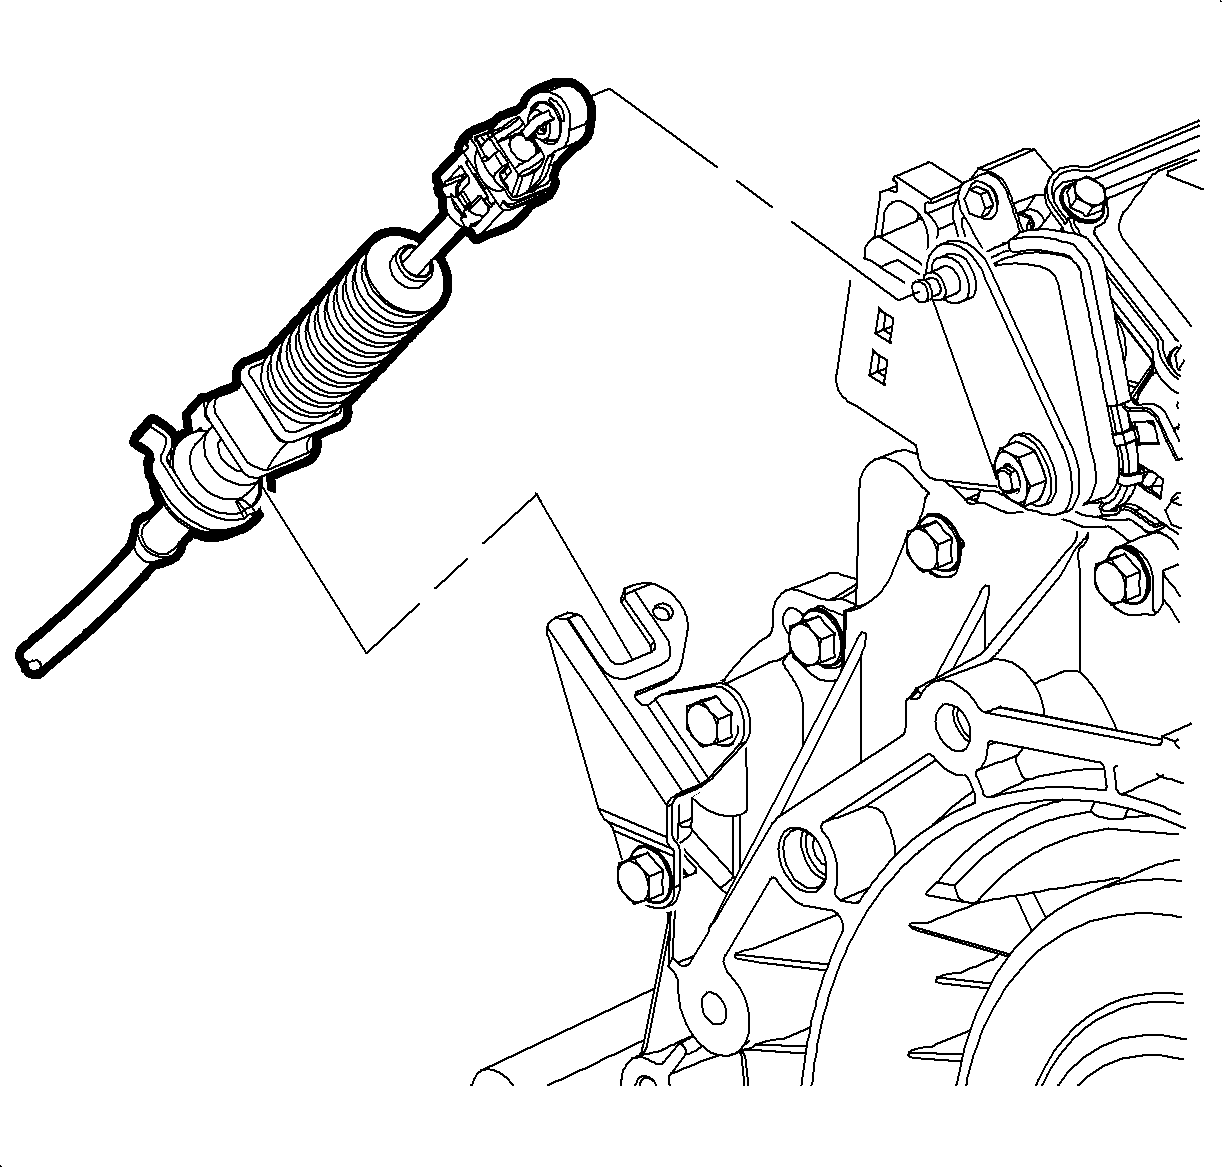
Notice: The control cable must be disconnected from the transaxle range switch lever prior to disconnecting it from the control cable bracket. Otherwise damage to the manual shift shaft may result, requiring transaxle disassembly.
Caution: Ensure that the vehicle is properly supported and squarely positioned. To help avoid personal injury when a vehicle is on a hoist, provide additional support for the vehicle on the opposite end from which the components are being removed.
Important: For VT25-E transaxles, perform steps 11-13.
Installation Procedure
- Route the control cable through the cable bracket.
- Secure the cable to the bracket with a new control cable retainer clip. An audible snap will be heard when properly installed.
- With the transaxle range switch lever located in N - Neutral, snap the cable end fitting onto the ball stud of the lever. An audible snap will be heard when properly installed.
- Position the vehicle on a hoist and raise the vehicle.
- Route the cable along the steering gear assembly into the clip and up into the dash panel.
- Lower the vehicle.
- Secure the control cable grommet by pressing the cable into the pass-thru hole in the dash panel.
- Make sure the control assembly is in the N - Neutral position.
- Connect the control cable to the control assembly. Secure with a new control cable retainer clip.
- Install the control cable onto the control assembly lever.
- Adjust the control cable assembly. Refer to Shift Cable Adjustment procedure in this section.
- Install the console. Refer to Console Replacement installation procedure in Body and Accessories.
- Install the battery tray bracket.
- Position the battery tray bracket and install and tighten the screws.
- Install the battery cooling box. Refer to Battery Box Replacement installation procedure in Engine Electrical.
- Install the battery.
- Program the radio stations.
Caution: Ensure that the vehicle is properly supported and squarely positioned. To help avoid personal injury when a vehicle is on a hoist, provide additional support for the vehicle on the opposite end from which the components are being removed.
Important: For the VT25-E transaxle, perform steps 4-6.
Notice: Use the correct fastener in the correct location. Replacement fasteners must be the correct part number for that application. Fasteners requiring replacement or fasteners requiring the use of thread locking compound or sealant are identified in the service procedure. Do not use paints, lubricants, or corrosion inhibitors on fasteners or fastener joint surfaces unless specified. These coatings affect fastener torque and joint clamping force and may damage the fastener. Use the correct tightening sequence and specifications when installing fasteners in order to avoid damage to parts and systems.
Tighten
Tighten the battery tray bracket screws to 16 N·m (12 lb ft).
| 16.1. | Insert the battery and install and tighten the battery hold-down screws. |
Tighten
Tighten the battery hold-down screws to 15 N·m (11 lb ft).
| 16.2. | Connect the positive battery cable to the battery. |
Tighten
Tighten the battery terminal bolts to 17 N·m (13 lb ft).
| 16.3. | Connect the negative battery cable to the battery. |
Tighten
Tighten the battery terminal bolts to 17 N·m (13 lb ft).
| 16.4. | Install the battery cooling box cover and install and tighten the screws. |
Tighten
Tighten the battery cooling box cover screws to 2 N·m (1.5 lb ft).
