For 1990-2009 cars only
Tools Required
J 39194-C Oxygen Sensor Wrench
Removal Procedure
- Turn the ignition OFF.
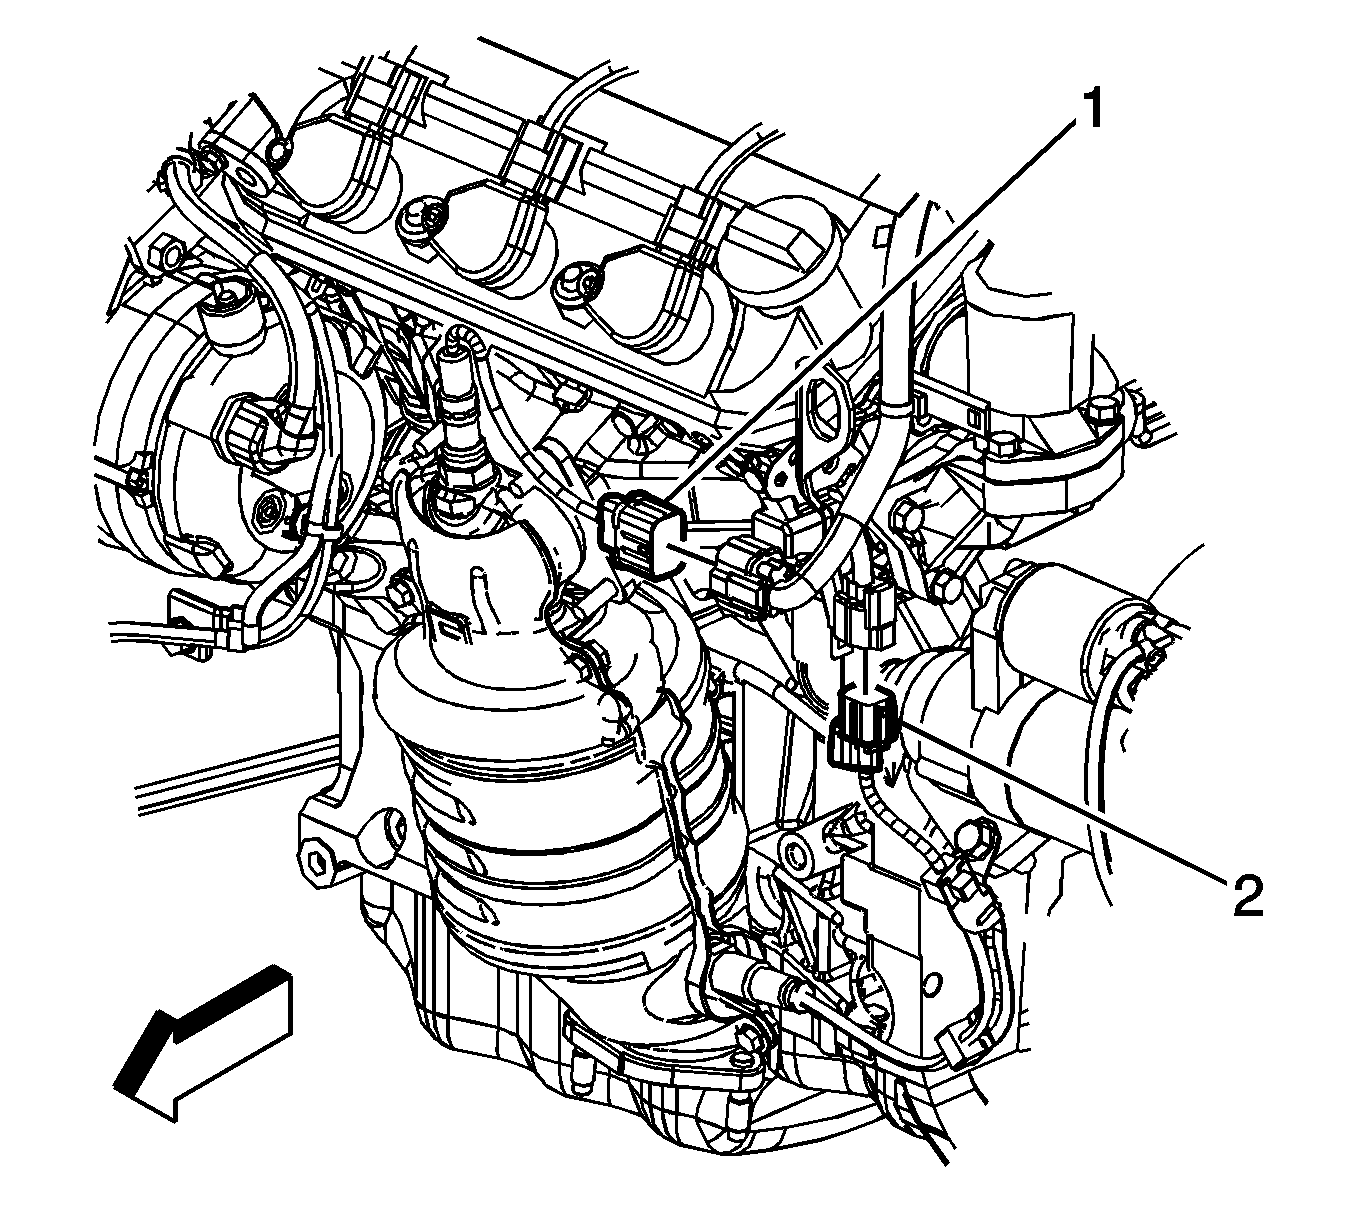
- Disconnect the bank 2 heated oxygen sensor 2 harness connector (2) and disconnect from the retaining bracket.
- Raise and support the vehicle. Refer to Lifting and Jacking the Vehicle .
- Remove the left transmission mount just enough to gain access to the heated oxygen sensor. Refer to Transmission Rear Mount Replacement .
- Remove the heated oxygen sensor wiring harness bracket and bolt.
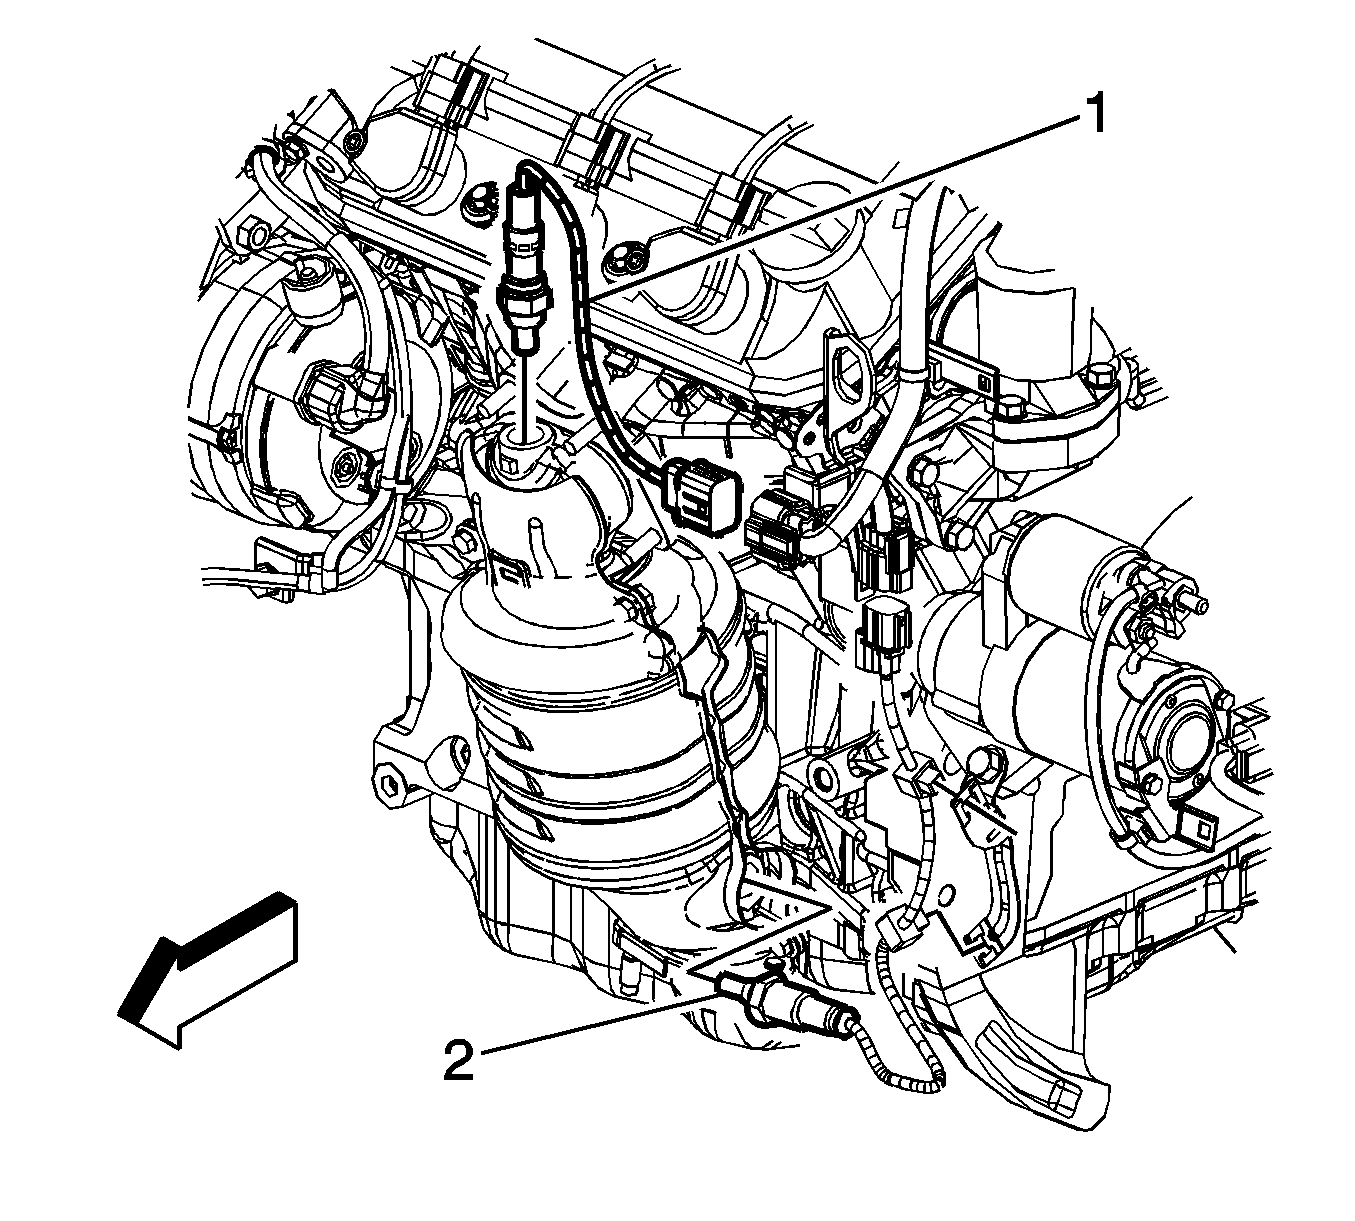
- Remove the bank 2 heated oxygen sensor 2 using the J 39194-C .
Important: Bank 2 are cylinders 2, 4, and 6 which are closest to the front of the vehicle.
Caution: Removal of the sensor is easier if the exhaust system is warmed up slightly. Be careful that it is not too hot to work on safely. Applying penetrating oil to the threads while moving the sensor back and forth will also aid in removal and will decrease the chance of exhaust pipe thread damage.
Installation Procedure
- Apply a small amount of the anti-seize compound SA P/N 21485279, or equivalent, to the threads of the heated oxygen sensor.
- Install the bank 2 heated oxygen sensor 2 using the J 39194-C .
- Install the heated oxygen sensor wiring harness bracket and bolt.
- Install the left transmission mount . Refer to Transmission Rear Mount Replacement .
- Lower the vehicle. Refer to Lifting and Jacking the Vehicle .
- Connect the heated oxygen sensor harness connector (2). Make sure the locking tab is in the full closed position.
- Start the engine and make sure no exhaust leaks exist.
Notice: Refer to Fastener Notice in the Preface section.
Tighten
Tighten the oxygen sensors (exhaust manifold) to 44 N·m (33 lb ft).
Tighten
Tighten the bolt to 40 N·m (30 lb ft).
