For 1990-2009 cars only
Tools Required
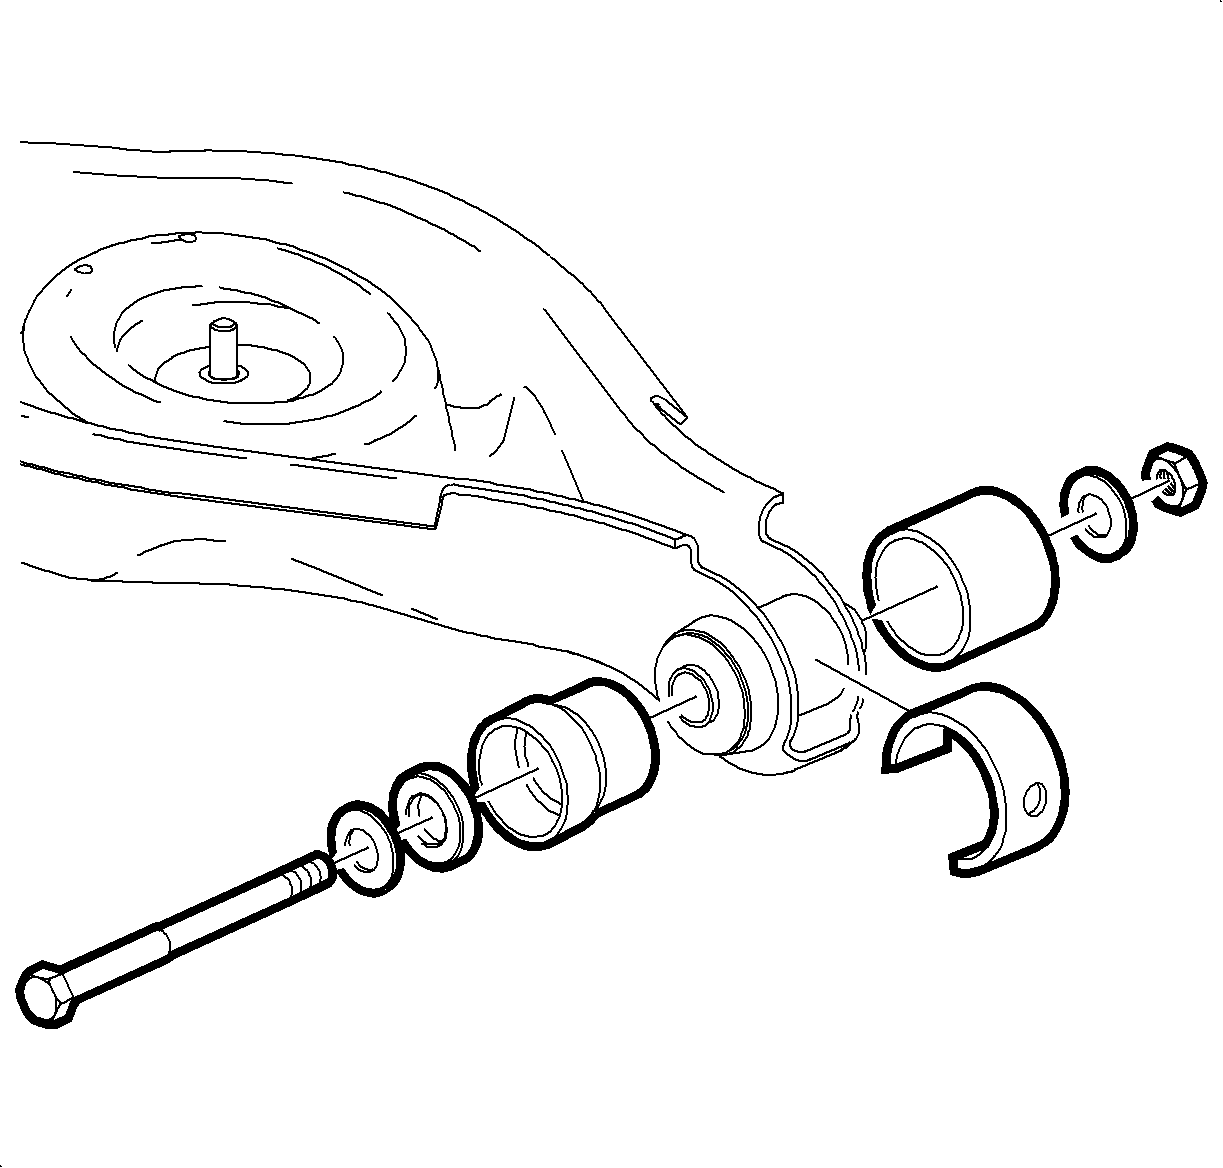
J 45097 Rear Control Arm Bushing Remover
Removal Procedure
- Remove the lower control arm. Refer to Rear Axle Lower Control Arm Replacement .
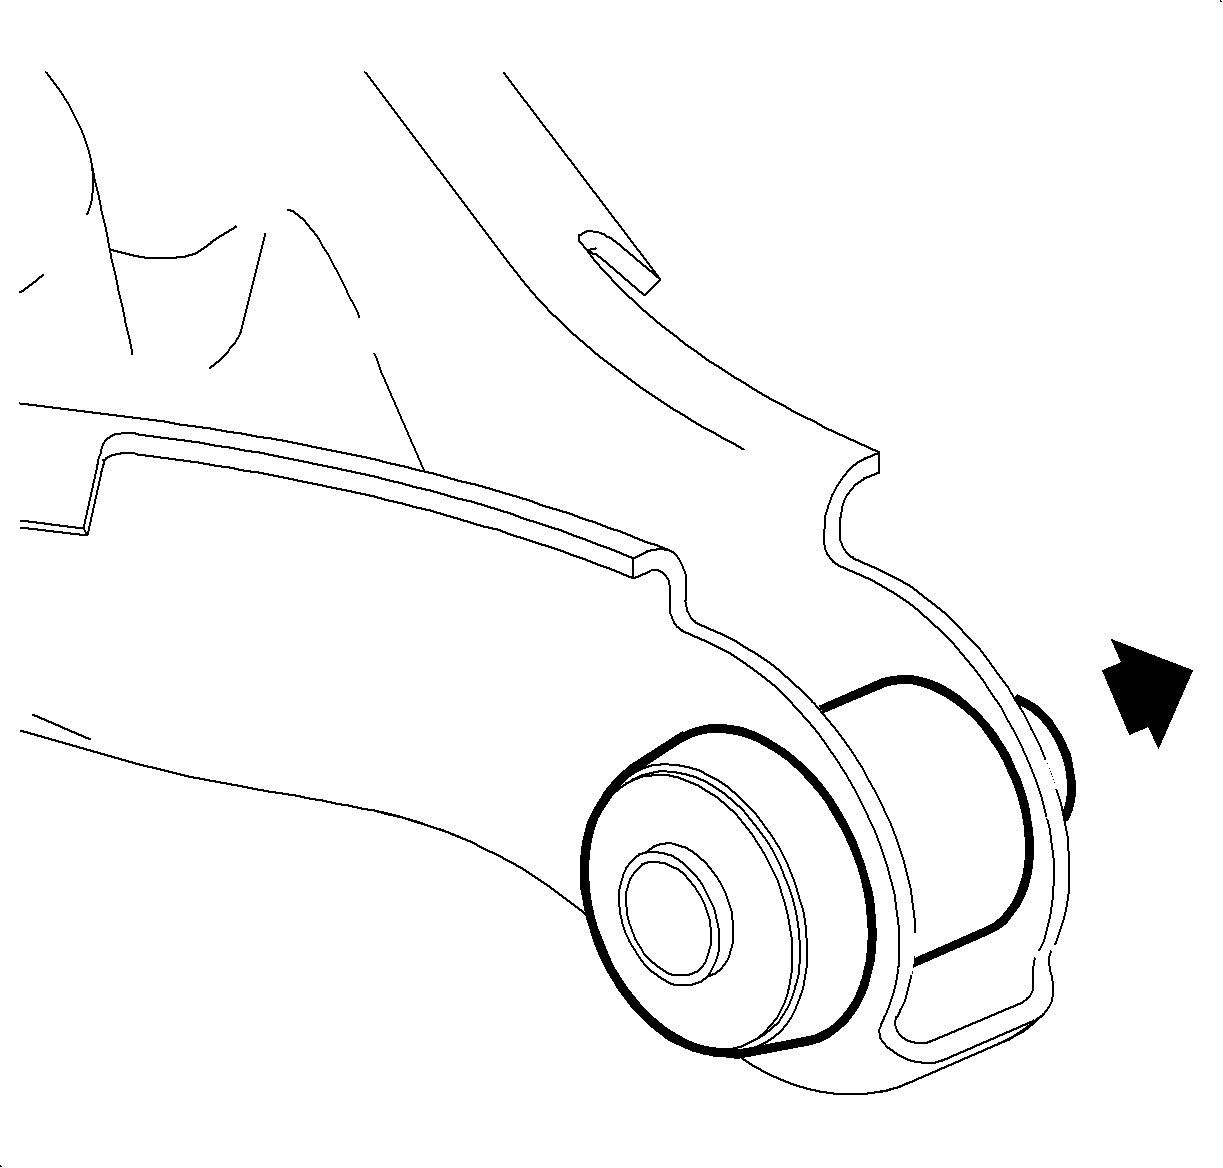
- Using the J 45097 , remove the bushing in the direction of the arrow.
- Install the push out socket against the bushing from the flanged side of the control arm.
- Install the through bolt with the washer and bearing against the push out socket.
- Install a backing socket against the control arm, opposite of the flange.
- Install the stabilizer between the control arm ears.
- Install flat washer and nut.
- Tighten the nut until the bushing is removed.


Important: Apply high pressure lube to the threads of the tool.
Installation Procedure
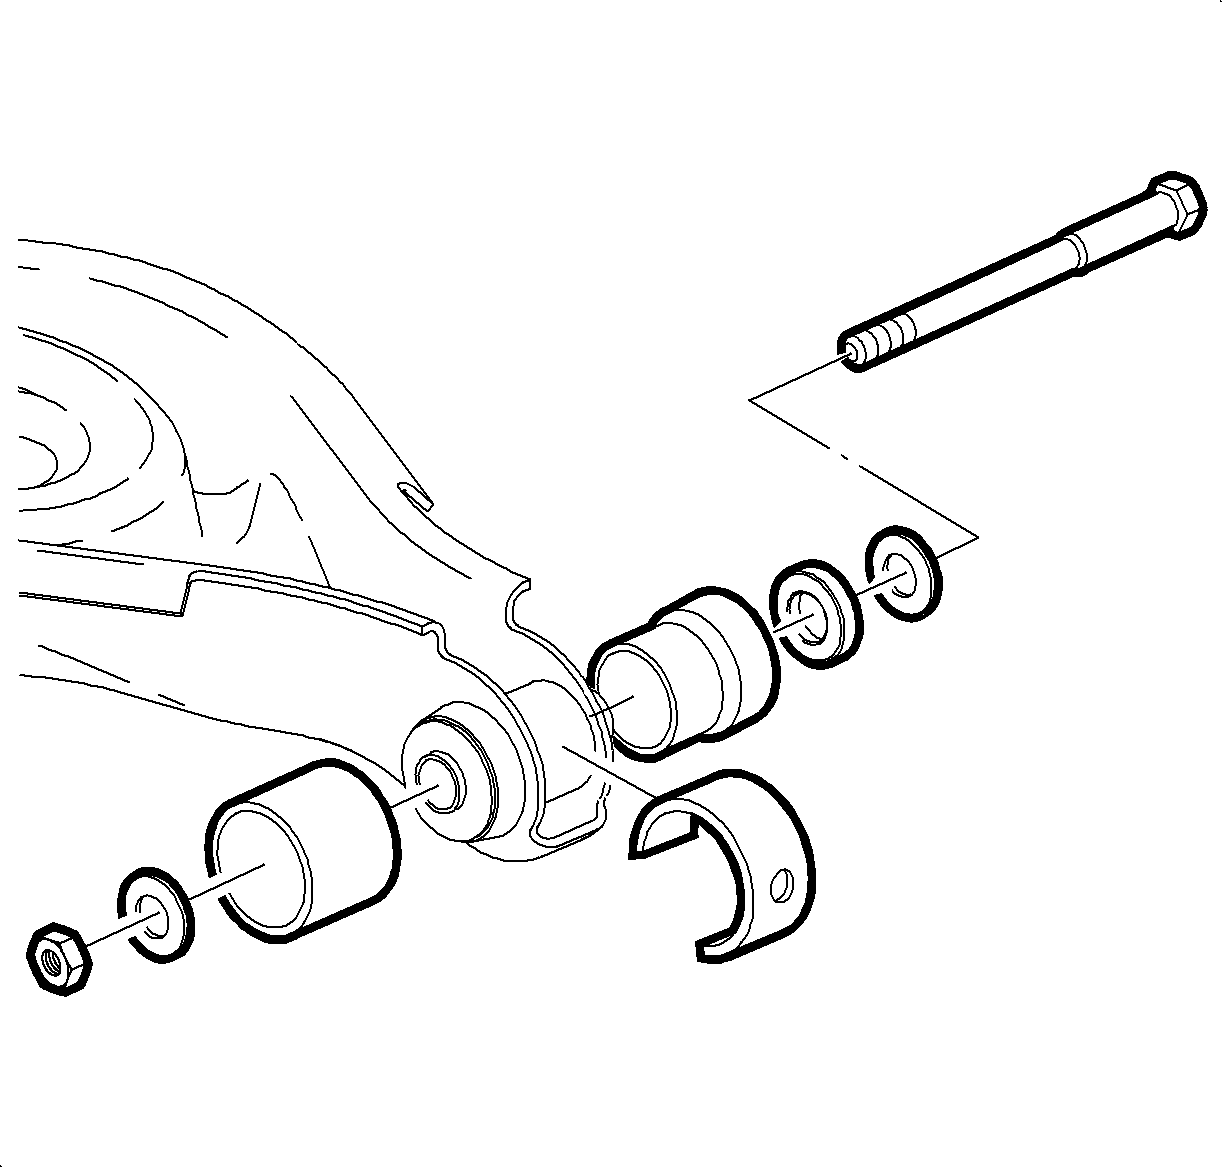
- Install a new bushing from the opposite direction.
- Using the J 45097 , reverse the tool layout from the removal procedure.
- Tighten the nut until the bushing is fully installed.
- Install the lower control arm. Refer to Rear Axle Lower Control Arm Replacement .

Important: Apply high pressure lube to the threads of the tool.
