For 1990-2009 cars only
Tools Required
| • | J 39400-A Halogen Leak Detector |
| • | SA9111E Hose Clamp Pliers |
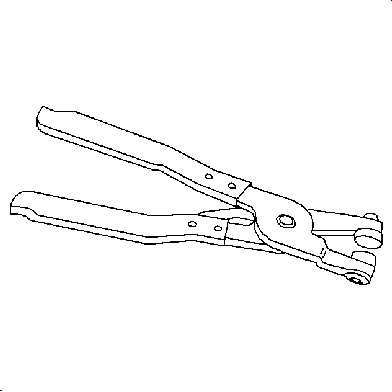
Removal Procedure
- Disable the frontal and curtain air bags. Refer to SIR Disabling and Enabling.
- Recover the refrigerant. Refer to Refrigerant Recovery and Recharging .
- Drain the engine coolant. Refer to Cooling System Draining and Filling .
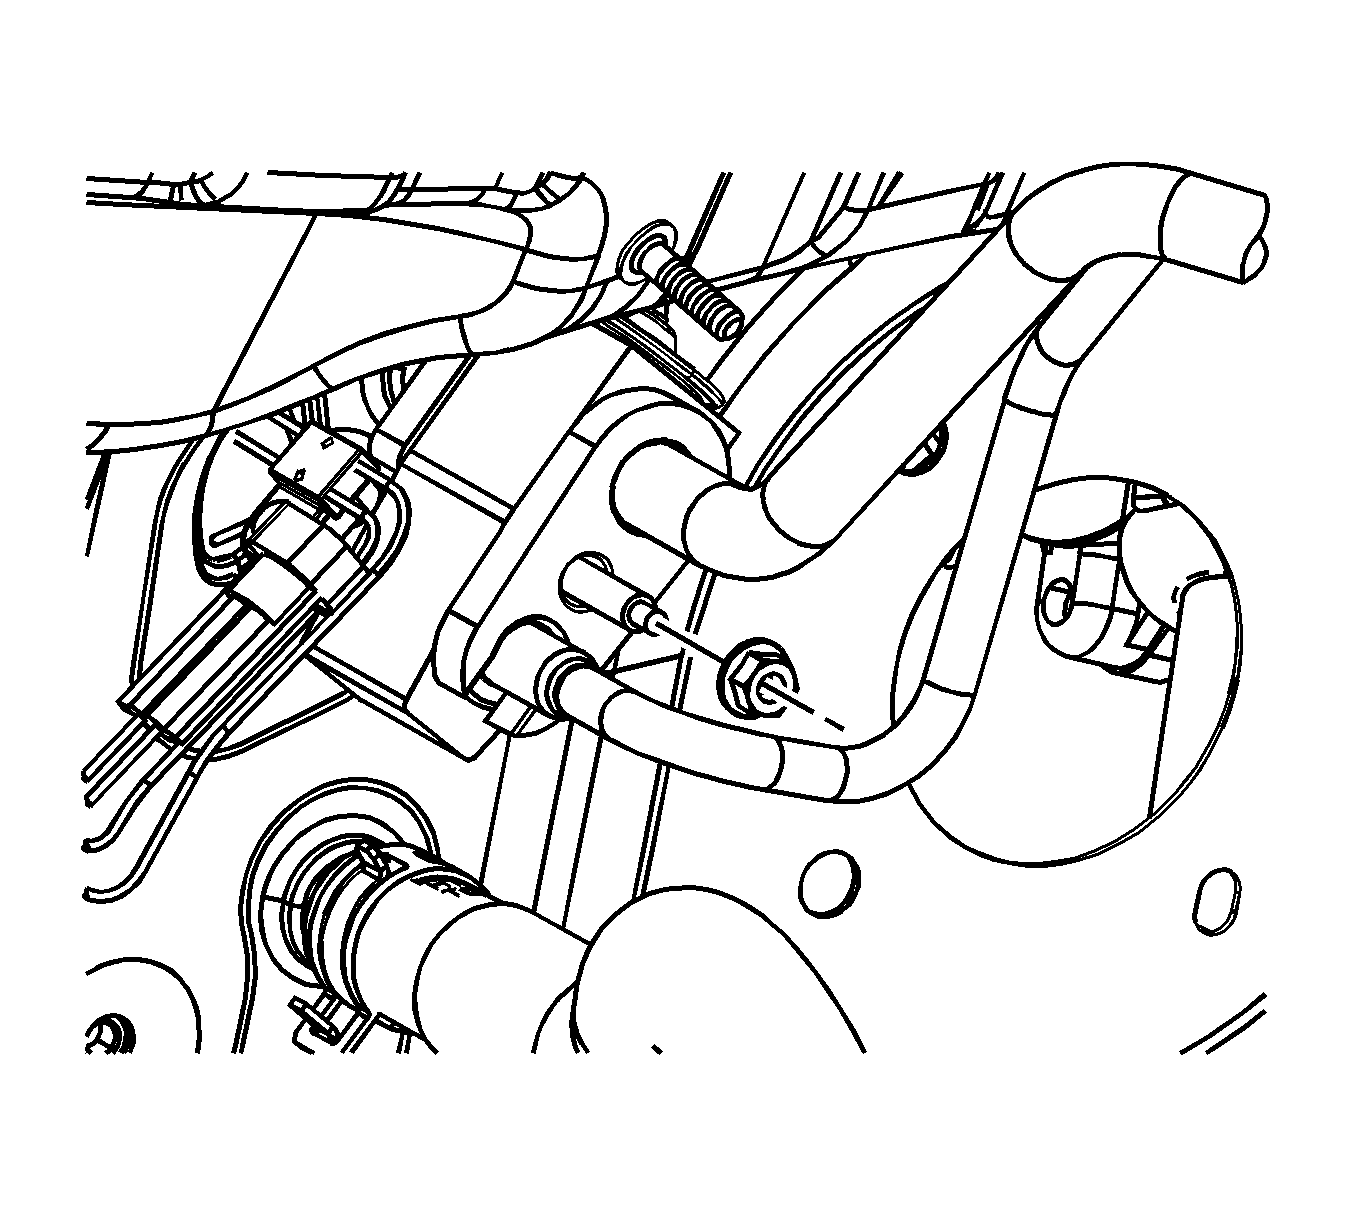
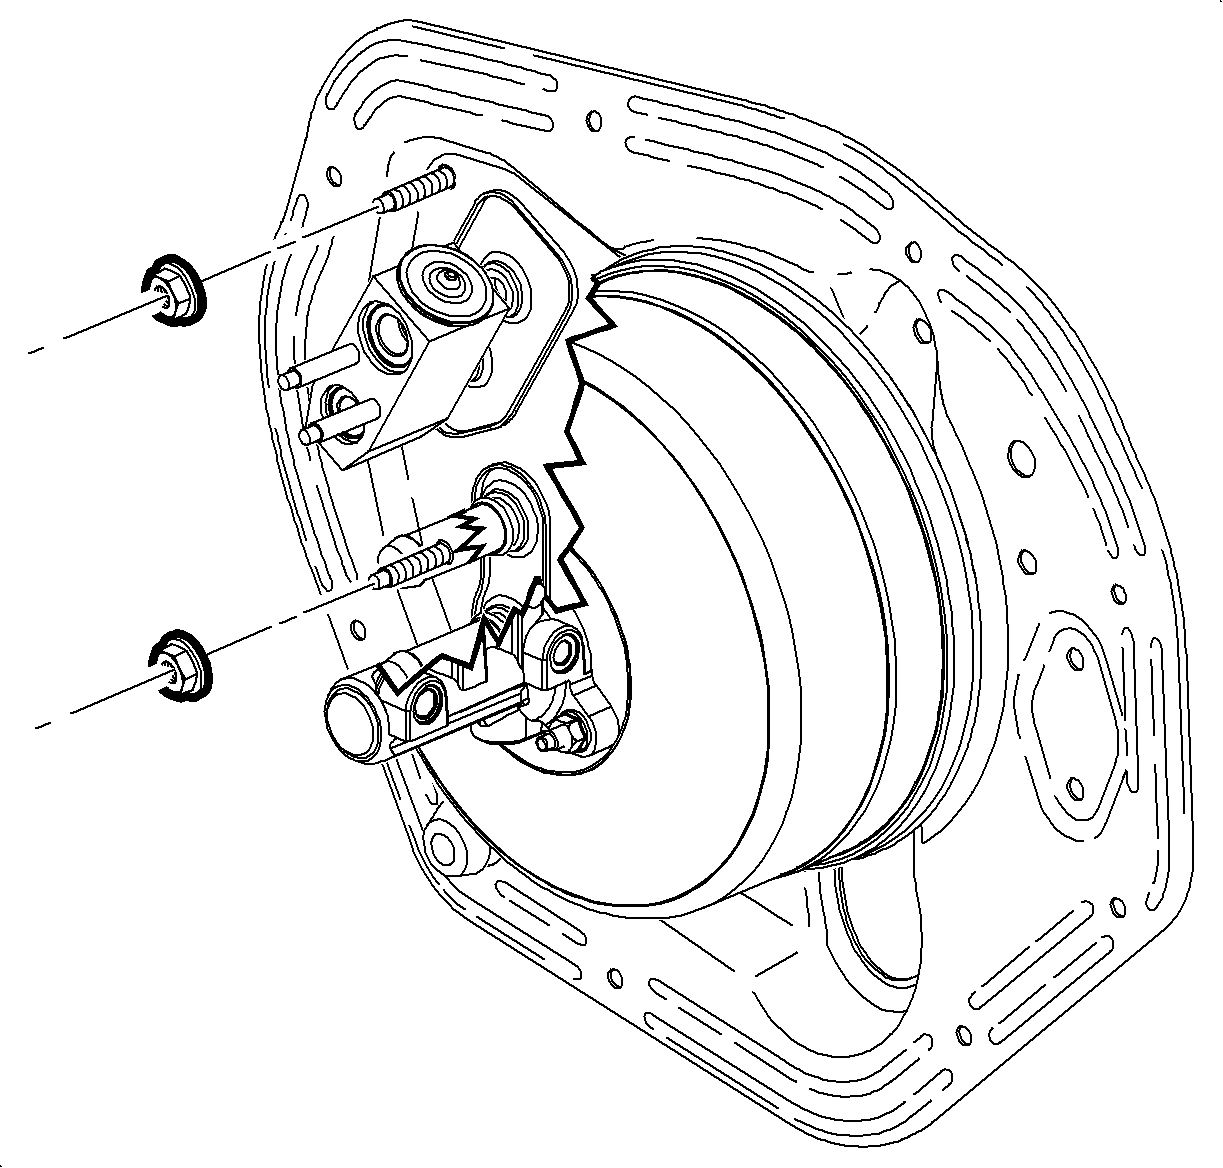
- Remove the evaporator outlet hose and liquid line nut from the thermal expansion valve (TXV).
- Remove the evaporator outlet hose from the TXV.
- Remove and discard the sealing washer from the evaporator outlet hose. Refer to Sealing Washer Replacement .
- Remove the evaporator outlet hose and liquid line from the TXV.
- Remove and discard the sealing washer from the liquid line. Refer to Sealing Washer Replacement .
- Install a protective caps to the evaporator outlet hose and the liquid line to prevent contamination and desiccant saturation.
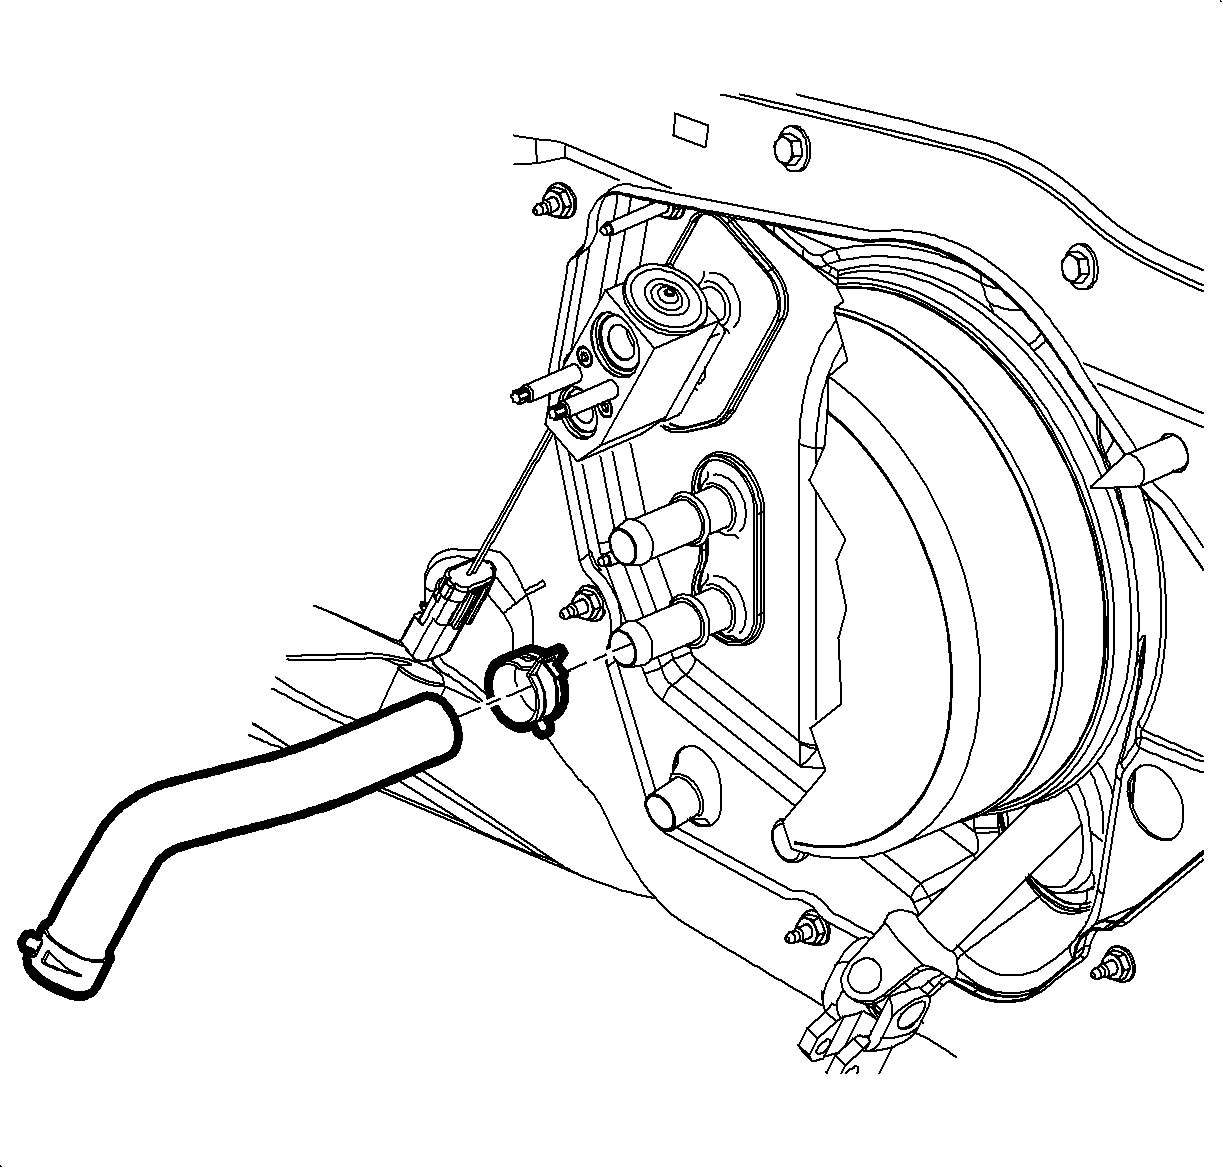
- Disconnect the TXV low temperature sensor connector from the engine harness.
- Reposition the heater outlet hose clamp at the heater core using SA9111E .
- Remove the heater outlet hose from the heater core.
- Reposition the heater inlet hose clamp at the heater core using SA9111E .
- Remove the heater inlet hose at the heater core.
- Plug the heater core and the evaporator core with clean towels to prevent spillage when the HVAC module is removed.
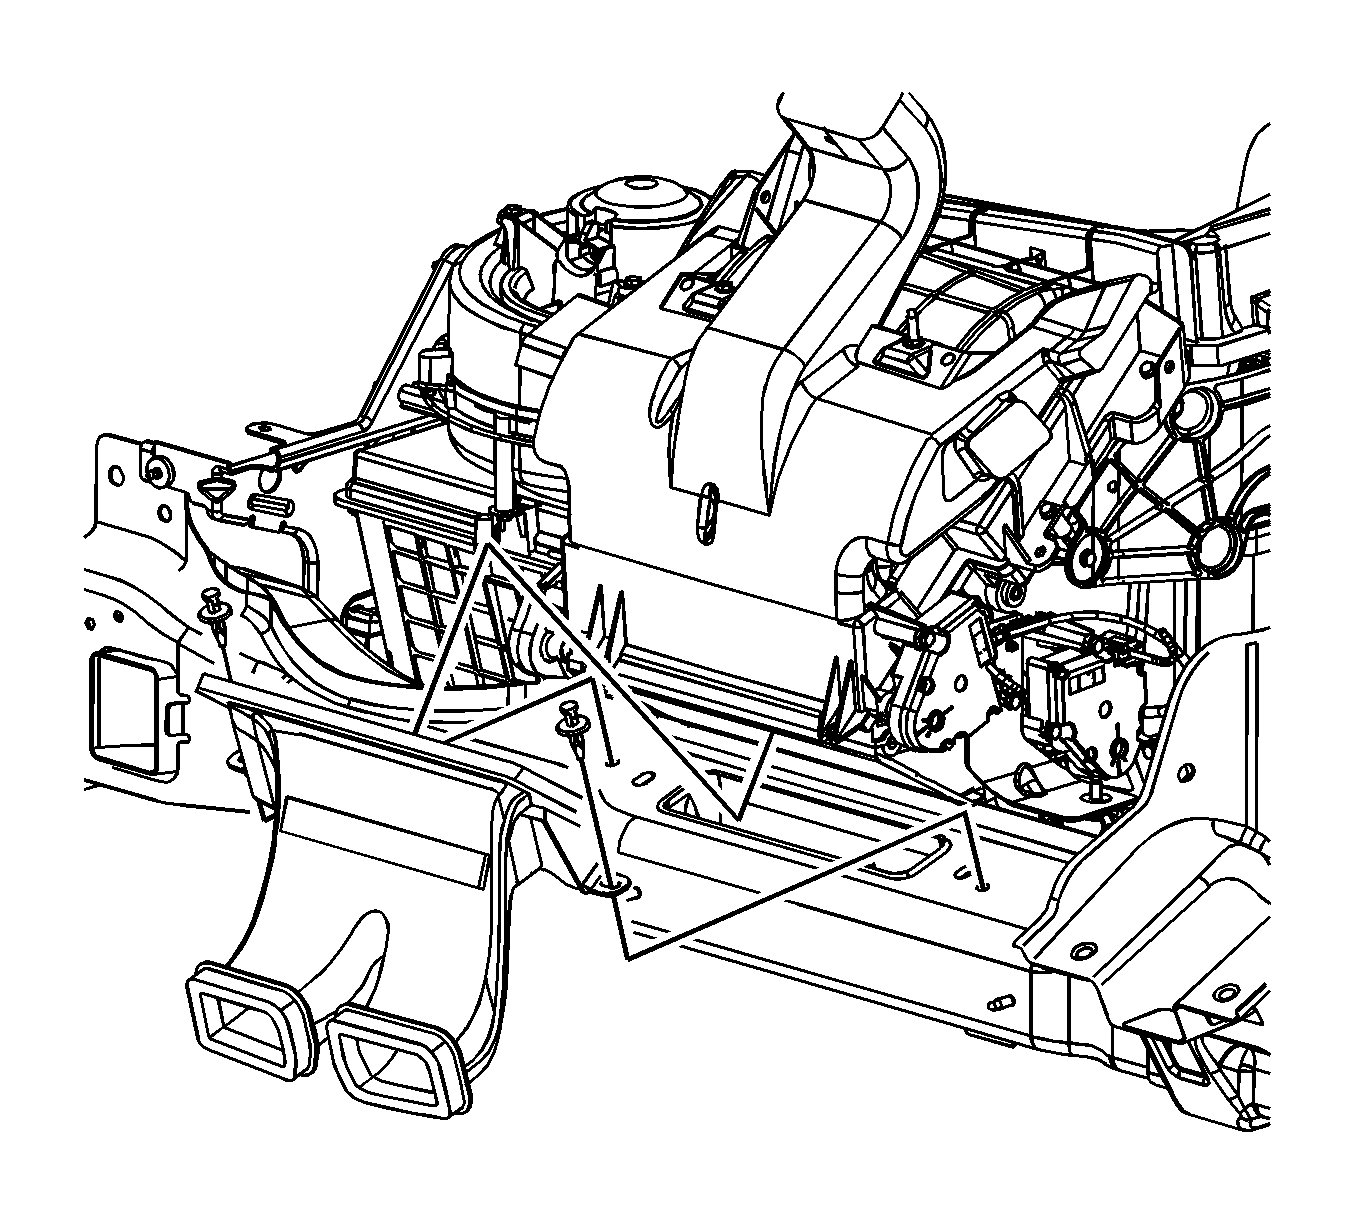
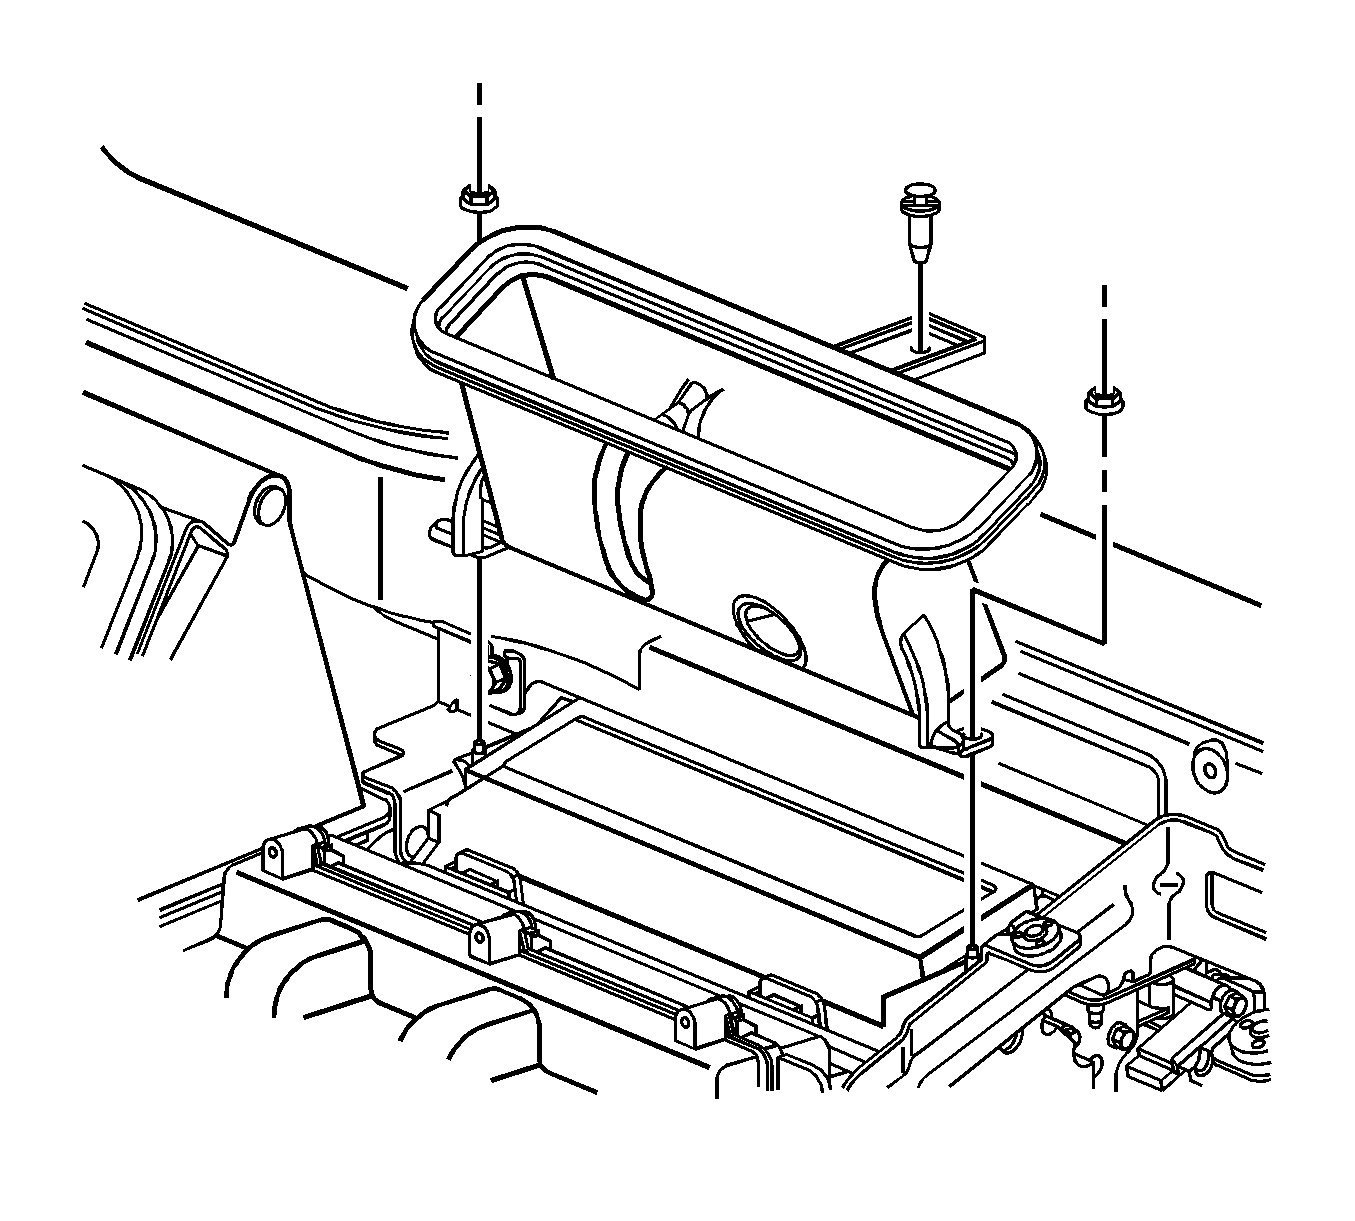
- Remove the HVAC module seal nuts from the front of dash.
- Remove the instrument panel (I/P) retainer. Refer to Instrument Panel Retainer Replacement .
- Remove the shift control bracket. Refer to Transmission Control Replacement for the 5AT transmission or Transmission Control Replacement for the 4T45-E transaxle or Transmission Control Replacement for the Getrag 5 speed transmission.
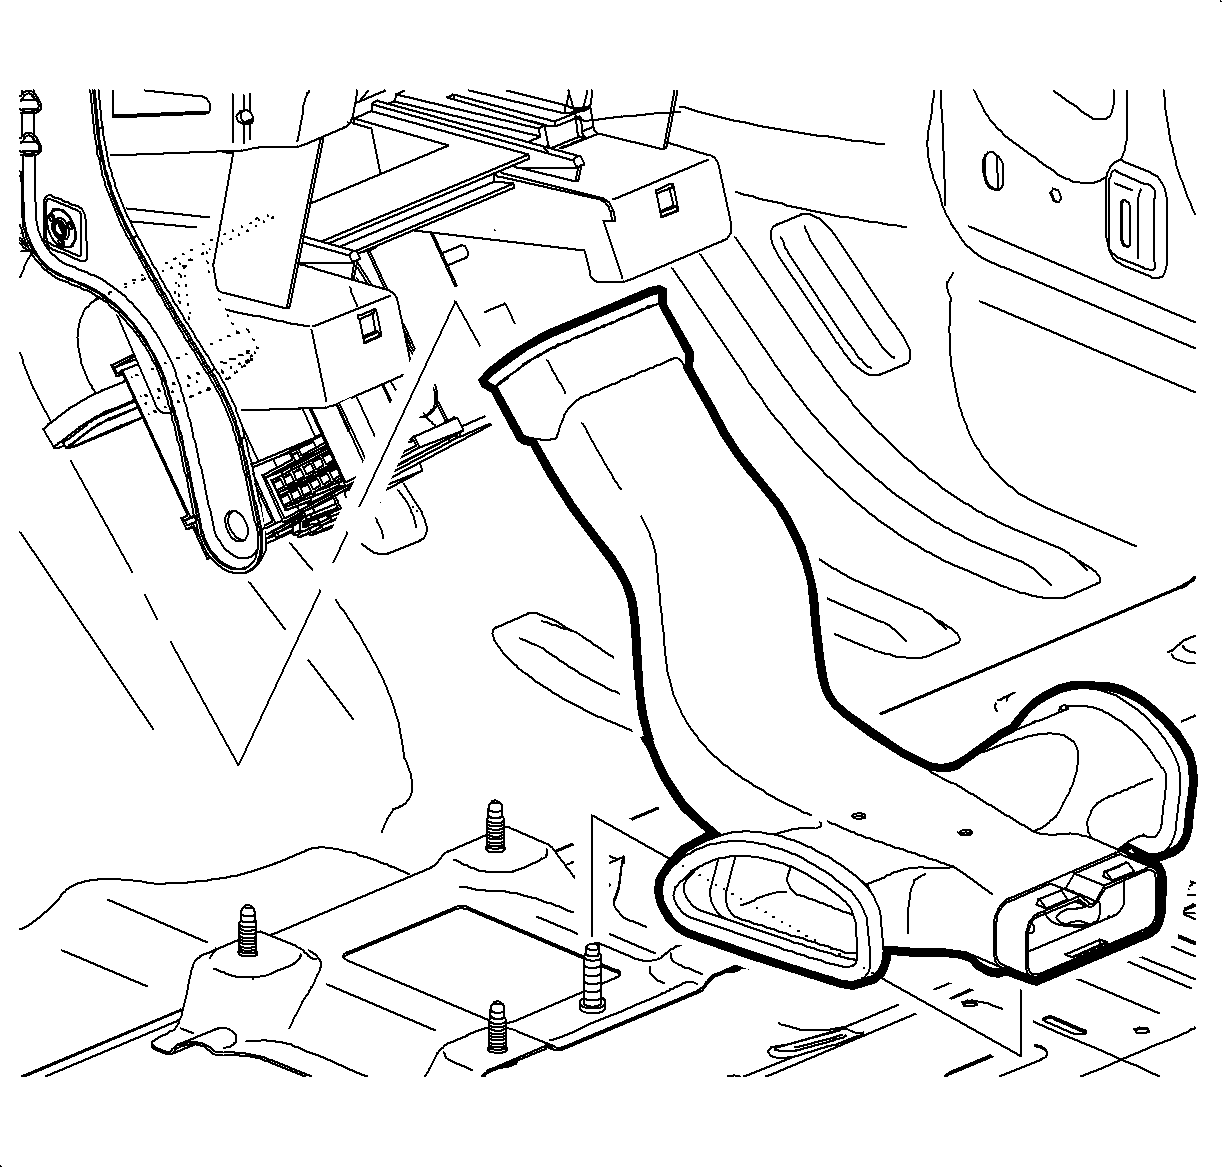
- Remove the center floor air outlet duct by sliding the duct forward then up at the rear.
- Remove the center I/P air outlet duct retainers from the cross car beam.
- Remove the center I/P air outlet duct from the cross car beam.
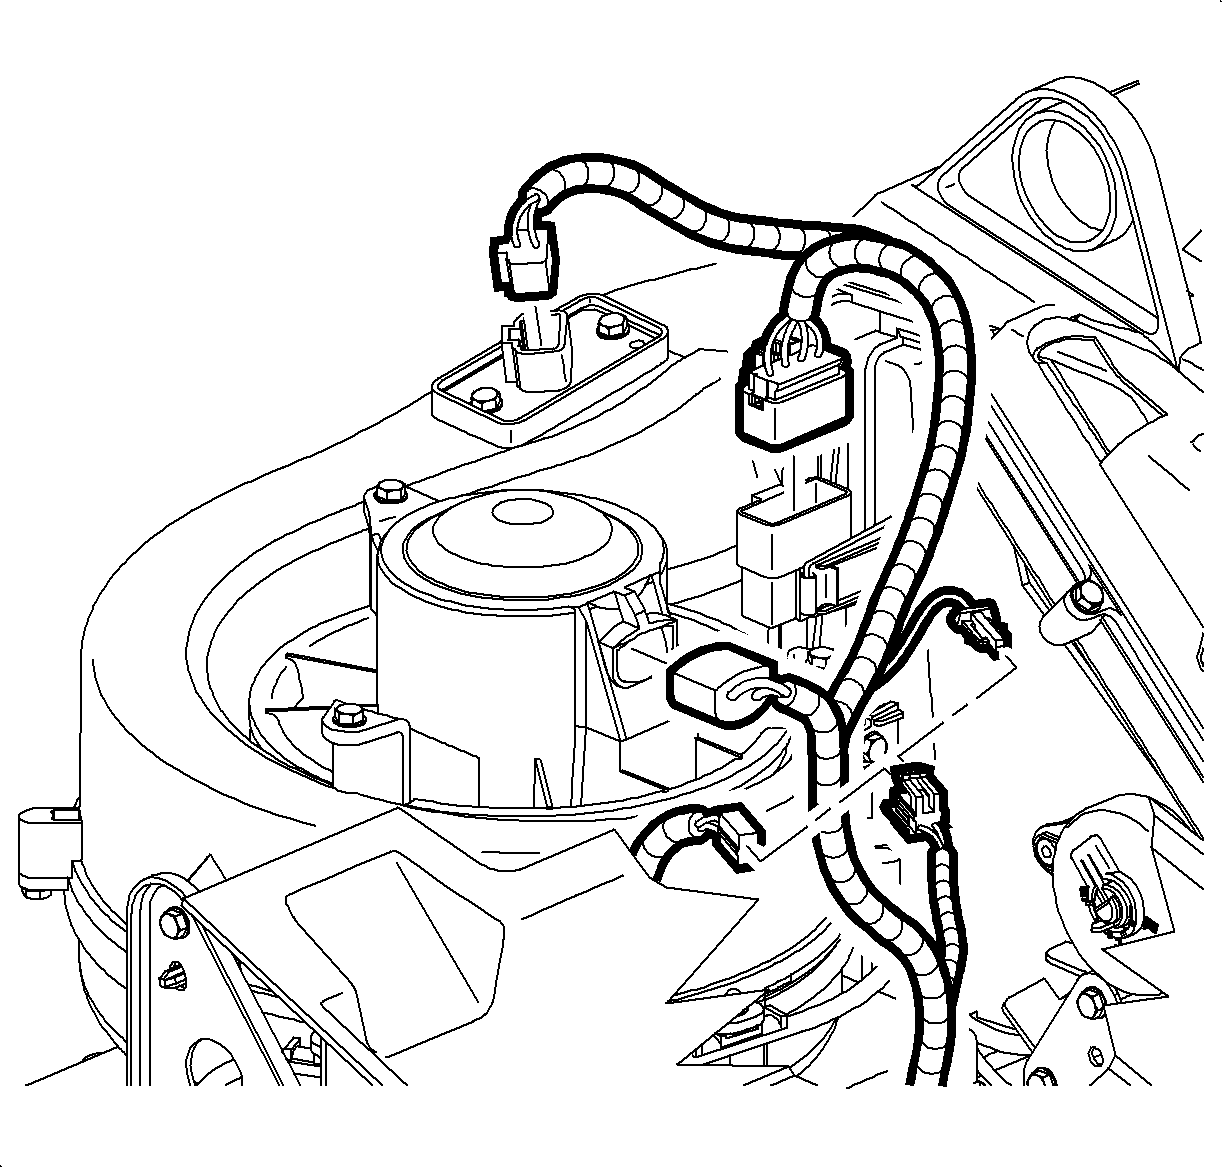
- Disconnect the blower motor electrical connector from the I/P wire harness.
- Disconnect the blower motor resistor electrical connector from the I/P wire harness.
- Disconnect the HVAC module electrical connector from the I/P wire harness.
- Remove the defroster duct retainer from the cross car beam.
- Remove the defroster duct nuts from the HVAC module.
- Remove the defroster duct from the HVAC module.
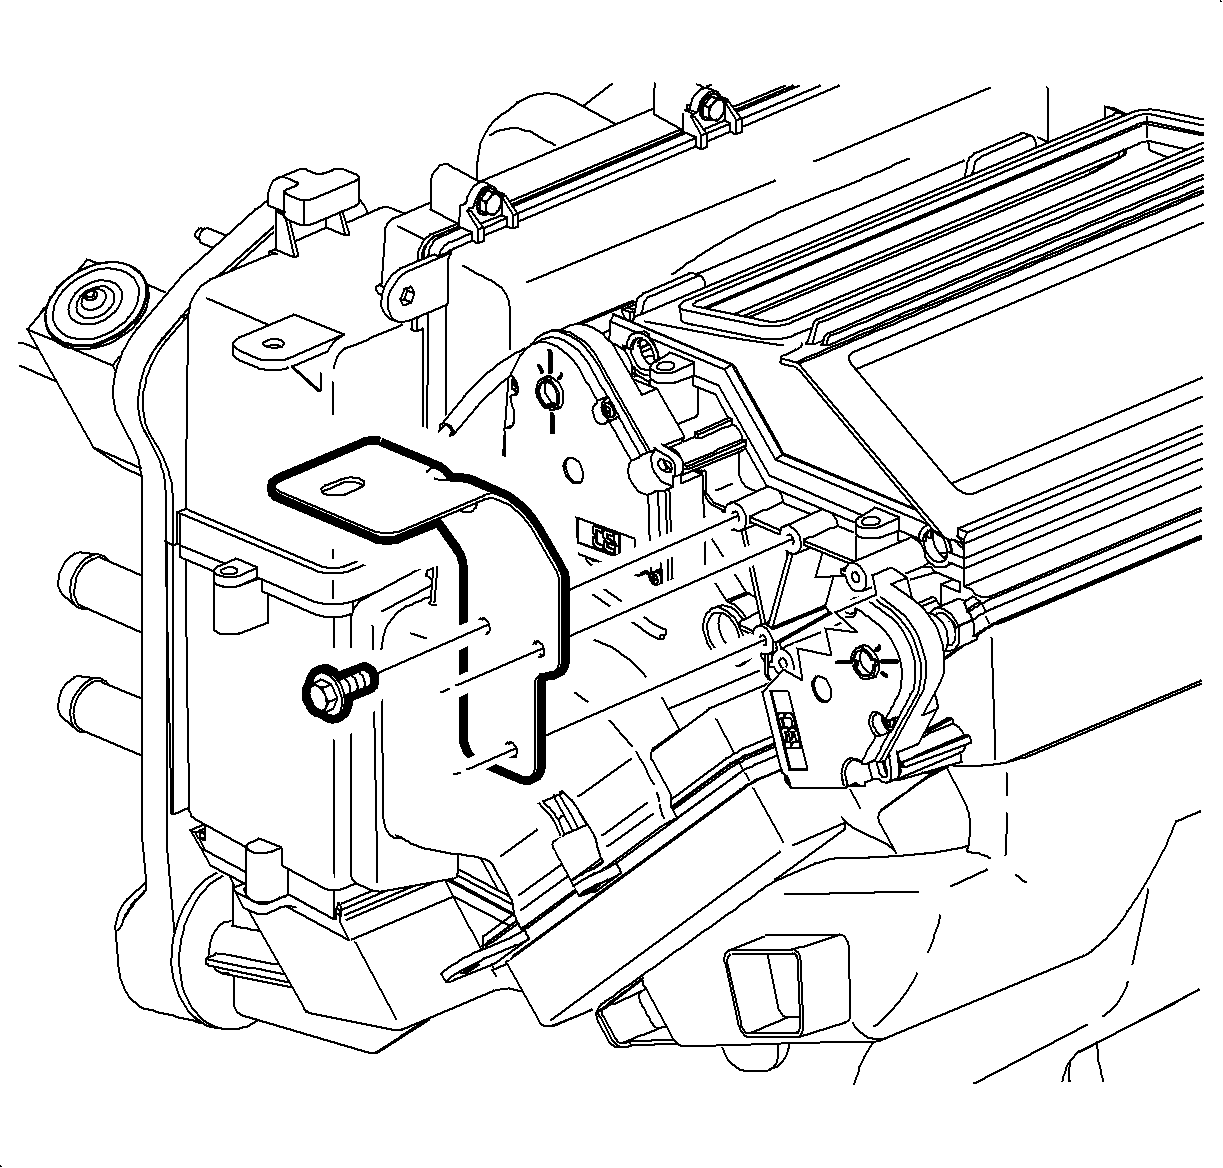
- Disconnect the I/P wire harness clips from the HVAC module.
- Remove the metal bracket nut from the cross car beam.
- Remove the metal bracket nuts from the HVAC module.
- Remove the metal bracket from the HVAC module.
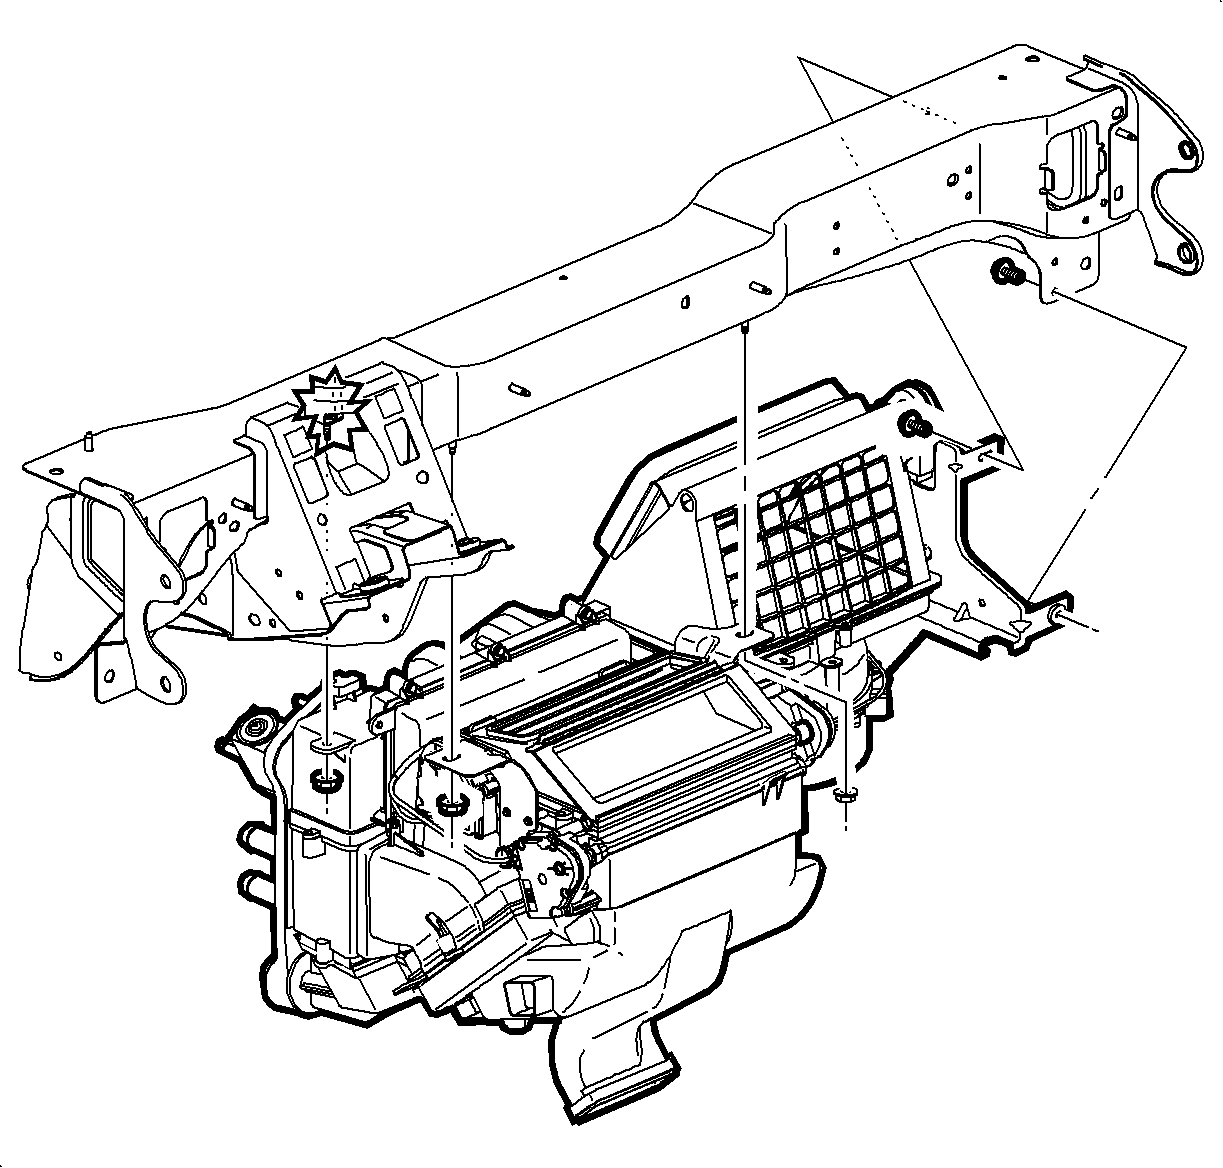
- Remove the HVAC module bolts from the right side of the cross car beam.
- Remove the HVAC module nut from the center of the cross car beam.
- Remove HVAC module bolt from the left side of the cross car beam.
- Remove the HVAC module from the vehicle.

Installation Procedure
- Inspect the front of dash seal for proper alignment.
- Inspect the seal mating surfaces to ensure there are no obstructions.
- Loose hang the HVAC module from the cross car beam.
- Install the metal bracket to the left side of the HVAC module.
- Install the metal bracket bolts to the left side of the HVAC module.
- Install the HVAC module seal nuts to the front of dash. Draw the HVAC module to the front of dash evenly by alternating between the seal nuts.
- Install the HVAC module bolts to the right side of the cross car beam.
- Push up on the right side of the HVAC module while tightening the HVAC module bolts to the cross car beam.
- Install the HVAC module bolt to the left side of the cross car beam.
- Install the HVAC module nuts to the left side and center of the cross car beam.
- Install the defroster duct to the HVAC module.
- Install the defroster duct nuts to the HVAC module.
- Install the defroster duct retainer to the cross car beam.
- Connect the I/P wire harness clips to the HVAC module.
- Connect the blower motor electrical connector to the I/P wire harness.
- Connect the blower motor resistor electrical connector to the I/P wire harness.
- Connect the HVAC module electrical connector to the I/P wire harness.
- Install the center I/P duct to the cross car beam.
- Install the center I/P duct retainers to the cross car beam.
- Install the center floor air outlet by sliding forward onto the front floor air outlet then down and rearward over the rear floor air outlet.
- Install the shift control bracket. Refer to Transmission Control Replacement for the 5AT transmission or Transmission Control Replacement for the 4T45-E transaxle or Transmission Control Replacement for the Getrag 5 speed transmission.
- Install the I/P retainer. Refer to Instrument Panel Retainer Replacement .
- Install the heater inlet hose to the heater core.
- Install the heater inlet hose clamp to the heater core using SA9111E .
- Install the heater outlet hose to heater core outlet.
- Install the heater outlet hose clamp to the heater core using SA9111E .
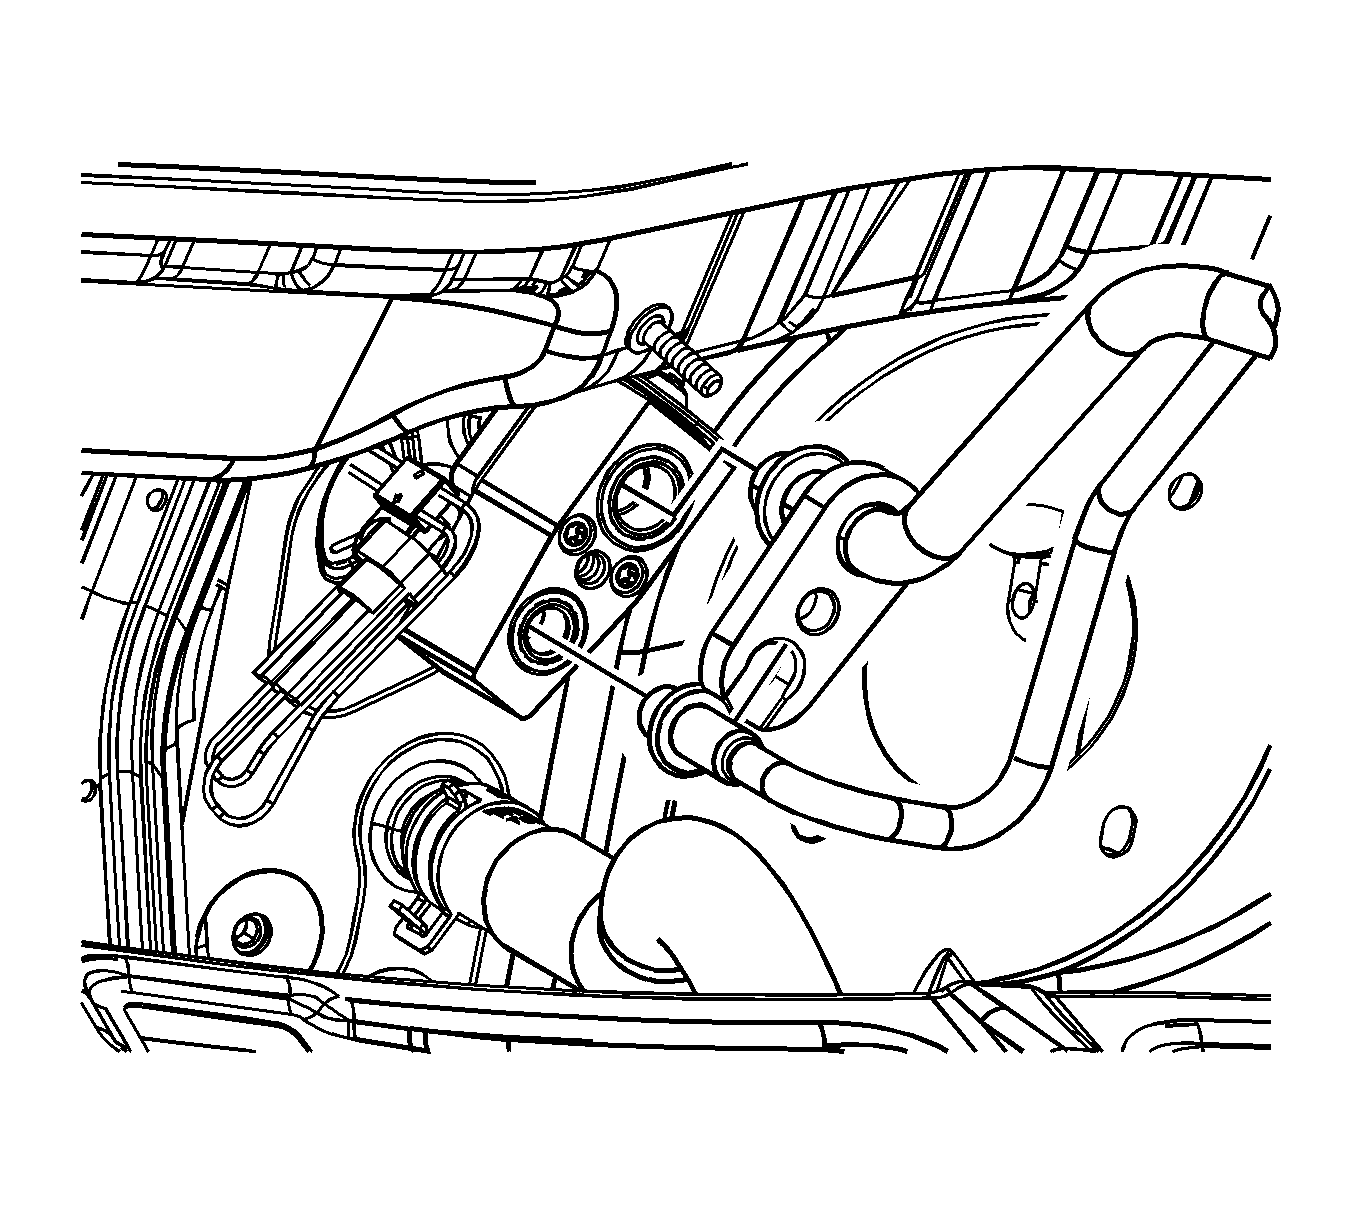
- Ensure the mating surfaces are clean and free of debris, and install new seal washers to the evaporator outlet hose and the liquid line. Refer to Sealing Washer Replacement .
- Install the evaporator outlet hose and the liquid line to the TXV.
- Install the evaporator outlet hose and liquid line nut to the TXV.
- Fill the coolant. Refer to Cooling System Draining and Filling .
- Evacuate and charge the A/C system. Refer to Refrigerant Recovery and Recharging .
- Test the affected A/C joints for leaks using J 39400-A .
Important: Make sure the HVAC module seals are flush and even as they meet their mating surfaces. This will reduce the chance of leaks and ensure proper fit.
Important: Make sure the plastic molded in bracket at the center of the HVAC module is forward of the cross car beam during installation.
Notice: Refer to Fastener Notice in the Preface section.
Tighten
Tighten the bolts to 2 N·m (18 lb in).
Important: New front of dash seal nuts must be used to prevent leaks.
Tighten
Tighten the nuts to 8 N·m (71 lb in).
Tighten
Tighten the bolts to 8 N·m (71 lb in).
Tighten
Tighten the bolt to 8 N·m (71 lb in).
Tighten
Tighten the nuts to 8 N·m (71 lb in).
Tighten
Tighten the nuts to 2.5 N·m (22 lb in).
Tighten
Tighten the nut to 16 N·m (12 lb ft).
