For 1990-2009 cars only
Removal Procedure
- Remove the HVAC module. Refer to HVAC Module Assembly Replacement .
- Remove the evaporator case assembly. Refer to Air Conditioning (A/C) Evaporator Case Assembly Replacement .
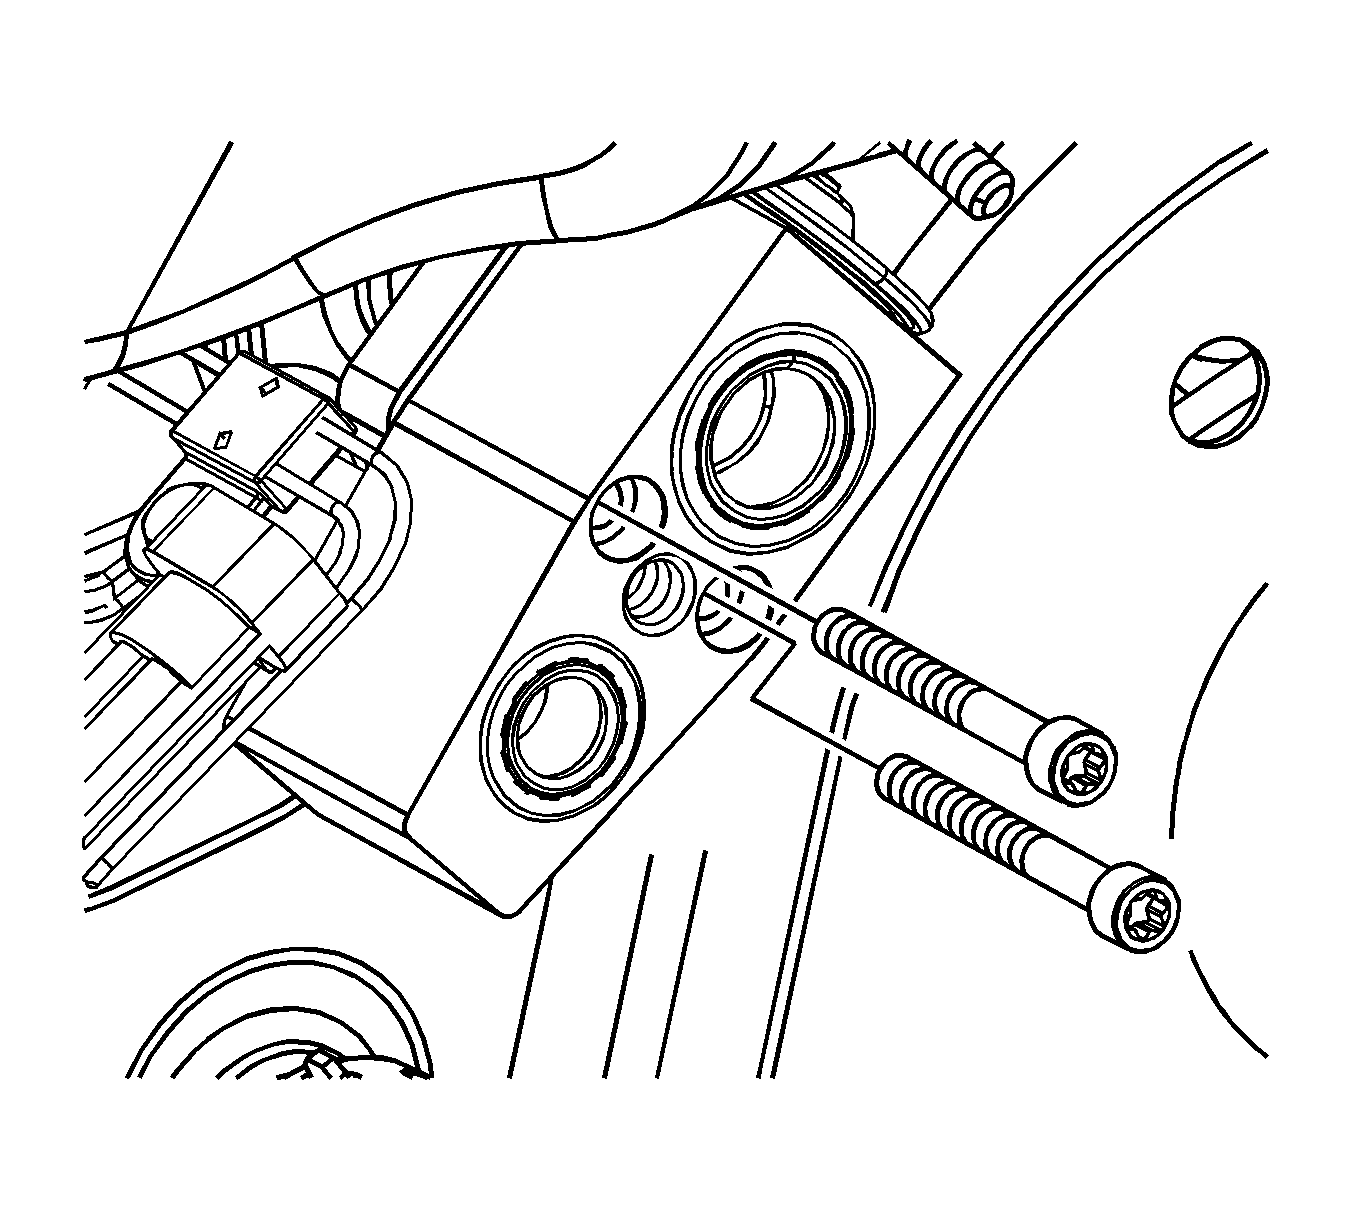
- Remove the thermal expansion valve (TXV) bolts from the backing plate.
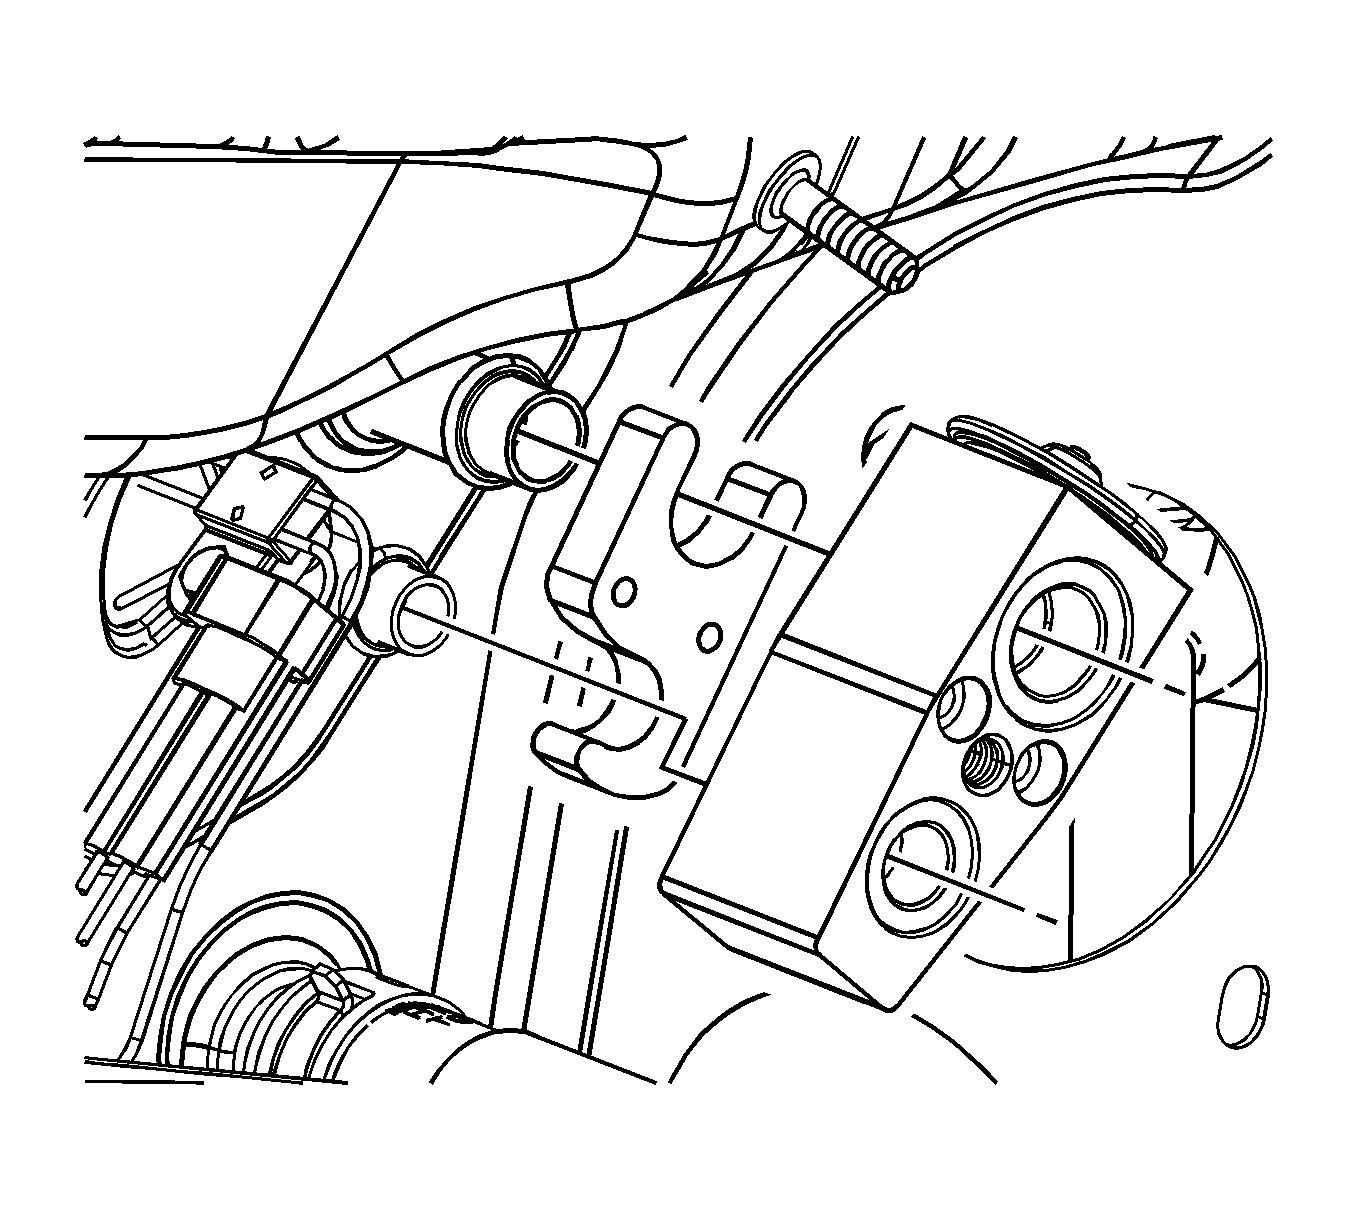
- Remove the TXV and the backing plate from the evaporator pipes.
- Remove the O-rings from evaporator pipes. Refer to O-Ring Replacement .
- Install protective caps to the evaporator pipes to prevent system contamination.
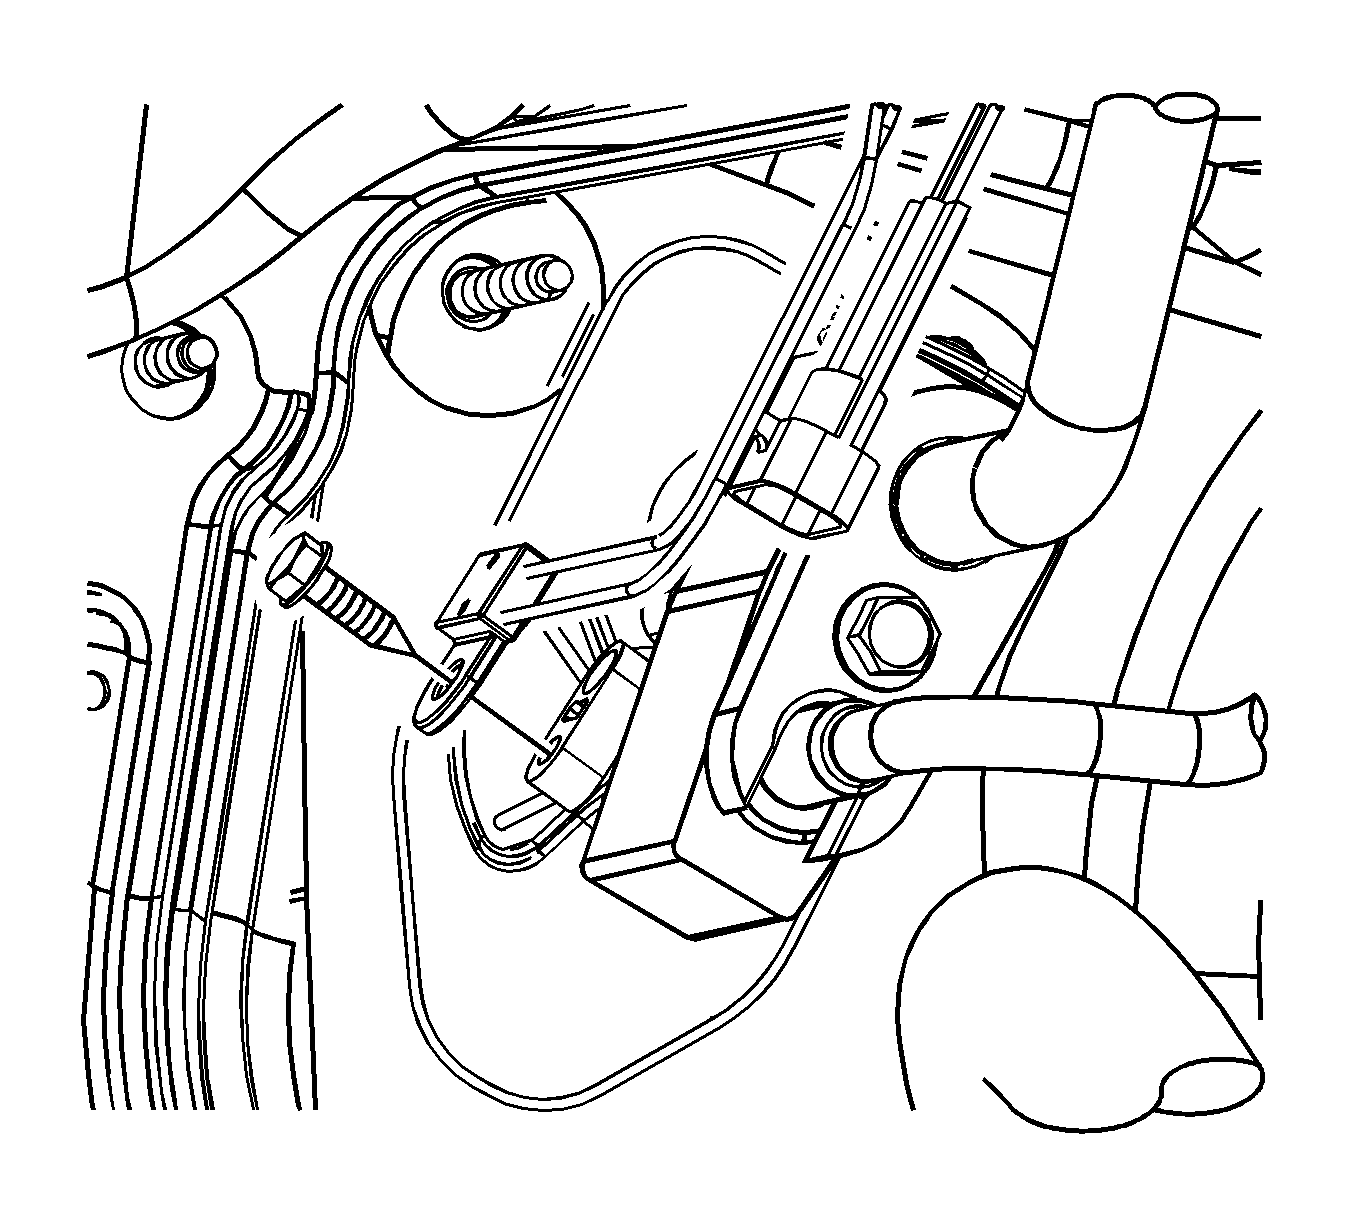
- Disconnect the thermal expansion valve (TXV) temperature sensor from the engine harness.
- Remove the temperature sensor screw from the evaporator pipe.
- Remove the temperature sensor from the evaporator pipe.
- Remove the HVAC module front of dash seal.
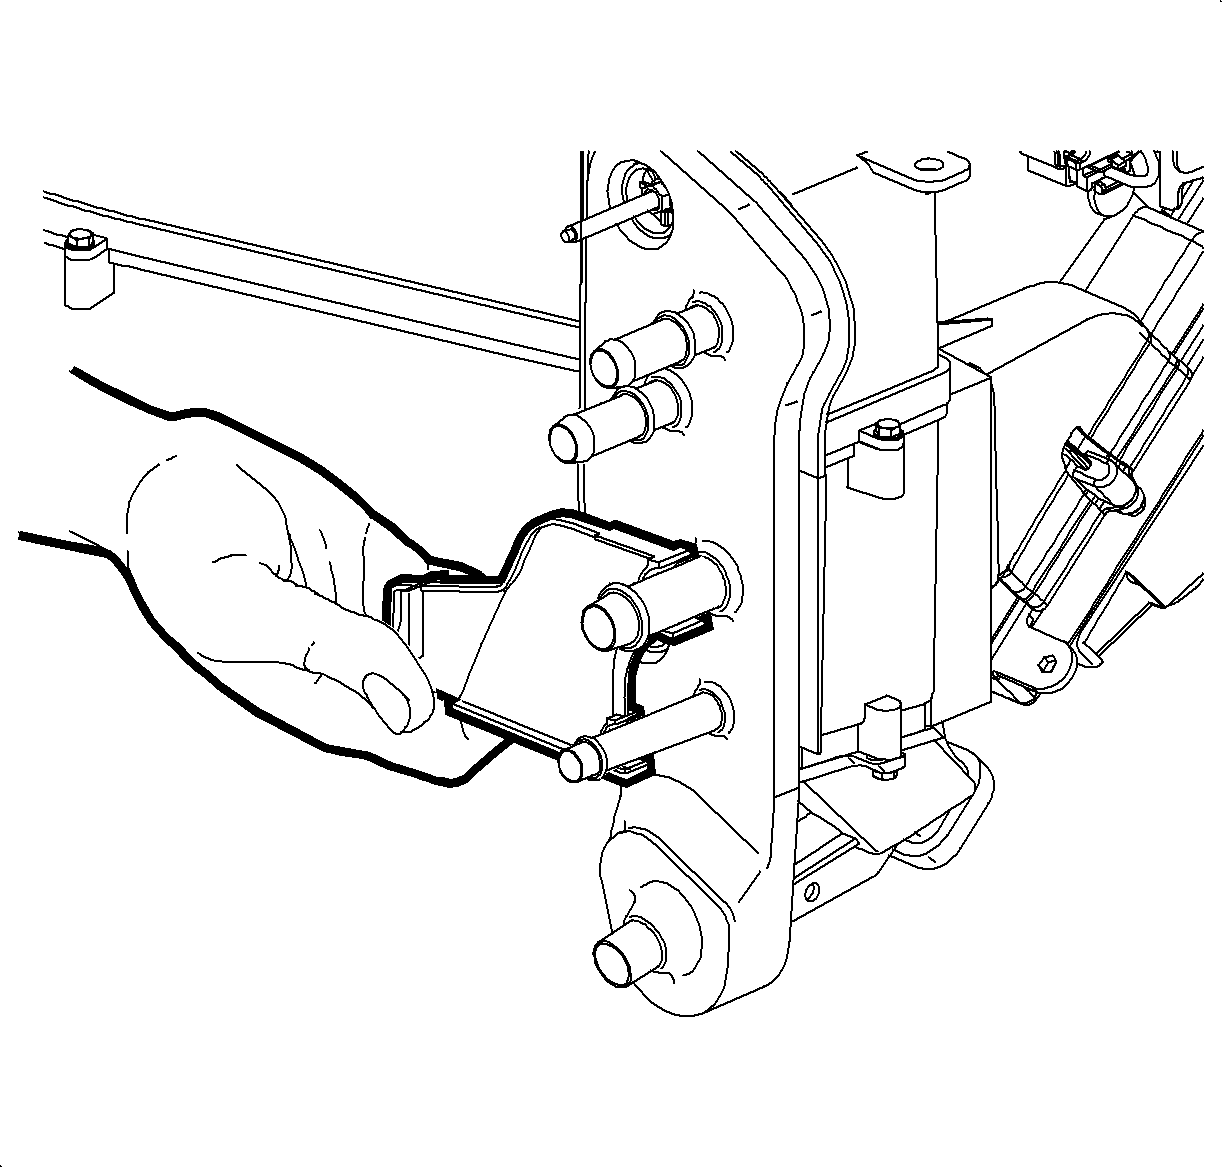
- Remove the evaporator pipe cover screw from the blower case assembly.
- Remove the evaporator pipe cover from the blower case assembly.
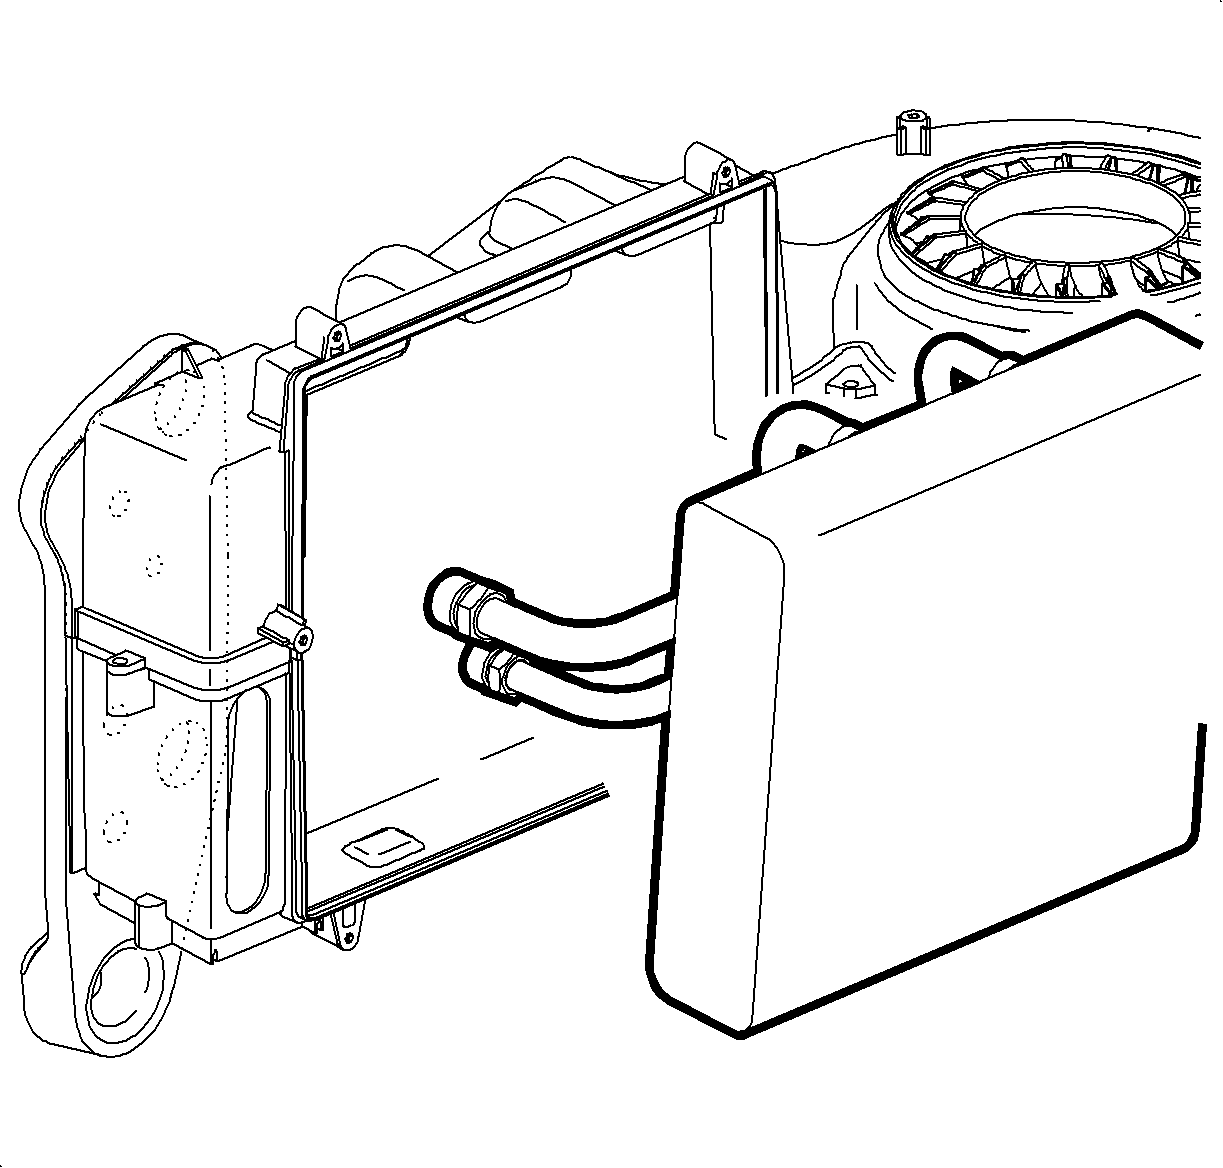
- Remove the evaporator core from the blower case assembly. Spraying the perimeter of the evaporator core seal with a soap and water mixture will ease removal.
Installation Procedure
- Add the proper amount of polyalkylene glycol (PAG) oil to the evaporator core. Refer to Refrigerant System Capacities .
- Inspect the seal around the evaporator core. Make sure the seal is in correct position and retained properly.
- Spray the seal with a soap and water mixture to ease the installation of evaporator core.
- Install the evaporator core to the blower case assembly.
- Install the evaporator pipe cover.
- Install the evaporator pipe cover screw.
- Install the HVAC module front of dash seal.
- Fill the temperature sensor housing in the TXV with the thermal grease included with the service kit.
- Install the temperature sensor and wipe away the excess grease.
- Install the temperature sensor screw.
- Connect the temperature sensor to the engine harness.
- Remove the protective caps from the evaporator pipes and ensure the seal areas are clean, dry and lint free.
- Install new O-rings to the evaporator pipes. Refer to O-Ring Replacement .
- Instal the TXV and the backing plate to the evaporator pipes.
- Install the TXV screws to the backing plate.
- Install the evaporator case assembly. Refer to Air Conditioning (A/C) Evaporator Case Assembly Replacement .
- Install the HVAC module. Refer to HVAC Module Assembly Replacement .


Notice: Refer to Fastener Notice in the Preface section.
Tighten
Tighten the screw to 1 N·m (9 lb in).

Important: The TXV cavity for temperature sensor must be packed with thermal grease to ensure functionality.
Tighten
Tighten the screw to 8.5 N·m (75 lb in).

Important: Use only R-12 refrigerant oil (mineral) to lubricate O-rings. Use of R-134a PAG oil will cause premature corrosion of fitting joints.
Use only clean lint free cloths with non-petroleum based solvents to clean refrigerant system sealing surfaces. Allow solvent to dry with air. Do not allow solvents to enter refrigerant system.
Tighten
Tighten the screws to 8 N·m (71 lb in).
