Module Replacement - Power Window Buick
Removal Procedure
- Remove the trim panel. Refer to Door Trim Panel Replacement .
- Remove the water deflector. Refer to Door Water Deflector Replacement .
- Remove the inner belt strip.
- Remove the window retaining bolts.
- Remove the door glass. Refer to Door Window Replacement .
- Raise the regulator to the top travel.
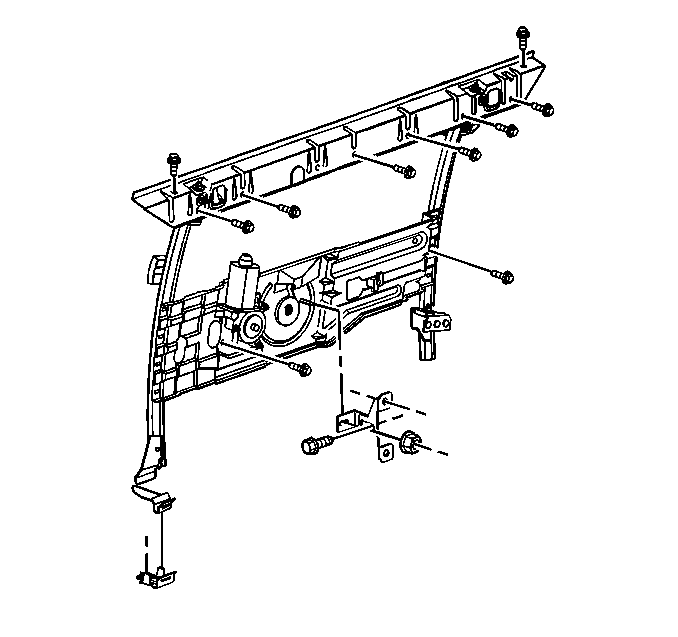
- Drill out the 8 rivets on the module belt member using a 6 mm (¼ in) drill.
- Disconnect the window motor electrical connector.
- Mark all of the adjustments for future glass adjustment.
- Loosen the adjustments.
- Remove the lower rear adjustment bracket.
- Pull up on the module belt member in order to remove the module assembly.

Important: Remove any pieces of rivet that fall inside of the door. Pieces left in the door may cause rattles.
Installation Procedure
- Perform the following steps in order to install the module in the door:
- Using the previous drill holes as locator holes, loosely install the bolts, the washers and the locknuts in place of all the rivets.
- Push down and out during assembly in order to ensure that the belt member is tight to the door sheet metal.
- Push out the bottom of the module as far as possible.
- Install the nut.
- Lower the bracket.
- Adjust the bracket to the original position, as marked in order to prepare for the window adjustment.
- Connect the electrical connector.
- Lower the regulator.
- Install the window. Refer to Door Window Replacement .
- Adjust the door, as necessary, in order to fit the body. Refer to Door Hinge Replacement .
- Adjust the door window. Refer to Door Window Adjustment .
- Install the water deflector. Refer to Door Water Deflector Replacement .
- Install the inner belt strip.
- Install the trim panel. Refer to Door Trim Panel Replacement .

| 1.1. | Align the front lower blade bracket into the adjuster. |
| 1.2. | Orient the adjuster against the inner panel. |
Place the adjuster onto the module stud.
Verify that the bracket has minimum slip fit relative to the guide channel bracket.
Module Replacement - Power Window Oldsmobile
Removal Procedure
- Remove the trim panel. Refer to Front Side Door Trim Panel Replacement or Rear Side Door Trim Panel Replacement .
- Remove the door trim hanger bracket fasteners.
- Remove the door trim hanger bracket.
- Remove the water deflector. Refer to Door Water Deflector Replacement .
- Remove the inner belt strip.
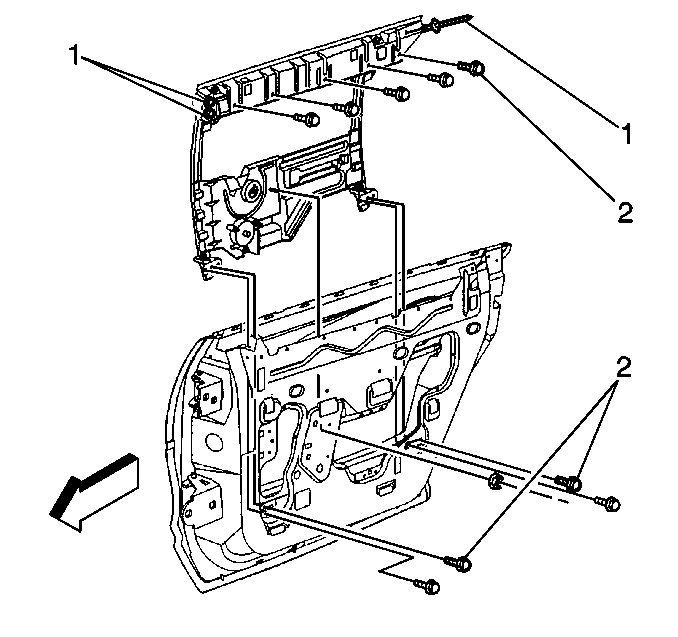
- Remove the window retaining bolts (1).
- Remove the door glass. Refer to Door Window Replacement .
- Raise the regulator to the top travel.
- Drill out the 8 rivets on the module belt member using a 6 mm (¼ in) drill.
- Disconnect the window motor electrical connector.
- Mark all of the adjustments for future glass adjustment.
- Loosen the adjustments.
- Remove the lower rear adjustment bracket.
- Pull up on the module belt member in order to remove the module assembly.


Important: Remove any pieces of rivet that fall inside the door. Pieces left in the door may cause rattles.
Installation Procedure
- Perform the following steps in order to install the module in the door:
- Install the short bolt in the top rear hole of the module.
- Using the previous drill holes as locator holes, loosely install the bolts, the washers and the locknuts in place of all the rivets:
- In order to ensure that the height adjustment is not lost, perform one of the following routines:
- Push out the bottom of the module as far as possible.
- Install the nut.
- Lower the bracket in order to ensure that the bracket has minimum slip fit relative to the guide channel bracket.
- Adjust the bracket to the original position, as marked in order to prepare for the window adjustment.
- Connect the electrical connector.
- Lower the regulator.
- Install the window. Refer to Door Window Replacement .
- Adjust the door, as needed, in order to fit the body. Refer to Door Hinge Replacement .
- Adjust the door glass. Refer to Door Window Adjustment or Rear Side Door Window Adjustment .
- Install the inner belt strip.
- Install the water deflector. Refer to Door Water Deflector Replacement .
- Install the door trim hanger bracket.
- Install the door trim hanger bracket fasteners.
- Install the trim panel. Refer to Front Side Door Trim Panel Replacement or Rear Side Door Trim Panel Replacement .

Important: Do not allow the fasteners to fall into the door cavity during assembly.
| 1.1. | Align the front lower blade bracket into the adjuster. |
| 1.2. | Orient the adjuster against the inner panel. |
| • | For the rear doors, hold up on both the front and the rear of the module when securing the bolts. |
| • | For the front doors, hold up on the rear of the module while securing the bolts. |
Place the adjuster onto the module stud.
Notice: Use the correct fastener in the correct location. Replacement fasteners must be the correct part number for that application. Fasteners requiring replacement or fasteners requiring the use of thread locking compound or sealant are identified in the service procedure. Do not use paints, lubricants, or corrosion inhibitors on fasteners or fastener joint surfaces unless specified. These coatings affect fastener torque and joint clamping force and may damage the fastener. Use the correct tightening sequence and specifications when installing fasteners in order to avoid damage to parts and systems.
Ensure the 3 upper tabs of the trim bracket are engaged into the slots of the door panel prior to securing the fasteners.
Tighten
Tighten the front fastener to 10 N·m (89 lb in).
Tighten
Tighten the rearward fastener to 3 N·m (27 lb in).
