Tools Required
J 42038 Camshaft Holding Fixtures
Removal Procedure
- Remove the engine front cover. Refer to Engine Front Cover Replacement .
- Remove the camshaft covers. Refer to Camshaft Cover Replacement - Left Side and Camshaft Cover Replacement - Right Side .
- Install the camshaft holding fixture J 42038 onto the ends of the camshaft. Rotate the engine to align the camshafts with the tool using the hex in the camshaft and an open wrench.
- When installed properly, the J 42038 will be fully seated on the camshaft ends with the camshaft flats parallel to the cam cover sealing surface.
- Remove the oil pan. Refer to Oil Pan Replacement .
- Remove the oil pump pipe and screen. Refer to Oil Pump Suction Pipe and Screen Assembly Replacement .
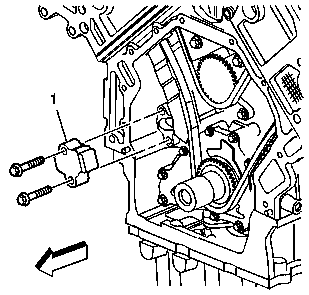
- Remove the camshaft drive chain tensioner (1) in order to remove the primary camshaft drive chain from the drive sprocket. Refer to Primary Camshaft Drive Chain Tensioner Shoe Replacement .
- Remove the 4 oil pump assembly bolts identified by the larger head size.
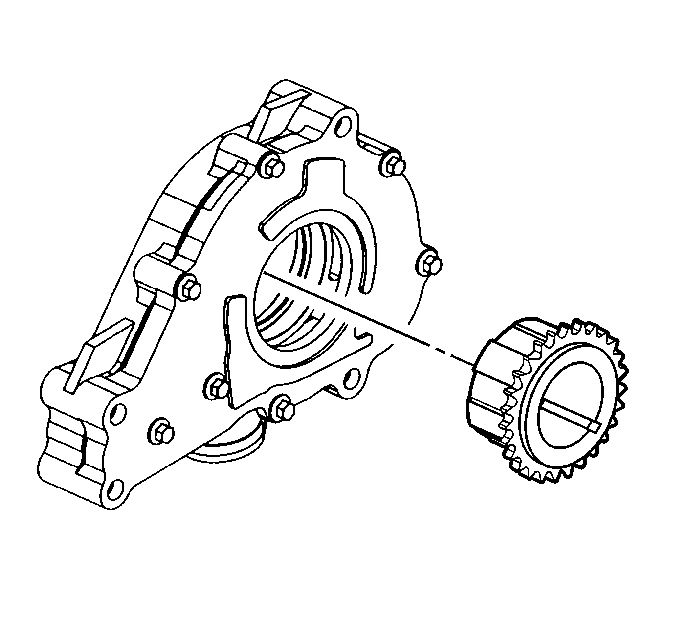
- Slide the oil pump assembly off the nose of the crankshaft with the drive sprocket in place.
- Remove the crankshaft sprocket from the oil pump assembly.
- Wrap the oil pump in a towel for safe, clean storage until inspection or assembly is necessary.
- If necessary, disassemble the oil pump. Refer to Oil Pump Disassemble in Engine Mechanical - 3.5L Unit Repair.
- If necessary, clean and inspect the oil pump. Refer to Oil Pump Cleaning and Inspection in Engine Mechanical - 3.5L Unit Repair.

Important: You must install the J 42038 immediately after cam cover removal. The fixtures prevent unexpected camshaft rotation caused by valve spring pressure.


Installation Procedure
- If necessary, assemble the oil pump. Refer to Oil Pump Assemble in Engine Mechanical - 3.5L Unit Repair.
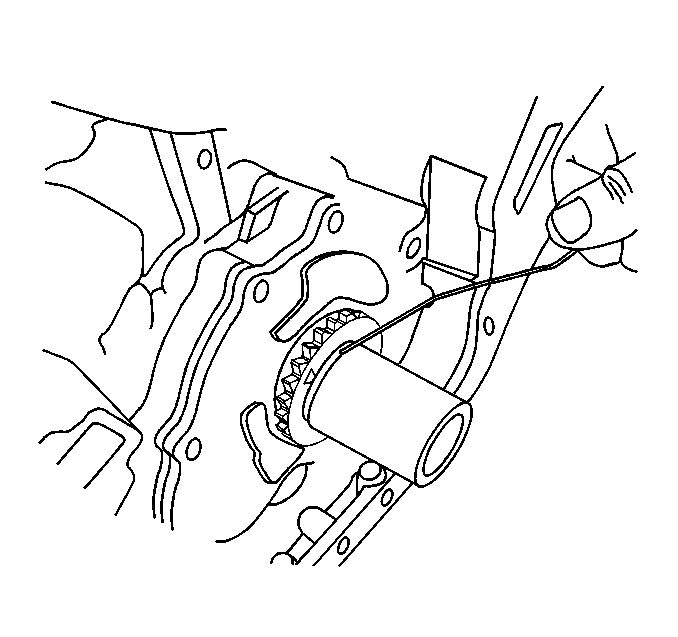
- Align the crankshaft sprocket splines with the oil pump gear and install the sprocket in the oil pump.
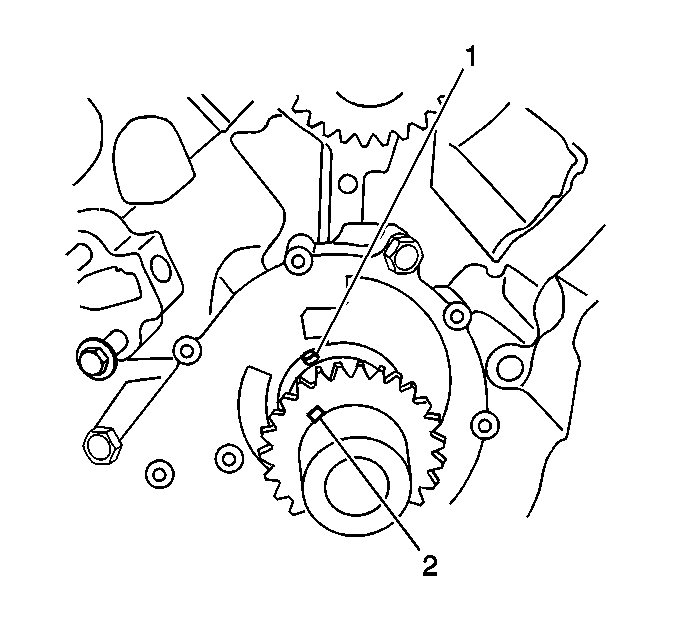
- Place the pump and sprocket assembly in position by rotating the crankshaft sprocket until the machined slot (2) is indexed with the drive pin (1) in the crankshaft.
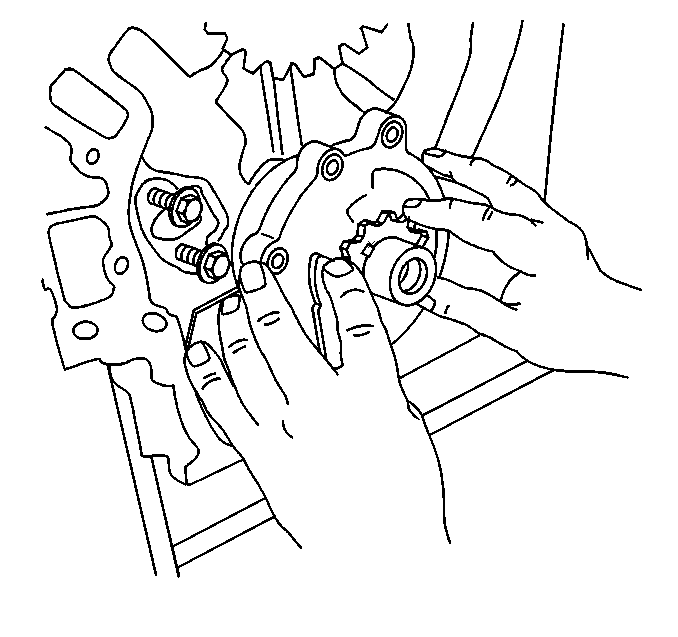
- Slide the pump and sprocket onto the crankshaft until a positive stop is felt. Make sure the crankshaft sprocket is aligned with the drive pin in the crankshaft.
- Install the oil pump pipe and screen. Refer to Oil Pump Suction Pipe and Screen Assembly Replacement .
- Install the oil pan. Refer to Oil Pan Replacement .
- When properly installed, the crankshaft sprocket will protrude from the oil pump but the face of the sprocket will be located behind the machined step in the crankshaft as shown.
- Align the pump body with the mounting holes in the cylinder block.
- Install the oil pump bolts.
- Install the primary camshaft drive chain over the drive sprocket. Refer to Primary Camshaft Drive Chain Replacement .
- Install the camshaft drive chain tensioner (1). Refer to Primary Camshaft Drive Chain Tensioner Shoe Replacement .
- Remove the J 42038 from the cylinder heads.
- Install the camshaft covers. Refer to Camshaft Cover Replacement - Left Side and Camshaft Cover Replacement - Right Side .
- Install the engine front cover. Refer to Engine Front Cover Replacement .

Notice: Use the correct fastener in the correct location. Replacement fasteners must be the correct part number for that application. Fasteners requiring replacement or fasteners requiring the use of thread locking compound or sealant are identified in the service procedure. Do not use paints, lubricants, or corrosion inhibitors on fasteners or fastener joint surfaces unless specified. These coatings affect fastener torque and joint clamping force and may damage the fastener. Use the correct tightening sequence and specifications when installing fasteners in order to avoid damage to parts and systems.
Tighten
Tighten the bolts to 25 N·m (18 lb ft).

Important: Make sure correct primary and secondary camshaft drive chain timing are maintained.

