Rear Seat Belt Retractor Replacement C Pillar
Removal Procedure
Tools Required
J 29843-9 Door Lock Striker and Seat Belt Torx® Wrench
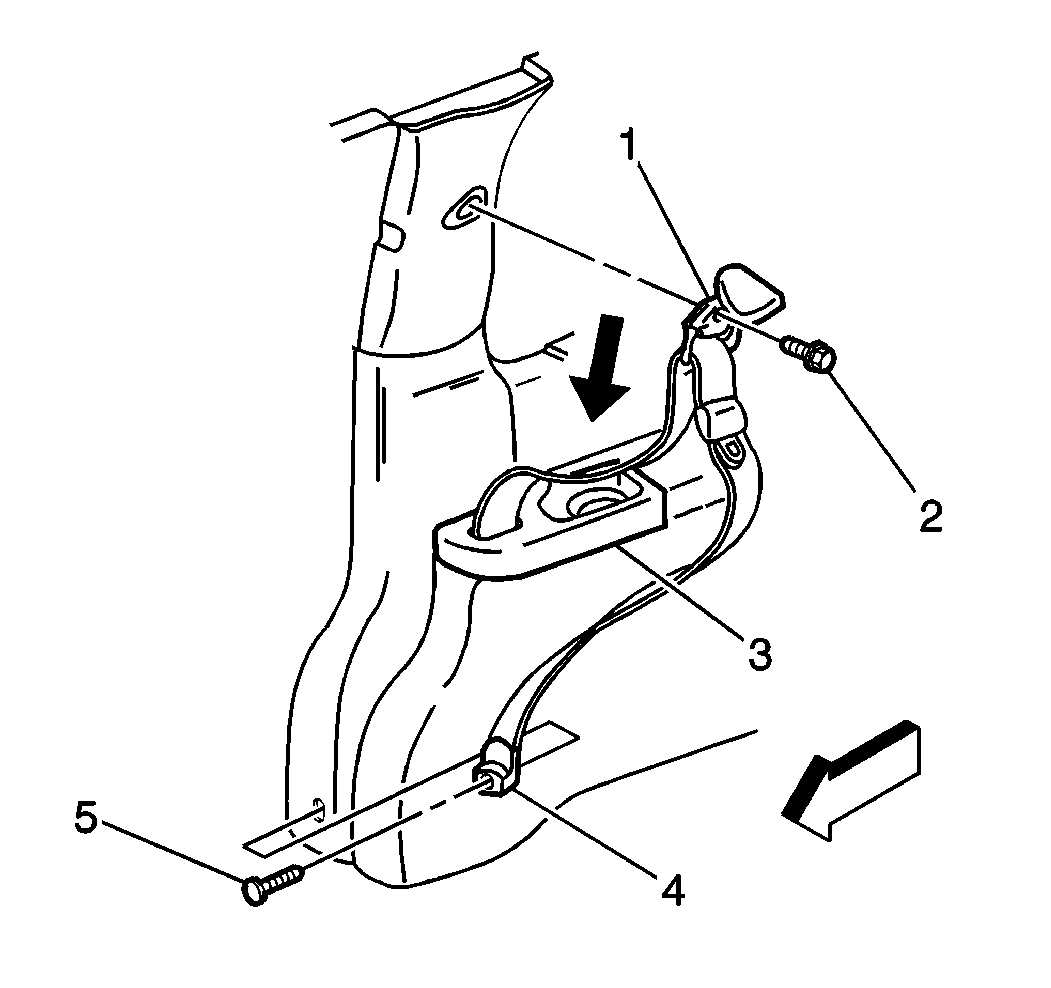
- Unsnap the cover from the upper seat belt (1) anchor.
- Use J 29843-9 in order to remove the upper seat belt anchor bolt (2).
- Lift the trim cover in order to expose the lower seat belt anchor bolt (5).
- Use J 29843-9 in order to remove the bolt (5) securing the lower seat belt anchor (4) from the C-pillar.
- Unsnap the cup holder/armrest trim cover (3) from the passenger's side.
- Remove the left body side front trim panel. Refer to Body Side Front Trim Panel Replacement - Left Side in Interior Trim.
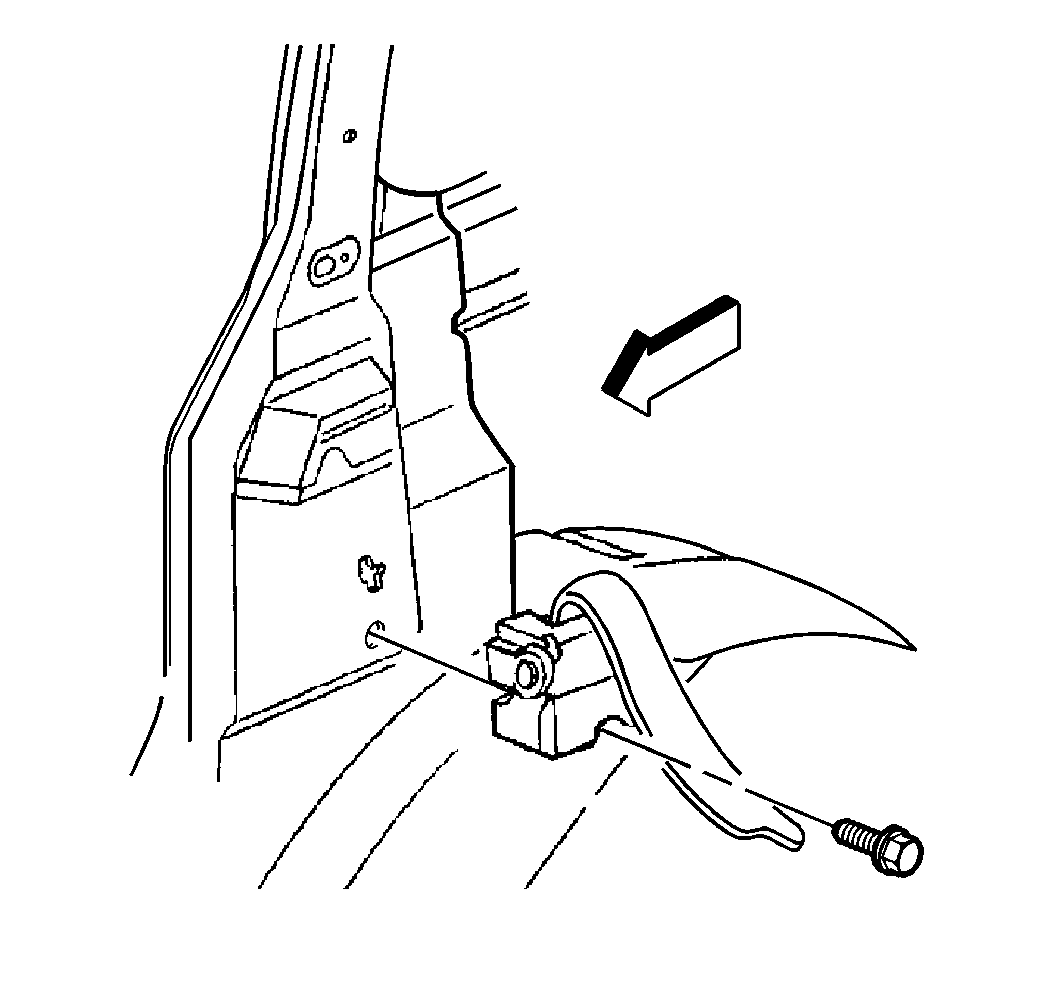
- Use J 29843-9 in order to remove the bolt securing the seat belt retractor from the C-pillar.
- Remove the seat side belt retractor from the C-pillar.

Important: The lower seat belt anchor (4) attaches to the mini-buckle on the right side of the 60 percent seat cushion on vehicles equipped with a 60/40 split bench seat. Use a key or a small flat bladed tool in order to release the seat belt anchor from the mini-buckle.

Installation Procedure
Tools Required
J 29843-9 Door Lock Striker and Seat Belt Torx® Wrench
- Install the seat belt retractor to the C-pillar.
- Use J 29843-9 in order to install the bolt securing the seat belt retractor to the C-pillar.
- Install the left body side front trim panel. Refer to Body Side Front Trim Panel Replacement - Left Side in Interior Trim.
- Snap the cup holder/armrest trim cover (3) in place on the passenger's side.
- Use J 29843-9 in order to install the bolt (5) securing the lower seat retractor side belt anchor (4) to the C-pillar.
- Install the seat belt anchor to the mini-buckle on the vehicles with the 60/40 split bench.
- Use J 29843-9 in order to install the bolt (2) securing the upper seat belt anchor (1).
- Snap the cover onto the upper seat belt anchor (1).

Notice: Use the correct fastener in the correct location. Replacement fasteners must be the correct part number for that application. Fasteners requiring replacement or fasteners requiring the use of thread locking compound or sealant are identified in the service procedure. Do not use paints, lubricants, or corrosion inhibitors on fasteners or fastener joint surfaces unless specified. These coatings affect fastener torque and joint clamping force and may damage the fastener. Use the correct tightening sequence and specifications when installing fasteners in order to avoid damage to parts and systems.
Tighten
Tighten the seat belt retractor bolt (C-pillar) to 43 N·m
(32 lb ft).

Tighten
Tighten the lower seat belt anchor bolt (C-pillar) to 43 N·m
(32 lb ft).
Tighten
Tighten the upper seat belt anchor bolt (C-pillar) to 43 N·m
(32 lb ft).
Rear Seat Belt Retractor Replacement D Pillar
Removal Procedure
Tools Required
J 29843-9 Door Lock Striker and Seat Belt Torx® Wrench
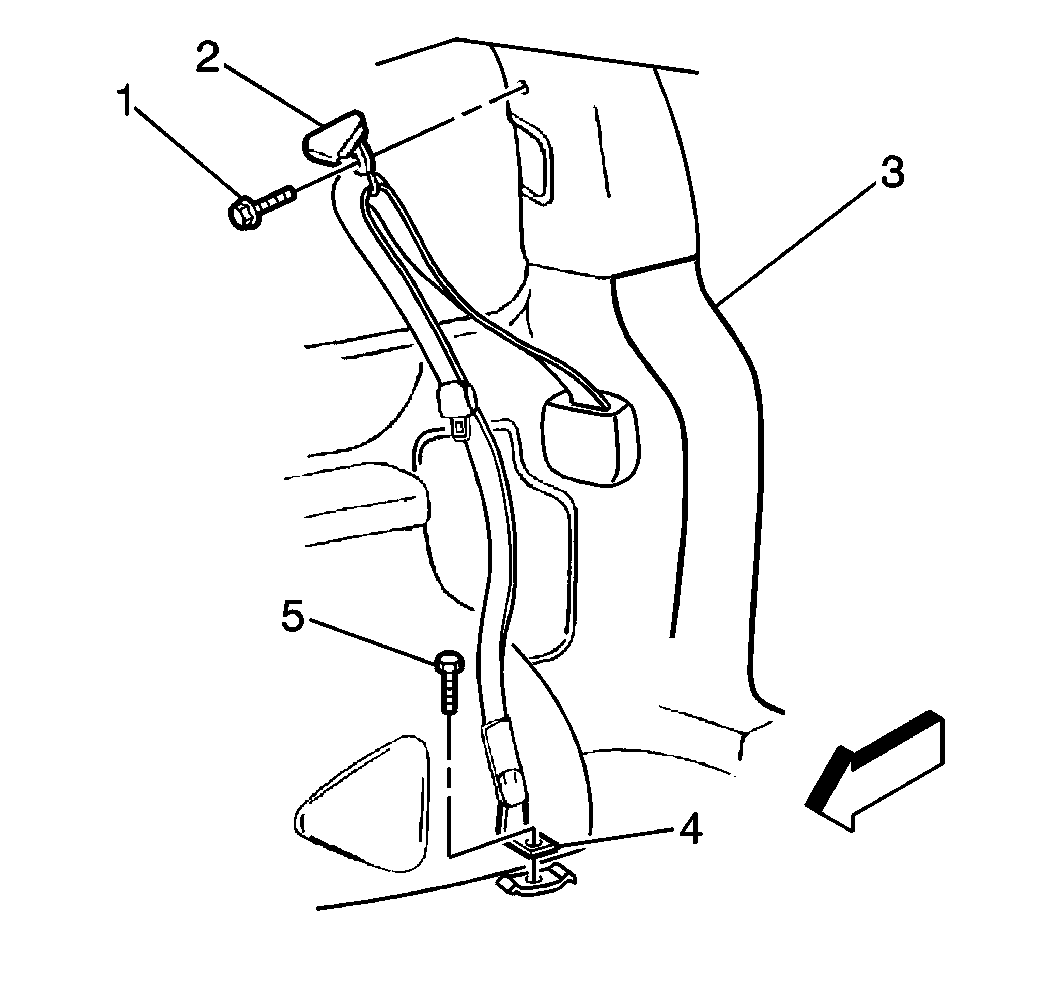
- Unsnap the cover (2) from the upper seat belt anchor.
- Use J 29843-9 in order to remove the bolt (1) securing the upper seat belt anchor from the D-pillar (3).
- Remove the upper seat belt anchor from the D-pillar (3).
- Raise the carpeting in order to expose the lower seat belt anchor bolt (5).
- Use J 29843-9 in order to remove the bolt (5) securing the lower seat belt anchor (4) from the floor.
- Unsnap the plastic trim cover from the D-pillar (3) trim panel. Slide the belt webbing through the slot.
- Remove the driver's side rear quarter trim with RPO-C34, rear A/C only. Refer to Rear Quarter Lower Trim Panel Replacement in Interior Trim.
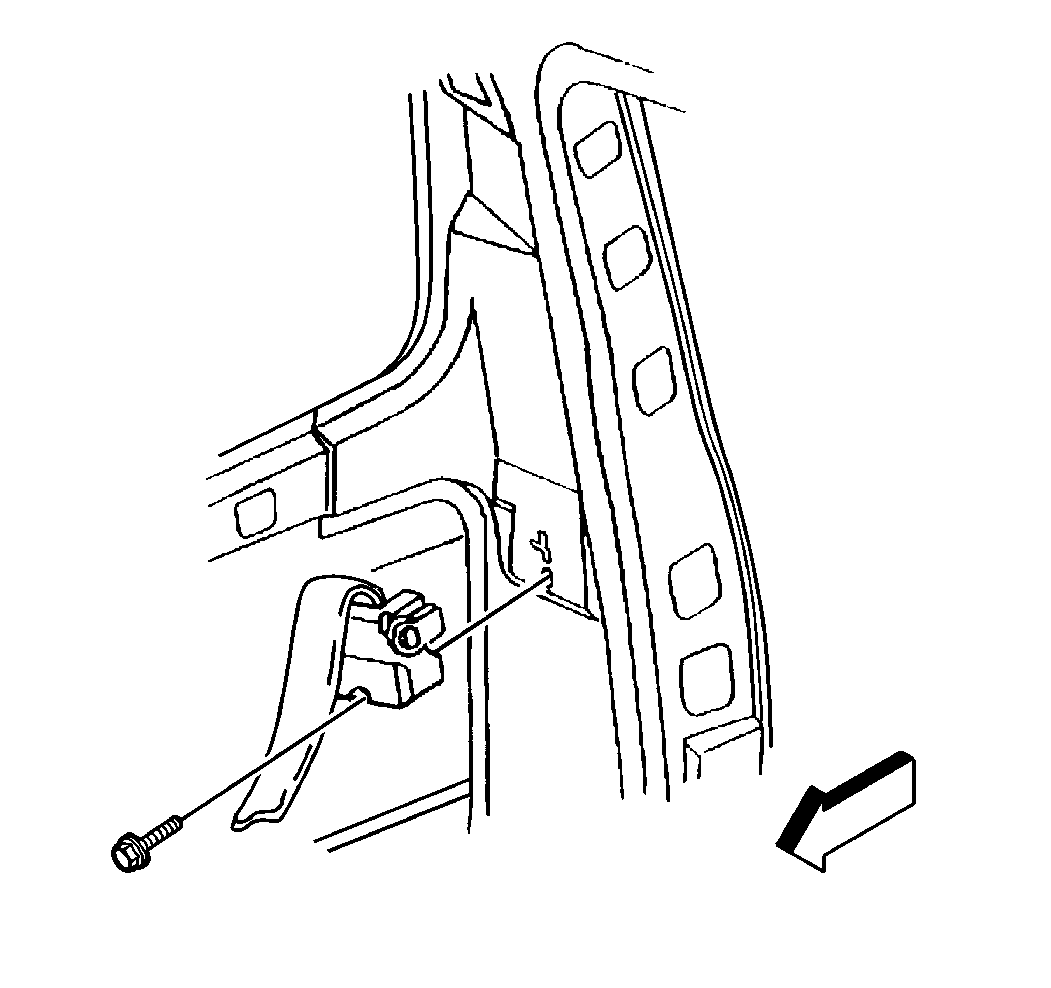
- Use J 29843-9 in order to remove the bolt securing the retractor from the D-pillar.
- Remove the retractor side seat belt from the vehicle.
- Remove the retractor from the vehicle.


Installation Procedure
Tools Required
J 29843-9 Door Lock Striker and Seat Belt Torx® Wrench
- Install the retractor side seat belt to the vehicle.
- Install the retractor to the vehicle.
- Use J 29843-9 in order to install the bolt securing the retractor to the D-pillar.
- Install the driver's side rear quarter trim with RPO-C34 rear AC only. Refer to Rear Quarter Lower Trim Panel Replacement in Interior Trim.
- Slide the belt webbing through the slotted trim cover. Then snap the plastic trim cover to the D-pillar (3) trim panel.
- Install the lower seat belt anchor (4) to the floor.
- Use the J 29843-9 in order to install the bolt (5) securing the lower seat belt anchor (4) to the floor.
- Install the upper seat belt anchor (1) to the D-pillar (3).
- Use the J 29843-9 in order to install the bolt (1) securing the upper seat belt anchor to the D-pillar (3).
- Snap the cover (2) to the upper seat belt anchor.

Notice: Use the correct fastener in the correct location. Replacement fasteners must be the correct part number for that application. Fasteners requiring replacement or fasteners requiring the use of thread locking compound or sealant are identified in the service procedure. Do not use paints, lubricants, or corrosion inhibitors on fasteners or fastener joint surfaces unless specified. These coatings affect fastener torque and joint clamping force and may damage the fastener. Use the correct tightening sequence and specifications when installing fasteners in order to avoid damage to parts and systems.
Tighten
Tighten the seat belt retractor bolt (D-pillar) to 43 N·m
(32 lb ft).

Tighten
Tighten the lower seat belt anchor bolt (D-pillar) to 43 N·m
(32 lb ft).
Tighten
Tighten the upper seat belt anchor bolt (D-pillar) to 43 N·m
(32 lb ft)
