Tools Required
J 35268-A Camshaft/Front Main Seal Installer
- Remove the oil pump pipe and screen assembly. Refer to Oil Pump Suction Pipe and Screen Assembly Replacement .
- Remove the crankshaft drive gear. Refer to Crankshaft Pulley Replacement .
- Remove the engine oil pressure switch. Refer to Engine Oil Pressure Sensor and/or Switch Replacement .
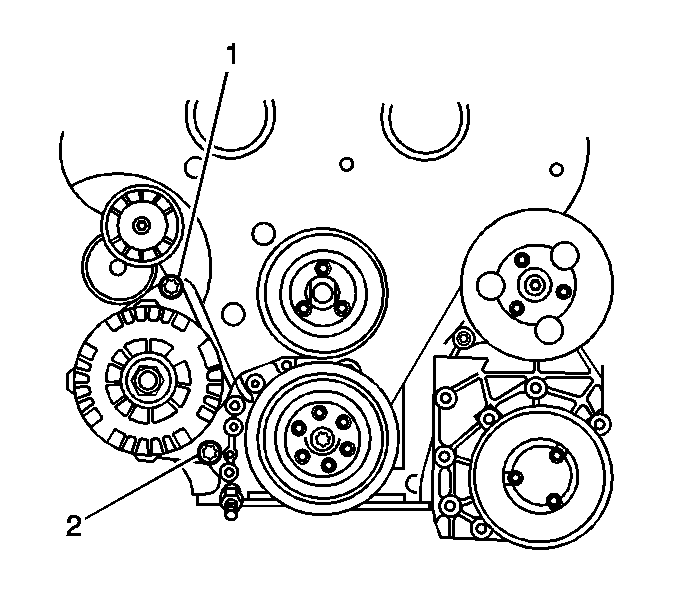
- Remove the generator lower mounting bolt (2).
- Loosen the generator upper mounting bolt (1).
- Pivot the generator out of the way and tighten the generator upper mounting bolt only enough to hold in position.
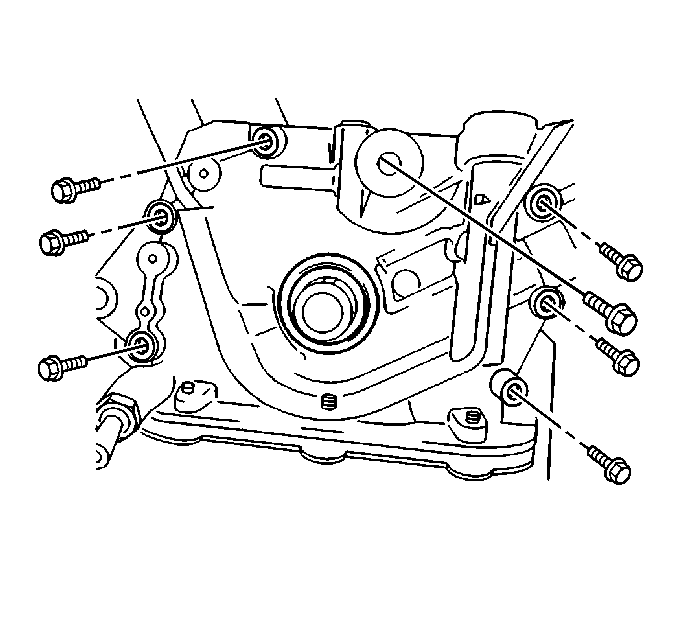
- Remove the oil pump bolts.
- Remove the oil pump and gasket.
- Remove the front main oil seal from the oil pump.
- Clean the engine block and oil pan sealing surfaces.
- Clean and inspect the oil pump. Refer to Oil Pump Cleaning and Inspection .
- Disassemble the oil pump if necessary. Refer to Oil Pump Disassemble .
Installation Procedure
- Assemble the oil pump if necessary. Refer to Oil Pump Assemble .
- Coat only the pump side of the new oil pump gasket with a thin, even coating of GM P/N 1052942 (Canadian P/N 10953466), or equivalent.
- Install the oil pump gasket.
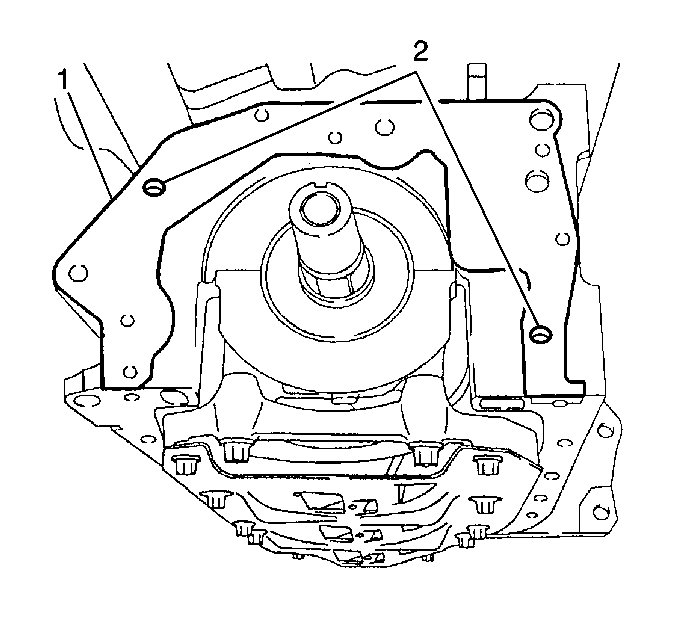
- Position the oil pump to the engine block (1) while aligning the guide pins (2).
- Coat the oil pump bolts with GM P/N 12345382 (Canadian P/N 10953489), or equivalent.
- Install the oil pump bolts.
- Tap the crankshaft front oil seal into place using the J 35268-A .
- Release and pivot the generator into place.
- Install the generator lower mounting bolt (2).
- Re-tighten the oil pump bolts.
- Install the engine oil pressure switch. Refer to Engine Oil Pressure Sensor and/or Switch Replacement .
- Install the crankshaft drive gear. Refer to Crankshaft Pulley Replacement .
- Install the oil pump pipe and screen assembly. Refer to Oil Pump Suction Pipe and Screen Assembly Replacement .
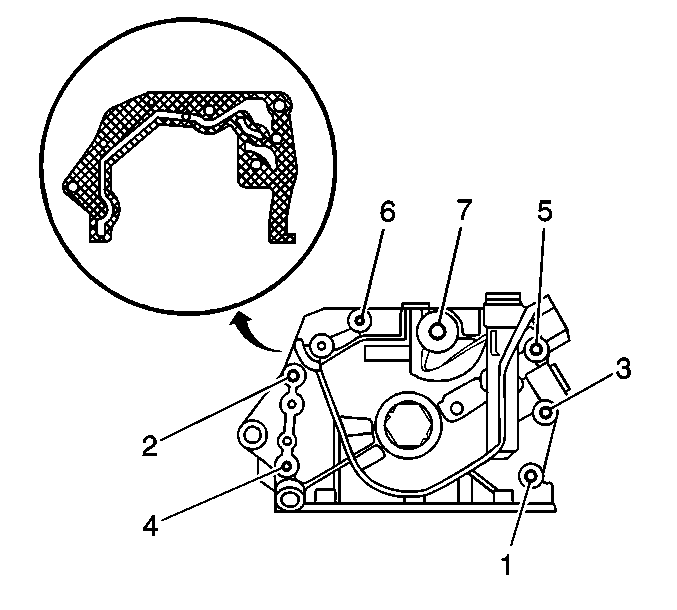
Important: Do not cover and/or restrict the gasket openings and oil passages with sealant. Only apply sealant to the crosshatched area of the gasket as shown in the illustration.
Notice: Refer to Fastener Notice in the Preface section.

Important: The oil pump bolts must be re-tightened AFTER the generator mounting bolt has been tightened to specifications to allow for uniform compression of the oil pump gasket.
Tighten
Tighten the oil pump bolts in sequence to 12 N·m
(106 lb in).
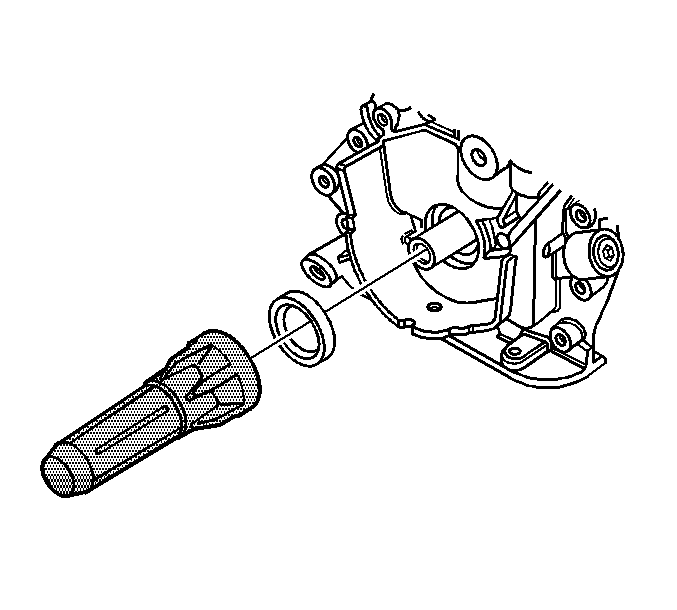
Important: Ensure the crankshaft front oil seal is fully and evenly seated.

Tighten
Tighten the generator mounting bolts
to 35 N·m (26 lb ft).
Important: The oil pump bolts must be re-tightened AFTER the generator mounting bolt has been tightened to specifications to allow for uniform compression of the oil pump gasket.
Tighten
Tighten the oil pump bolts in sequence to 28 N·m
(21 lb ft).
