Removal Procedure
When you remove the sunroof actuator from the vehicle, always check for synchronization before you reinstall the sunroof.
- Remove the glass panel. Refer to Sunroof Glass Panel Replacement
- Remove the headliner. Refer to Headliner in Interior Trim.
- Remove the actuator motor. Refer to Power Sunroof Motor Replacement in this section.
- Remove the drain nozzle hoses.
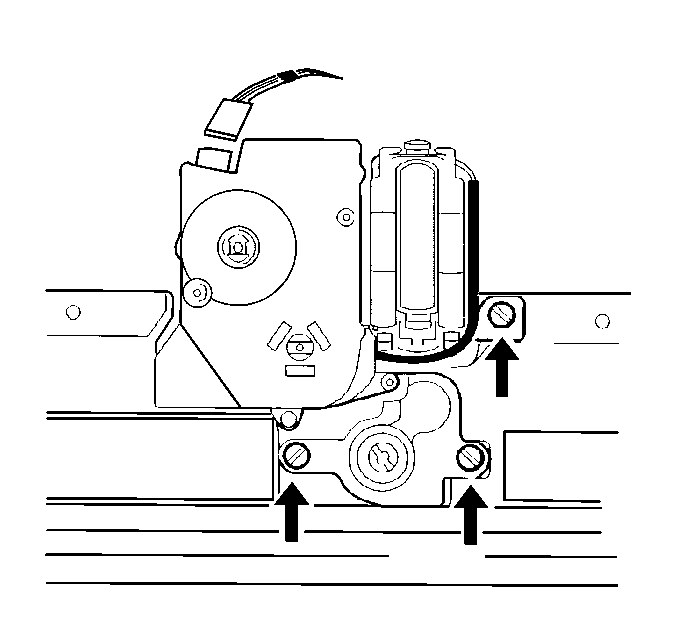
- Remove the bolts from the sunroof actuator.
- Remove the sunroof actuator.
- Remove the wind deflector. Refer to Sunroof Air Deflector Replacement
- Remove the sunshade panel and the slide. Refer to Sunroof Sunshade Replacement
- Remove the water gutter. Refer to Water Gutter Replacement
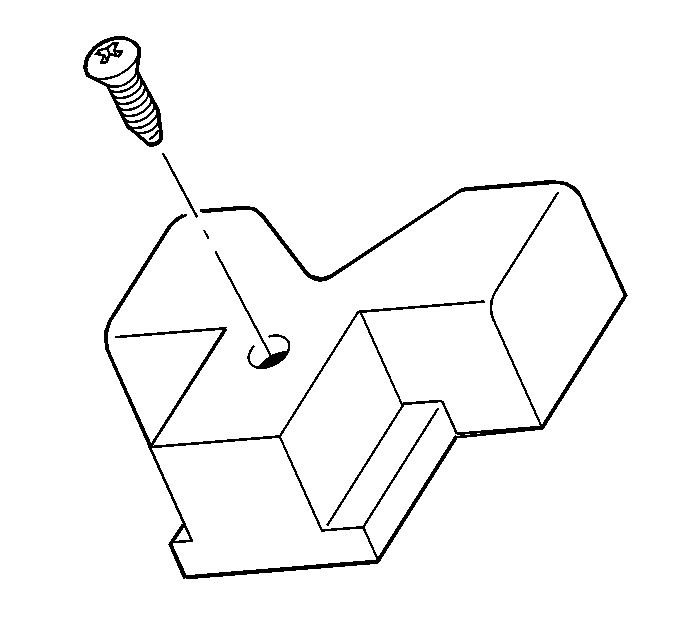
- Remove the screw from the sunroof actuator cable stop.
- Remove the sunroof actuator cable stop from the sunroof actuator.
- Remove the slide and/or the guide from the sunroof actuator. Refer to Sunroof Sliding Block Guide Replacement
The drain hoses pull off the end of the nozzles.
To remove the sunroof actuator you need the aid of a helper through the right rear door.
Installation Procedure
- Install the slide and/or the guide to the sunroof actuator. Refer to Sunroof Sliding Block Guide Replacement
- Install the sunroof actuator cable stop to the sunroof actuator.
- Install the screw to the sunroof actuator cable stop.
- Install the water gutter. Refer to Water Gutter Replacement
- Install the sunshade panel. Refer to Sunroof Sunshade Replacement
- Install the wind deflector. Refer to Sunroof Air Deflector Replacement in this section.
- Install the sunroof actuator.
- Install the bolts to the sunroof actuator.
- Install the drain hoses.
- Install the actuator motor. Refer to Power Sunroof Motor Replacement
- Install the headliner. Refer to Headliner Replacement in Interior Trim.
- Install the glass panel. Refer to Sunroof Glass Panel Replacement
- Inspect the hoses. The hoses may be pinched.
- Inspect the wires. The wires may be pinched by the sunroof actuator when tighten in place.
- Inspect the height and the centering of the glass panel in the sunroof opening. Refer to Sunroof Window Height and Opening Fit Adjustment
Reinstall the sunroof actuator with the aid of a helper through the right rear door.
Notice: Use the correct fastener in the correct location. Replacement fasteners must be the correct part number for that application. Fasteners requiring replacement or fasteners requiring the use of thread locking compound or sealant are identified in the service procedure. Do not use paints, lubricants, or corrosion inhibitors on fasteners or fastener joint surfaces unless specified. These coatings affect fastener torque and joint clamping force and may damage the fastener. Use the correct tightening sequence and specifications when installing fasteners in order to avoid damage to parts and systems.
Tighten
Tighten the sunroof actuator bolts to 4 N·m (35 lb in).
