Steering Gear Replacement RWD
Removal Procedure
- Remove the lower fan shroud. Refer to Engine Coolant Fan Lower Shroud Replacement in Engine Cooling.
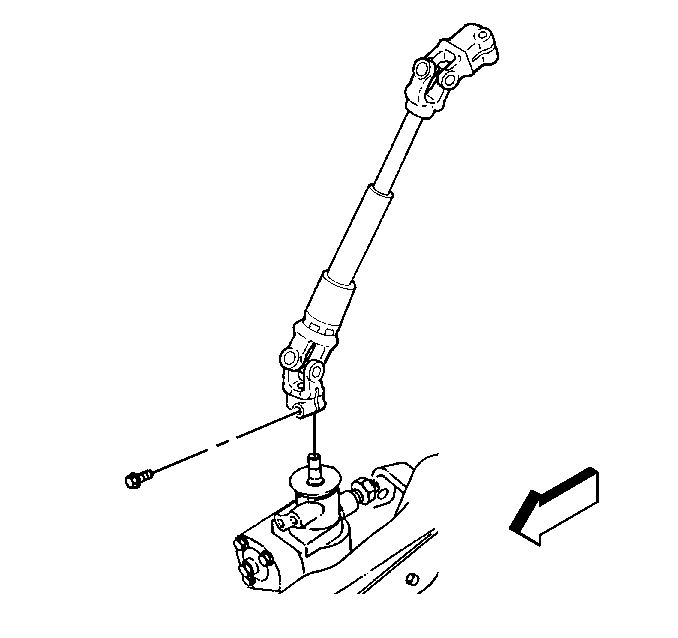
- Disconnect the intermediate shaft from the power steering gear. Refer to Intermediate Steering Shaft Replacement in Steering Wheel and Column.
- Place a drain pan under the steering gear.
- Disconnect the power brake booster outlet hose from the steering gear.
- Disconnect the power steering cooler pipe from the steering gear.
- Raise the vehicle. Refer to Lifting and Jacking the Vehicle in General Information.
- Remove the pitman arm from the steering gear. Refer to Pitman Arm Replacement in Steering Linkage.
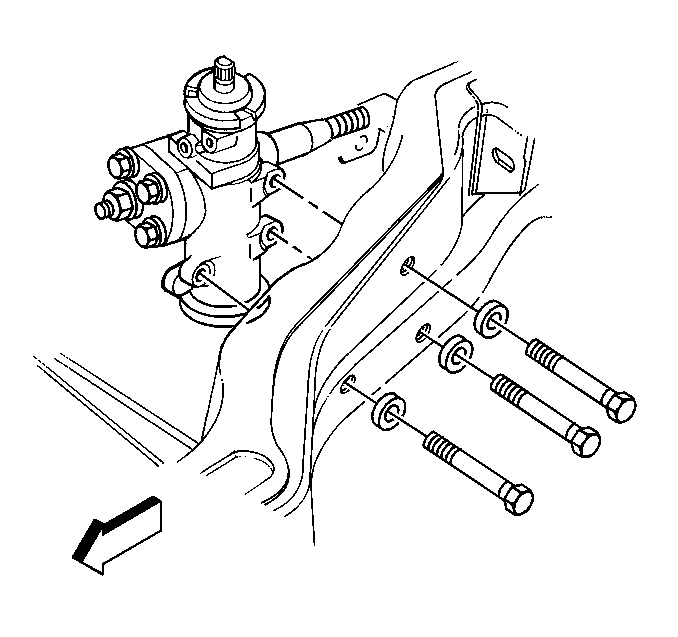
- Remove the steering gear mounting bolts and washers.
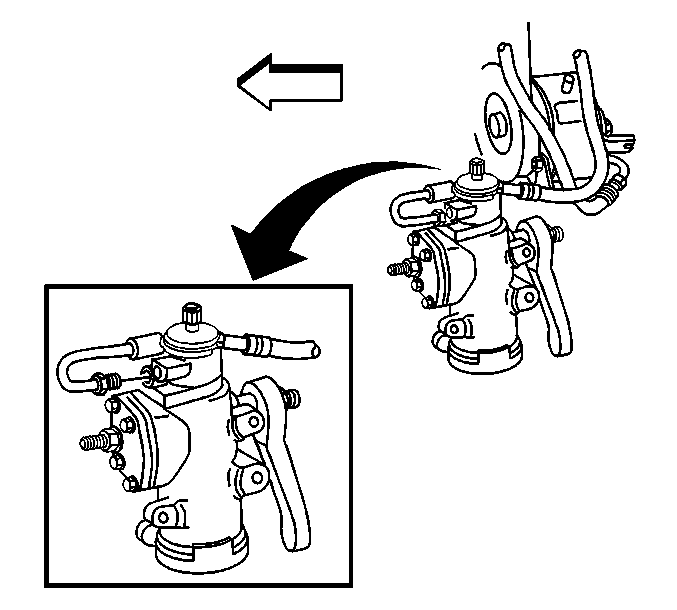
- Remove the steering gear from the vehicle.
Important: Cap or tape the ends of the hoses and the gear fittings to prevent spillage and contamination.

Installation Procedure
- Install the steering gear to the vehicle.
- Install the steering gear washers and bolts.
- Install the pitman arm to the steering gear. Refer to Pitman Arm Replacement in Steering Linkage.
- Lower the vehicle.
- Connect the power steering cooler pipe to the steering gear.
- Connect the power brake booster outlet hose to the steering gear.
- Remove the drain pan from under the vehicle.
- Connect the intermediate shaft to the power steering gear. Refer to Intermediate Steering Shaft Replacement in Steering Wheel and Column.
- Install the lower fan shroud. Refer to Engine Coolant Fan Lower Shroud Replacement in Engine Cooling.
- Bleed the power steering system. Refer to Power Steering System Bleeding .
Notice: Refer to Fastener Notice in the Preface section.
Tighten
Tighten the power steering gear bolts to 75 N·m (55 lb ft).
Tighten
Tighten the power steering cooler pipe fitting to 27 N·m (20 lb ft).
Tighten
Tighten the power brake booster outlet fitting to 27 N·m (20 lb ft).
Steering Gear Replacement AWD
Tools Required
J 42640 Steering Column Lock Pin
Removal Procedure
- Raise and support the vehicle. Refer to Lifting and Jacking the Vehicle in General Information.
- Remove the tire and the wheel. Refer to Tire and Wheel Removal and Installation in Tires and Wheels.
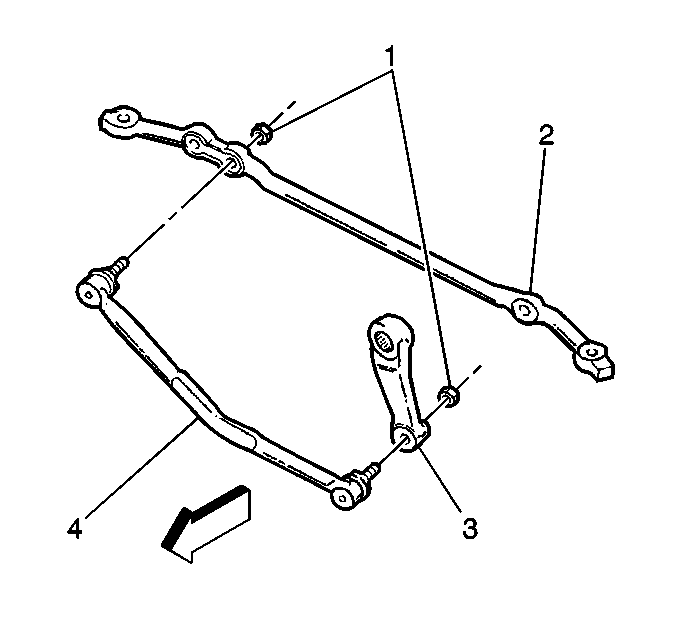
- Remove the pitman arm (3) to connecting rod (4) retaining nut (1).
- Disconnect the pitman arm from the connecting rod.
- Remove the stabilizer links. Refer to Stabilizer Shaft Link Replacement in Front Suspension.
- Rotate the stabilizer shaft downward.
- Lower the vehicle.
- Install the J 42640 into the lower steering column trim cover in order to lock the steering column.
- Remove the lower fan shroud. Refer to Engine Coolant Fan Lower Shroud Replacement in Engine Cooling.
- Remove the intermediate shaft to power steering gear pinch bolt.
- Disconnect the intermediate shaft from the power steering gear.
- Place a drain pan under the vehicle.
- Disconnect the power steering cooler hose from the power steering gear.
- Disconnect the hydraulic brake booster from the power steering gear.
- Raise the vehicle. Refer to Lifting and Jacking the Vehicle in General Information.
- Remove the power steering gear mounting bolts.
- Lower the vehicle.
- Remove the power steering gear.
- Remove the pitman arm from the power steering gear. Refer to Pitman Arm Replacement in Steering Linkage.
Installation Procedure
- Install the pitman arm to the power steering gear. Refer to Pitman Arm Replacement in Steering Linkage.
- Install the power steering gear to the vehicle.
- Connect the pitman arm to the connecting rod.
- Using the aid of an assistant, position the power steering gear to the frame and install the power steering mounting bolts.
- Connect the power brake booster outlet hose to the power steering gear.
- Connect the power steering cooler hose to the power steering gear.
- Connect the intermediate shaft to the power steering gear.
- Install the intermediate shaft to power steering gear pinch bolt.
- Install the lower fan shroud. Refer to Engine Coolant Fan Lower Shroud Replacement in Engine Cooling.
- Remove the J 42640 from the steering column.
- Install the pitman arm (3) to connecting rod (4) retaining nut (1).
- Rotate the stabilizer shaft to the correct position.
- Install the stabilizer links. Refer to Stabilizer Shaft Link Replacement in Front Suspension.
- Install the tire and the wheel. Refer to Tire and Wheel Removal and Installation in Tires and Wheels.
- Lower the vehicle.
- Bleed the power steering system. Refer to Power Steering System Bleeding .
Notice: Use the correct fastener in the correct location. Replacement fasteners must be the correct part number for that application. Fasteners requiring replacement or fasteners requiring the use of thread locking compound or sealant are identified in the service procedure. Do not use paints, lubricants, or corrosion inhibitors on fasteners or fastener joint surfaces unless specified. These coatings affect fastener torque and joint clamping force and may damage the fastener. Use the correct tightening sequence and specifications when installing fasteners in order to avoid damage to parts and systems.
Tighten
Tighten the power steering mounting bolts to 143 N·m (106 lb ft).
Tighten
Tighten the power brake booster outlet hose to the power steering gear to 27 N·m
(20 lb ft).
Tighten
Tighten the power steering cooler hose to the power steering gear to 27 N·m
(20 lb ft).
Tighten
Tighten the intermediate shaft to power steering gear pinch bolt to 41 N·m
(30 lb ft).
Tighten
Tighten the pitman arm to connecting rod retaining nut to 62 N·m
(48 lb ft).
