Tools Required
| • |
| • |
| • |
| • |
| • |
| • |
| • |
| • |
Removal Procedure
- Install a suitable liftgate brace to the vehicle.
- Remove the liftgate window side garnish moulding. Refer to Liftgate Window Side Garnish Molding Replacement.
- Remove the liftgate window lower garnish moulding. Refer to Liftgate Window Lower Garnish Molding Replacement.
- Remove the liftgate trim panel. Refer to Liftgate Trim Panel Replacement.
- Remove the rear window wiper arm. Refer to Rear Window Wiper Arm Replacement.
- Remove the rear window wiper motor. Refer to Rear Window Wiper Motor Replacement.
- Remove the liftgate window upper garnish moulding. Refer to Liftgate Window Upper Garnish Molding Replacement.
- Remove the liftgate upper moulding. Refer to Liftgate Upper Molding Replacement.
- Disconnect the liftgate window electrical connectors (2) from the liftgate window (1).
- Remove the suitable liftgate brace from the vehicle.
- Close the liftgate.
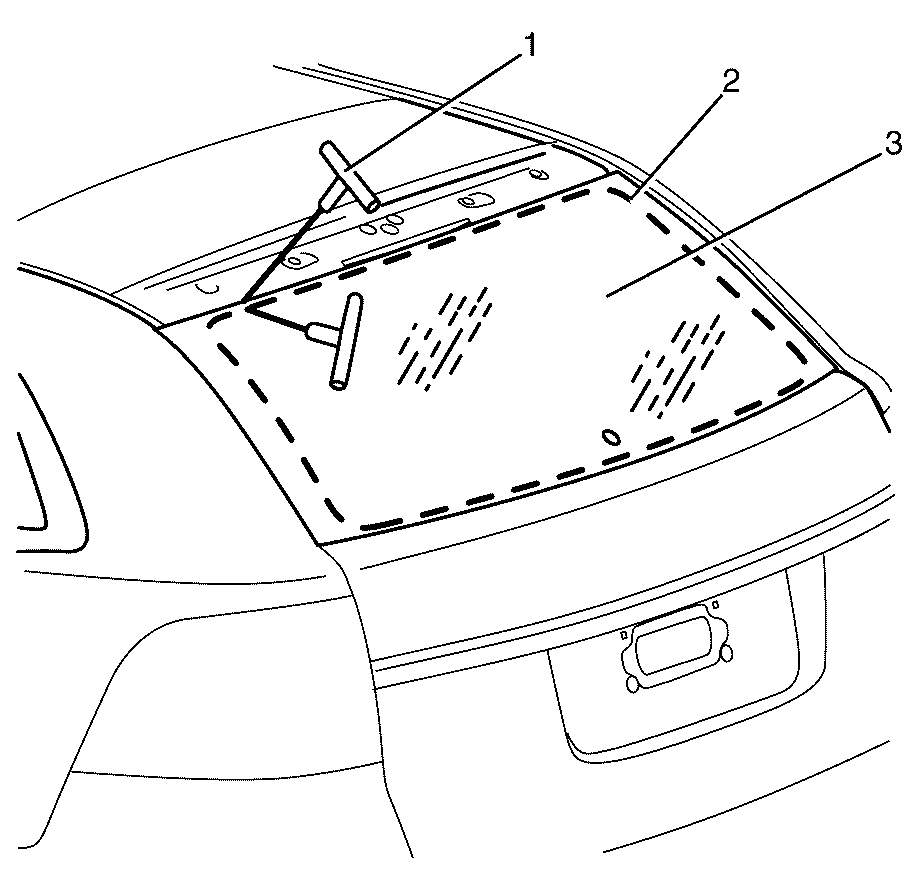
- Install J-36020 (1) to the vehicle.
- Connect the end of the piano wire to the other handle of J-36020 (1).
- With the aid of an assistant use tool J-36020 (1) to cut through the urethane bead (2) around the liftgate window (3) to the vehicle.
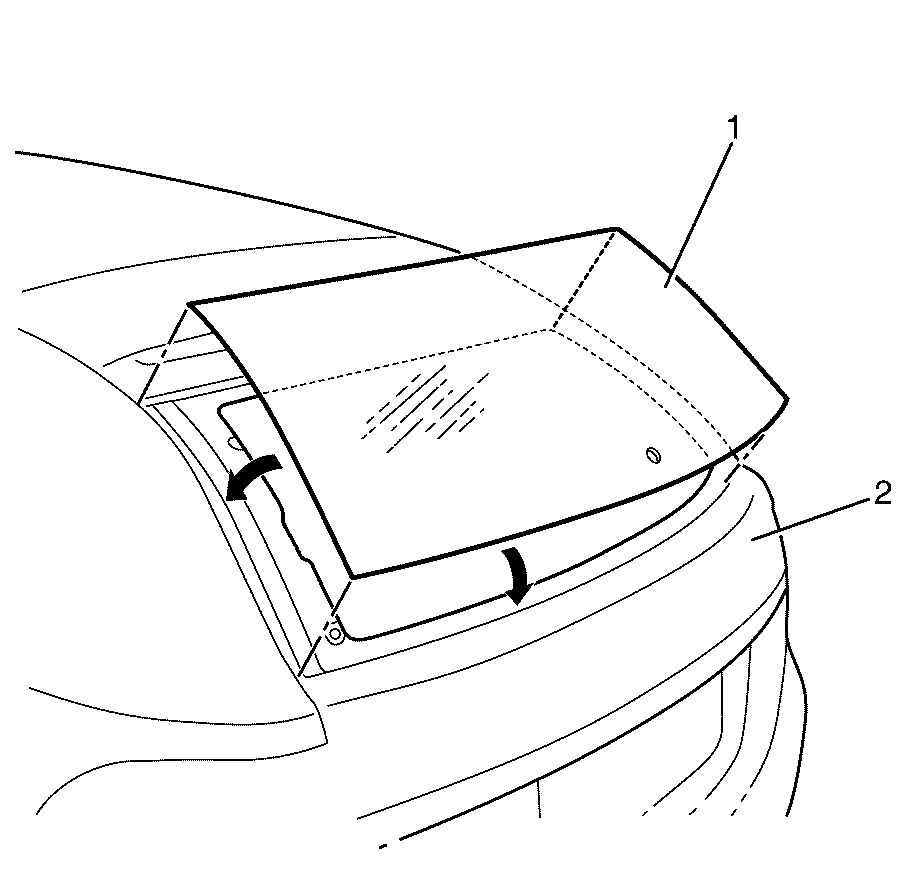
- With the aid of an assistant remove the liftgate window (1) from the vehicle (2).
Important: When a suitable hold open device is being removed or installed, provide alternate support to avoid the possibility of damage to the vehicle or personal injury.
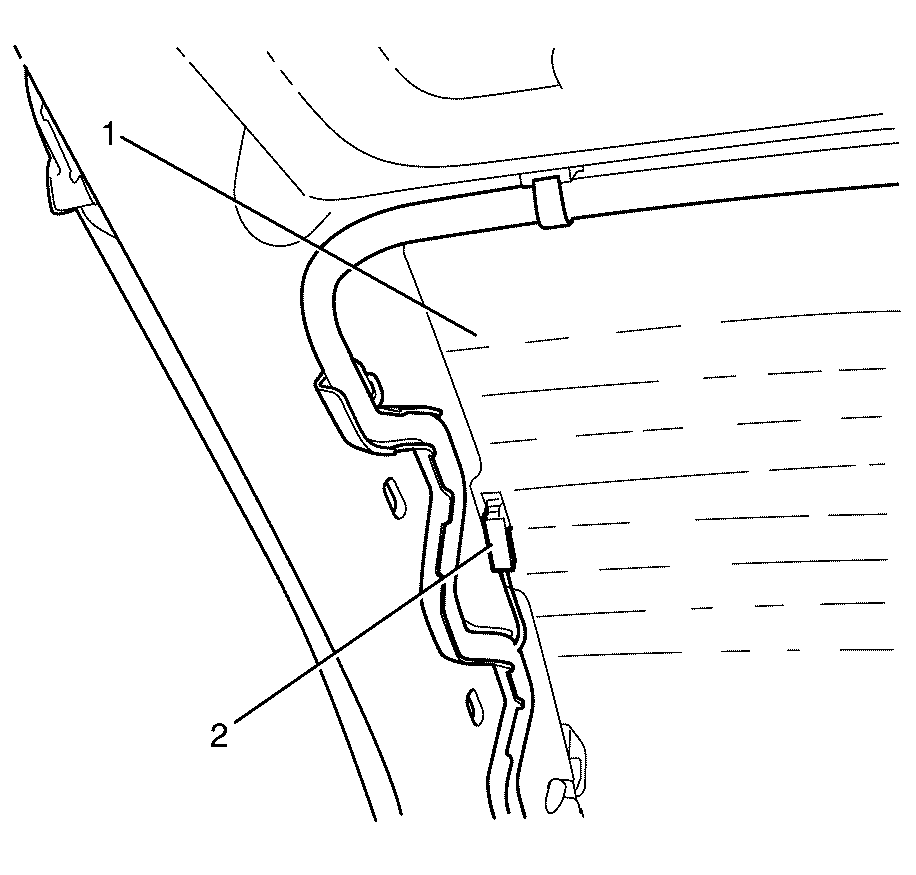
Important: Before cutting out the stationary window, apply a double layer of masking tape around the perimeter of the painted surfaces and the interior trim.
Important: Use a suitable tool to install the piano wire from J-36020 (1) through the urethane bead (2) at the upper corner of the liftgate window (3).
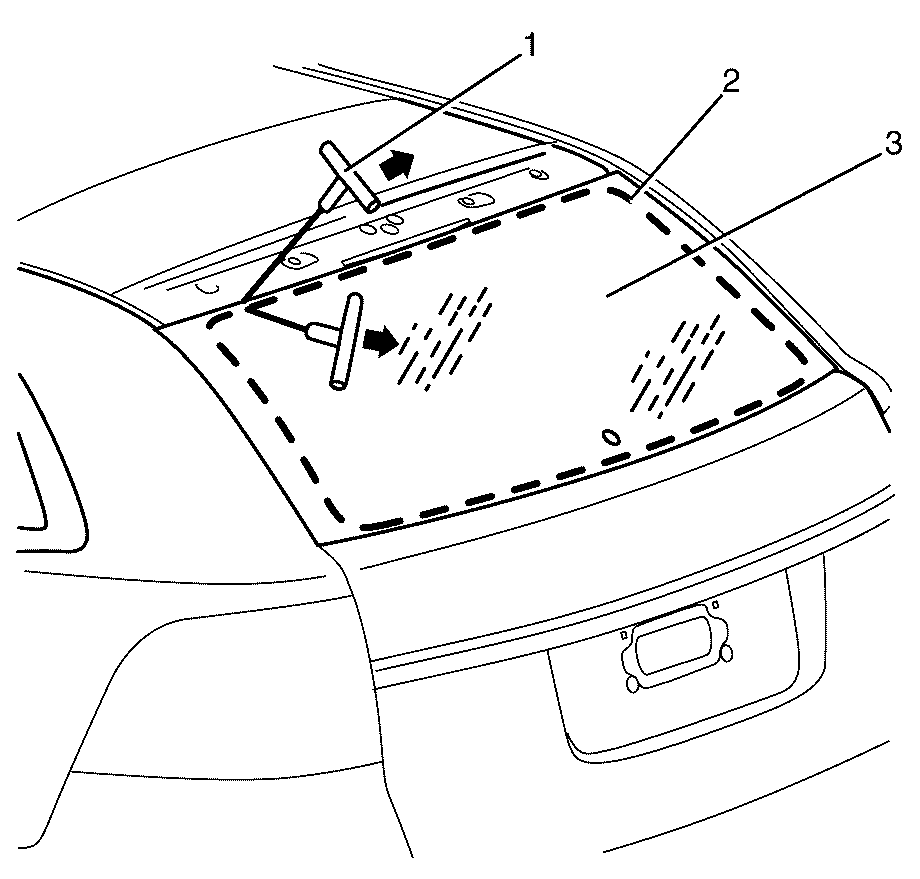
Important: Keep the inside handle of J-36020 (1) against the liftgate window (2) and cycle the full length of the piano wire to prevent heat build up.
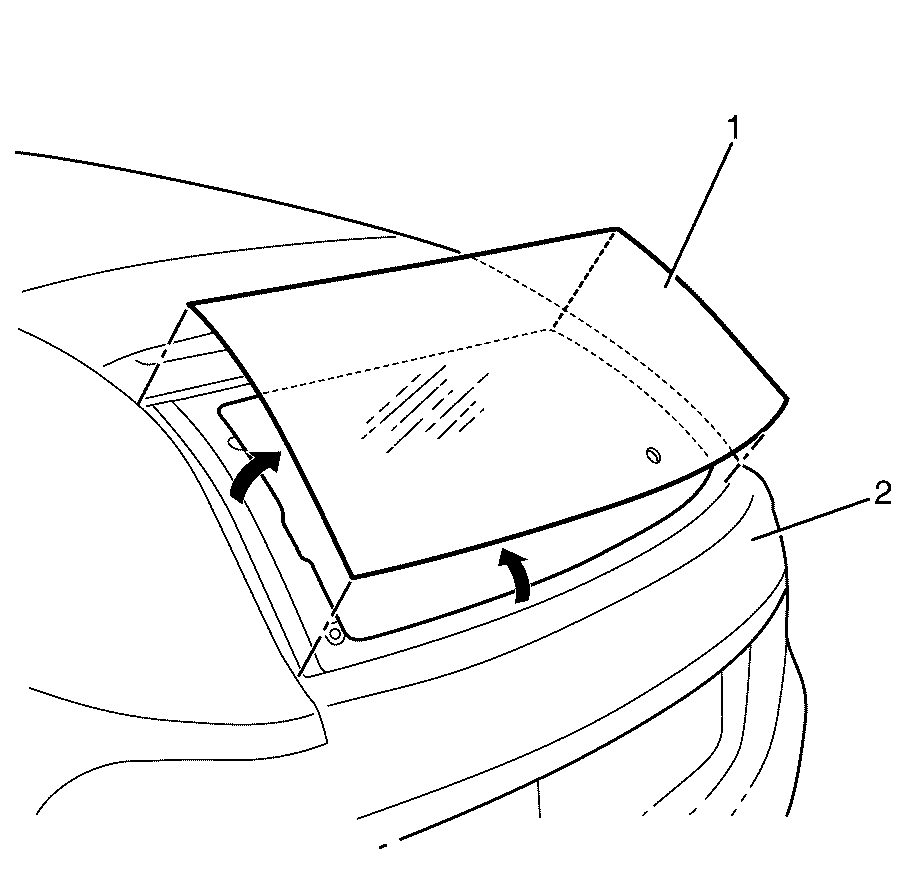
Important: The use of suction cups will aid in the liftgate window (1) removal.
Installation Procedure
- Clean surface and edges of liftgate window where urethane is to be applied.
- Apply clear glass primer to the inner surfaces of the liftgate window perimeter. Apply the clear glass primer as shown in the diagram where dimension A = 50mm and dimension B = 100mm.
- Apply the black glass primer to the liftgate window (1). Apply the clear glass primer as shown in the diagram where dimension A = 25mm and dimension B = 47mm.
- Apply a 7mm wide and 14mm deep continuous layer of urethane GMW3041 or equivalent to the inside perimeter of the liftgate window (1). Apply the urethane as shown in the diagram where dimension A = 12.5mm and dimension B = 59mm.
- With the aid of an assistant install the liftgate window (1) to the vehicle (2).
- Press the liftgate window (1) firmly into position.
- Open the liftgate
- Install a suitable liftgate brace to the vehicle.
- Connect the liftgate window electrical connectors (2) to the liftgate window (1).
- Remove the double layer of masking tape from around the perimeter of the painted surfaces and the interior trim.
- Install the liftgate upper moulding. Refer to Liftgate Upper Molding Replacement.
- Install the liftgate window upper garnish moulding. Refer to Liftgate Window Upper Garnish Molding Replacement.
- Install the rear window wiper motor. Refer to Rear Window Wiper Motor Replacement.
- Install the rear window wiper arm. Refer to Rear Window Wiper Arm Replacement.
- Install the liftgate trim panel. Refer to Liftgate Trim Panel Replacement.
- Install the liftgate window lower garnish moulding. Refer to Liftgate Window Lower Garnish Molding Replacement.
- Install the liftgate window side garnish moulding. Refer to Liftgate Window Side Garnish Molding Replacement.
- Remove the suitable liftgate brace from the vehicle.
Important: Use a lint free cloth and suitable oil free cleaning agent to make sure adhesion of the urethane.
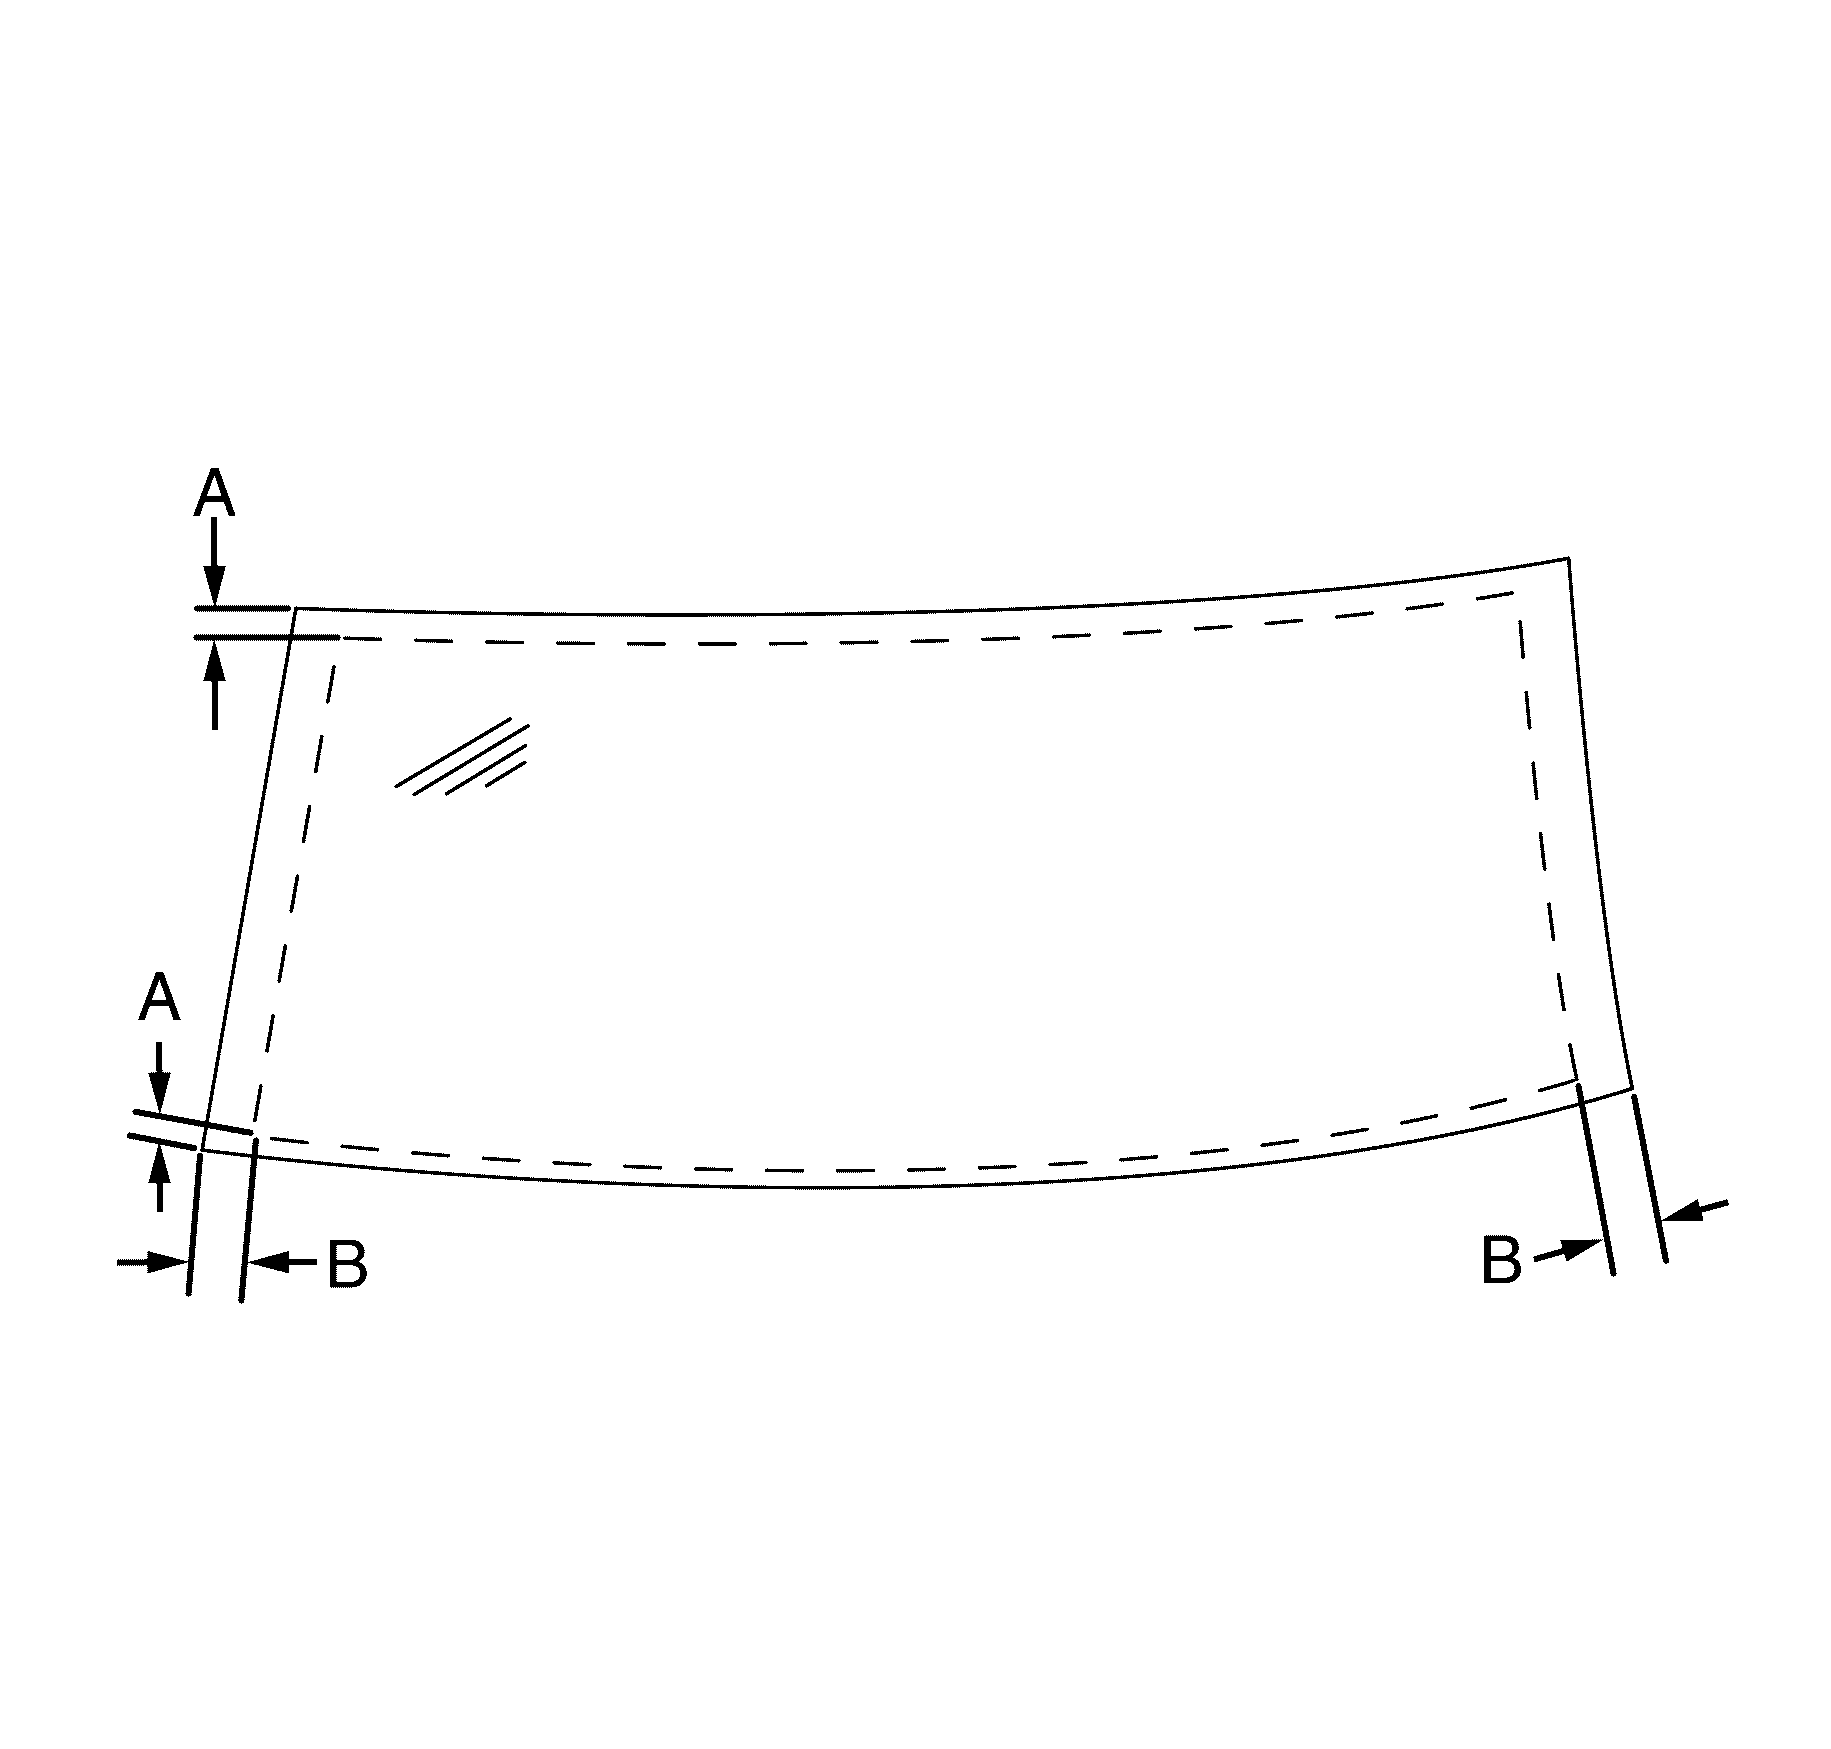
Important: The clear glass primer dries almost instantly and may stain the viewing area of the liftgate window if not applied evenly. Wipe off the clear glass primer with a lint free cloth immediately after application.
Important: Apply the clear glass primer with a suitable applicator.
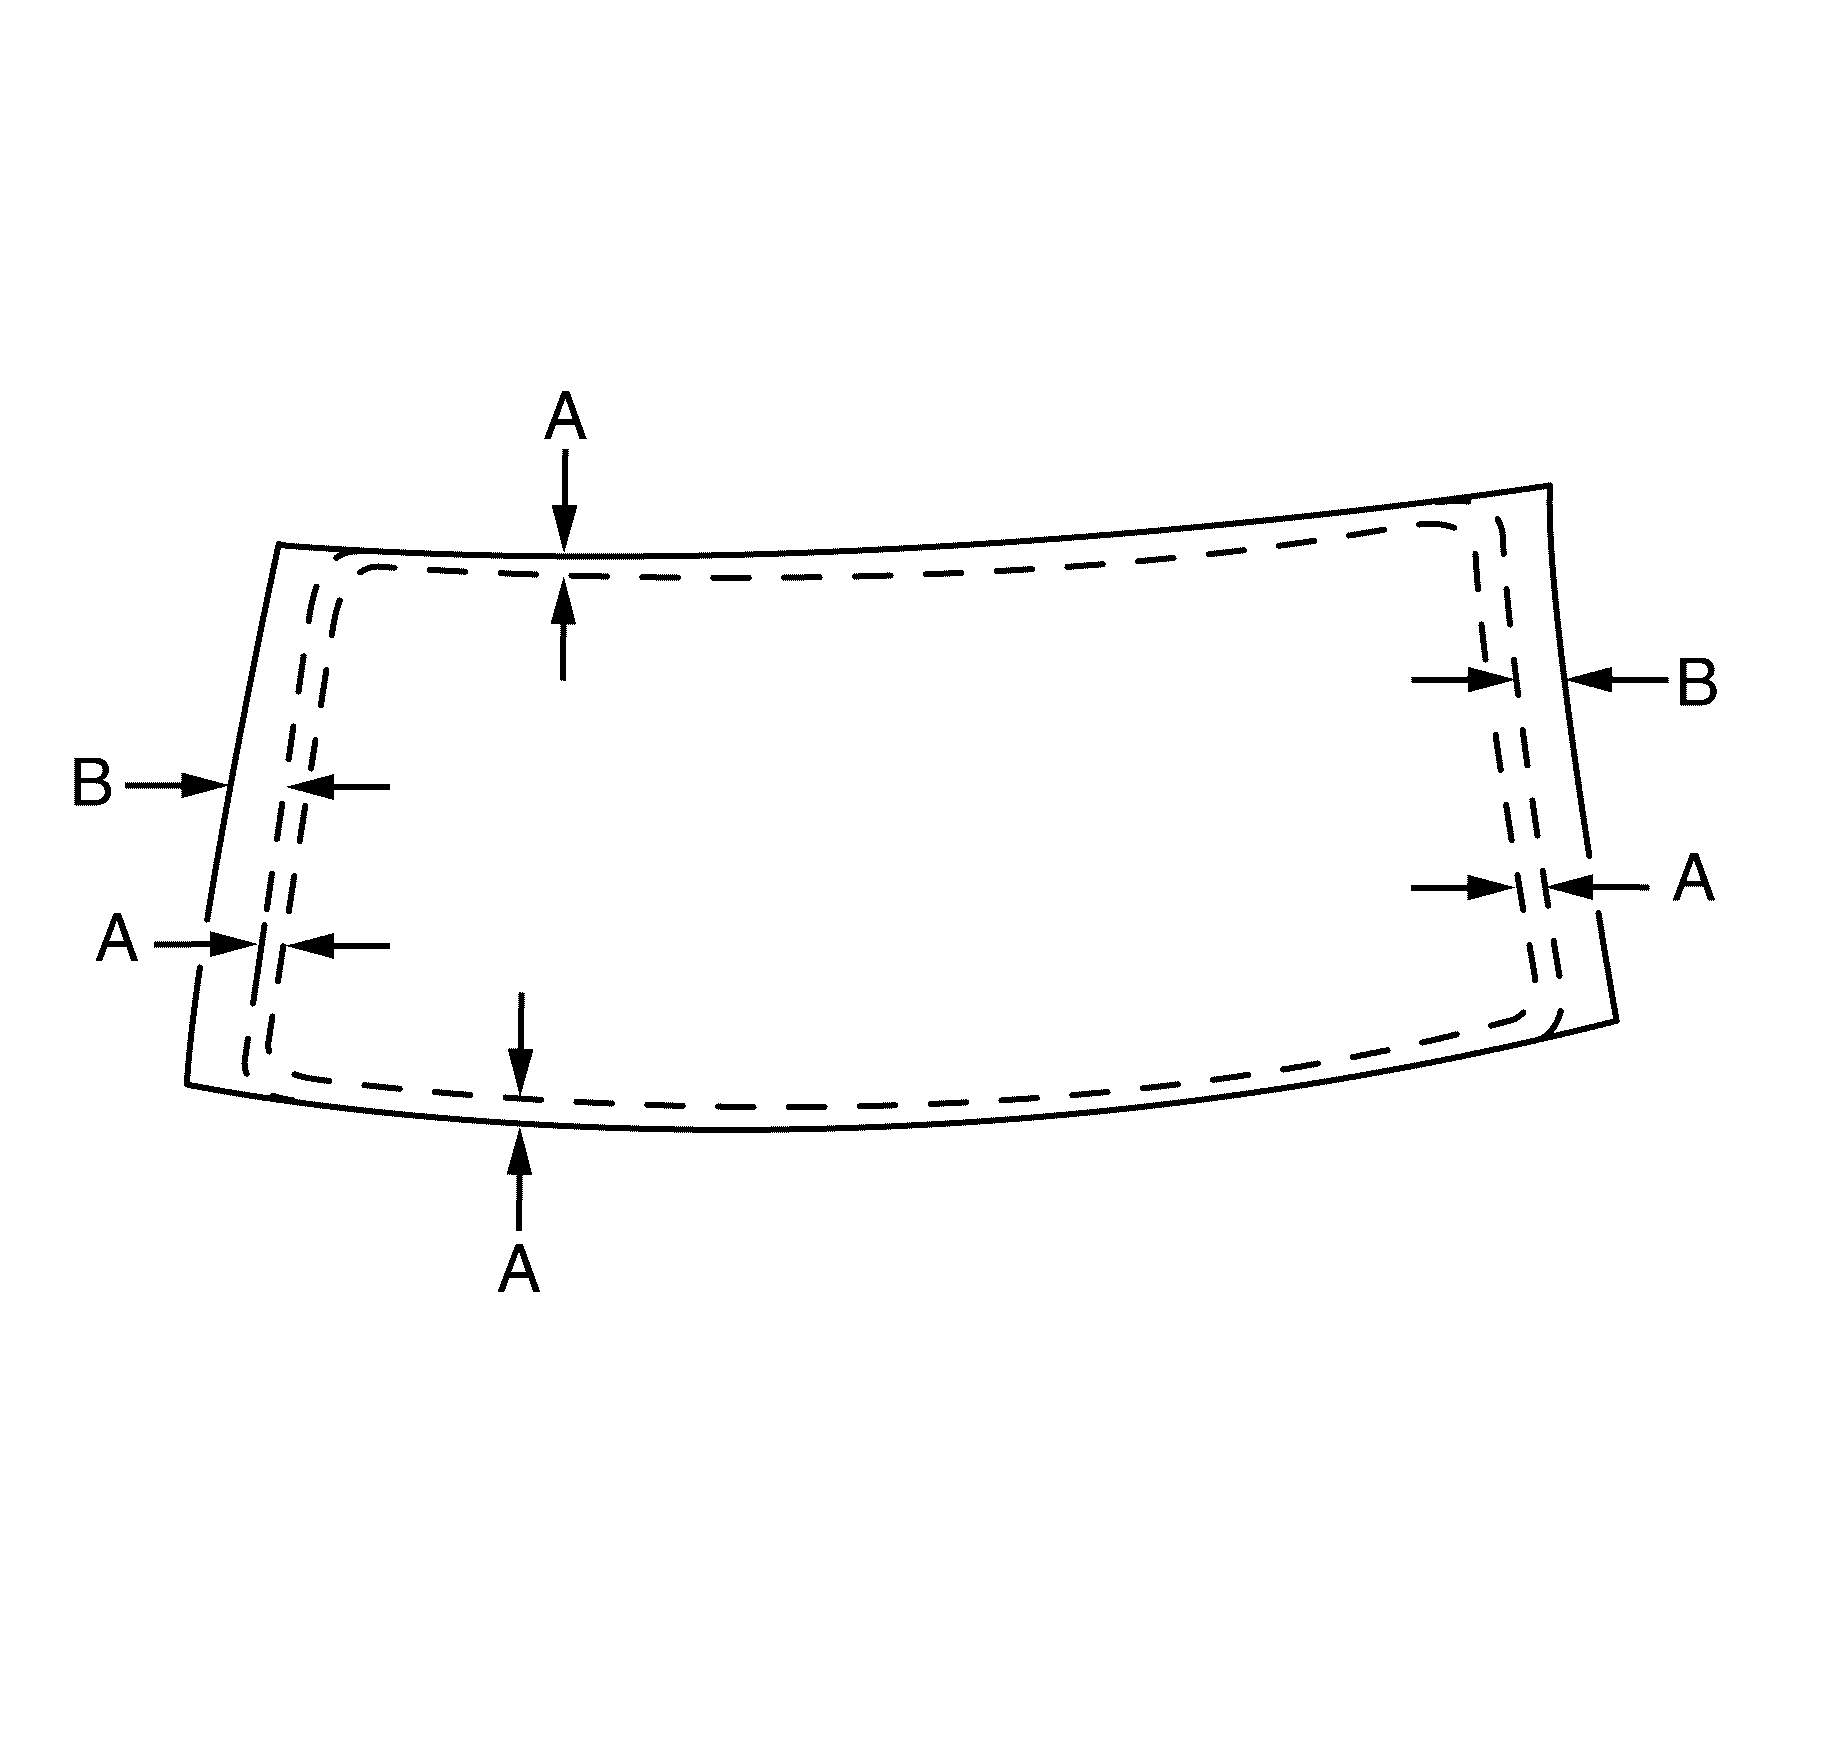
Important: Agitate the black glass primer for 1 minute to mix thoroughly.
Important: Apply a 25mm wide layer of black glass primer with the applicator to the liftgate window (1) perimeter.
Caution: Refer to Window Retention Caution in the Preface section.
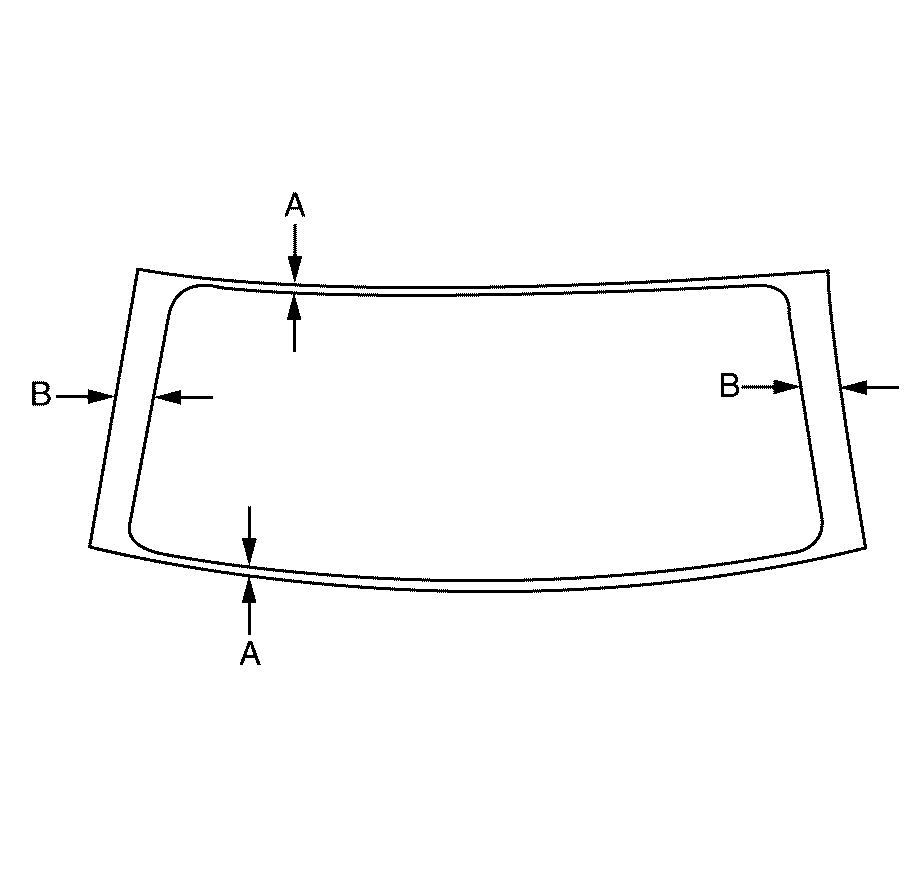
Important: The liftgate window (1) is aligned by two datum pins located on the outer upper edges of the liftgate window and two 8mm thick foam spacers located on the outer lower edges of the liftgate window (1).
Important: During the curing period of the urethane adhesive, the door windows should be left open to avoid a build up of pressure when the doors are opened and closed.

Important: When a suitable hold open device is being removed or installed, provide alternate support to avoid the possibility of damage to the vehicle or personal injury.
