For 1990-2009 cars only
Quarter Lower Rear Trim Panel Replacement C 100/Long Body
Removal Procedure
- Remove the rear seat lower bolts. Refer to Seat Belt Retractor Replacement - No. 1 Rear and Seat Belt Retractor Replacement - No. 2 Rear .
- Remove the rear compartment stow tray. Refer to Rear Storage Compartment Replacement .
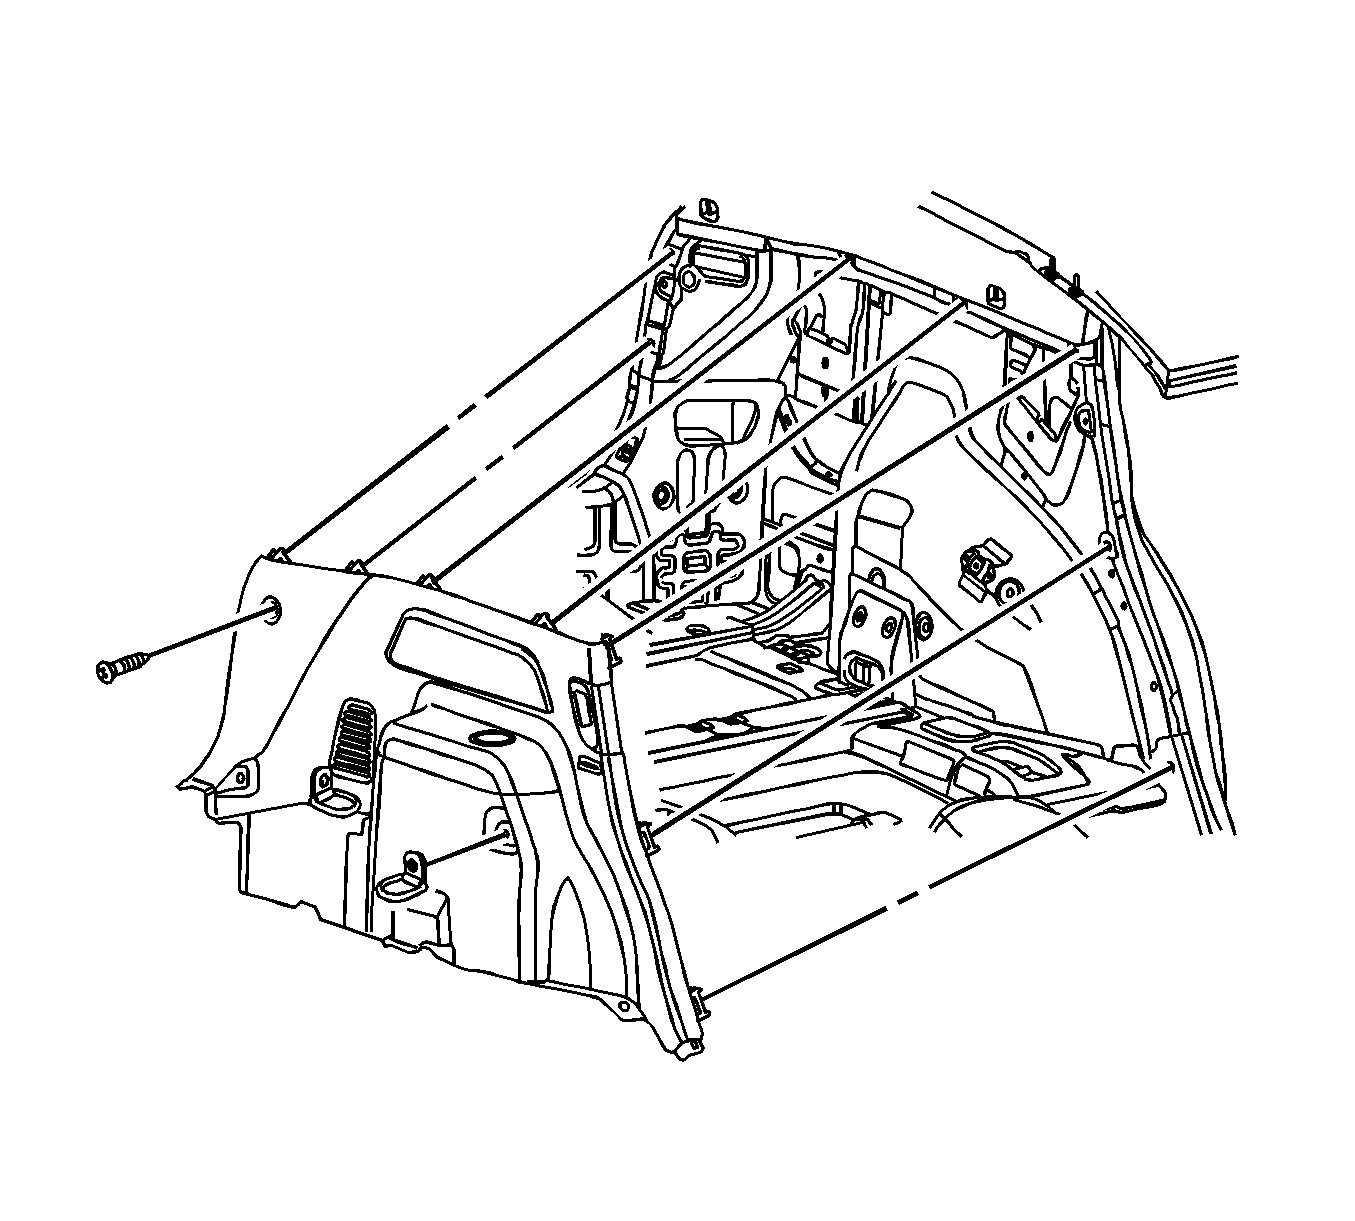
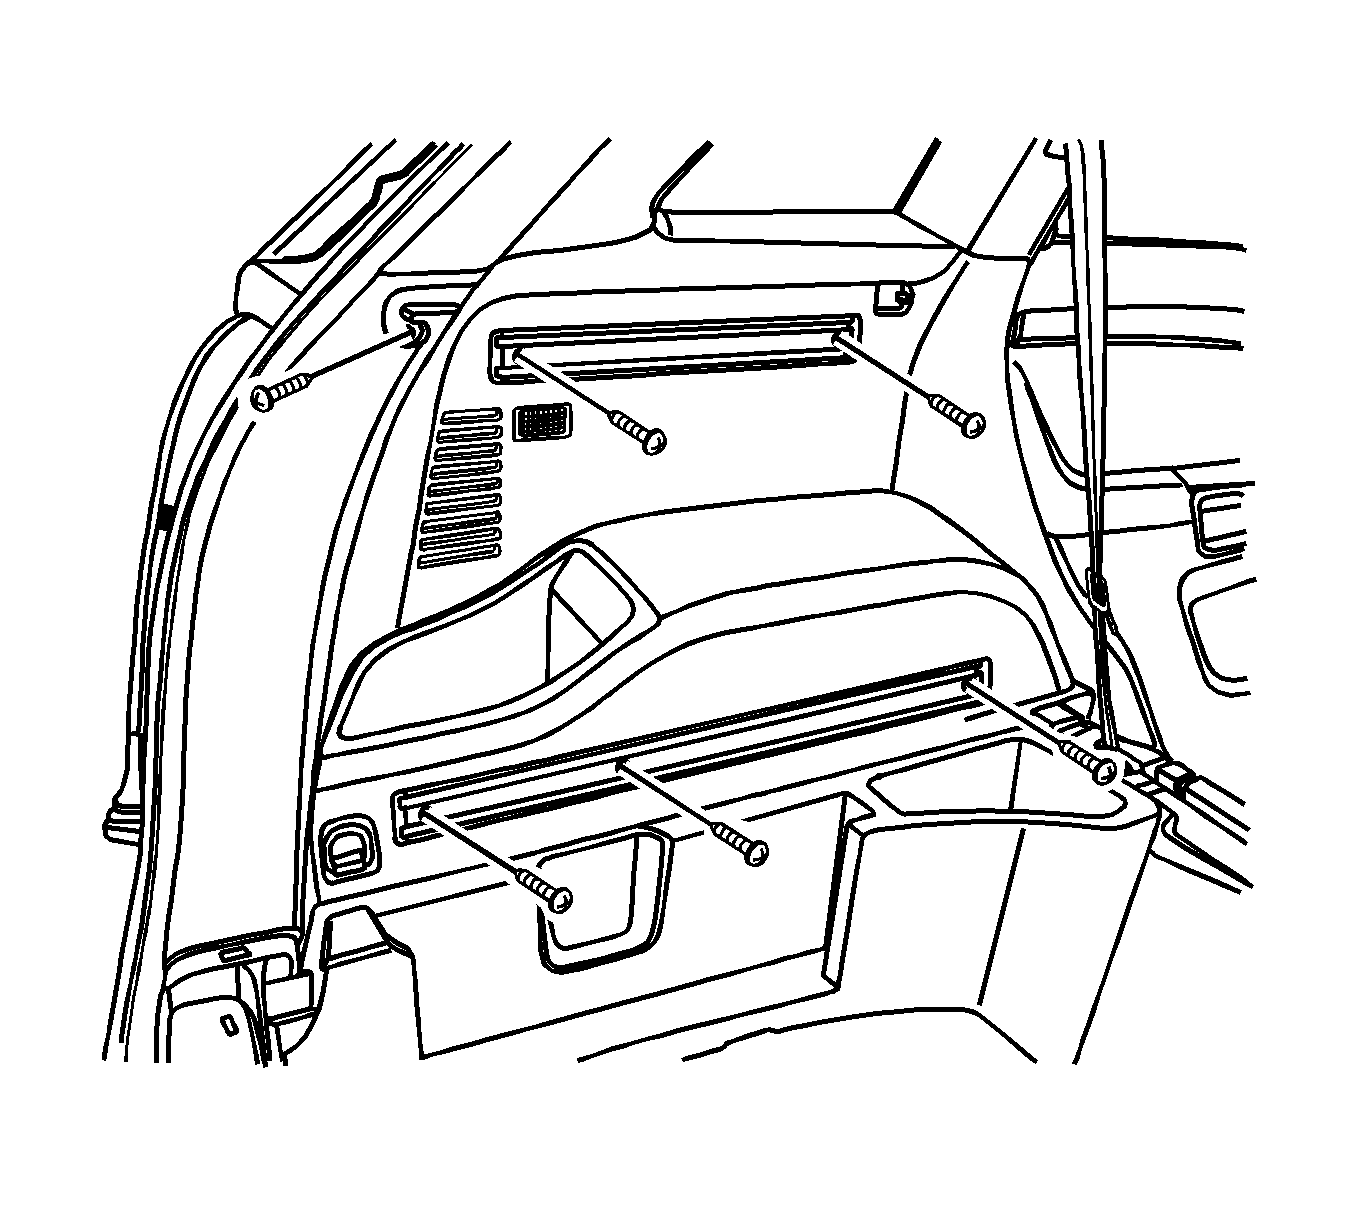
- Remove the screws and the rear quarter lower trim panel.

Installation Procedure
- Install the rear quarter lower trim panel with the screws.
- Install the rear compartment stow tray. Refer to Rear Storage Compartment Replacement .
- Install the rear seat lower bolts. Refer to Seat Belt Retractor Replacement - No. 1 Rear and Seat Belt Retractor Replacement - No. 2 Rear .
Notice: Refer to Fastener Notice in the Preface section.

Tighten
Tighten the rear trim panel screws to 2 N·m (18 lb in).
Quarter Lower Rear Trim Panel Replacement C 105/Short Body
Removal Procedure
- Remove the rear seat lower bolts. Refer to Seat Belt Retractor Replacement - No. 1 Rear and Seat Belt Retractor Replacement - No. 2 Rear .
- Remove the rear compartment stow tray. Refer to Rear Storage Compartment Replacement .
- Remove the screws and the rear quarter lower trim panel.

Installation Procedure
- Install the rear quarter lower trim panel with the screws.
- Install the rear compartment stow tray. Refer to Rear Storage Compartment Replacement .
- Install the rear seat lower bolts. Refer to Seat Belt Retractor Replacement - No. 1 Rear and Seat Belt Retractor Replacement - No. 2 Rear .
Notice: Refer to Fastener Notice in the Preface section.

Tighten
Tighten the rear trim panel screws to 2 N·m (18 lb in).
Quarter Lower Rear Trim Panel Replacement C 105/Short Body Auxiliary HVAC
Removal Procedure
- Remove the rear seat belt retractors. Refer to Seat Belt Retractor Replacement - No. 1 Rear and Seat Belt Retractor Replacement - No. 2 Rear.
- Remove the rear seat and rear number two folding seat. Refer to Rear Number 2 Folding Seat Replacement and Rear Seat Replacement.
- Remove the rear passenger door rocker panel.
- Remove the rear compartment sill trim plate. Refer to Rear Side Door Sill Trim Plate Replacement.
- Remove the rear compartment stow tray. Refer to Rear Storage Compartment Replacement.
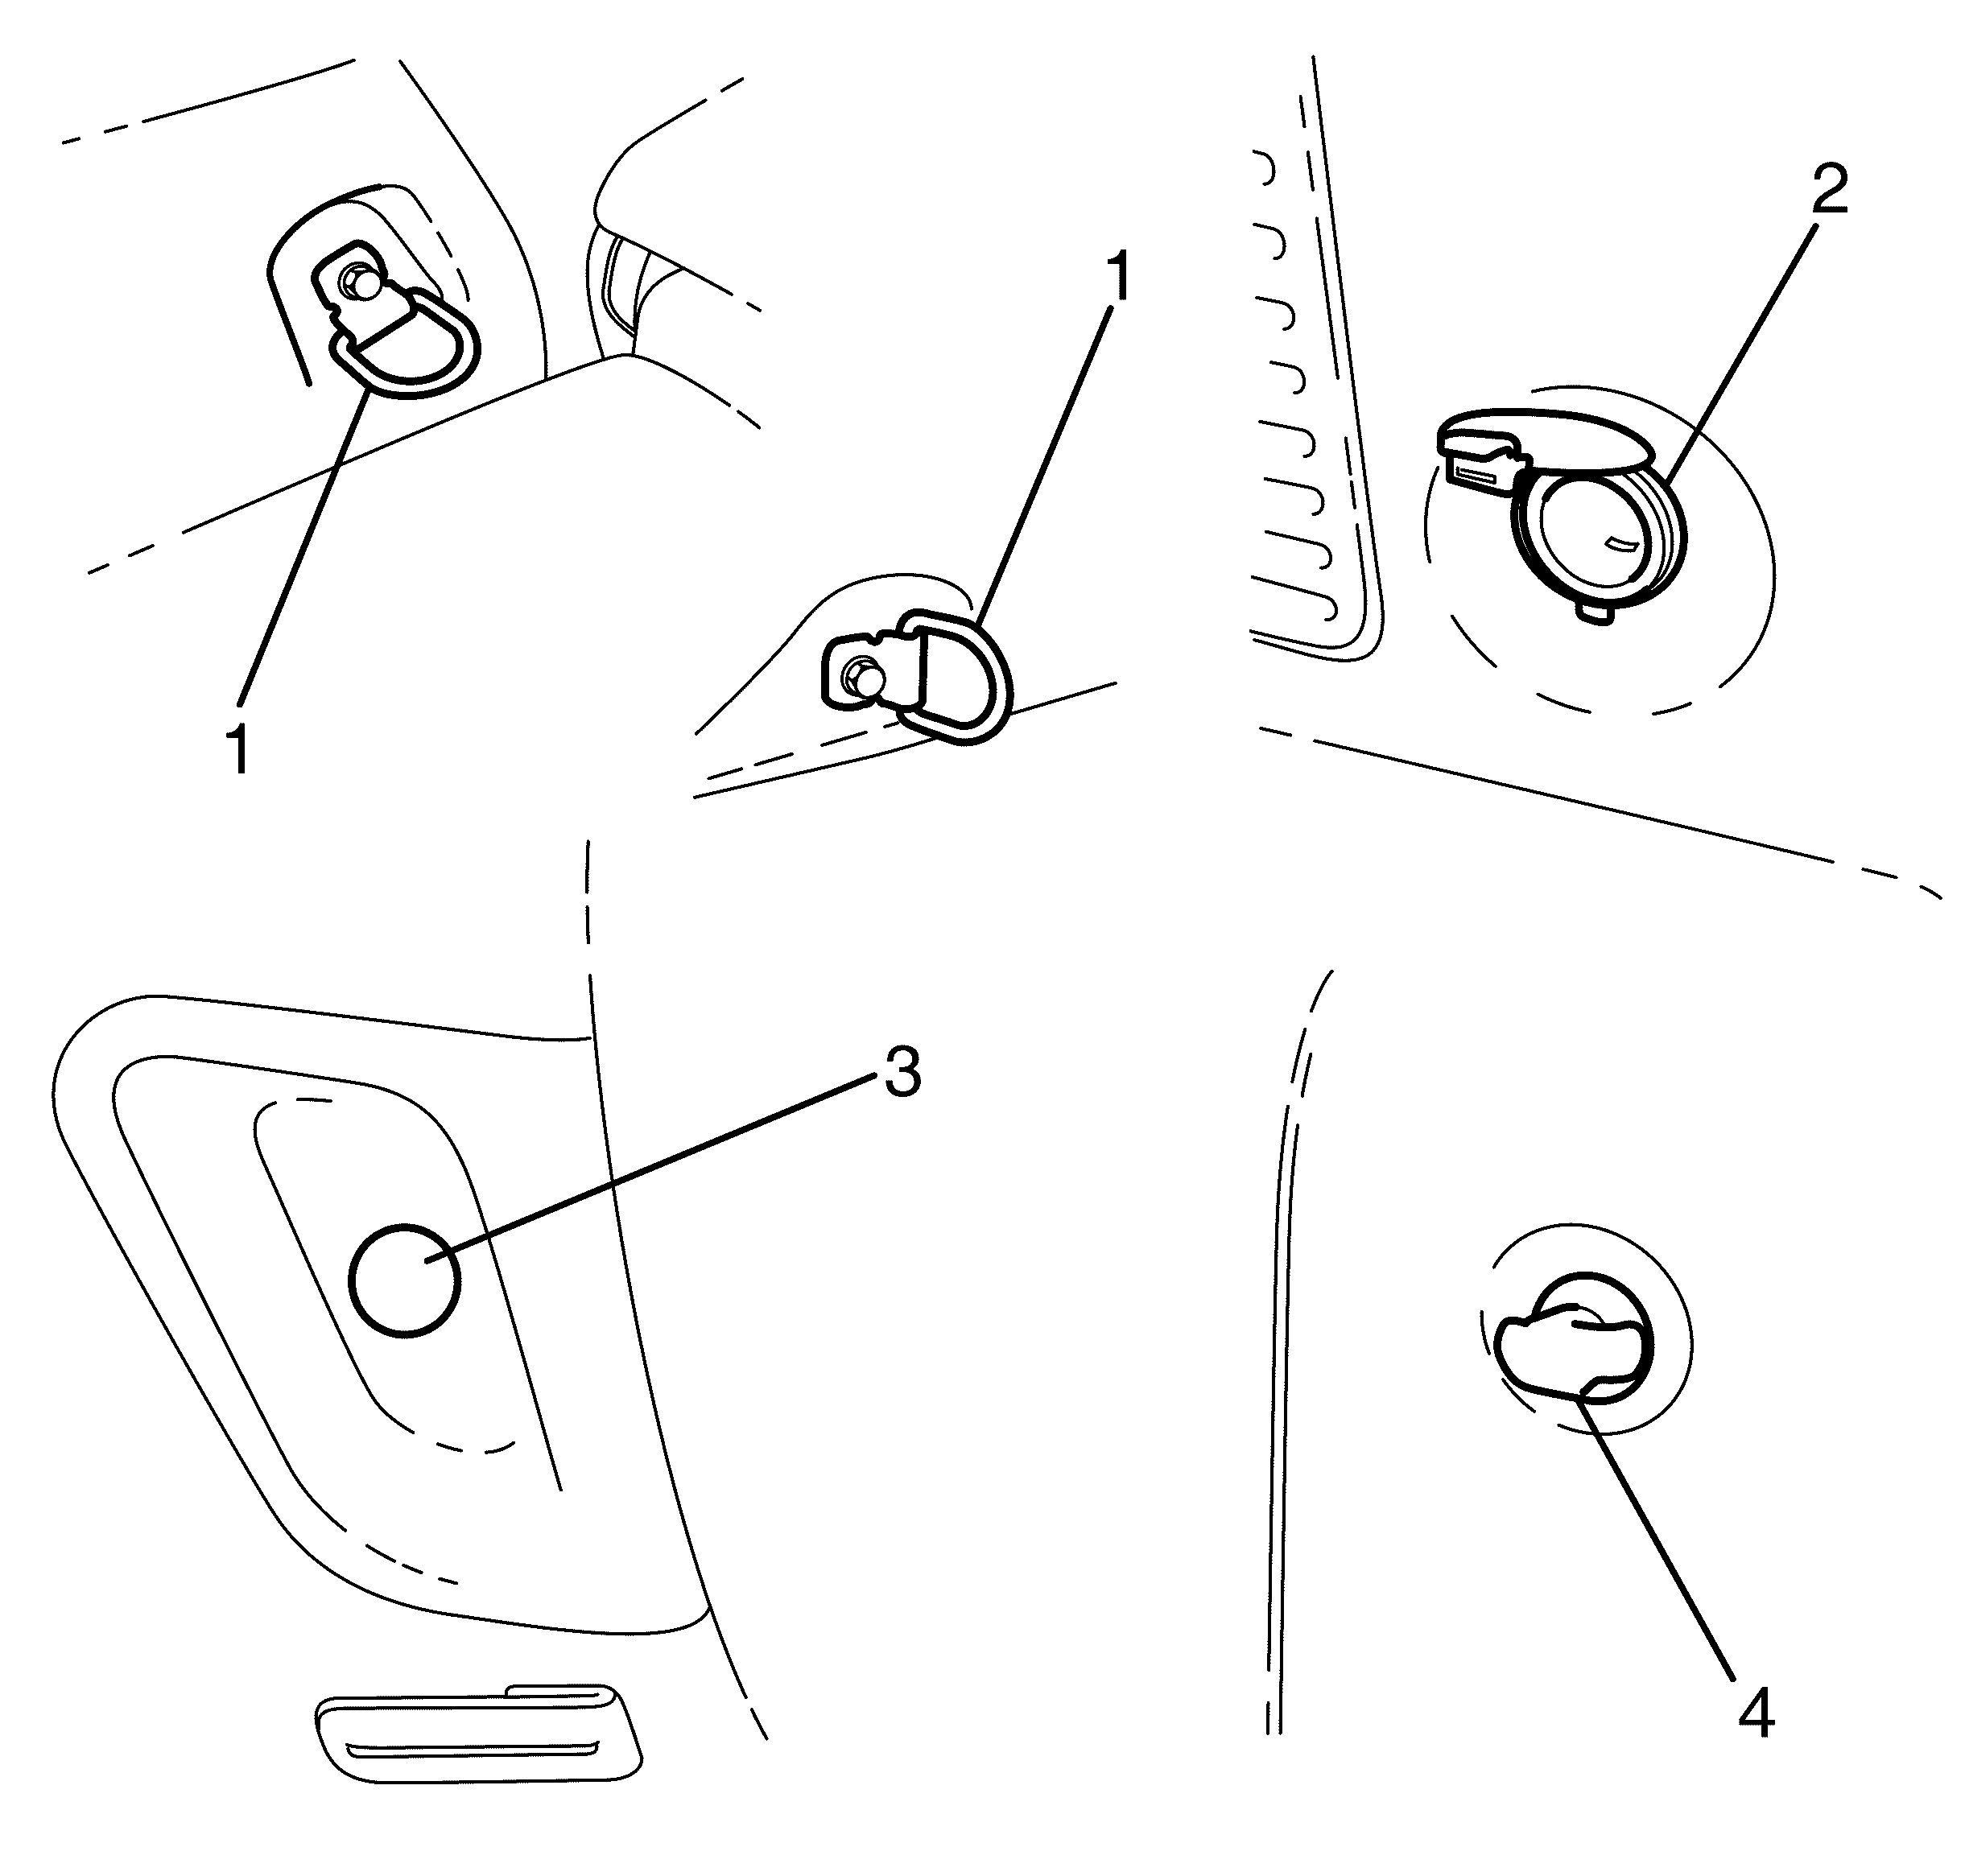
- Using suitable tools, remove the tie down hooks (1), auxiliary power outlet (2) trim screw cap (3) and cargo net fixture (4) from the rear quarter lower trim panel.
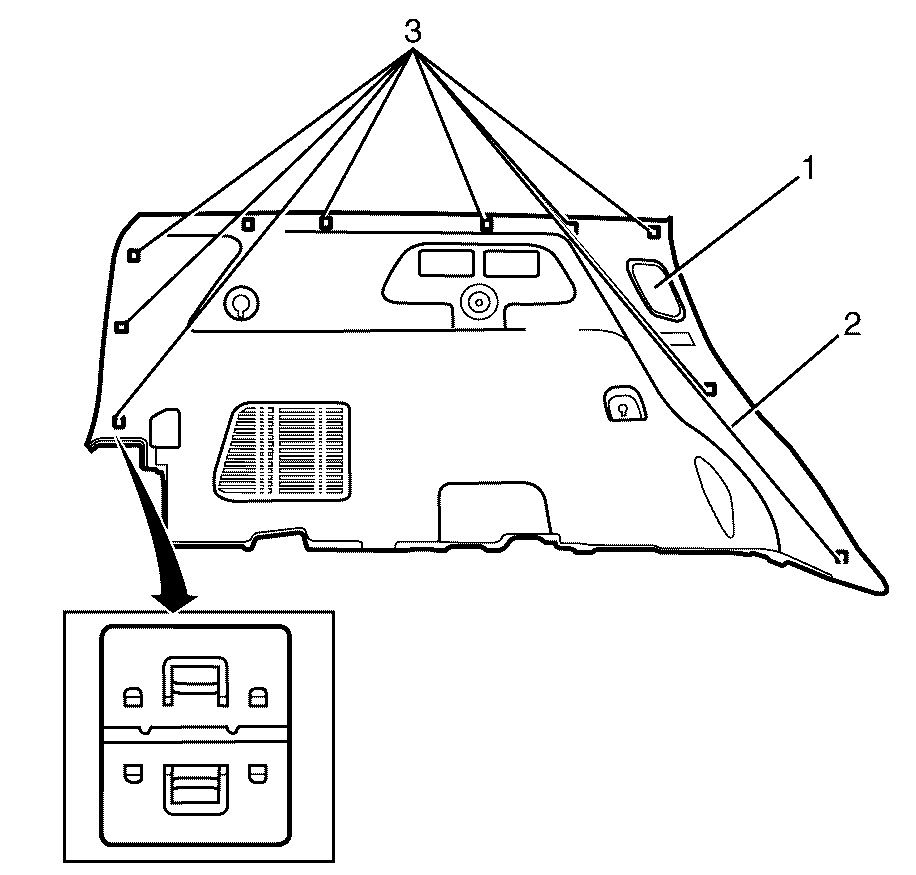
- Remove the rear quarter lower trim panel screws (1) from the rear quarter lower trim panel (2).
- Using a suitable tool, disengage the rear quarter lower trim panel clips (3), disconnect the auxiliary heater and air conditioning control module connectors, and remove the rear quarter lower trim panel (2) from the vehicle body.
- Remove the auxiliary heating and air conditioning control module. Refer to Auxiliary Heater and Air Conditioning Control Module Replacement.

Important: Only the rear selt belt retractor to floor fasteners require removal.

Important: The rear passenger door and liftgate seals will require temporary removal to facilitate complete trim removal.
Installation Procedure
- Install the auxiliary heating and air conditioning control module. Refer to Auxiliary Heater and Air Conditioning Control Module Replacement.
- Install the rear quarter lower trim panel (2) into the vehicle body, connecting the rear heating and air conditioning control module connectors and engaging the rear quarter lower trim panel clips (3).
- Install the rear quarter lower trim panel screws (1) into the rear quarter lower trim panel (2).
- Install the tie down hooks (1), auxiliary power outlet (2) and trim screw cap (3) and cargo net fixture (4) from the rear quarter lower trim panel.
- Install the rear seat and rear number two folding seat. Refer to Rear Number 2 Folding Seat Replacement and Rear Seat Replacement.
- Install the rear seat belt retractors. Refer to Seat Belt Retractor Replacement - No. 1 Rear and Seat Belt Retractor Replacement - No. 2 Rear.
- Install the rear compartment stow tray. Refer to Rear Storage Compartment Replacement.
- Install the rear passenger door rocker panel.
- Install the rear compartment sill trim plate. Refer to Rear Side Door Sill Trim Plate Replacement.

Notice: Refer to Fastener Notice in the Preface section.
Tighten
Tighten the rear quarter lower trim panel screws
to 2 N·m (18 lb in).

Tighten
Tighten the tie down hooks to 3 N·m
(26 lb in).
