For 1990-2009 cars only
Special Tools
J 37228 Seal Cutter
Removal Procedure
- Remove the oil level indicator tube. Refer to Oil Level Indicator and Tube Replacement.
- Remove the lower oil pan. Refer to Lower Oil Pan Replacement.
- Remove the engine flywheel. Refer to Engine Flywheel Replacement.
- Remove the front engine crossmember. Refer to Engine Front Crossmember Replacement.
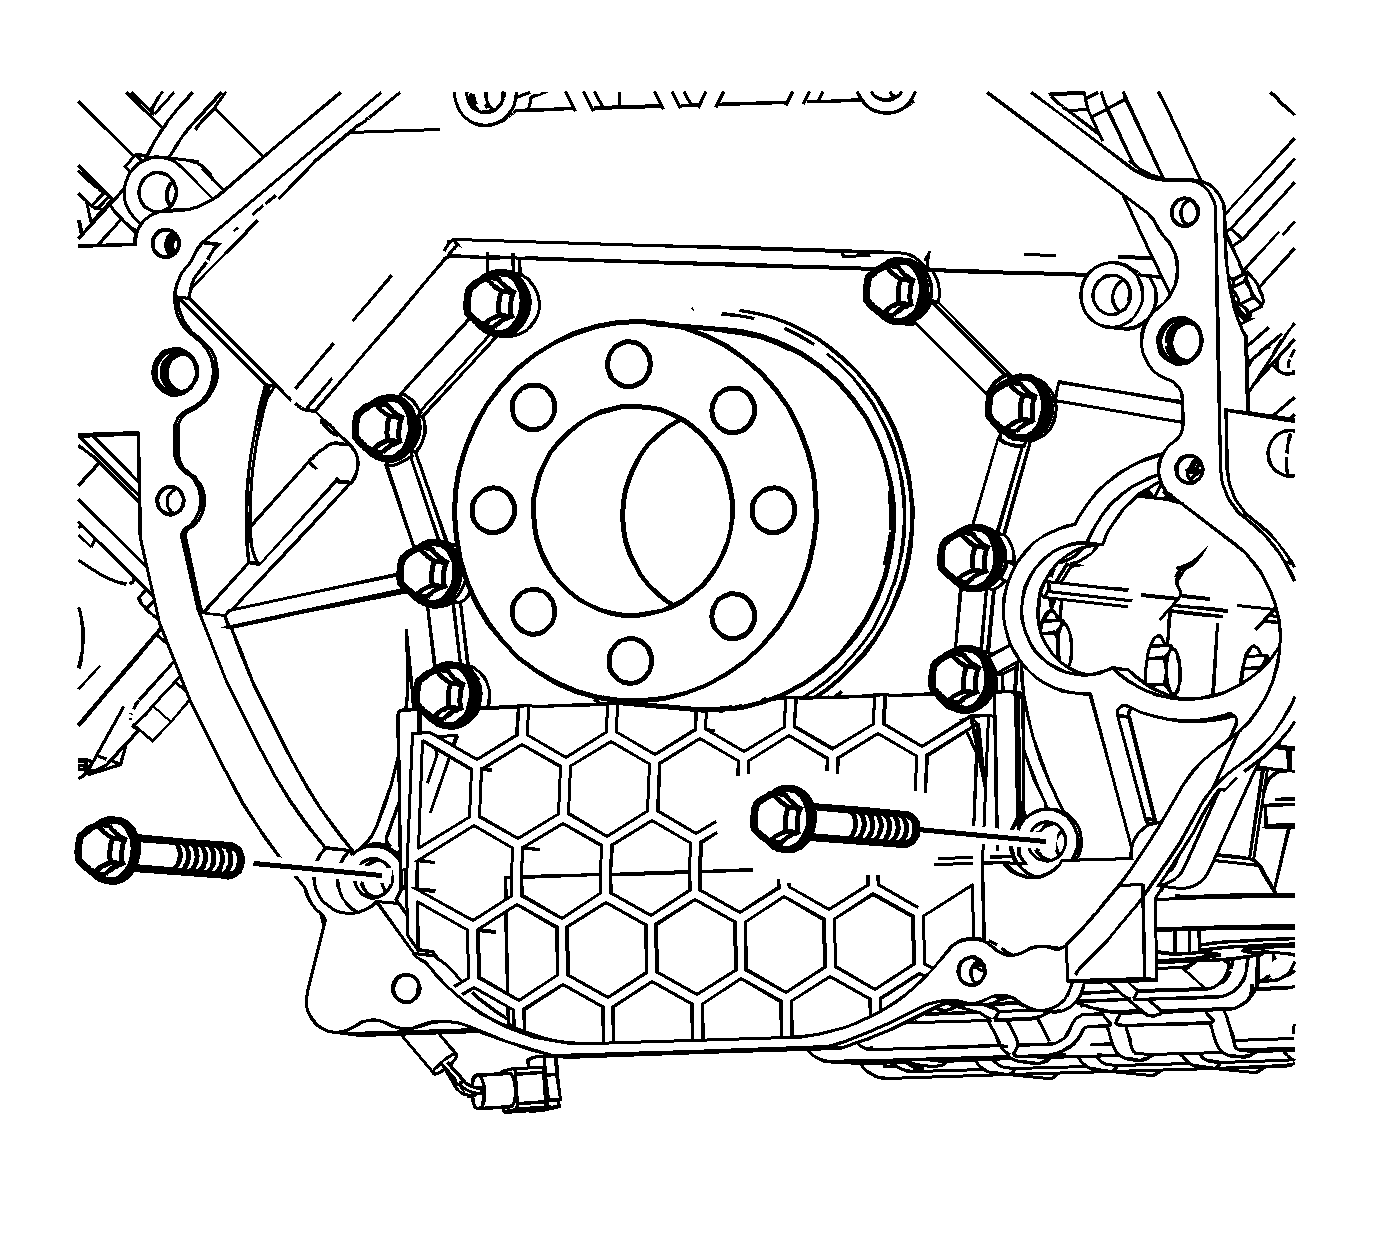
- Remove the 2 flywheel housing to upper oil pan bolts.
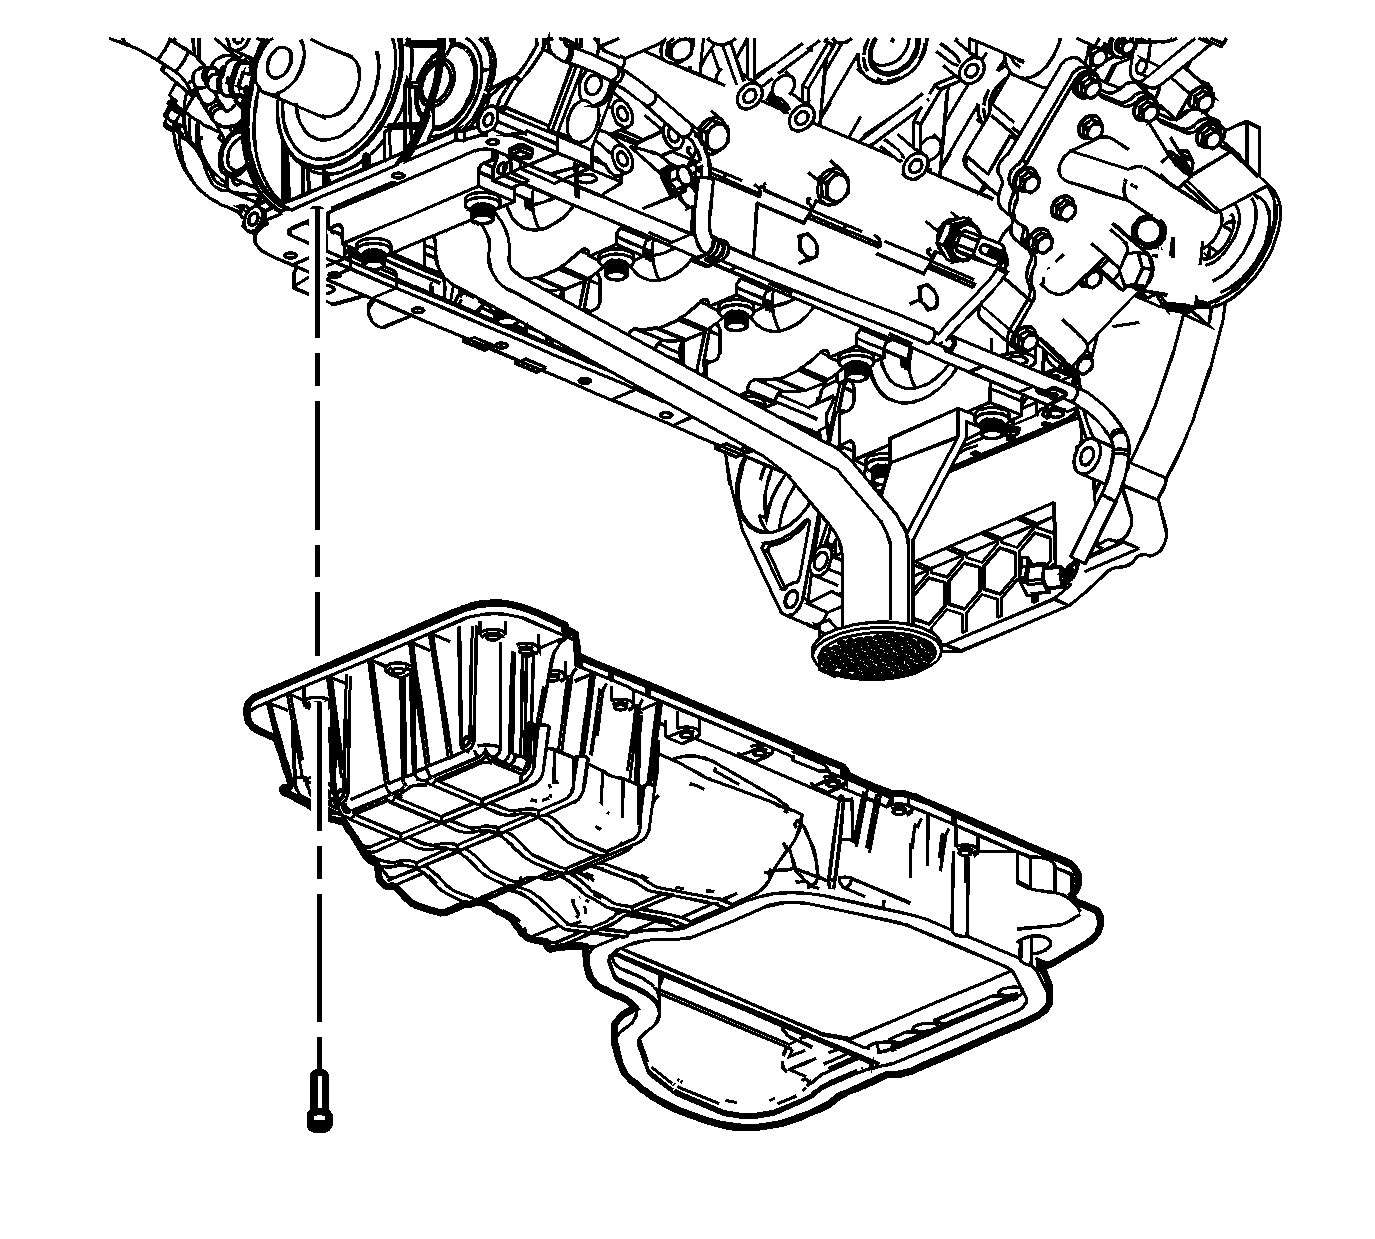
- Remove the upper oil pan bolts and any brackets. Mark the bolt location of the bracket.
- Separate the upper oil pan from the engine block using the J 37228 .
- Remove the upper oil pan.


Installation Procedure
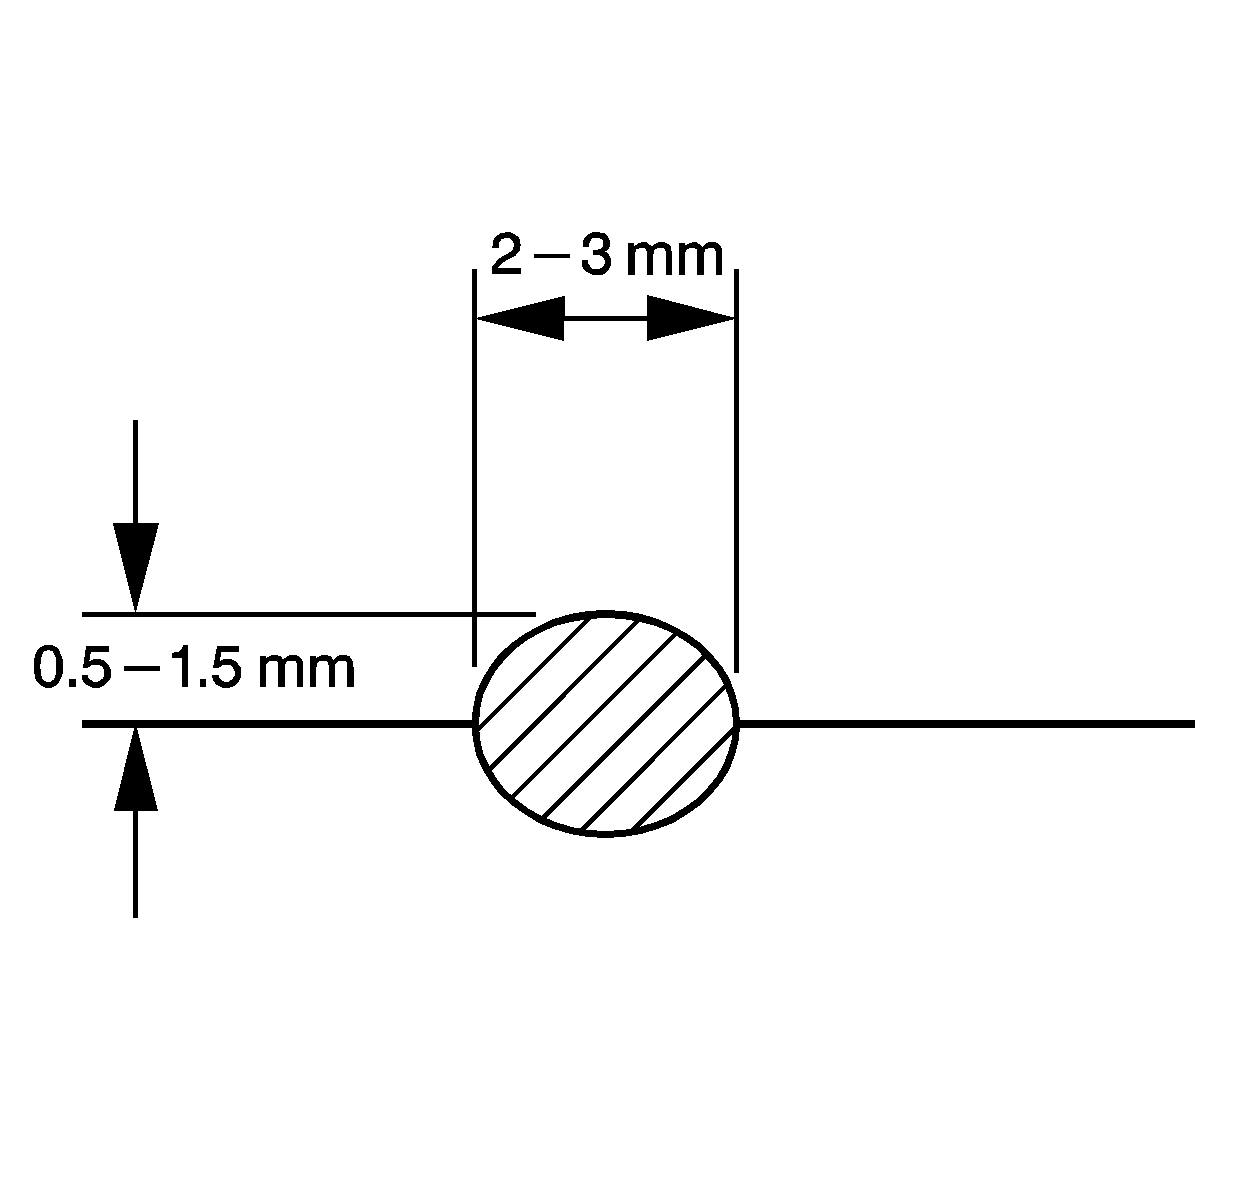
- Apply a 2-3 mm (0.79-0.118 in) wide by 0.5-1.5 mm (0.02-0.06 in) bead of sealant to the upper oil pan mating surfaces. Refer to Adhesives, Fluids, Lubricants, and Sealers.
- Apply a 2-3 mm (0.79-0.118 in) wide by 0.5-1.5 mm (0.02-0.06 in) bead of sealant to the flywheel housing sealing surface. Refer to Adhesives, Fluids, Lubricants, and Sealers.
- Install the upper oil pan to the engine block.
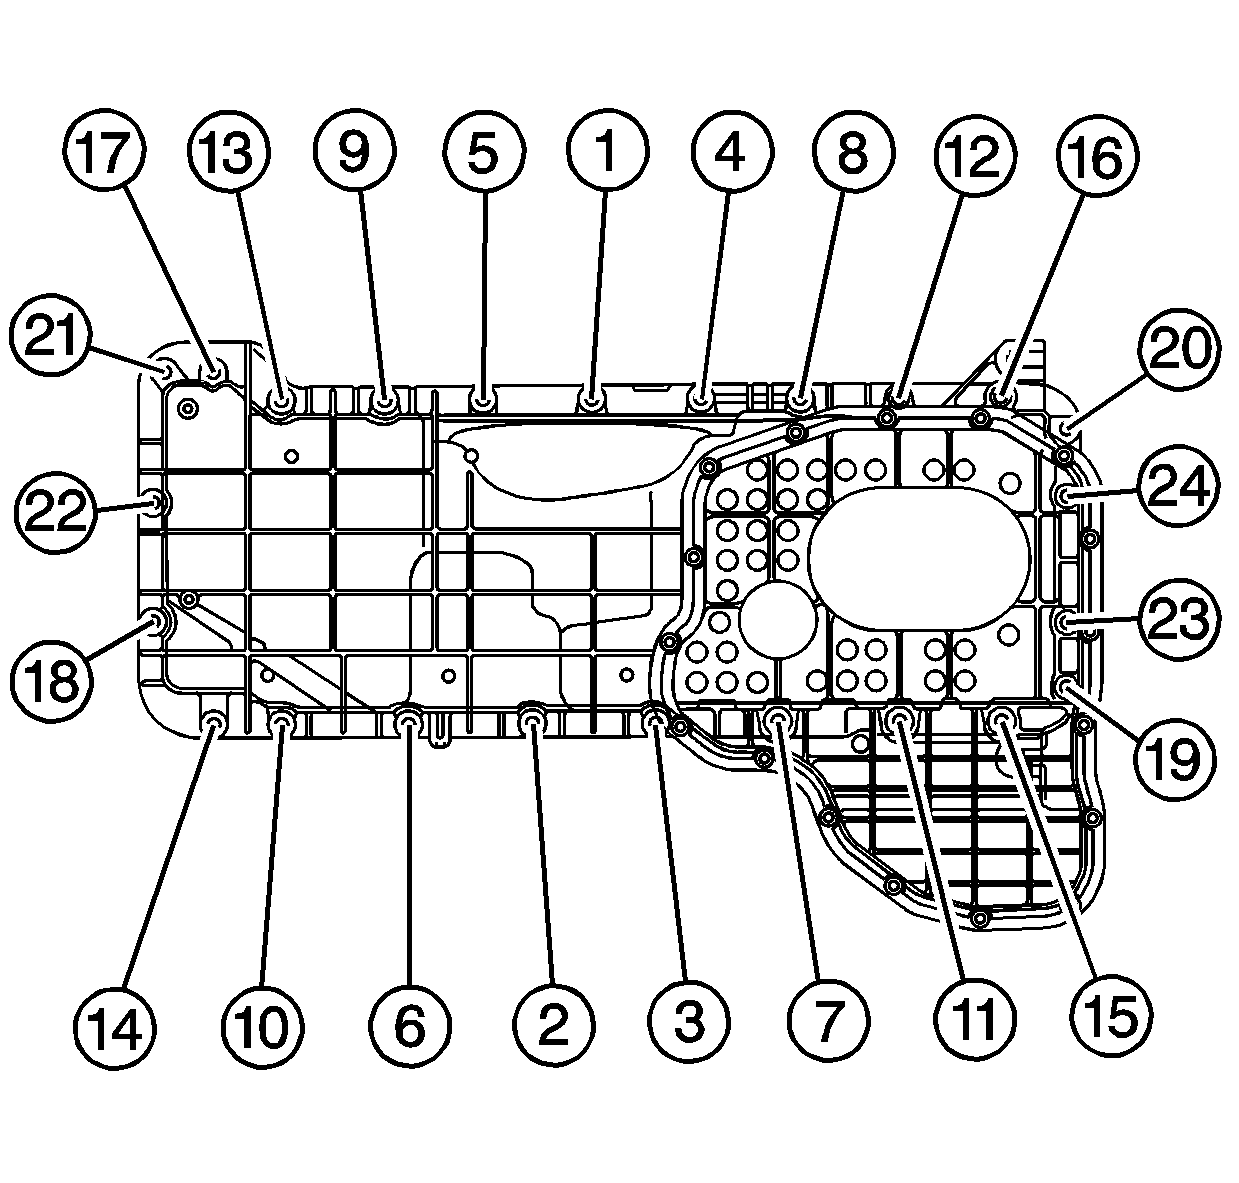
- Install any brackets and the upper oil pan bolts in the sequence shown and tighten to 20 N·m (15 lb ft).
- Install the 2 flywheel housing to upper oil pan bolts and tighten to 50 N·m (37 lb ft).
- Install the front engine crossmember. Refer to Engine Front Crossmember Replacement.
- Install the engine flywheel. Refer to Engine Flywheel Replacement.
- Install the lower oil pan. Refer to Lower Oil Pan Replacement.
- Install the oil level indicator tube. Refer to Oil Level Indicator and Tube Replacement.


Caution: Refer to Fastener Caution in the Preface section.


