Rear Brake Rotor Replacement 6500, 7500, 8500
Tools Required
| • | J 44959 Torque-Bit Socket T-70 |
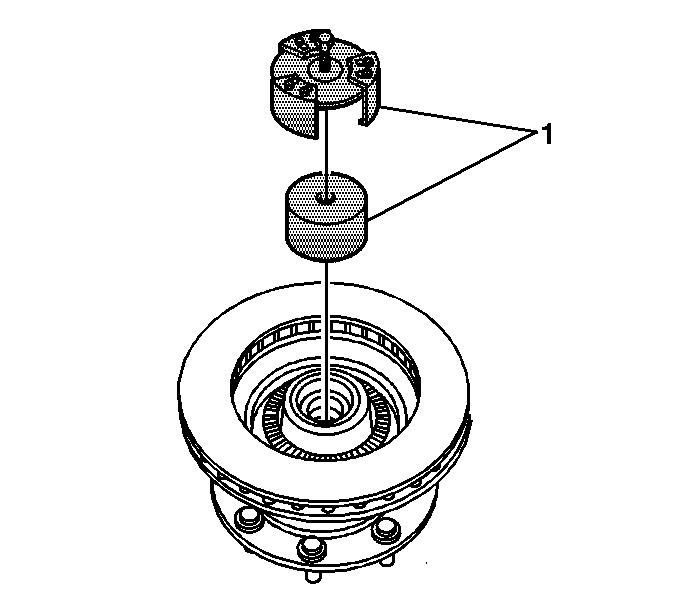
| • | J 45107 Tone Ring Remover/Installer |
Removal Procedure
Caution: Refer to Brake Dust Caution in the Preface section.
- Block the wheels.
- Apply the parking brake.
- Raise the vehicle. Refer to Lifting and Jacking the Vehicle .
- Remove the tire and wheel. Refer to Tire and Wheel Removal and Installation .
- Remove the brake caliper and mounting plate. Refer to Rear Brake Caliper Mount Plate Replacement .
- Do not remove the brake line from the caliper.
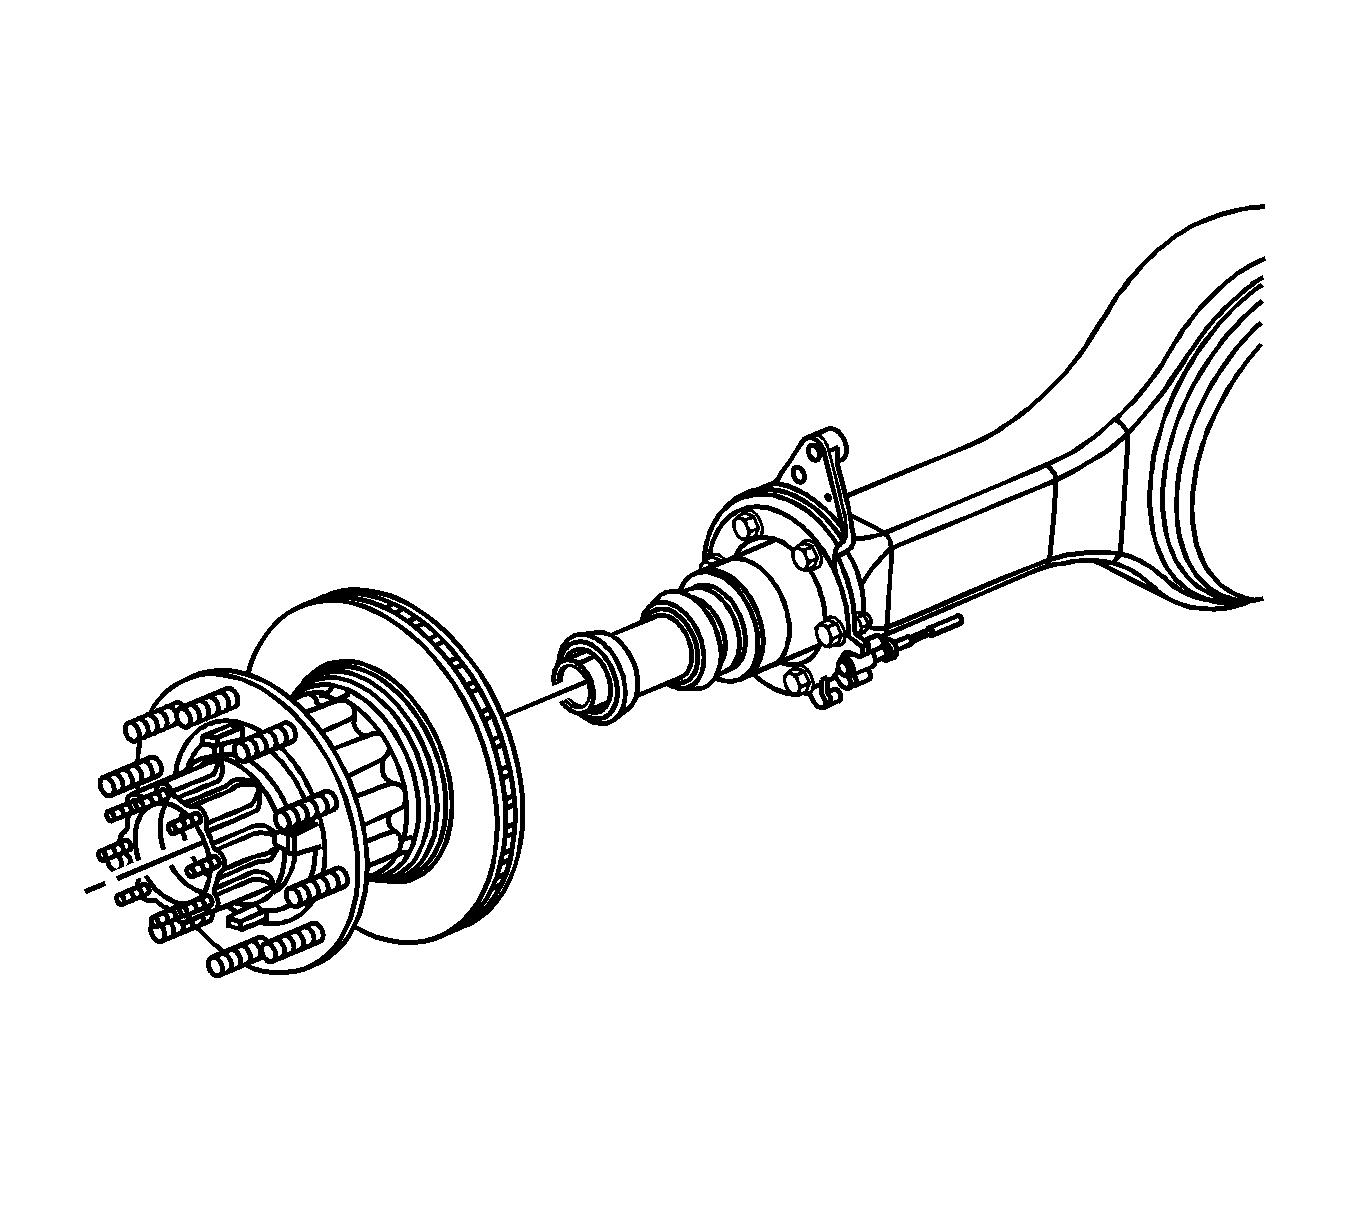
- Remove the brake rotor (with the hub, or with the wheel). Refer to Rear Axle Hub, Bearing, Cup, and/or Seal Replacement .
- Remove the wheel speed sensor ring, if equipped with removable ring, using the J 45107 .
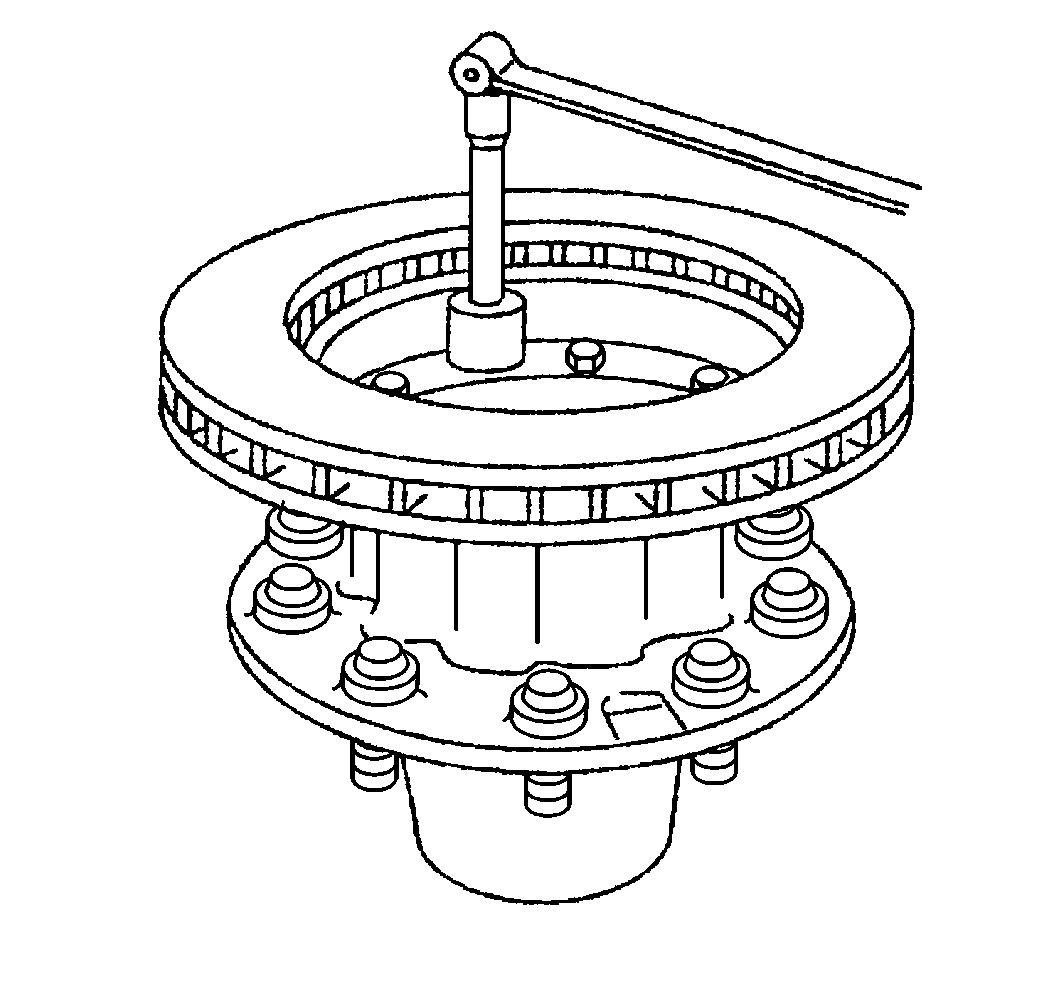
- Remove the bolts that mount the rear brake rotor to the hub or the wheel using the J 44959 .
- Remove the brake rotor from the hub or the wheel.
Notice: Support the brake caliper with heavy mechanic wire, or equivalent, whenever it is separated from its mount and the hydraulic flexible brake hose is still connected. Failure to support the caliper in this manner will cause the flexible brake hose to bear the weight of the caliper, which may cause damage to the brake hose and in turn may cause a brake fluid leak.
Installation Procedure
- Install the brake rotor to the hub, or the wheel.
- Install the bolts that mount the brake rotor to the hub, or the wheel using J 44959 .
- Apply 272 Threadlock GM P/N 12345493 (Canadian P/N 10953488) or equivalent, to the threads of each brake rotor bolt.
- Install the wheel speed sensor ring, if equipped with removable ring, using the J 45107 .
- Install the brake rotor (with the hub, or with the wheel). Refer to Rear Axle Hub, Bearing, Cup, and/or Seal Replacement .
- Clean both sides of the brake rotor using denatured alcohol or an equivalent.
- Install the brake caliper. Refer to Rear Brake Caliper Replacement .
- Install the tire and wheel. Refer to Tire and Wheel Removal and Installation .
- Lower the vehicle.
- Pump the brake pedal several times in order to ensure the pedal is firm and the brake pads are adjusted.
- Remove the wheel blocks.
Notice: Any new rotor must have the protective coating removed from the friction surfaces before being placed in service. Remove the protective coating using denatured alcohol or an equivalent brake cleaner, and wipe the surface clean with clean cloths. Do not use gasoline, kerosene, or other oil base solvents which may leave an oily residue. This residue is damaging to the brake lining and is flammable.

Notice: Refer to Fastener Notice in the Preface section.
Tighten
| • | Tighten the brake rotor bolts (9/16 in OD-10 bolt pattern) to 152 N·m (112 lb ft). |
| • | Tighten the brake rotor bolts (5/8 in OD-5 bolt pattern) to 256 N·m (189 lb ft). |
Important: Ensure that the threads are clean and greaseless before applying the threadlock.

Important: Check the level of the brake fluid in the master cylinder reservoir after pumping the brake pedal.
Rear Brake Rotor Replacement 4500, 5500, GL4, GL8
Tools Required
| • | J 44959 Torque-Bit Socket T-70 |
| • | J 45107 Tone Ring Remover/Installer |
Removal Procedure
Caution: Refer to Brake Dust Caution in the Preface section.
- Block the wheels.
- Apply the parking brake.
- Raise the vehicle. Refer to Lifting and Jacking the Vehicle .
- Remove the tire and wheel. Refer to Tire and Wheel Removal and Installation .
- Remove the brake caliper and mounting plate. Refer to Rear Brake Caliper Mount Plate Replacement .
- Do not remove the brake line from the caliper.
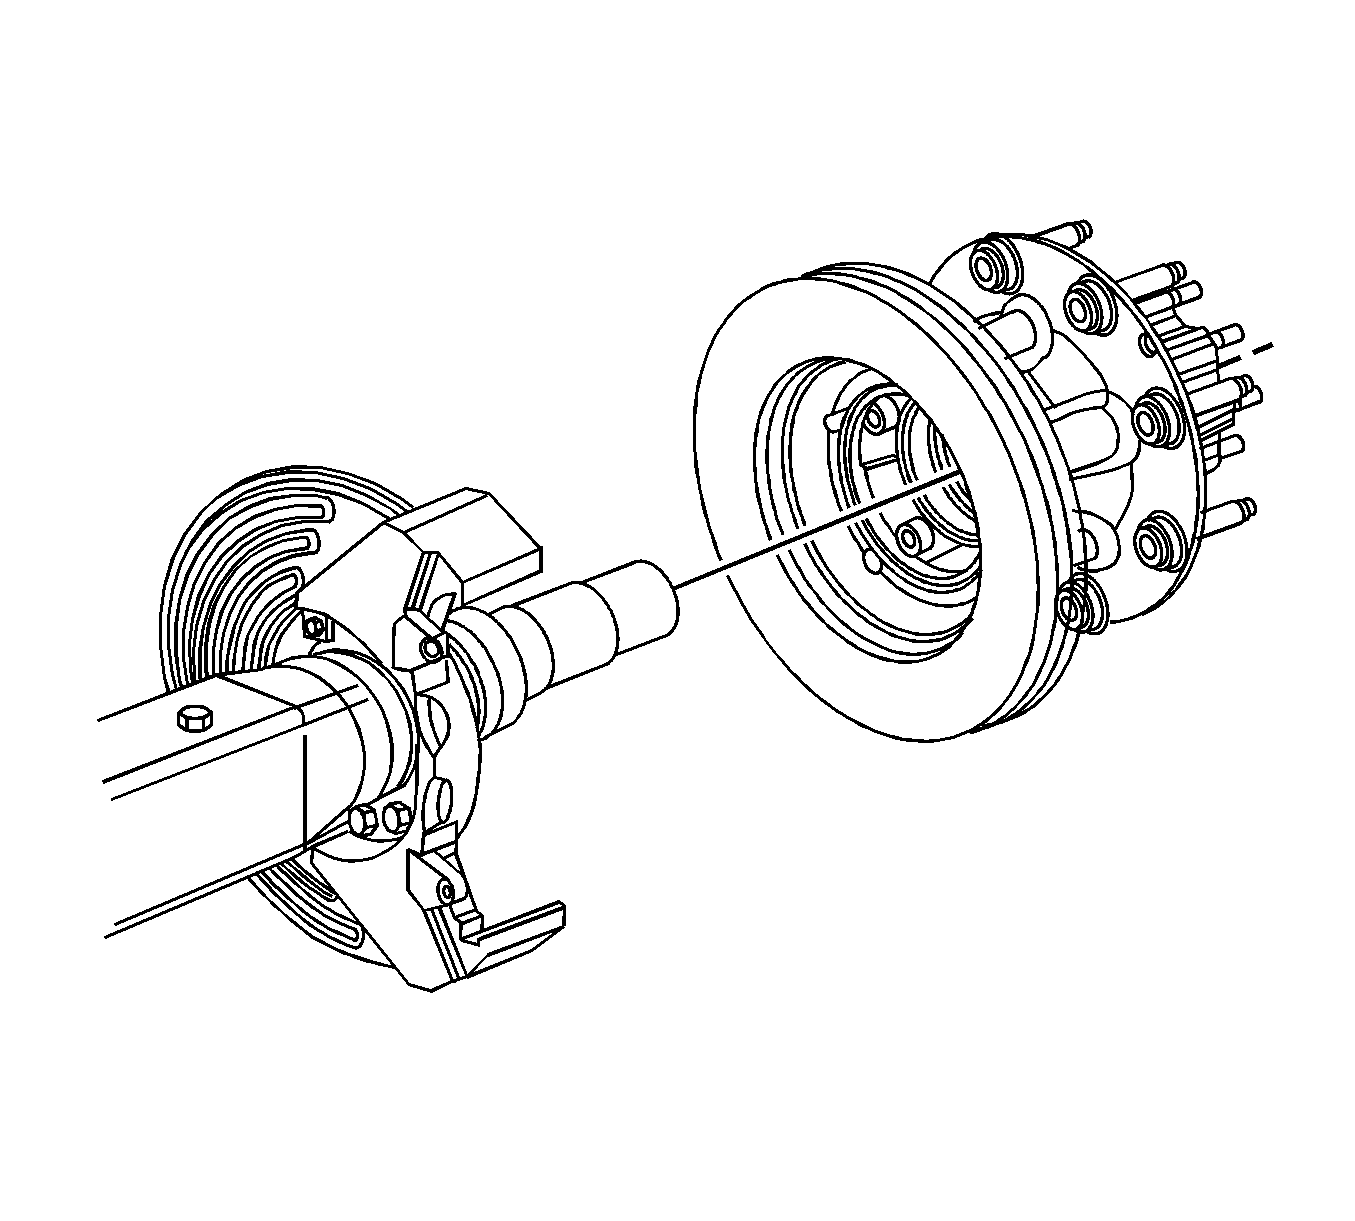
- Remove the brake rotor (with the hub, or with the wheel). Refer to Rear Axle Hub, Bearing, Cup, and/or Seal Replacement .
- Remove the wheel speed sensor ring, if equipped with removable ring, using the J 45107 .
- Remove the bolts that mount the rear brake rotor to the hub or the wheel using the J 44959 .
- Remove the brake rotor from the hub or the wheel.
Notice: Support the brake caliper with heavy mechanic wire, or equivalent, whenever it is separated from its mount and the hydraulic flexible brake hose is still connected. Failure to support the caliper in this manner will cause the flexible brake hose to bear the weight of the caliper, which may cause damage to the brake hose and in turn may cause a brake fluid leak.


Installation Procedure
- Install the brake rotor to the hub, or the wheel.
- Install the bolts that mount the brake rotor to the hub, or the wheel using J 44959 .
- Apply 272 Threadlock GM P/N 12345493 (Canadian P/N 10953488) or equivalent, to the threads of each brake rotor bolt.
- Install the wheel speed sensor ring, if equipped with removable ring, using the J 45107 .
- Install the brake rotor (with the hub, or with the wheel). Refer to Rear Axle Hub, Bearing, Cup, and/or Seal Replacement .
- Clean both sides of the brake rotor using denatured alcohol or an equivalent.
- Install the brake caliper. Refer to Rear Brake Caliper Replacement .
- Install the tire and wheel. Refer to Tire and Wheel Removal and Installation .
- Lower the vehicle.
- Pump the brake pedal several times in order to ensure the pedal is firm and the brake pads are adjusted.
- Remove the wheel blocks.
Notice: Any new rotor must have the protective coating removed from the friction surfaces before being placed in service. Remove the protective coating using denatured alcohol or an equivalent brake cleaner, and wipe the surface clean with clean cloths. Do not use gasoline, kerosene, or other oil base solvents which may leave an oily residue. This residue is damaging to the brake lining and is flammable.

Notice: Refer to Fastener Notice in the Preface section.
Tighten
| • | Tighten the brake rotor bolts (M12x15 or 9/16 in OD-10 bolt pattern) to 152 N·m (112 lb ft). |
| • | Tighten the brake rotor bolts (5/8 in OD-5 bolt pattern) to 256 N·m (189 lb ft). |
Important: Ensure that the threads are clean and greaseless before applying the threadlock.

Important: Check the level of the brake fluid in the master cylinder reservoir after pumping the brake pedal.
Rear Brake Rotor Replacement 4500, 5500, HPK/HO8
Tools Required
| • | J 44959 Torque-Bit Socket T-70 |
| • | J 45107 Tone Ring Remover/Installer |
Removal Procedure
Caution: Refer to Brake Dust Caution in the Preface section.
- Block the wheels.
- Apply the parking brake.
- Raise the vehicle. Refer to Lifting and Jacking the Vehicle .
- Remove the tire and wheel. Refer to Tire and Wheel Removal and Installation .
- Remove the brake caliper and mounting plate. Refer to Rear Brake Caliper Mount Plate Replacement .
- Do not remove the brake line from the caliper.
- Remove the brake rotor (with the hub, or with the wheel). Refer to Rear Axle Hub, Bearing, Cup, and/or Seal Replacement .
- Remove the wheel speed sensor ring, if equipped with removable ring, using the J 45107 .
- Remove the bolts that mount the rear brake rotor to the hub or the wheel using the J 44959 .
- Remove the brake rotor from the hub or the wheel.
Notice: Support the brake caliper with heavy mechanic wire, or equivalent, whenever it is separated from its mount and the hydraulic flexible brake hose is still connected. Failure to support the caliper in this manner will cause the flexible brake hose to bear the weight of the caliper, which may cause damage to the brake hose and in turn may cause a brake fluid leak.
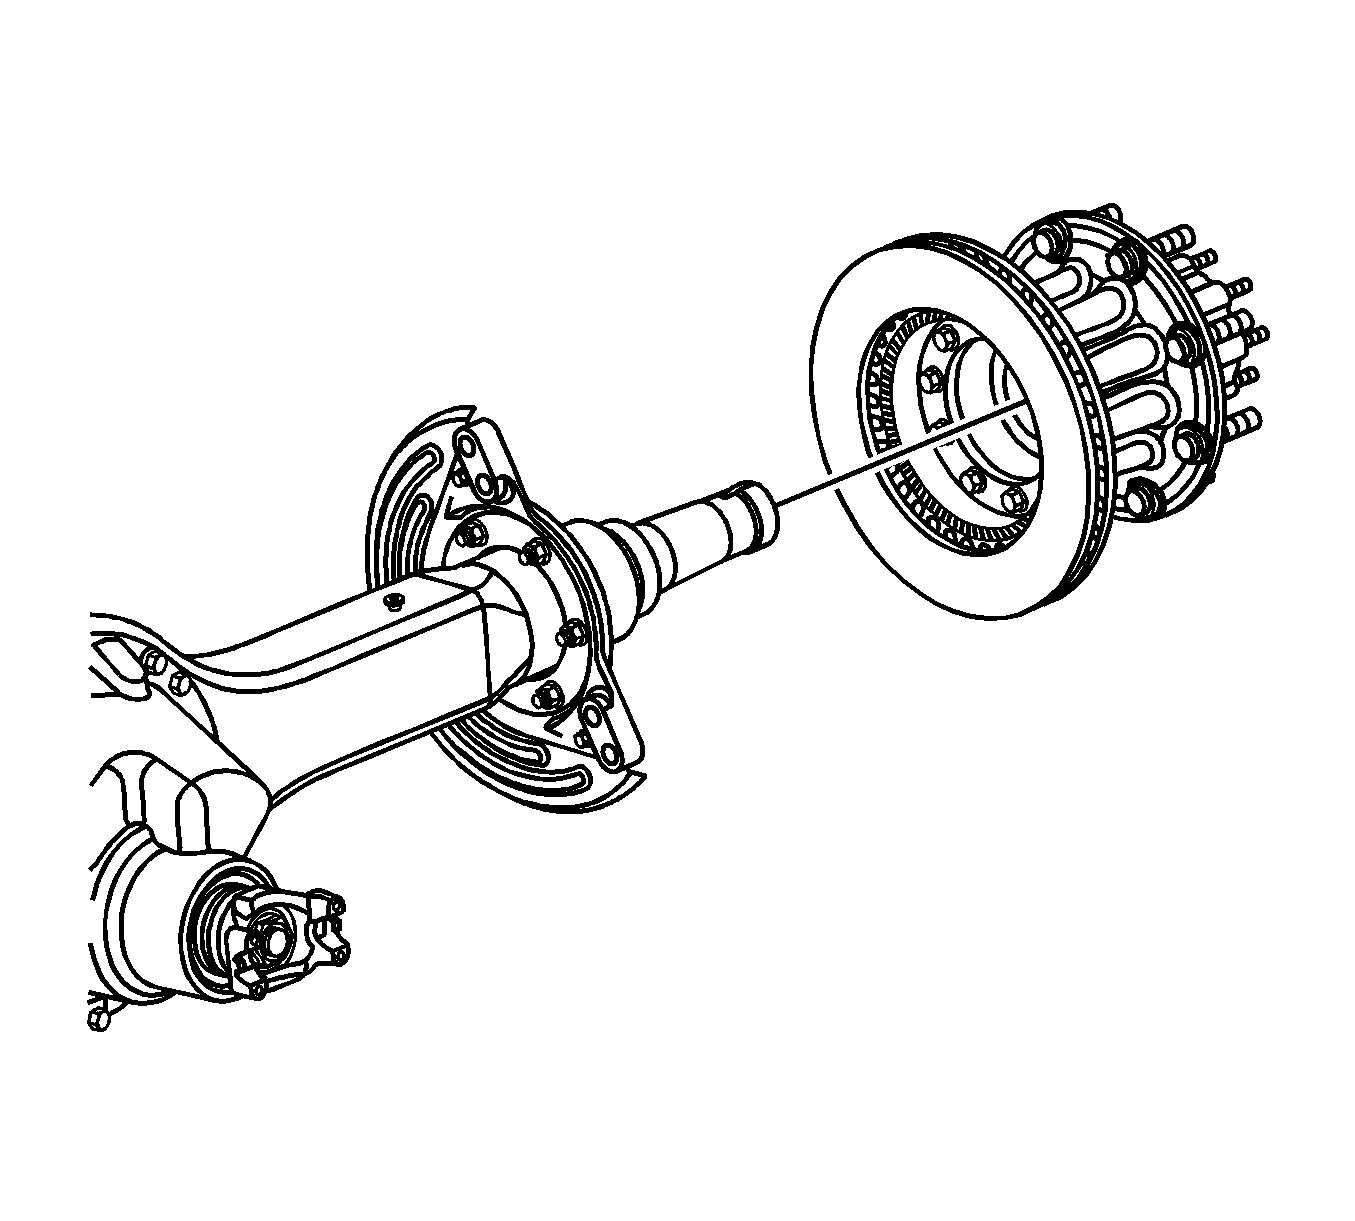


Installation Procedure
- Install the brake rotor to the hub, or the wheel.
- Install the bolts that mount the brake rotor to the hub, or the wheel using J 44959 .
- Apply 272 Threadlock GM P/N 12345493 (Canadian P/N 10953488) or equivalent, to the threads of each brake rotor bolt.
- Install the wheel speed sensor ring, if equipped with removable ring, using the J 45107 .
- Install the brake rotor (with the hub, or with the wheel). Refer to Rear Axle Hub, Bearing, Cup, and/or Seal Replacement .
- Clean both sides of the brake rotor using denatured alcohol or an equivalent.
- Install the brake caliper. Refer to Rear Brake Caliper Replacement .
- Install the tire and wheel. Refer to Tire and Wheel Removal and Installation .
- Lower the vehicle. Refer to Rear Axle Hub, Bearing, Cup, and/or Seal Replacement .
- Pump the brake pedal several times in order to ensure the pedal is firm and the brake pads are adjusted.
- Remove the wheel blocks.
Notice: Any new rotor must have the protective coating removed from the friction surfaces before being placed in service. Remove the protective coating using denatured alcohol or an equivalent brake cleaner, and wipe the surface clean with clean cloths. Do not use gasoline, kerosene, or other oil base solvents which may leave an oily residue. This residue is damaging to the brake lining and is flammable.

Notice: Refer to Fastener Notice in the Preface section.
Tighten
| • | Tighten the brake rotor bolts (M12x15 or 9/16 in OD-10 bolt pattern) to 152 N·m (112 lb ft). |
| • | Tighten the brake rotor bolts (5/8 in OD-5 bolt pattern) to 256 N·m (189 lb ft). |
Important: Ensure that the threads are clean and greaseless before applying the threadlock.

Important: Check the level of the brake fluid in the master cylinder reservoir after pumping the brake pedal.
