Rear Axle Replacement 8.6 Inch Axle
Removal Procedure
- Raise and support the vehicle. Refer to Lifting and Jacking the Vehicle.
- Remove the rear tires and wheels. Refer to Tire and Wheel Removal and Installation.
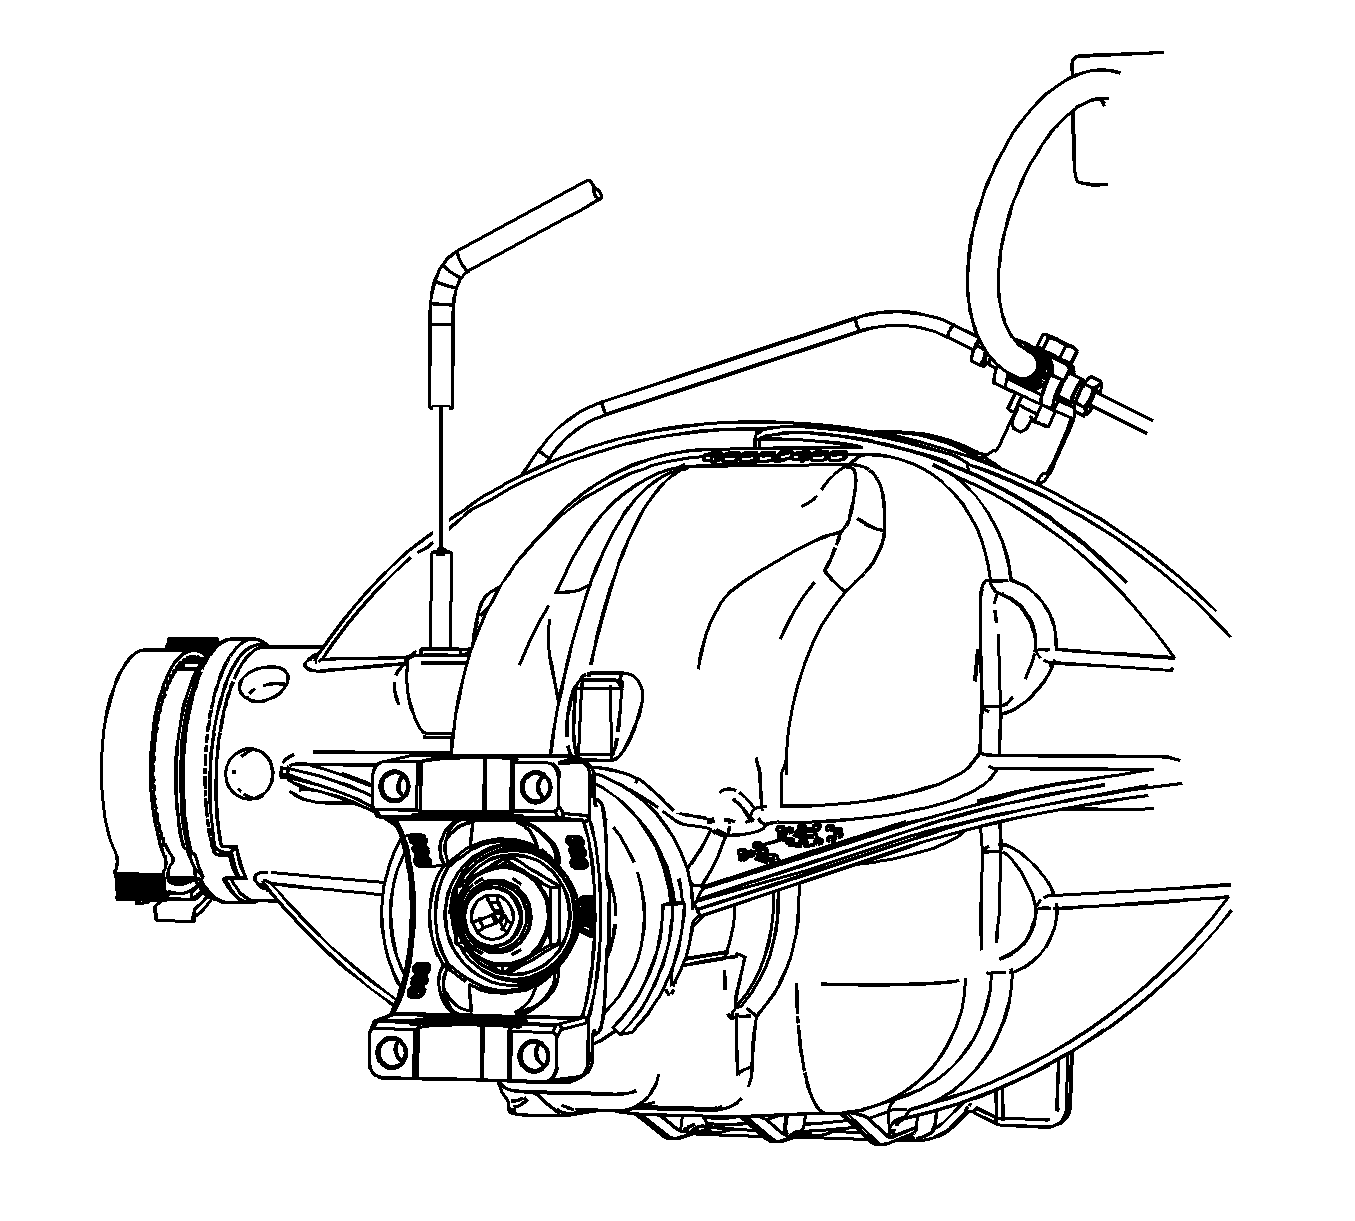
- Remove the vent hose from the rear drive axle.
- Remove the electronic suspension control sensor , if equipped.
- Remove the rear wheel speed sensors from the rear drive axle.
- Remove the rear brake calipers, and relocate to the side. Refer to Rear Brake Caliper Replacement.
- Drain the rear axle. Refer to Rear Axle Lubricant Replacement.
- Remove the propeller shaft. Refer to Electronic Suspension Rear Position Sensor Replacement - Left Side.
- Remove the rear axle tie rod. Refer to Electronic Suspension Rear Position Sensor Replacement - Right Side.
- Remove the rear stabilizer shaft, if equipped. Refer to Stabilizer Shaft Replacement.
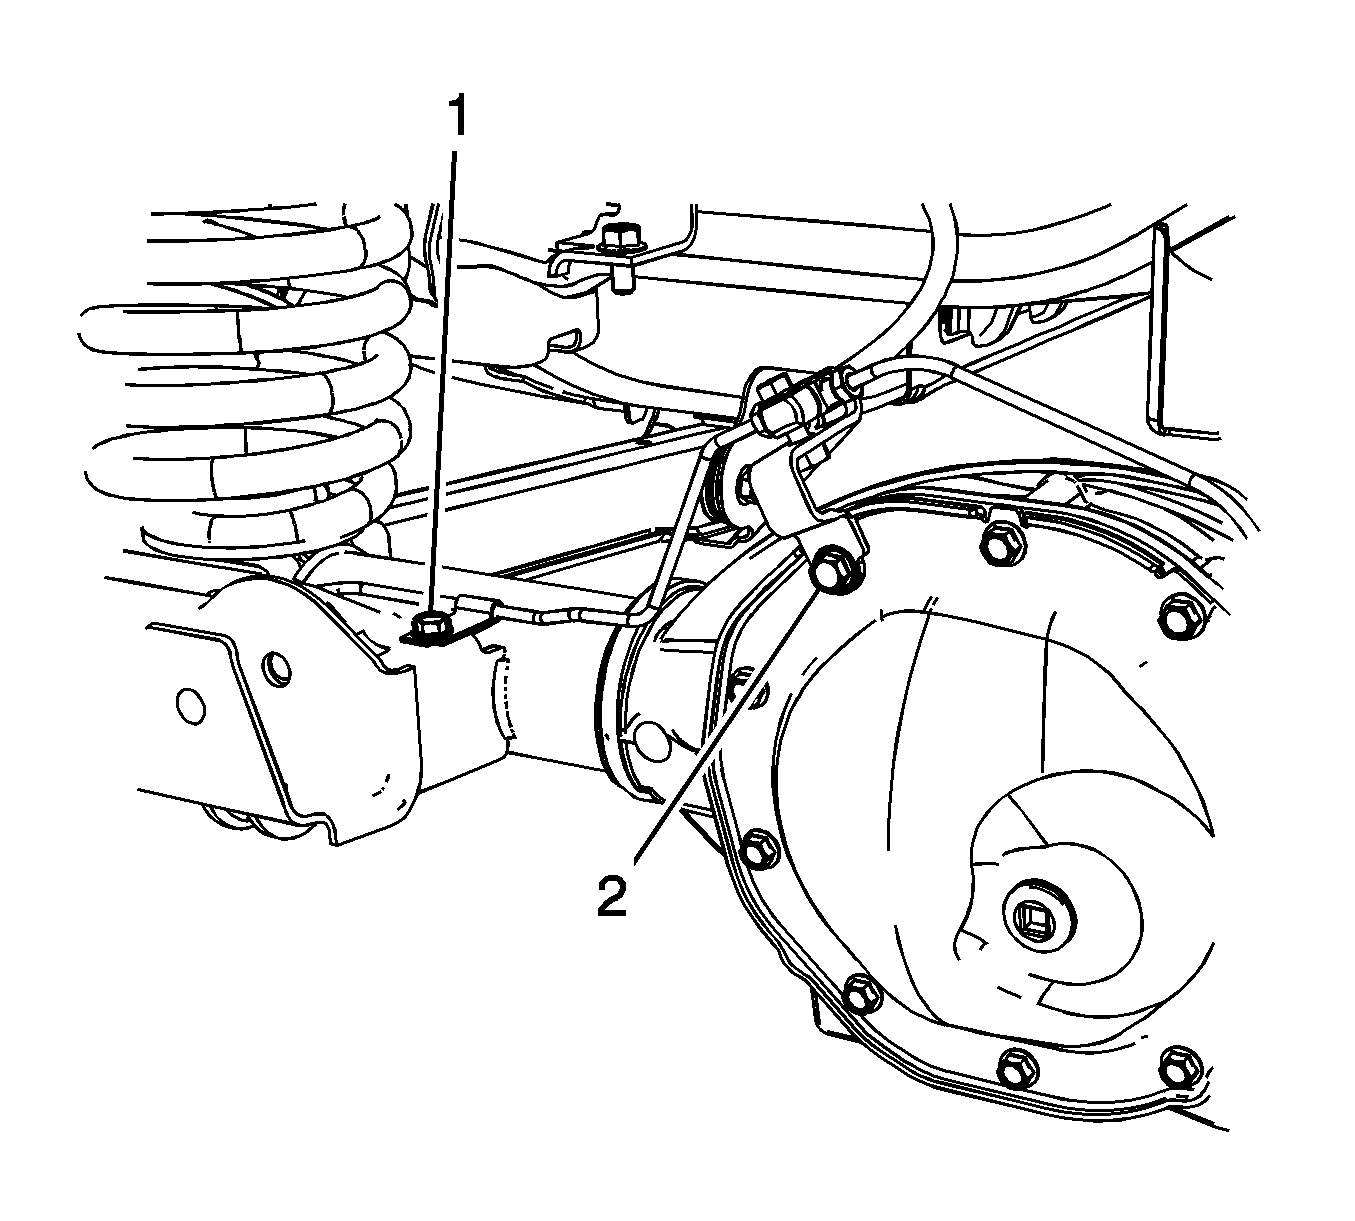
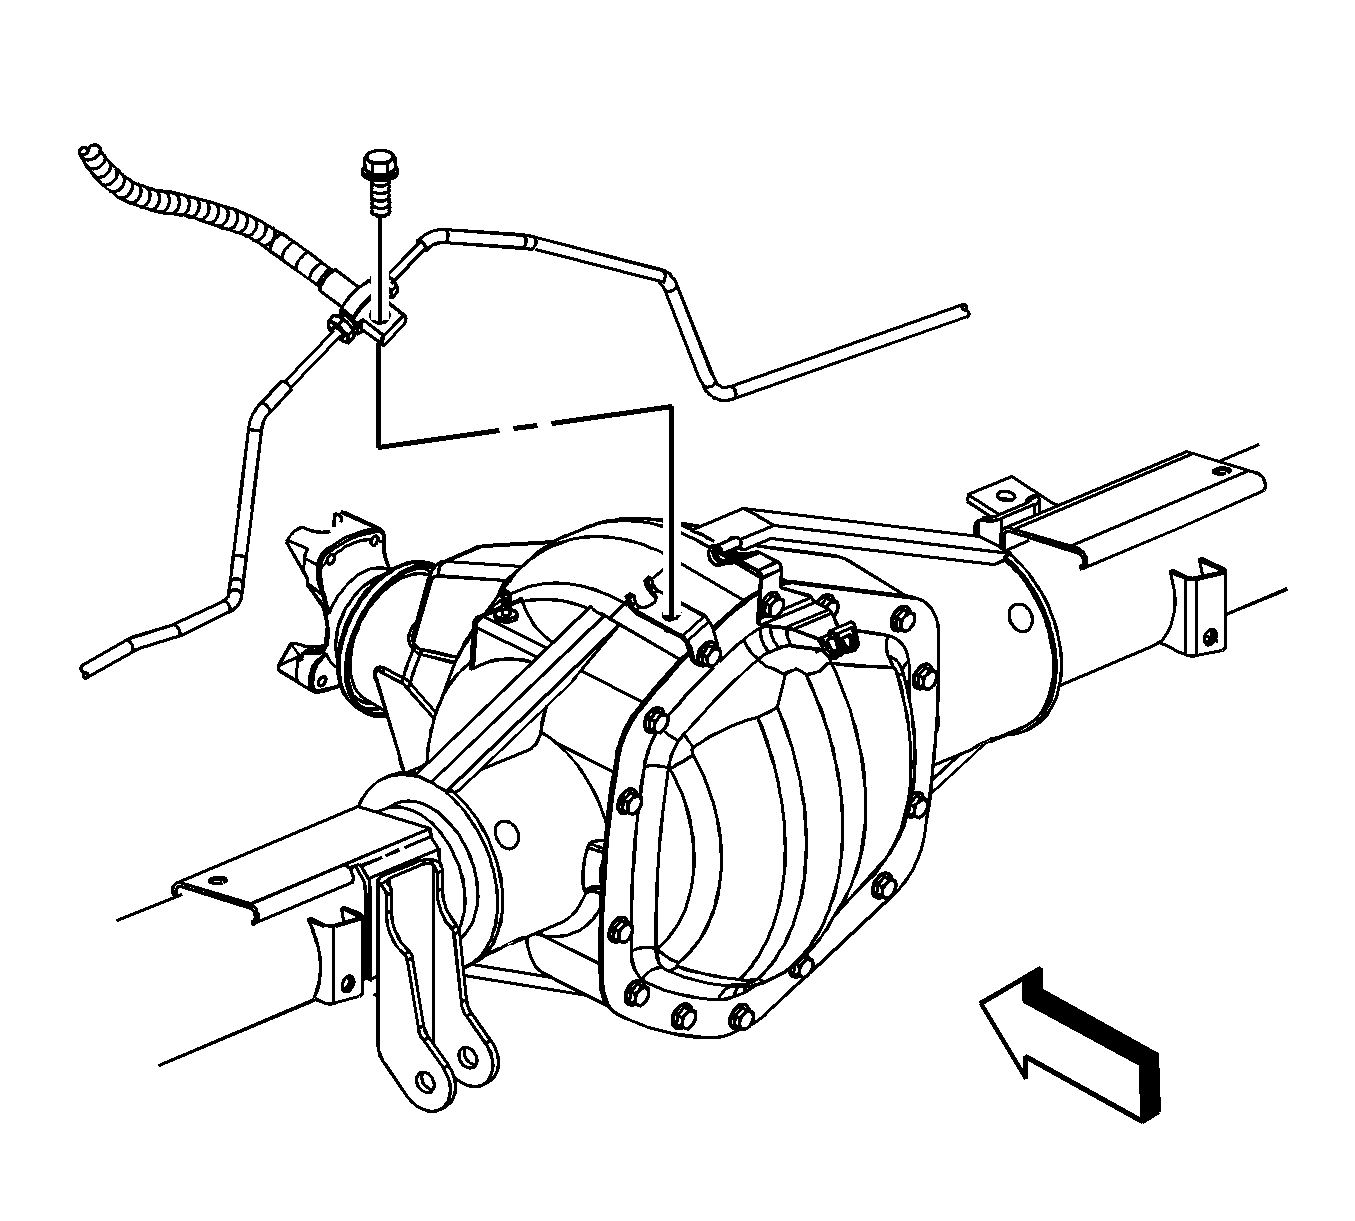
- Remove the rear brake pipe retaining bracket bolt (1).
- Remove the rear brake junction block retaining bolt (2) at the rear axle cover.
- Secure the rear brake pipes to the frame with mechanics wire or equivalent.
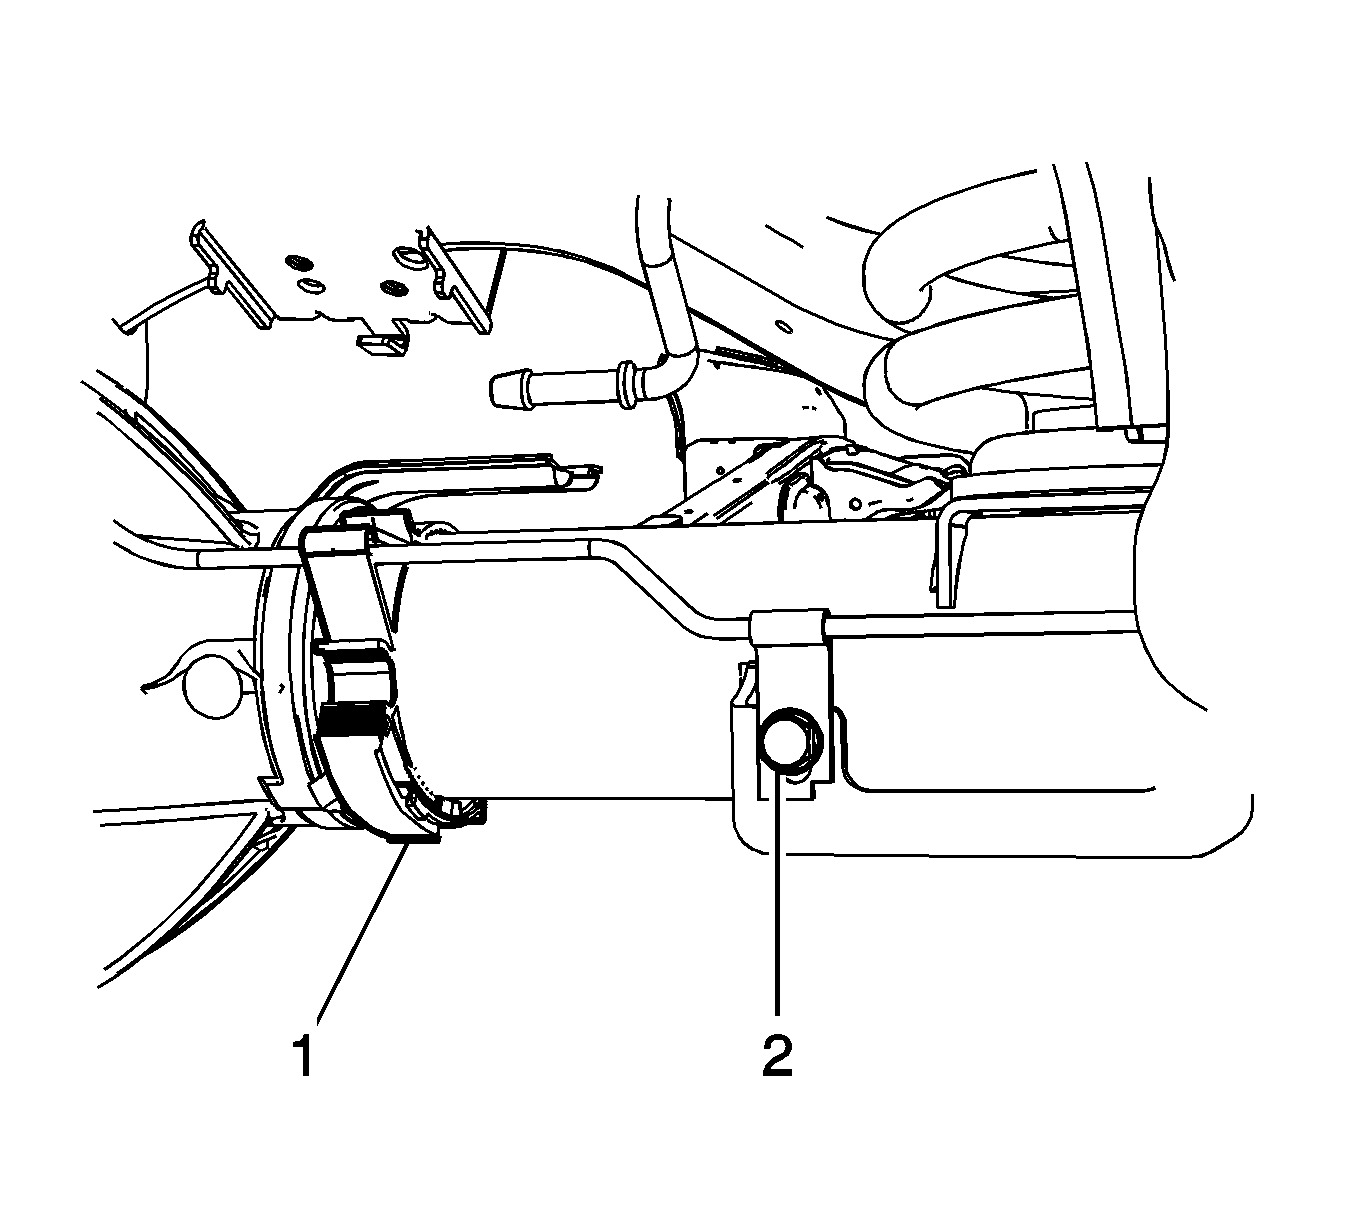
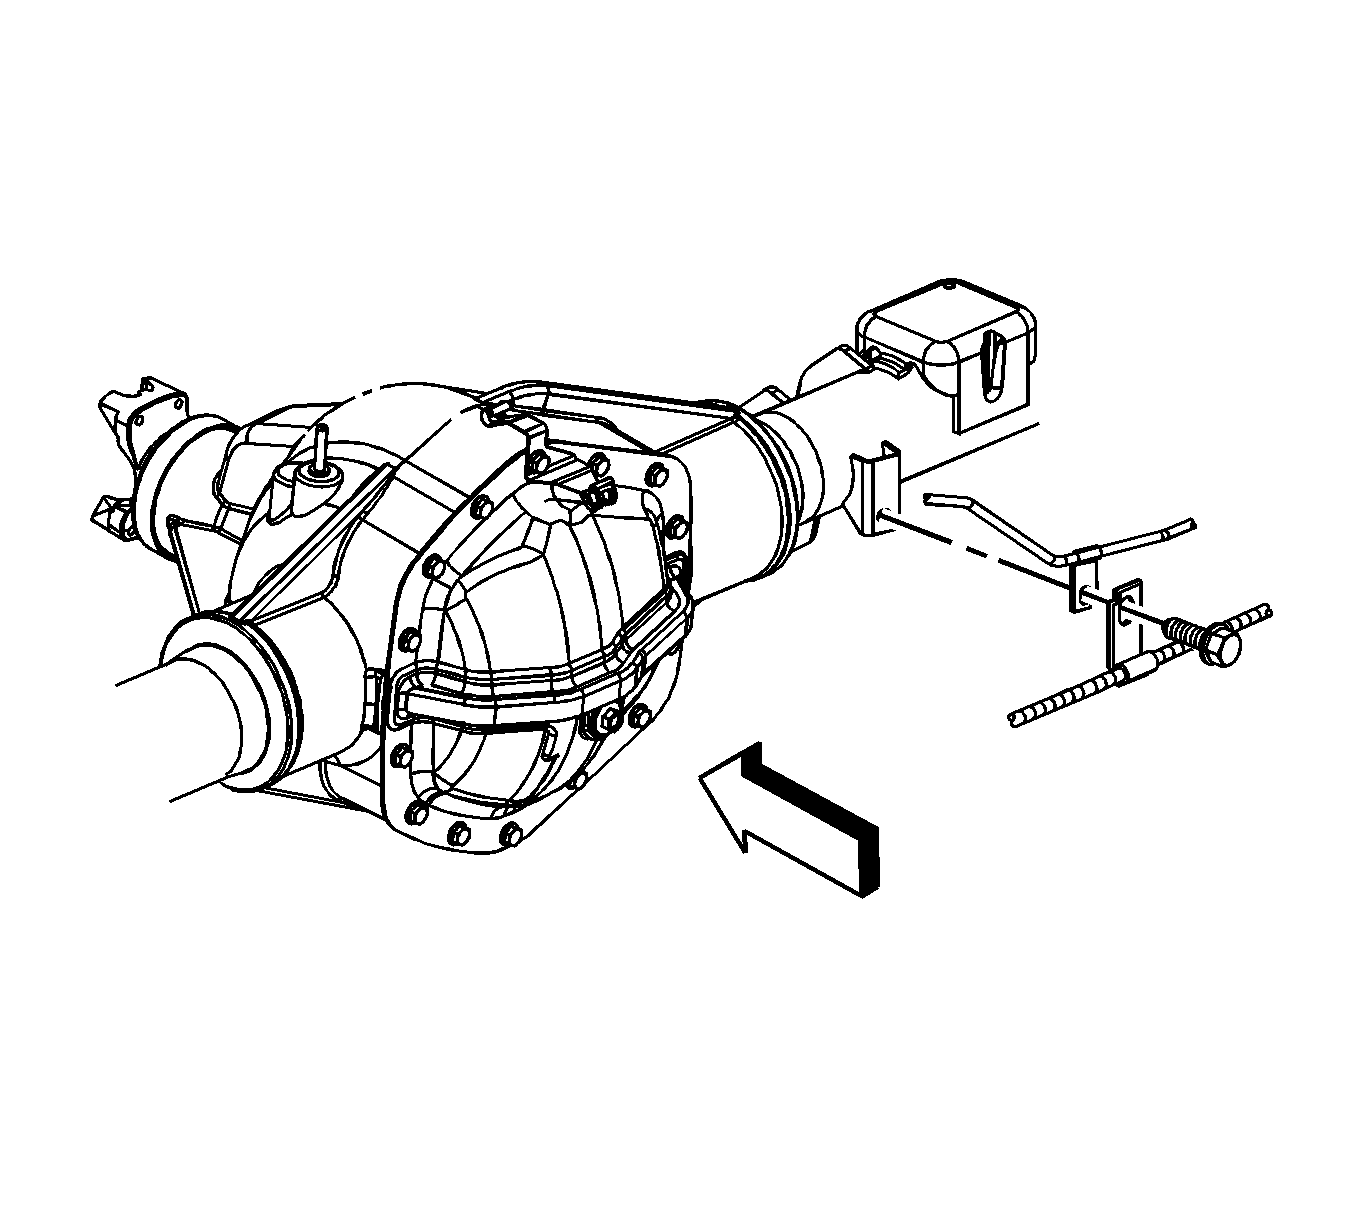
- Remove the rear brake pipe from the retaining strap (1).
- Remove the brake pipe retaining bracket bolt (2).
- Support the rear drive axle with a hydraulic jack stand.
- Remove the lower control arm bolts from the rear the drive axle. Refer to Rear Axle Lower Control Arm Replacement.
- Remove the upper control arm bolts from the rear drive axle. Refer to Rear Axle Upper Control Arm Replacement.
- With the aid of an assistant, lower the drive axle.
- Remove the rear coil springs.
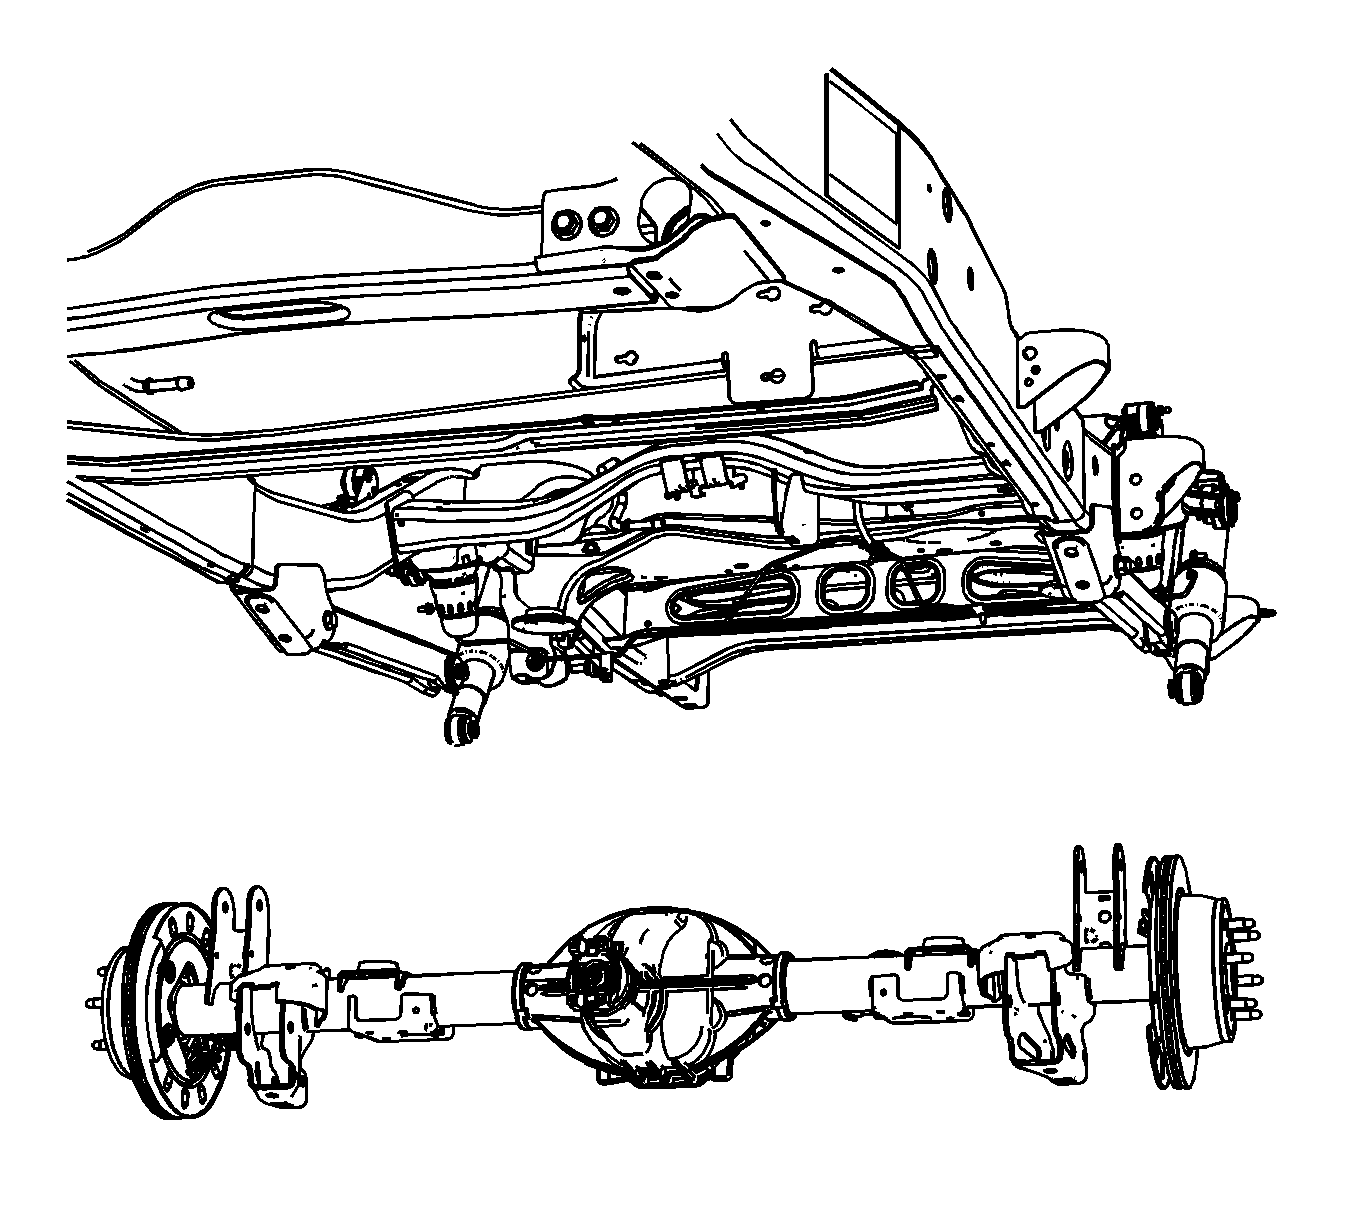
- Lower the rear drive axle assembly.
- Transfer parts , if needed.
| • | For the left side, refer to Electronic Suspension Rear Position Sensor Replacement - Left Side. |
| • | For the right side, refer to Electronic Suspension Rear Position Sensor Replacement - Right Side. |
| • | For the Hybrid vehicles, refer to Rear Wheel Speed Sensor Replacement. |
| • | For the non Hybrid vehicles (1500 series), refer to Rear Wheel Speed Sensor Replacement. |
Important: The stabilizer shaft links do not have removed in the following procedure. Rotate the links upward toward the frame and of the way.
Important: Ensure that the rear drive axle is properly secured to the jack stand.
Important: In steps 17 and 18, it is not necessary to remove the control arms. Secure the control arms to the frame with the use of mechanics wire or equivalent.
Installation Procedure
- Position the rear drive axle assembly under the vehicle.
- With the aide of an assistant, raise the rear drive axle into place.
- Install the rear coil springs on the rear drive axle.
- Install the upper control arms to the rear drive axle. Refer to Rear Axle Upper Control Arm Replacement.
- Install the lower control arms to the rear drive axle. Refer to Rear Axle Lower Control Arm Replacement.
- Install the lower shock absorber bolts to the rear drive axle. Refer to Shock Absorber Replacement.
- Remove the hydraulic jack stand from the rear drive axle assembly.
- Install the rear brake pipe retaining bracket bolt (1).
- Install the rear brake junction block retaining bolt (2) at the rear axle cover.
- Install the brake pipe retaining bracket bolt (2).
- Install the rear brake pipe in the retaining strap (1).
- Install rear drive axle the vent hose.
- Install the rear stabilizer shaft, if equipped. Refer to Stabilizer Shaft Replacement.
- Install the rear wheel speed sensors.
- Install the rear axle tie rod. Refer to Rear Axle Tie Rod Replacement.
- Install the rear brake calipers. Refer to Rear Brake Caliper Replacement.
- Install the rear propeller shaft. Refer to Rear Propeller Shaft Replacement.
- Install the air level sensors.
- Fill the rear drive axle with fluid. Refer to Rear Axle Lubricant Replacement.
- Install the rear tires and wheels. Refer to Tire and Wheel Removal and Installation.
- Remove the supports and lower the vehicle.
- Calibrate the air level control, if needed. Refer to Suspension Position Calibration.

Notice: Refer to Fastener Notice in the Preface section.

Tighten
Tighten the retaining bracket bolt to 20 N·m (15 lb ft).
Tighten
Tighten the junction block bolt to 20 N·m (15 lb ft).

Tighten
Tighten the retaining bracket bolt to 20 N·m (15 lb ft).

Important: Rotate the stabilizer shaft links down into position to install them.
| • | For the Hybrid vehicles, refer to Rear Wheel Speed Sensor Replacement. |
| • | For the non Hybrid vehicles (1500 series), refer to Rear Wheel Speed Sensor Replacement. |
| • | For the left side, refer to Electronic Suspension Rear Position Sensor Replacement - Left Side. |
| • | For the right side, refer to Electronic Suspension Rear Position Sensor Replacement - Right Side. |
Rear Axle Replacement 10.5 Inch Axle
Removal Procedure
- Raise and support the vehicle. Refer to Lifting and Jacking the Vehicle.
- Place jack stands in the front of the vehicle.
- Drain the rear axle of fluid. Refer to Rear Axle Lubricant Replacement.
- Remove the tires and wheels. Refer to Tire and Wheel Removal and Installation.
- Remove the rear propeller shaft. Refer to Rear Propeller Shaft Replacement.
- Remove the vent hose from the rear axle.
- Remove the mounting bolt and the rear brake junction block from the rear axle housing.
- Remove the retaining bolt for the rear brake line from the rear axle housing.
- Remove the rear wheel speed sensors from the rear axle. Refer to Rear Wheel Speed Sensor Replacement.
- Remove the rear brake calipers and relocate to the side. Refer to Rear Brake Caliper Replacement.
- Remove the rear park brake cables from the rear brake calipers.
- Remove the rear shock absorber lower mounting bolts and nuts from the mounting brackets. Refer to Shock Absorber Replacement.
- Remove the stabilizer shaft from the rear axle, if equipped. Refer to Stabilizer Shaft Replacement.
- Support the rear axle assembly with a suitable hydraulic jack stand.
- Remove the U-bolt nuts, anchor plates and spacers from the rear leaf springs. Refer to Leaf Spring Replacement.
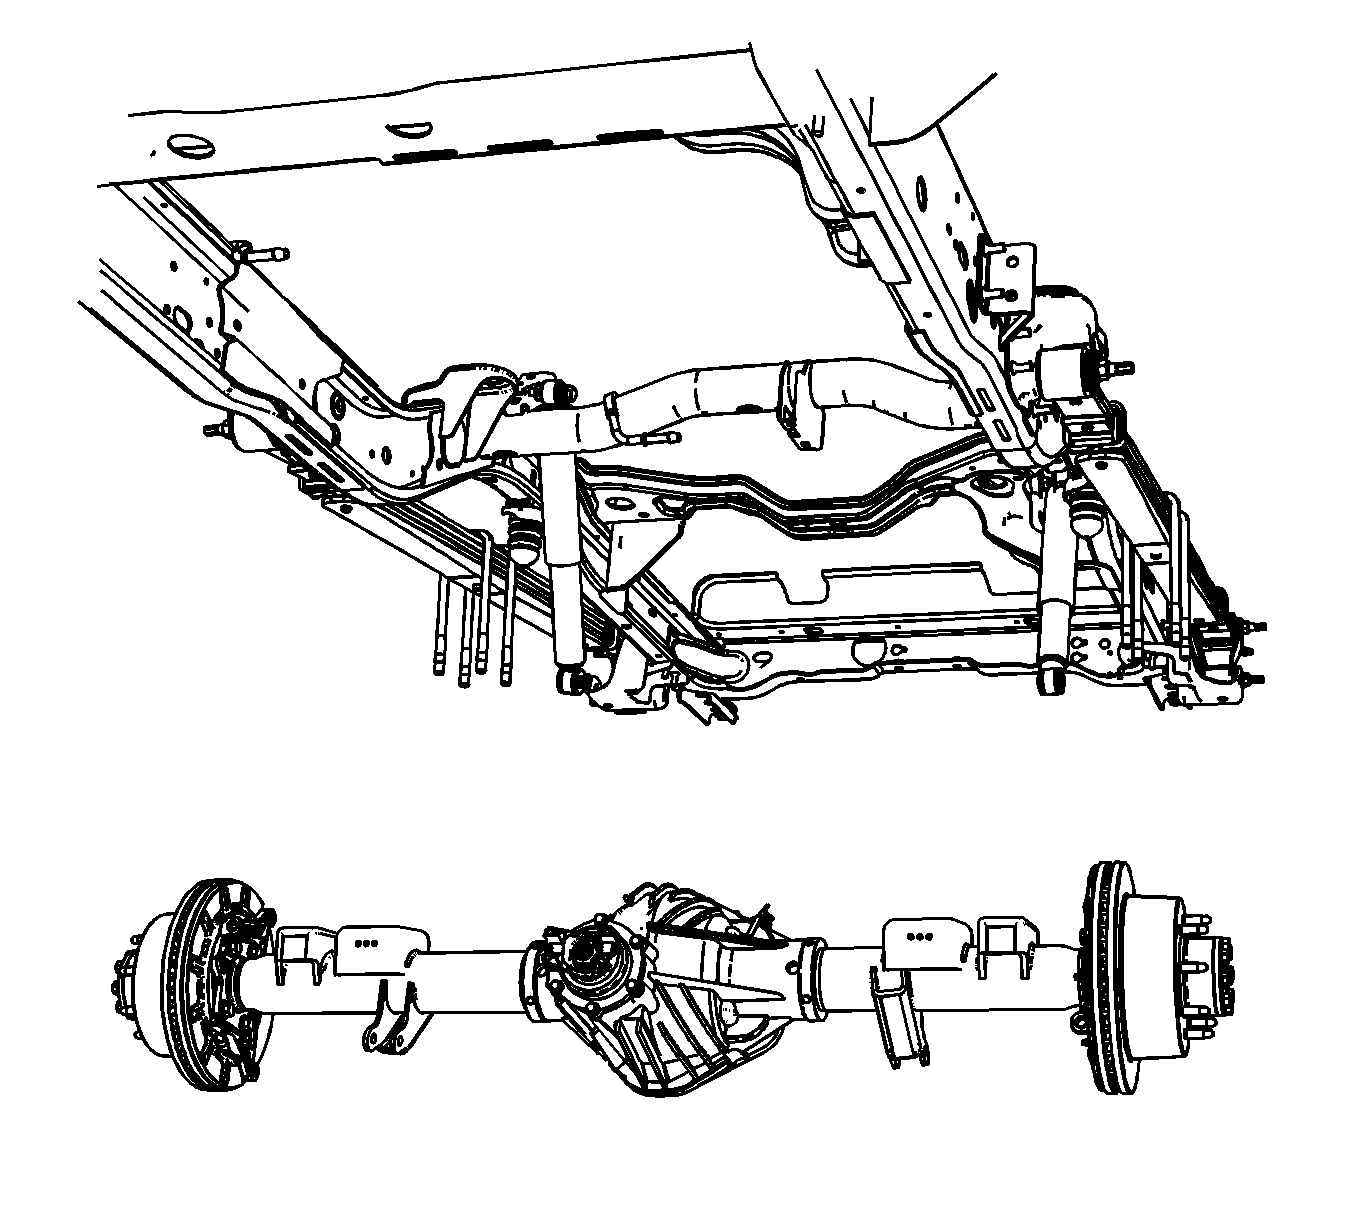
- With the aide of an assistant, lower the rear axle assembly and remove from the vehicle.
- Transfer parts, if needed.
| • | For the left side, refer to Parking Brake Rear Cable Replacement - Left Side. |
| • | For the right side, refer to Parking Brake Rear Cable Replacement - Right Side. |
Important: In the following service procedure, it is not necessary to remove the rear drive axle U-bolts. Allow the U-bolts to remain on the rear leaf springs.
Installation Procedure
- With the aide of an assistant, lift the rear drive axle into place.
- Align the U-bolts, nuts, anchor plates and spacers from the rear leaf springs to the rear drive axle. Refer to Leaf Spring Replacement.
- Install the rear shock absorber lower mounting bolts and nuts in the mounting brackets. Refer to Shock Absorber Replacement.
- Remove the hydraulic jack from the rear drive axle.
- Install the rear brake junction block and mounting bolt on the rear axle housing.
- Install the rear brake line retaining bolt on the rear axle housing.
- Install the rear drive axle vent hose.
- Install the rear stabilizer shaft on the rear drive axle. Refer to Stabilizer Shaft Replacement.
- Install the rear wheel speed sensors. Refer to Rear Wheel Speed Sensor Replacement.
- Install the rear brake calipers. Refer to Rear Brake Caliper Replacement.
- Install the rear park brake cables on the rear brake calipers.
- Install the rear propeller shaft. Refer to Rear Propeller Shaft Replacement.
- Fill the rear drive axle with fluid. Refer to Rear Axle Lubricant Replacement.
- Install the tires and wheels. Refer to Tire and Wheel Removal and Installation.
- Remove the jack stands from the from of the vehicle.
- Remove the supports and lower the vehicle.

Notice: Refer to Fastener Notice in the Preface section.

Tighten
Tighten the mounting bolt to 22 N·m (16 lb ft).

Tighten
Tighten the mounting bolt to 22 N·m (16 lb ft).
| • | For the left side, refer to Parking Brake Rear Cable Replacement - Left Side. |
| • | For the right side, refer to Parking Brake Rear Cable Replacement - Right Side. |
