Tools Required
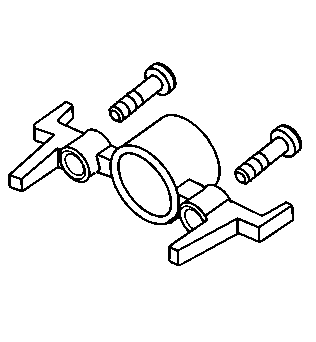
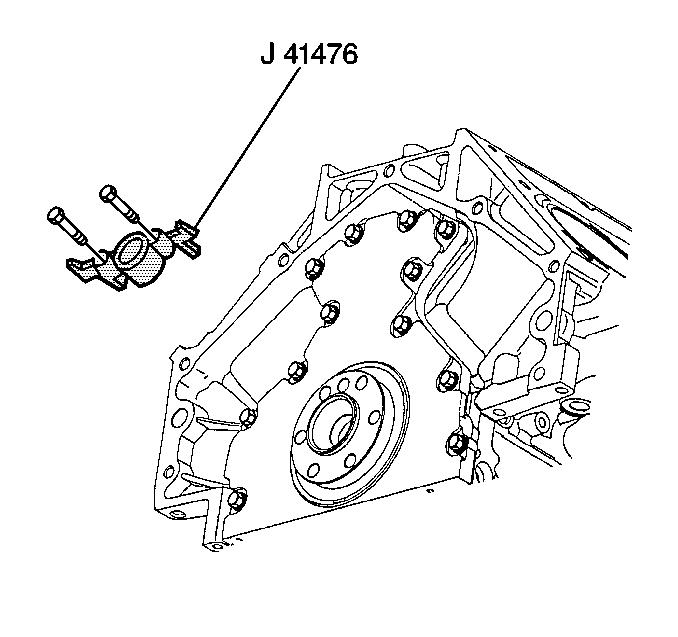
J 41476 Front and Rear Cover Alignment Tool
Removal Procedure
- Remove the engine assembly. Refer to Engine Replacement .
- Remove the crankshaft balancer. Refer to Crankshaft Balancer Removal in Engine Mechanical - 5.7L Unit Repair.
- Remove the oil level indicator tube. Refer to Oil Level Indicator and Tube Removal in Engine Mechanical - 5.7L Unit Repair.
- Remove the left and right exhaust manifolds. Refer to Exhaust Manifold Removal - Left Side and Exhaust Manifold Removal - Right Side in Engine Mechanical - 5.7L Unit Repair.
- Remove the water pump. Refer to Water Pump Removal in Engine Mechanical - 5.7L Unit Repair.
- Remove the intake manifold. Refer to Intake Manifold Removal in Engine Mechanical - 5.7L Unit Repair.
- Remove the coolant air bleed pipe. Refer to Coolant Air Bleed Pipe Removal in Engine Mechanical - 5.7L Unit Repair.
- Remove the left and right valve rocker arm covers. Refer to Valve Rocker Arm Cover Removal - Left Side and Valve Rocker Arm Cover Removal - Right Side in Engine Mechanical - 5.7L Unit Repair.
- Remove the valve rocker arms and push rods. Refer to Valve Rocker Arm and Push Rod Removal in Engine Mechanical - 5.7L Unit Repair.
- Remove the left and right cylinder heads. Refer to Cylinder Head Removal - Left Side and Cylinder Head Removal - Right Side in Engine Mechanical - 5.7L Unit Repair.
- Remove the valve lifters. Refer to Valve Lifter Removal in Engine Mechanical - 5.7L Unit Repair.
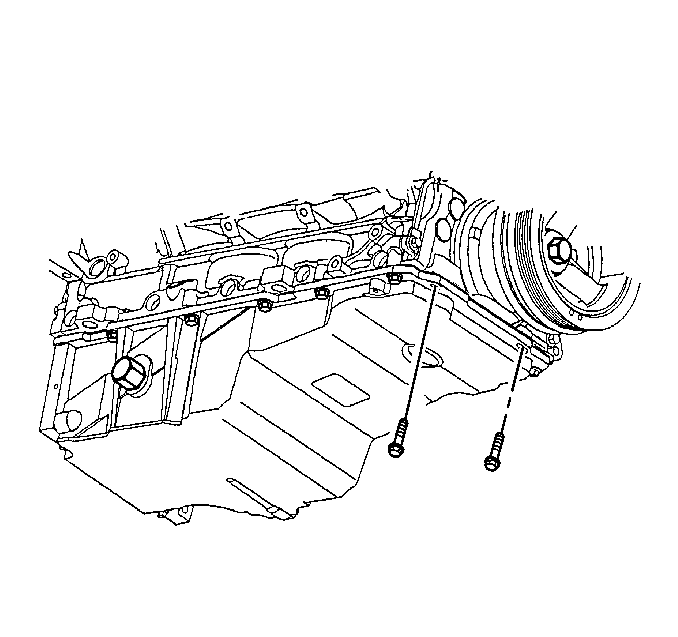
- Remove the oil pan-to-front cover bolts.
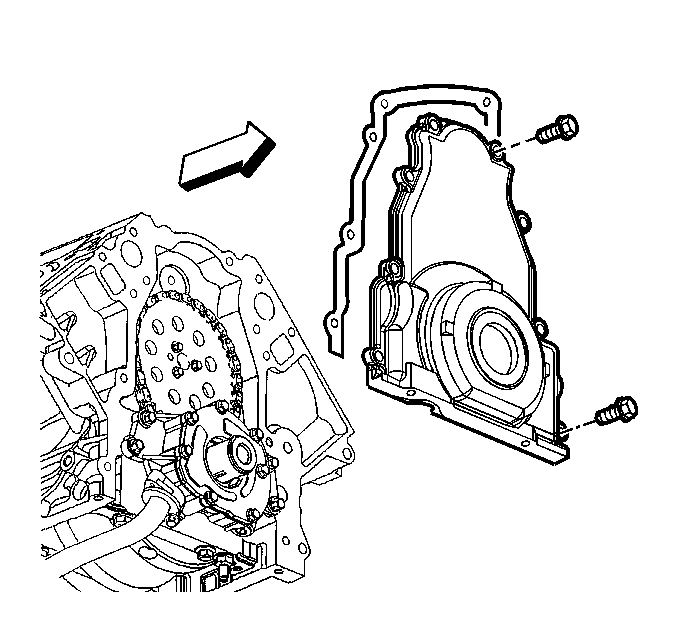
- Remove the front cover bolts.
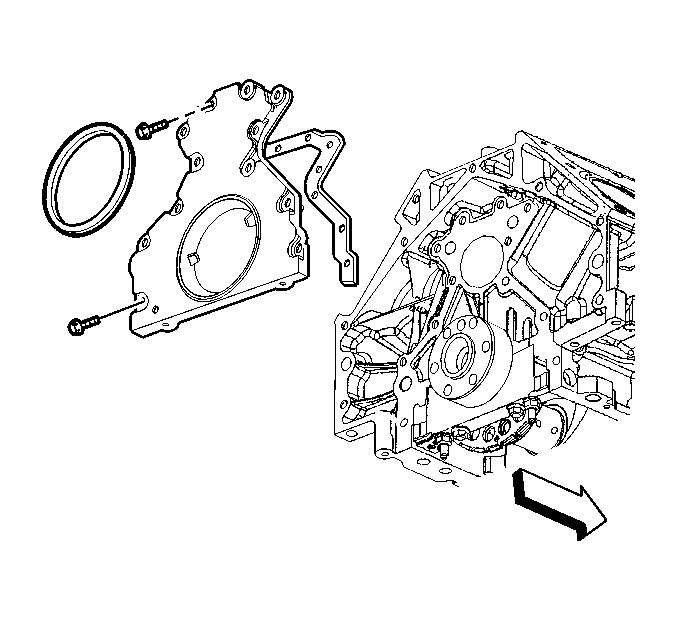
- Remove the front cover and gasket. Discard the old gasket.
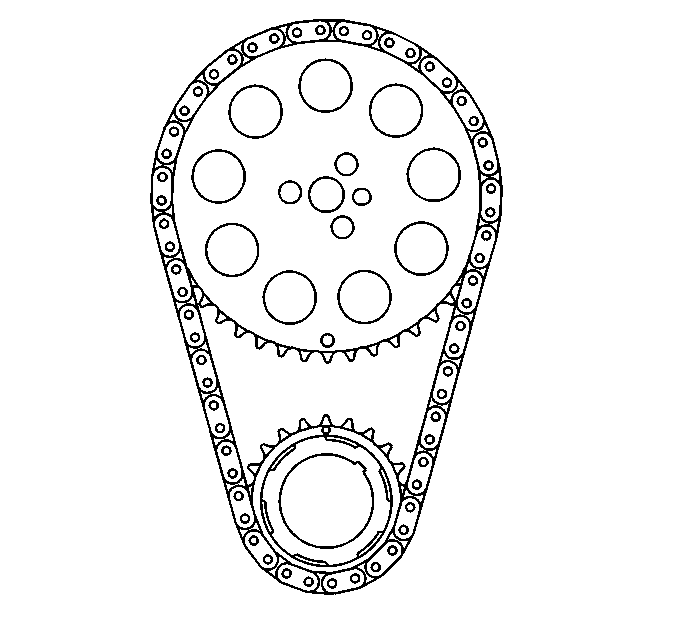
- Rotate the engine in order to align the timing marks.
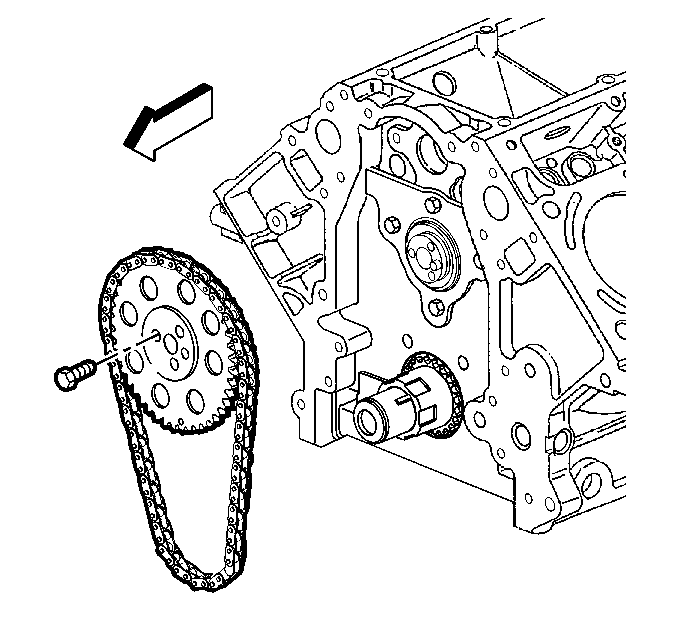
- Remove the camshaft sprocket bolts.
- Remove the timing chain from the camshaft sprocket, and allow the timing chain to rest on the crankshaft sprocket.
- Remove the camshaft. Refer to Camshaft Removal in Engine Mechanical - 5.7L Unit Repair.
- Clean and inspect the camshaft and bearings. Refer to Camshaft and Bearings Cleaning and Inspection in Engine Mechanical - 5.7L Unit Repair.
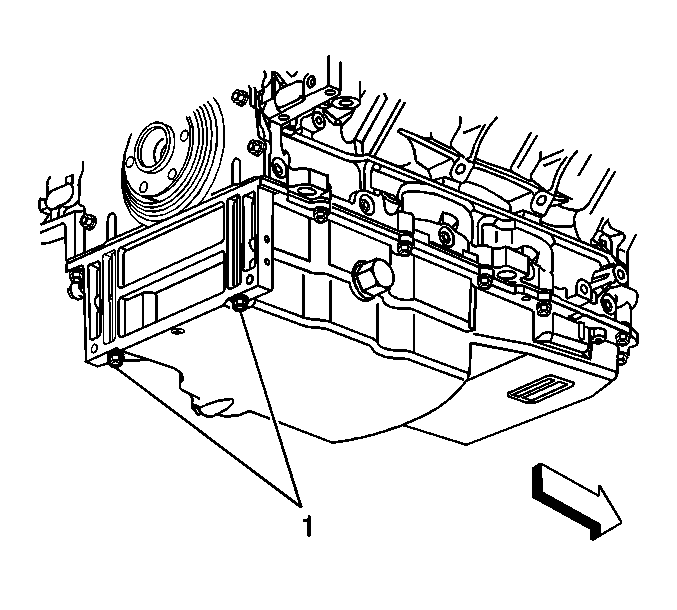
- If the camshaft bearings need to be replaced, remove the oil pan-to rear cover bolts (1).
- Remove the rear cover bolts.
- Remove the rear cover and gasket. Discard the gasket.
- Remove the camshaft bearings, if required. Refer to Camshaft Bearing Removal in Engine Mechanical - 5.7L Unit Repair.
Important: Rear cover removal is not required, if the camshaft bearings are not being replaced.
Installation Procedure
- Install NEW camshaft bearings, if required. Refer to Camshaft Bearing Installation in Engine Mechanical - 5.7L Unit Repair.
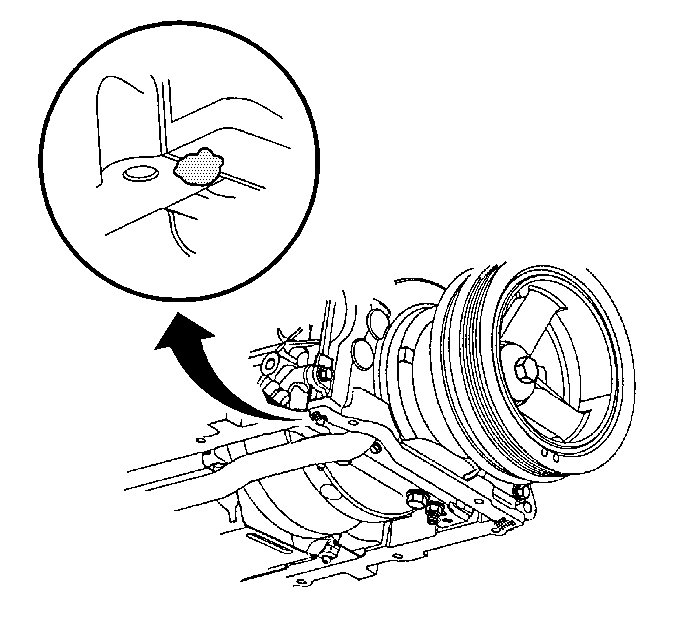
- Apply a 5 mm (0.20 in) bead of sealant GM P/N 12378190, or equivalent 20 mm (0.8 in) long to the oil pan to engine block junction, if required.
- Install the rear cover and a new gasket, if required.
- Install the rear cover bolts until snug, if required.
- Install the oil pan-to-rear cover bolts (1) until snug, if required.
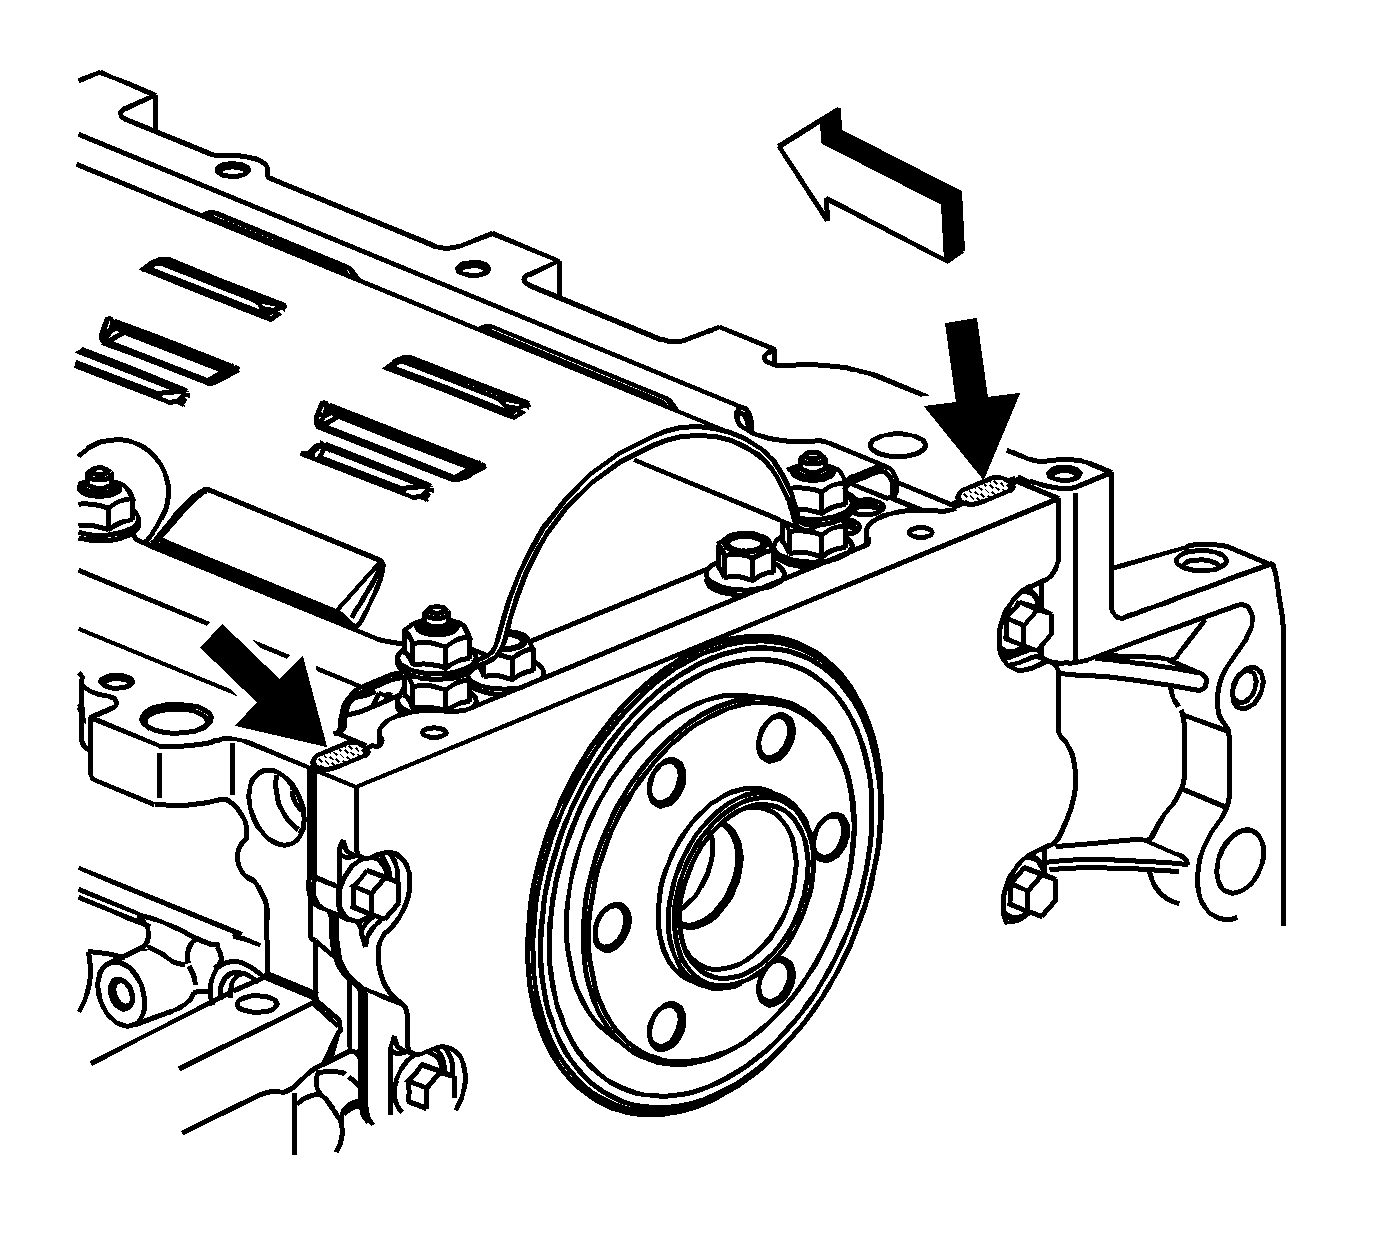
- Rotate the crankshaft as required until two opposing flywheel bolt holes are parallel to the oil pan surface, if required.
- Install the J 41476 bolts until snug. Do not overtighten, if required.
- Tighten the oil pan-to-rear cover bolts to 12 N·m (106 lb in).
- Tighten the engine rear cover bolts to 25 N·m (18 lb ft).
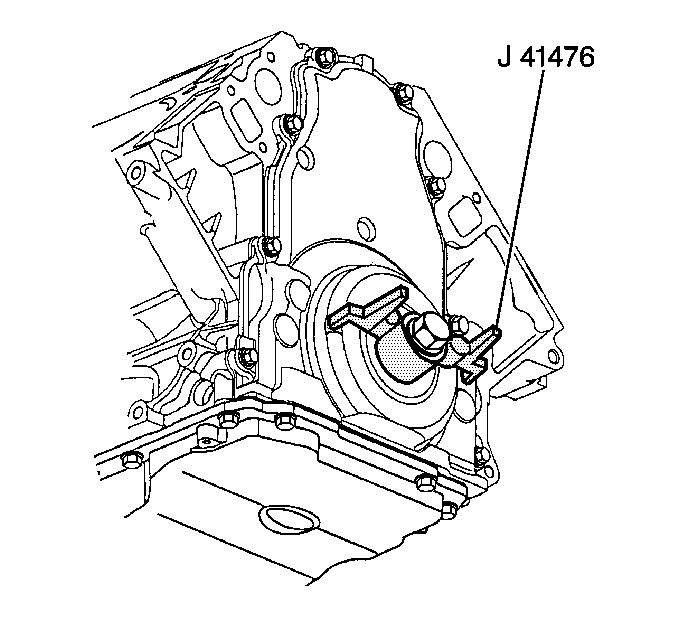
- Remove the J 41476 .
- Install a NEW crankshaft rear oil seal, if required. Refer to Crankshaft Rear Oil Seal Installation in Engine Mechanical - 5.7L Unit Repair.
- Install the camshaft. Refer to Camshaft Installation in Engine Mechanical - 5.7L Unit Repair.
- Align the camshaft sprocket alignment mark in the 6 o'clock position.
- Install the camshaft sprocket and timing chain.
- Install the camshaft sprocket bolts.
- Apply a 5 mm (0.20 in) bead of sealant GM P/N 12378190 or equivalent 20 mm (0.8 in) long to the oil pan to engine block junction.
- Install the front cover and a new gasket.
- Install the front cover bolts until snug.
- Install the oil pan-to-front cover bolts until snug.
- Install the J 41476 and crankshaft balancer bolt to the front cover.
- Align the tapered legs of the J 41476 with the machined alignment surfaces on the front cover.
- Install the crankshaft balancer bolt until snug. Do not overtighten.
- Tighten the oil pan-to-front cover bolts to 25 N·m (18 lb ft).
- Tighten the engine front cover bolts to 25 N·m (18 lb ft).
- Remove the J 41476 .
- Install a NEW crankshaft front oil seal. Refer to Crankshaft Front Oil Seal Installation in Engine Mechanical - 5.7L Unit Repair.
- Install the valve lifters. Refer to Valve Lifter Installation in Engine Mechanical - 5.7L Unit Repair.
- Install the right and left cylinder heads. Refer to Cylinder Head Installation - Right Side and Cylinder Head Installation - Left Side in Engine Mechanical - 5.7L Unit Repair.
- Install the valve rocker arms and push rods. Refer to Valve Rocker Arm and Push Rod Installation in Engine Mechanical - 5.7L Unit Repair.
- Install the right and left valve rocker arm covers. Refer to Valve Rocker Arm Cover Installation - Right Side and Valve Rocker Arm Cover Installation - Left Side in Engine Mechanical - 5.7L Unit Repair.
- Install the coolant air bleed pipe. Refer to Coolant Air Bleed Pipe Installation in Engine Mechanical - 5.7L Unit Repair.
- Install the intake manifold. Refer to Intake Manifold Installation in Engine Mechanical - 5.7L Unit Repair.
- Install the water pump. Refer to Water Pump Installation in Engine Mechanical - 5.7L Unit Repair.
- Install the left and right exhaust manifolds. Refer to Exhaust Manifold Installation - Left Side and Exhaust Manifold Installation - Right Side in Engine Mechanical - 5.7L Unit Repair.
- Install the oil level indicator tube. Refer to Oil Level Indicator and Tube Installation in Engine Mechanical - 5.7L Unit Repair.
- Install the crankshaft balancer. Refer to Crankshaft Balancer Installation in Engine Mechanical - 5.7L Unit Repair.
- Install the engine assembly. Refer to Engine Replacement .
Notice: Use the correct fastener in the correct location. Replacement fasteners must be the correct part number for that application. Fasteners requiring replacement or fasteners requiring the use of thread locking compound or sealant are identified in the service procedure. Do not use paints, lubricants, or corrosion inhibitors on fasteners or fastener joint surfaces unless specified. These coatings affect fastener torque and joint clamping force and may damage the fastener. Use the correct tightening sequence and specifications when installing fasteners in order to avoid damage to parts and systems.
Important: The tapered legs of the alignment tool must enter the rear cover oil seal bore.
Tighten
Tighten
Tighten the camshaft sprocket bolts to 35 N·m (26 lb ft).
Tighten
