For 1990-2009 cars only
Removal Procedure
- Disconnect the battery ground cable. Refer to Battery Negative Cable Disconnection and Connection.
- Remove the following components:
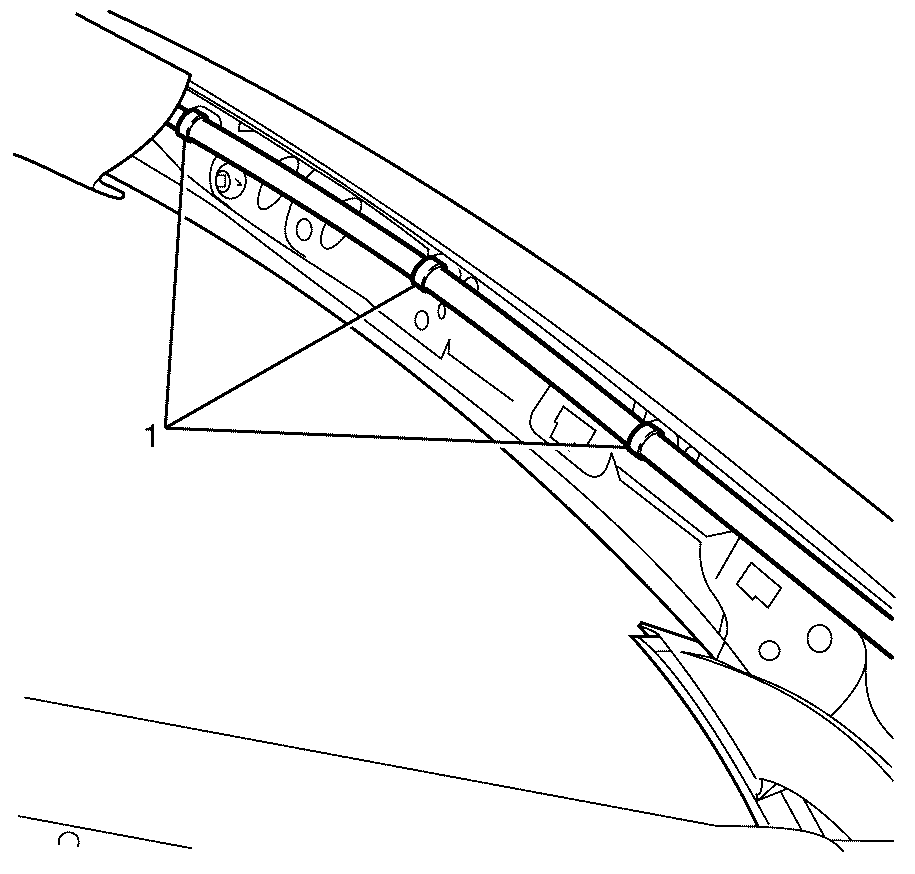
- Detach the headliner wiring harness to A-pillar retaining clips (1).
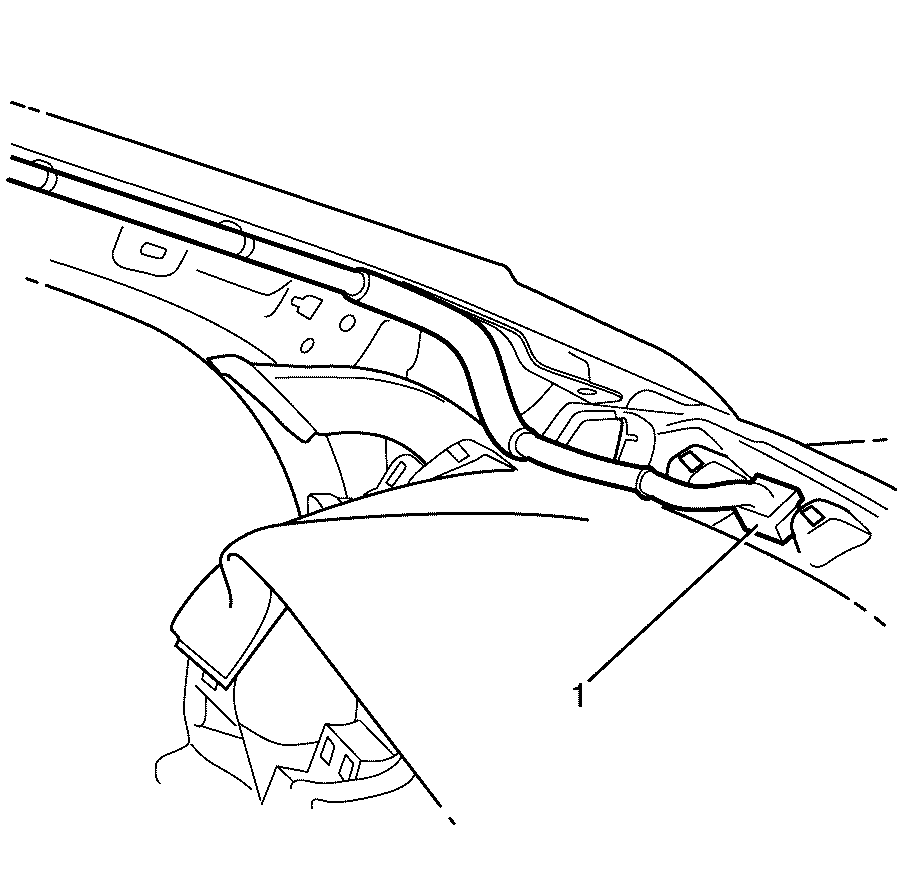
- Disconnect the headliner electrical connector (1).
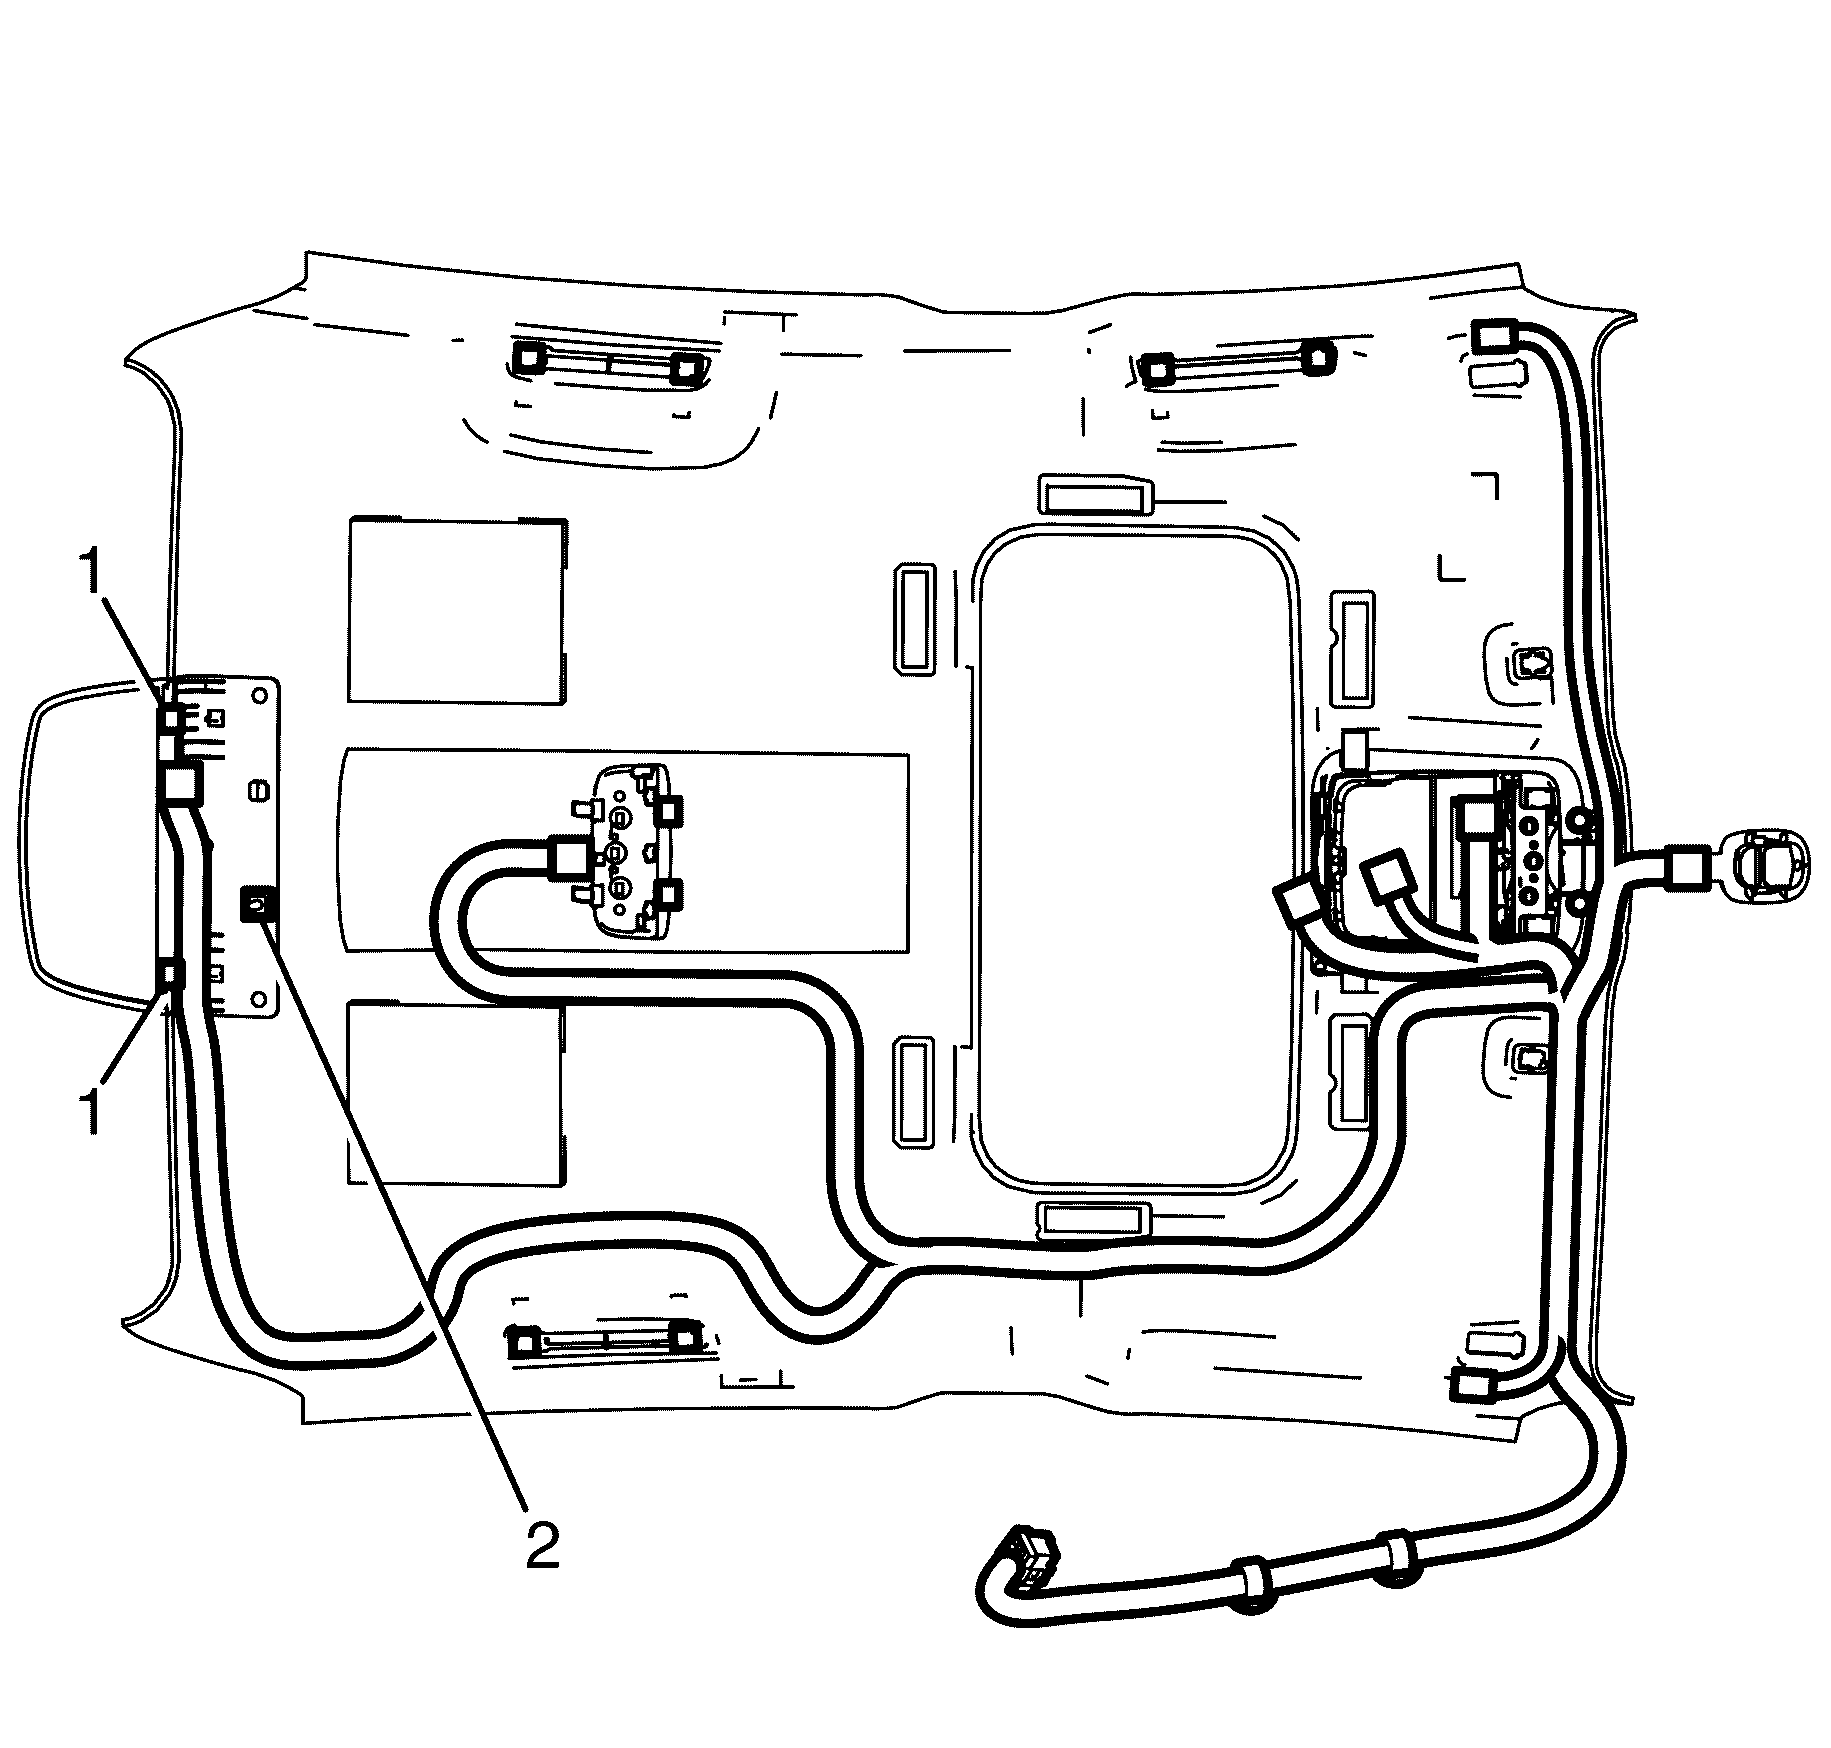
- At the rear centre of the headliner gently pull the headliner down to detach the headliner to roof retaining clips (1).
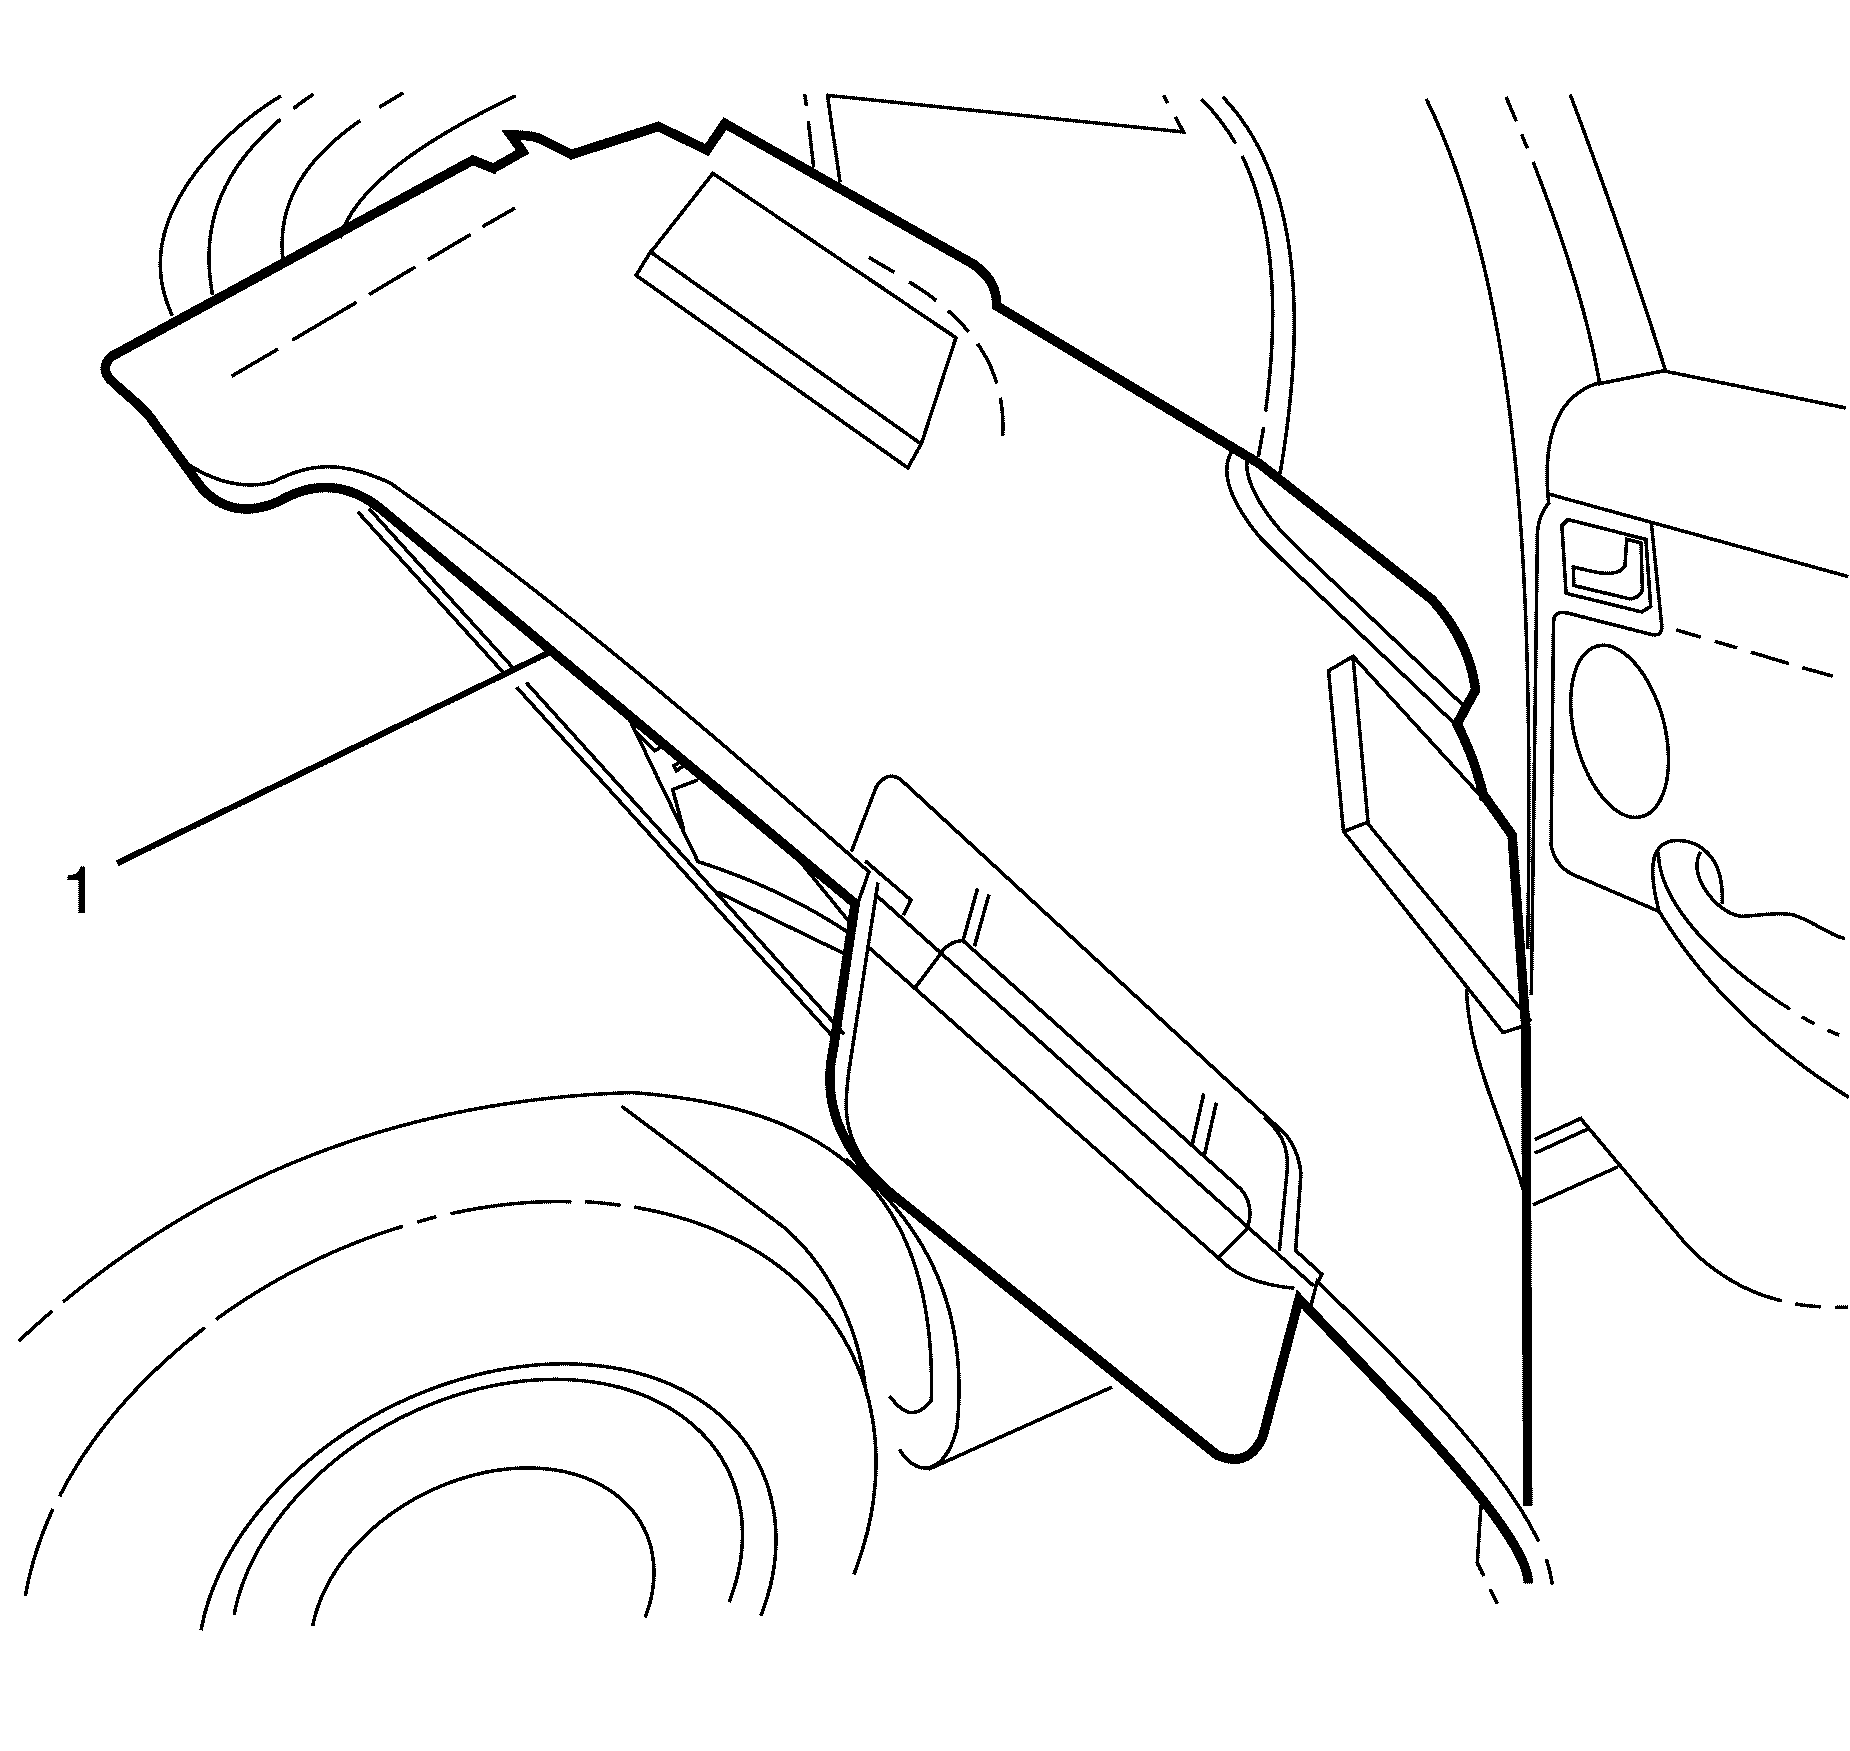
- Remove the headliner (1) through the right rear door opening.
Caution: Refer to Battery Disconnect Caution in the Preface section.
| 2.1. | Assist handles. Refer to Assist Handle Replacement. |
| 2.2. | Right front seat. Refer to Front Seat Replacement - Bucket. |
| 2.3. | Dome lamp assembly. Refer to Dome Lamp Replacement. |
| 2.4. | Windshield side garnish, on both sides. Refer to Windshield Garnish Molding Replacement. |
| 2.5. | Sunshade assembly, on both sides. Refer to Sunshade Replacement. |
| 2.6. | Windshield defroster grill. Refer to Defroster Grille Replacement. |
| 2.7. | Front door opening weatherstrip, on both sides. Refer to Front Door Opening Weatherstrip Replacement. |
| 2.8. | Centre pillar upper trim panel, on both sides. Refer to Center Pillar Upper Trim Panel Replacement. |
| 2.9. | Rear seat head restraints, if fitted. Refer to Rear Seat Head Restraint Replacement. |
| 2.10. | Rear quarter upper trim panel, on both sides. Refer to Quarter Upper Trim Panel Replacement. |
| 2.11. | Rear door opening weatherstrip, on both sides. Refer to Rear Door Opening Weatherstrip Replacement. |


Important: Recline the left front seat back completely.
Important: To avoid damage to the headliner, remove the headliner with the aid of an assistant.
Important: Take care not to damage the datum pin (2) when removing the headliner from the vehicle.

Important: The headliner must be removed from the vehicle as shown above.
Installation Procedure
- Install the headliner (1) through the right rear door opening.
- Carefully lift the headliner into place and locate that datum pin (2).
- At the rear centre of the headliner gently push the headliner up to engage the headliner to roof retaining clips (1).
- Attach the headliner wiring harness to A-pillar retaining clips (1).
- Connect the headliner electrical connector (1).
- Install the following components:
- Connect the battery ground cable. Refer to Battery Negative Cable Disconnection and Connection.

Important: To avoid damage to the headliner, install the headliner with the aid of an assistant.
Important: The headliner must be installed into the vehicle as shown above.


| 6.1. | Right front seat. Refer to Front Seat Replacement - Bucket. |
| 6.2. | Dome lamp assembly. Refer to Dome Lamp Replacement. |
| 6.3. | Windshield side garnish, on both sides. Refer to Windshield Garnish Molding Replacement. |
| 6.4. | Sunshade assembly, on both sides. Refer to Sunshade Replacement. |
| 6.5. | Windshield defroster grill. Refer to Defroster Grille Replacement. |
| 6.6. | Front door opening weatherstrip, on both sides. Refer to Front Door Opening Weatherstrip Replacement. |
| 6.7. | Centre pillar upper trim panel, on both sides. Refer to Center Pillar Upper Trim Panel Replacement. |
| 6.8. | Rear seat head restraints, if fitted. Refer to Rear Seat Head Restraint Replacement. |
| 6.9. | Rear quarter upper trim panel, on both sides. Refer to Quarter Upper Trim Panel Replacement. |
| 6.10. | Rear door opening weatherstrip, on both sides. Refer to Rear Door Opening Weatherstrip Replacement. |
| 6.11. | Assist handles. Refer to Assist Handle Replacement. |
