Removal Procedure
- Disable the SIR system. Refer to SIR Disabling and Enabling.
- Remove the windshield garnish mouldings. Refer to Windshield Garnish Molding Replacement.
- Remove the sunshades from the headliner assembly. Refer to Assist Handle Replacement.
- Remove the passenger assist handle bolts from the headliner. Refer to Sunshade Replacement.
- Remove the lower centre pillar trim panel. Refer to Center Pillar Lower Trim Panel Replacement.
- Remove the upper centre pillar trim panel. Refer to Center Pillar Upper Trim Panel Replacement.
- Remove the rear upper quarter pillar trim panel. Refer to Quarter Upper Trim Panel Replacement.
- Remove the headliner assembly from the vehicle. Refer to Headlining Trim Panel Replacement.
- Remove the inflatable restraint roof rail module to body retaining bolts (A to I) in the sequence of A through to I.
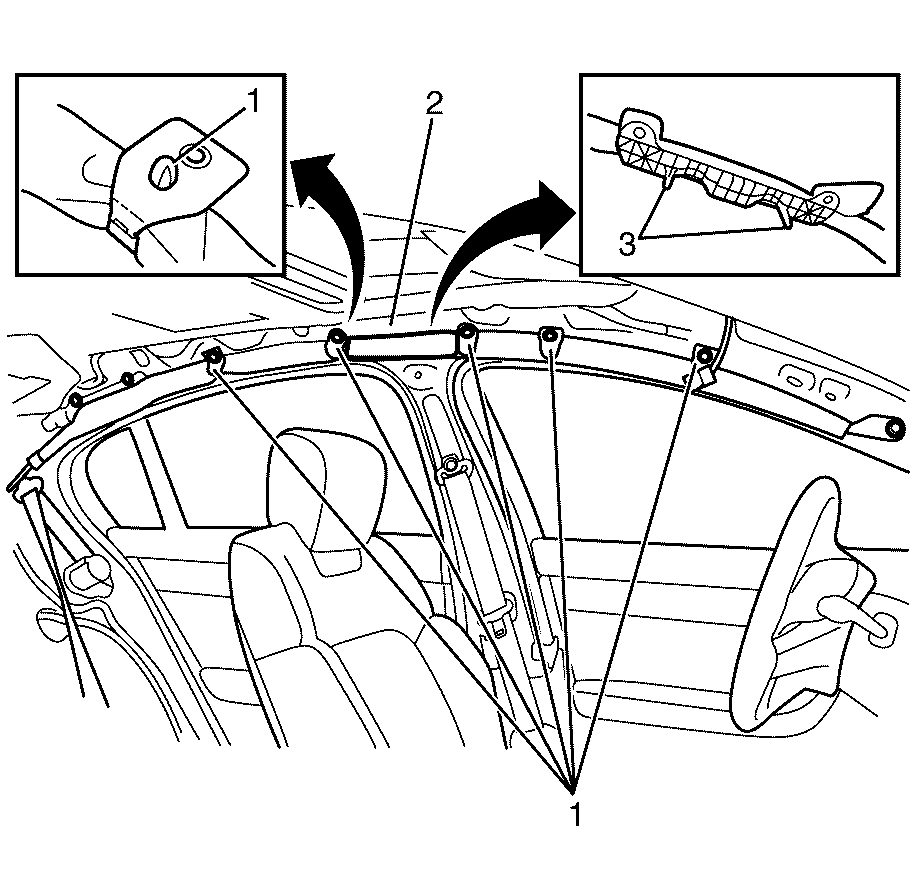
- Detach the inflatable restraint roof rail module to body retaining clips (1) from the body (2).
- Disconnect the electrical connector (1) from the inflatable restraint roof rail module (2).
- Disengage the inflatable restraint roof rail module supporting hook (1) from the body (2).
- With the aid of an assistant remove the inflatable restraint roof rail module (3) from the vehicle.
Caution: Refer to SIR Caution in the Preface section.
Caution: Refer to SIR Inflator Module Handling and Storage Caution in the Preface section.
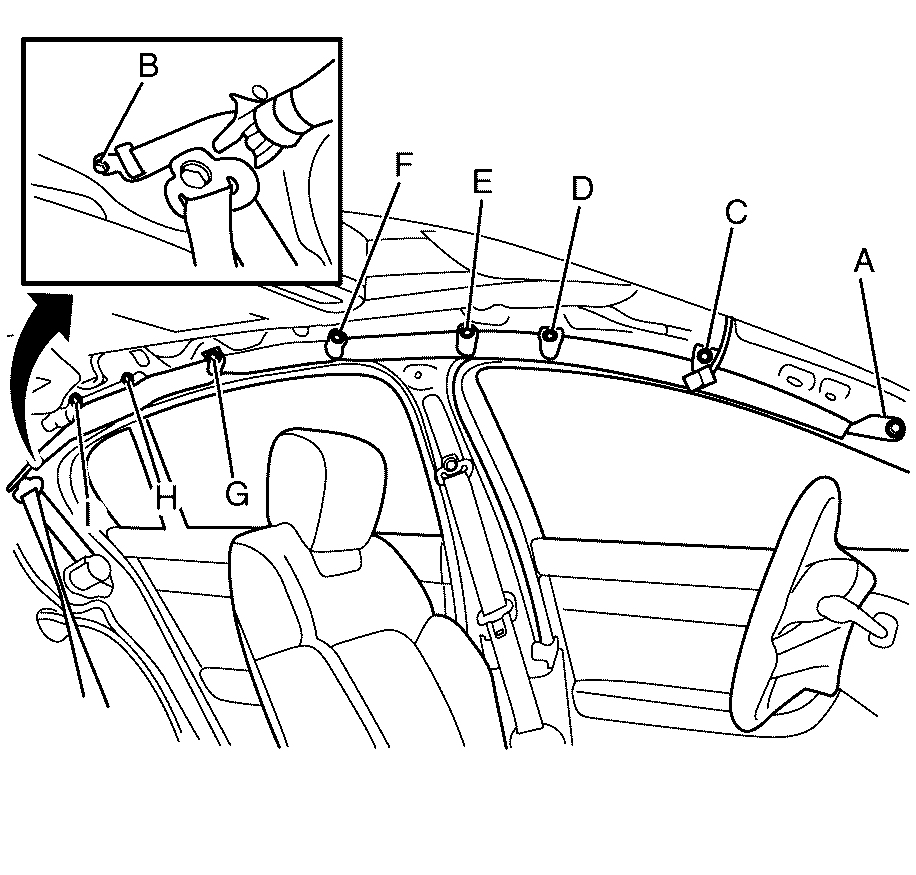
Important: Removal of the inflatable restraint roof rail module to body retaining bolts (A-I) should be performed in sequence.
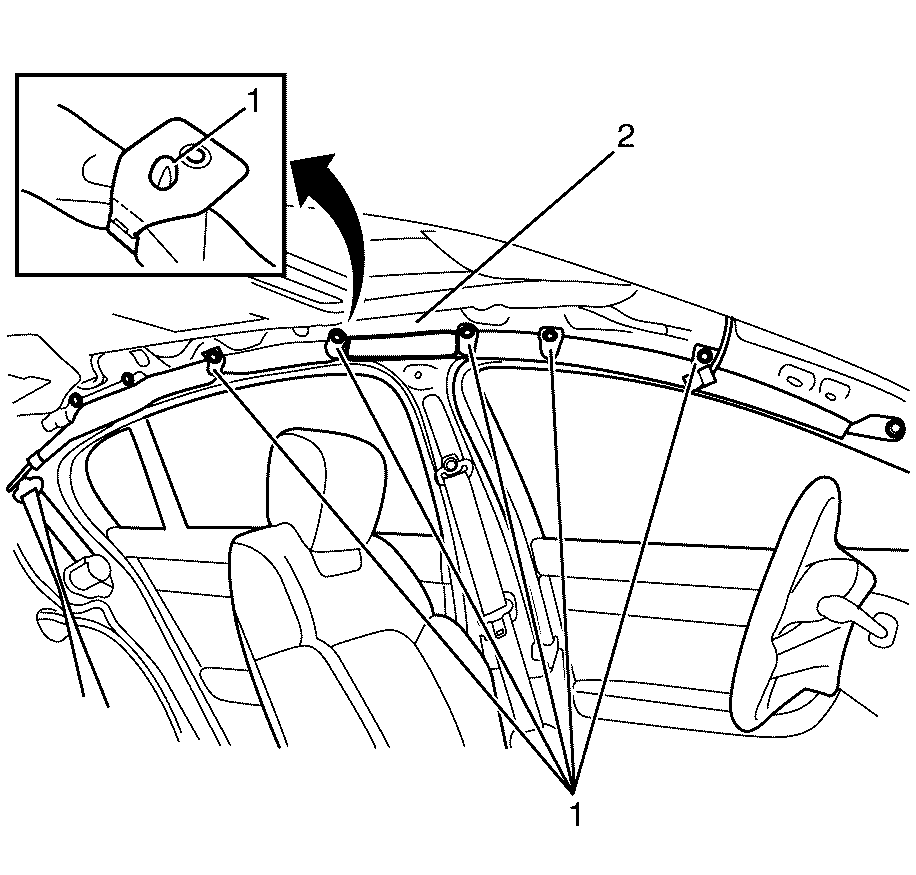
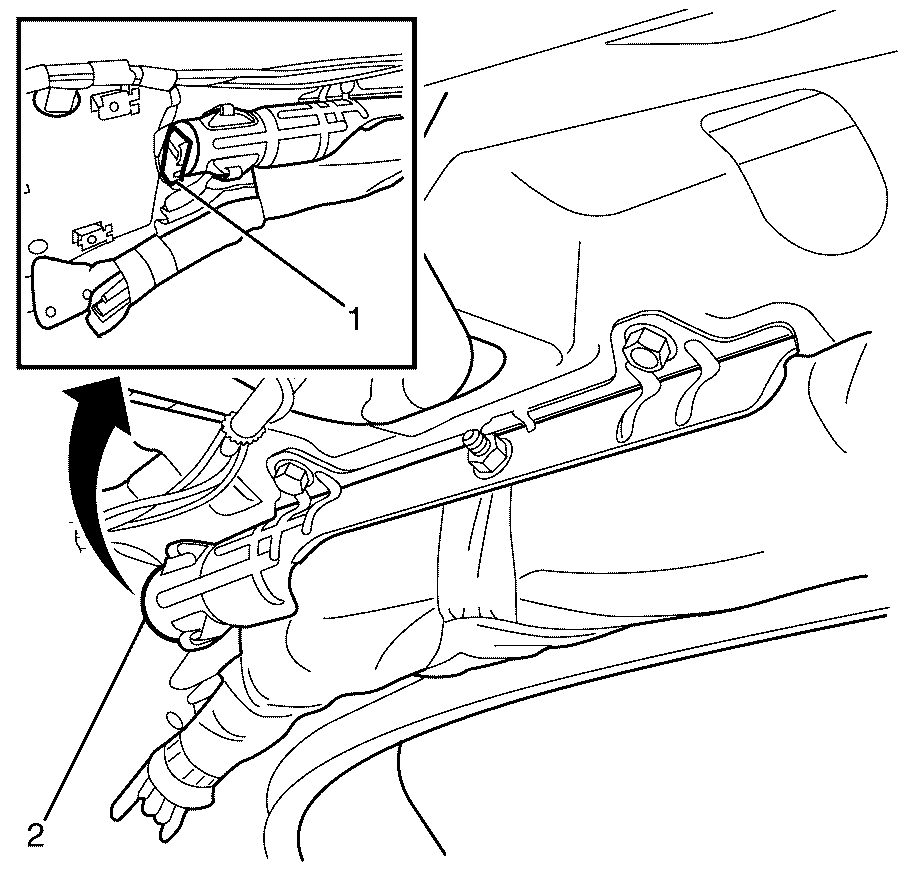
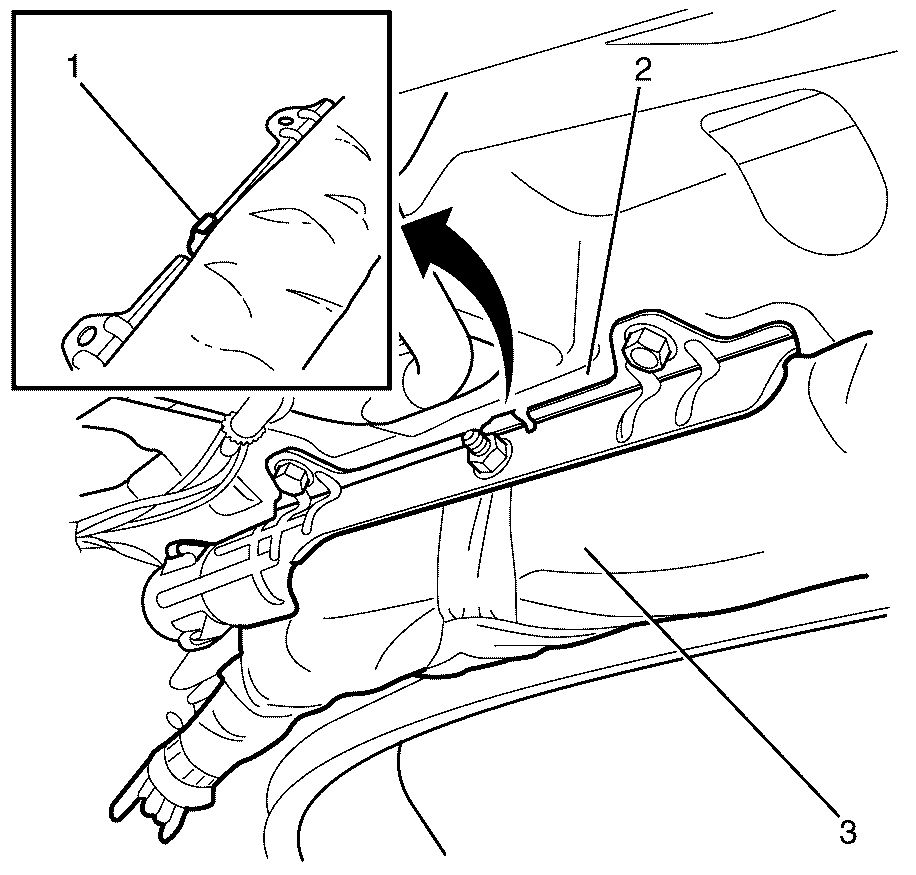
Important: The inflatable restraint roof rail module flute channel must not be twisted during removal or installation procedures
For deployment procedure. Refer to Inflator Module Handling and Scrapping.
Installation Procedure
- With the aid of an assistant, install the inflatable restraint roof rail module (3) to the vehicle.
- Attach the supporting hook (1) to the body (2)
- Attach the inflatable restraint roof rail module to body.
- Make sure that the retaining clips (1) engages correctly to the body (2).
- Connect the electrical connector (1) to the inflatable restraint roof rail module (2).
- Align the locating pins (3) to the body (2).
- Install the inflatable restraint roof rail module to body retaining bolts (A to I) in the sequence of A through to I.
- Install the headliner assembly to the vehicle. Refer to Headlining Trim Panel Replacement.
- Install the rear upper quarter pillar trim panel. Refer to Quarter Upper Trim Panel Replacement.
- Install the upper centre pillar trim panel. Refer to Center Pillar Upper Trim Panel Replacement.
- Install the lower centre pillar trim panel. Refer to Center Pillar Lower Trim Panel Replacement.
- Install the passenger assist handle bolts to the headliner. Refer to Assist Handle Replacement.
- Install the sunshades to the headliner assembly. Refer to Sunshade Replacement.
- Install the windshield garnish mouldings. Refer to Windshield Garnish Molding Replacement.
- Enable the SIR system. Refer to SIR Disabling and Enabling.
Caution: Refer to SIR Caution in the Preface section.
Caution: Refer to SIR Inflator Module Handling and Storage Caution in the Preface section.
Caution: In order to prevent accidental deployment of the air bag which could cause personal injury, do not dispose of an undeployed inflator module as normal shop waste. The undeployed inflator module contains substances that could cause severe illness or personal injury if the sealed container is damaged during disposal. Use the following deployment procedures to safely dispose of an undeployed inflator module. Failure to dispose of an inflator module as instructed may be a violation of federal, state, province, or local laws.
Important: Before installation, make sure that the mounting surfaces of the inflatable restraint roof rail module are clean and free from grease, solvents paint and other foreign matter.


Notice: Refer to Fastener Notice in the Preface section.
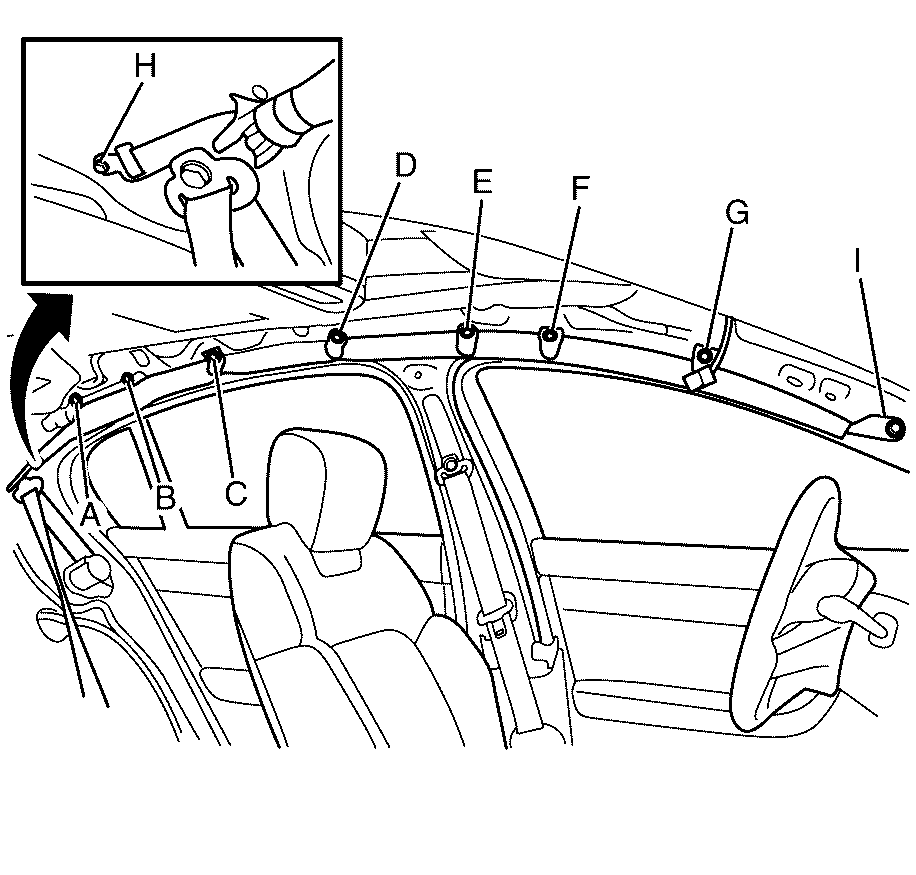
Important: Installation of the inflatable restraint roof rail module to body retaining bolts (A-I) should be performed in sequence.
Tighten
Tighten the fasteners to 7 N·m (53 lb in).
