For 1990-2009 cars only
Removal Procedure
- Remove the console trim plate. Refer to Console Trim Plate Replacement .
- Remove the left console trim panel. Refer to Front Floor Console Side Trim Panel Replacement - Left Side .
- Remove the right console trim panel. Refer to Front Floor Console Side Trim Panel Replacement - Right Side .
- Remove the floor console compartment. Refer to Front Floor Console Compartment Replacement .
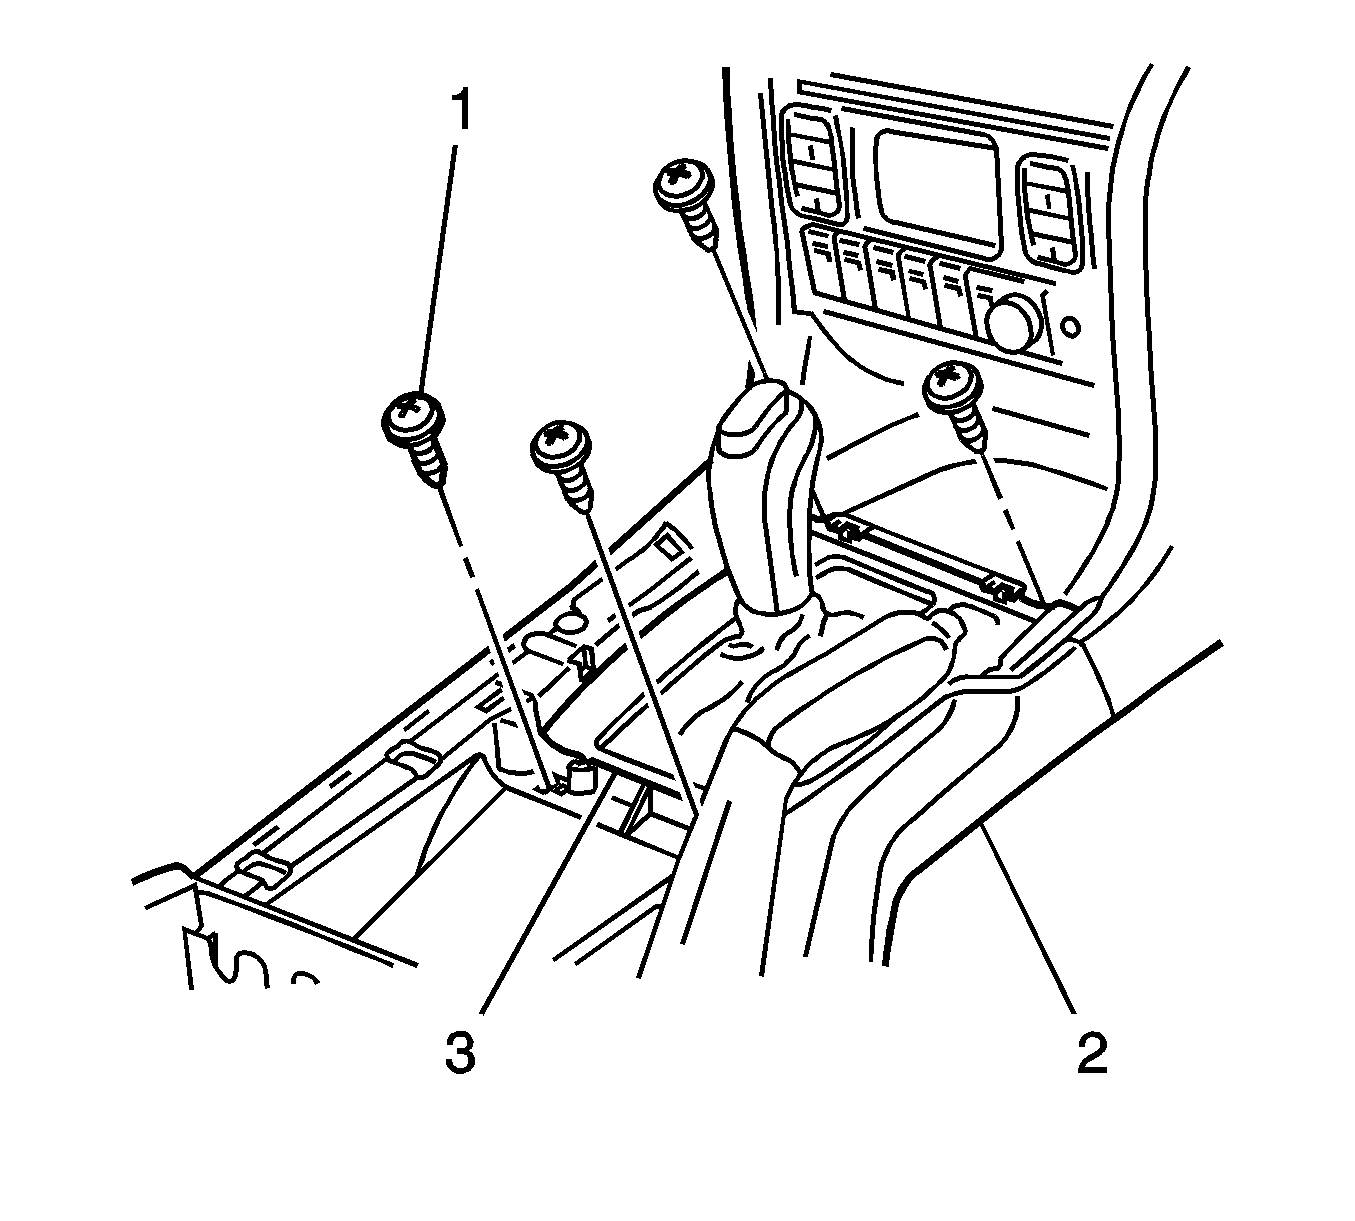
- If equipped with an automatic transmission, remove the 4 screws (1), attaching the console (2) to the shifter assembly (3).
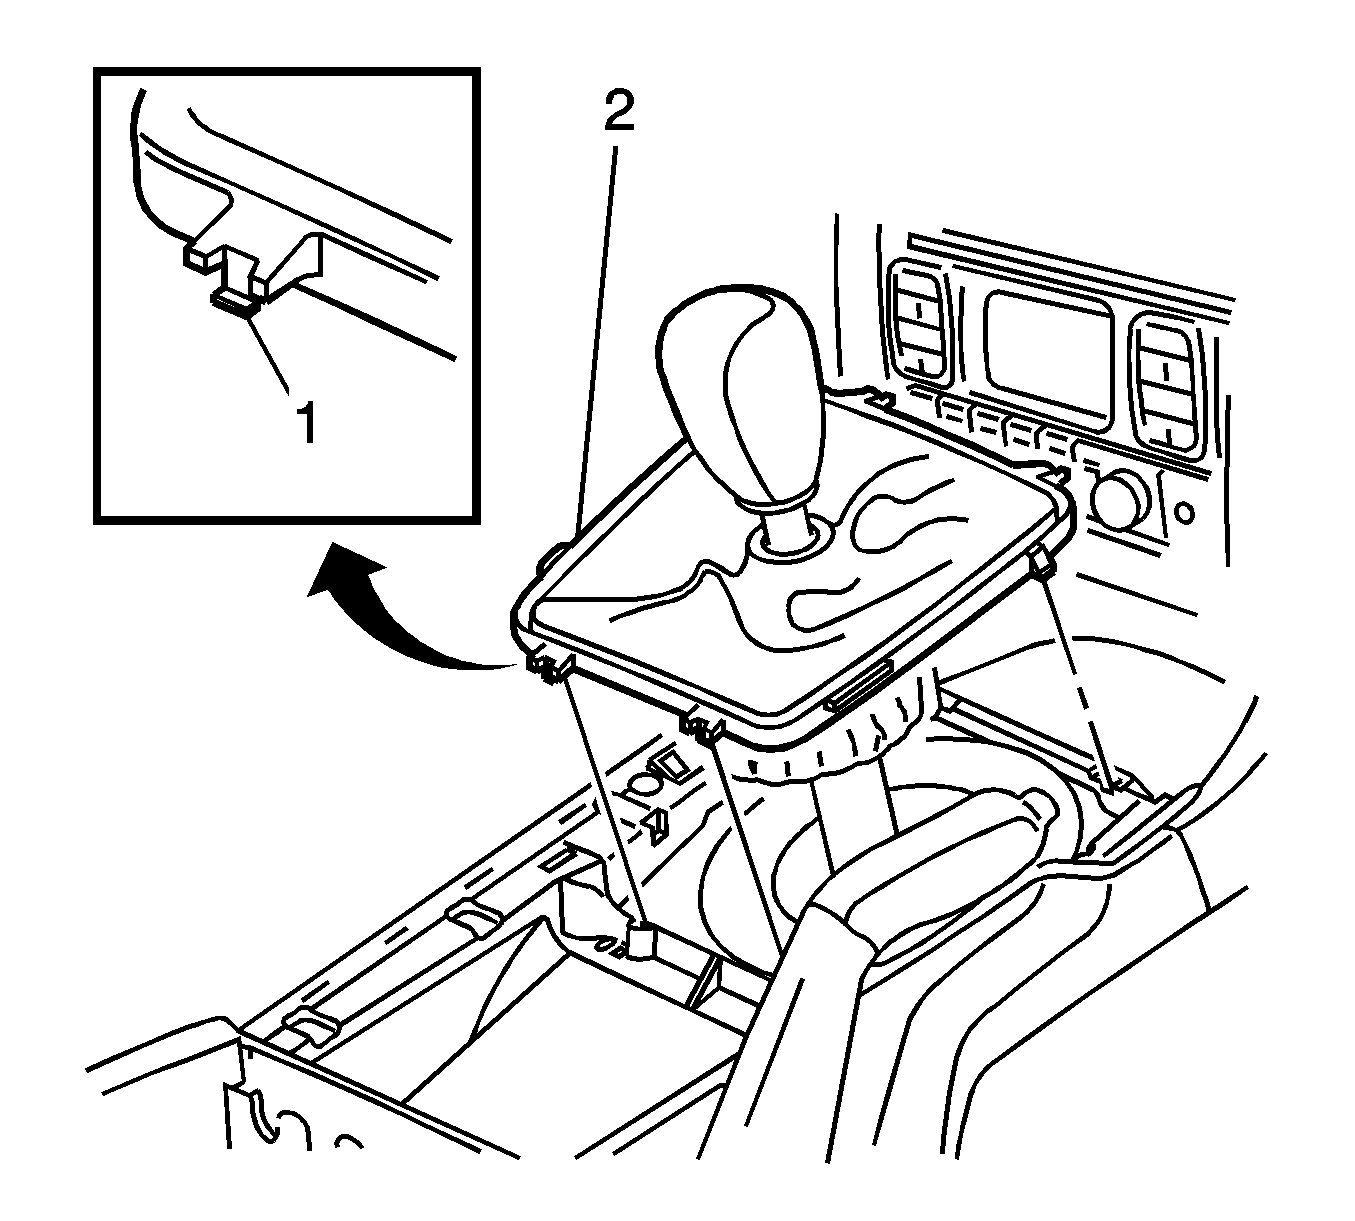
- If equipped with a manual transmission, use a flat-bladed tool to disengage the retaining tabs (1) attaching the manual transmission shifter boot assembly (2) to the console.
- Remove the manual transmission gear shifter knob, if necessary. Refer to Transmission Control Lever Knob Replacement in Manual Transmissions - Tremac 6-Speed.
- Remove the manual transmission shifter boot assembly (2) from the shifter, if equipped.
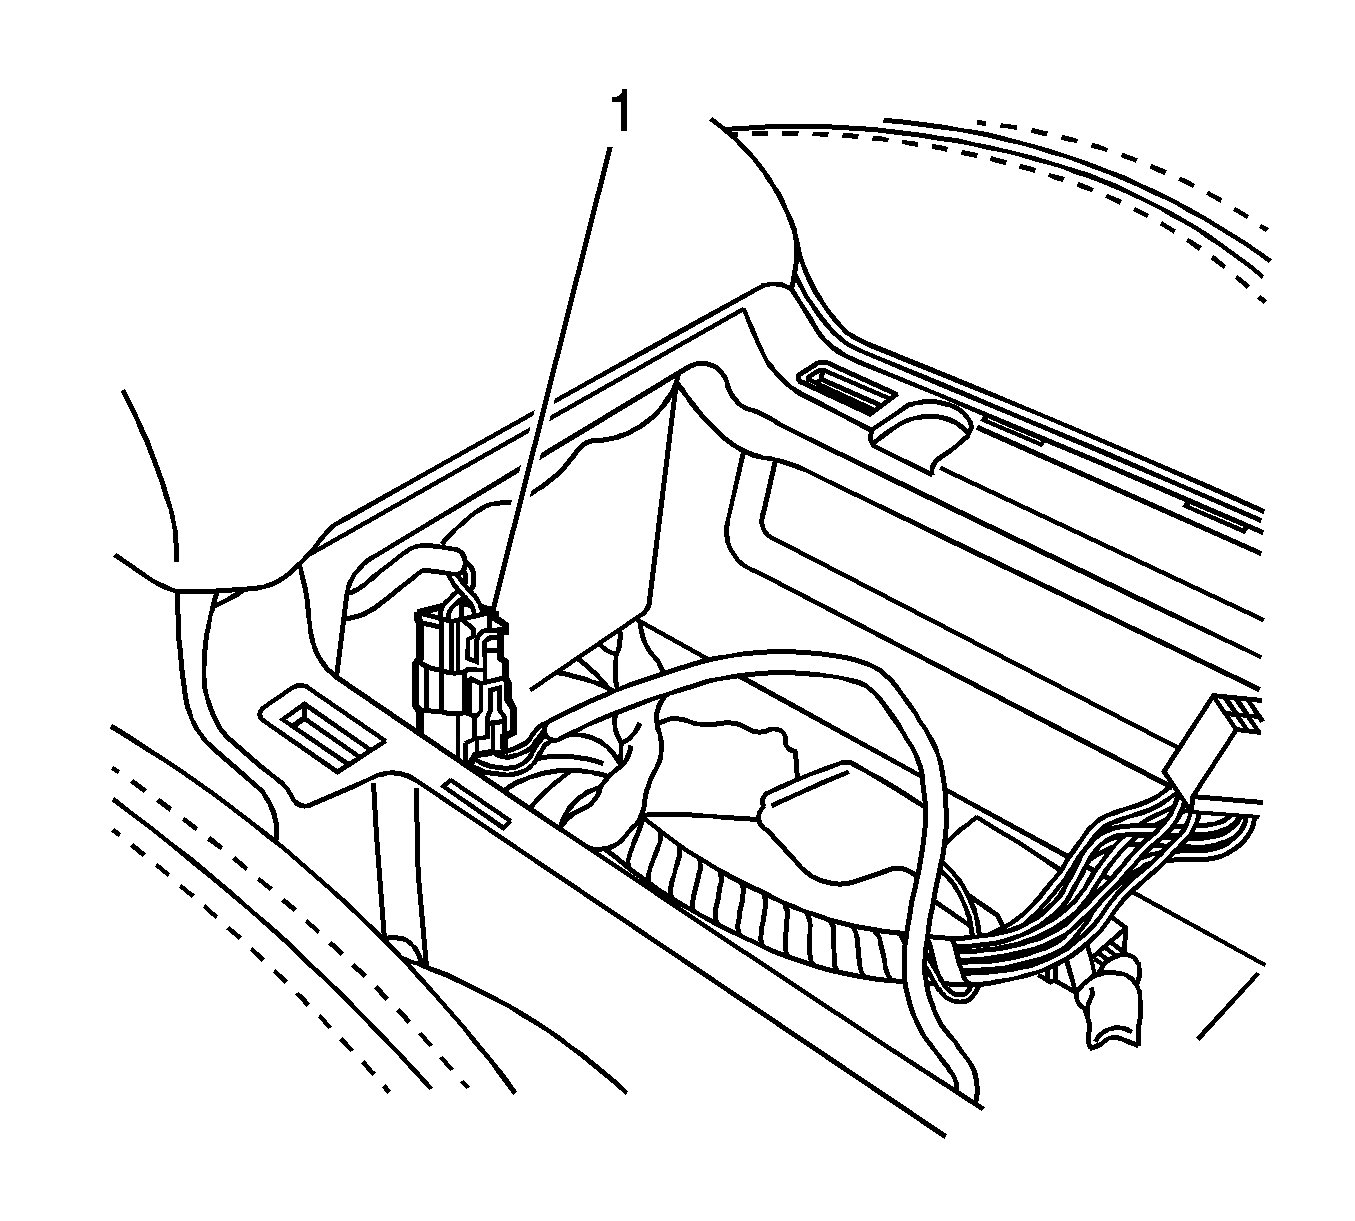
- Disconnect the console wiring connector (1) from the inner console.
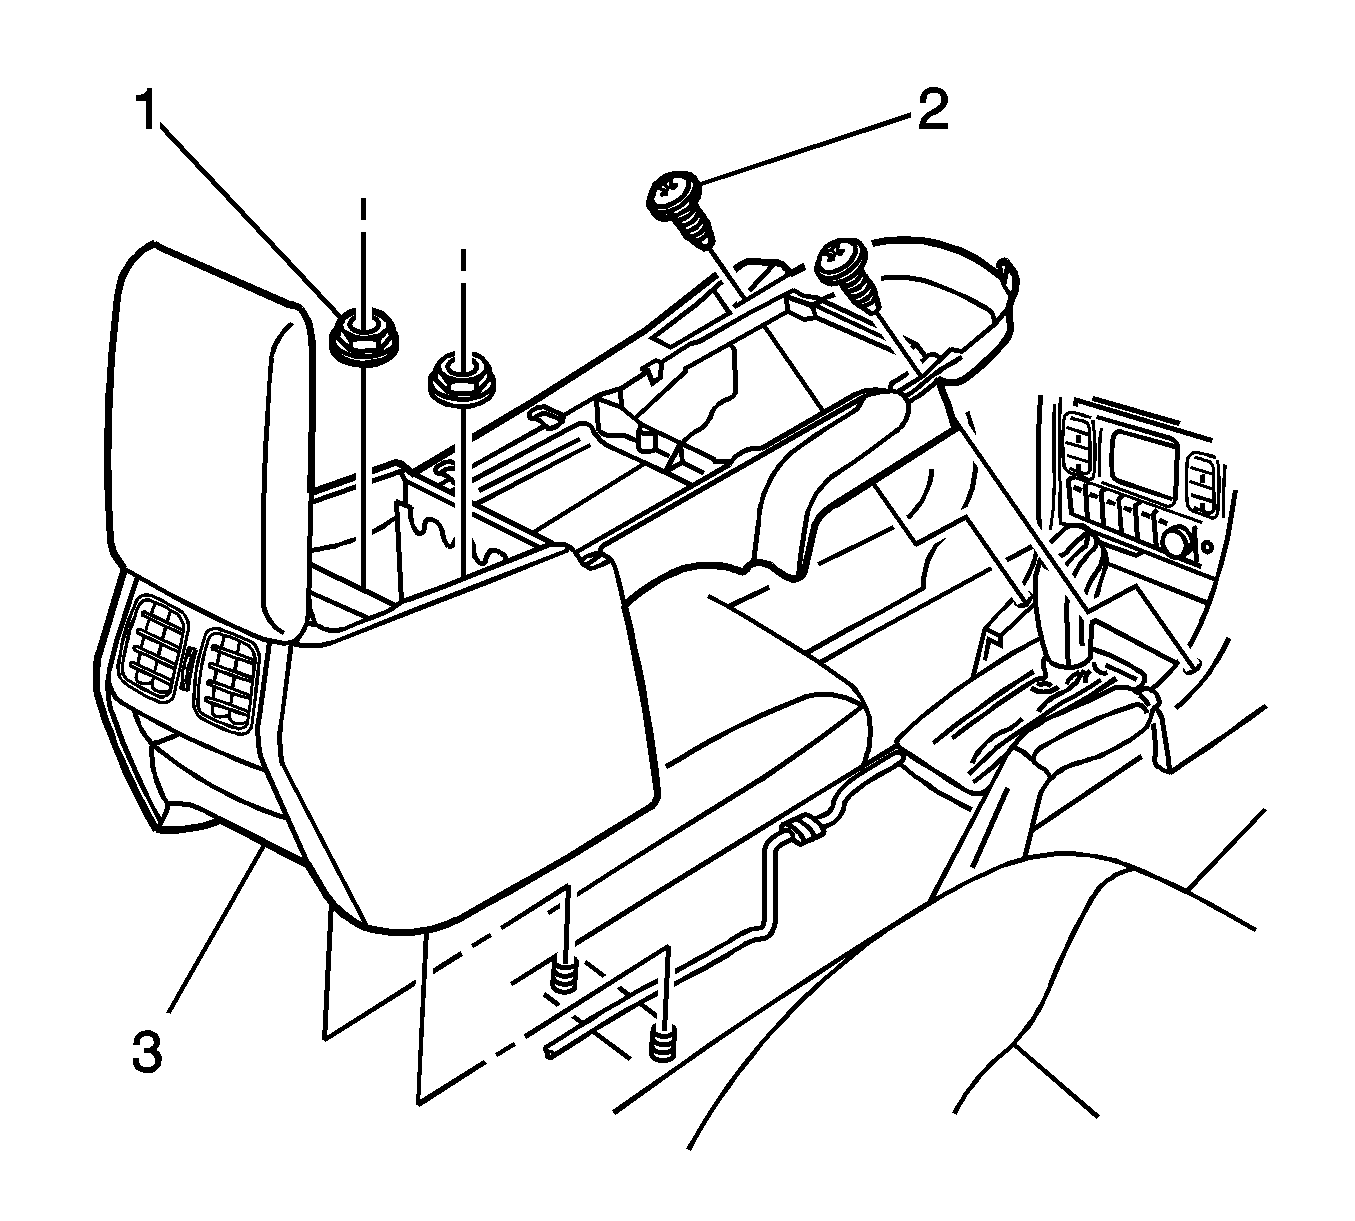
- Remove the two nuts (1) attaching the floor console (3) to the vehicle floor.
- Remove the two screws (2) attaching the front of the console to the instrument panel assembly.
- Remove the accessory power receptacle. Refer to Floor Console Accessory Power Receptacle Replacement in Power Outlets.
- Lift the rear of the console upward and remove from the vehicle.
- Remove the floor console armrest hinge, if necessary. Refer to Front Floor Console Armrest Hinge Replacement .
- Remove the center console end panel. Refer to Center Console End Panel Replacement .
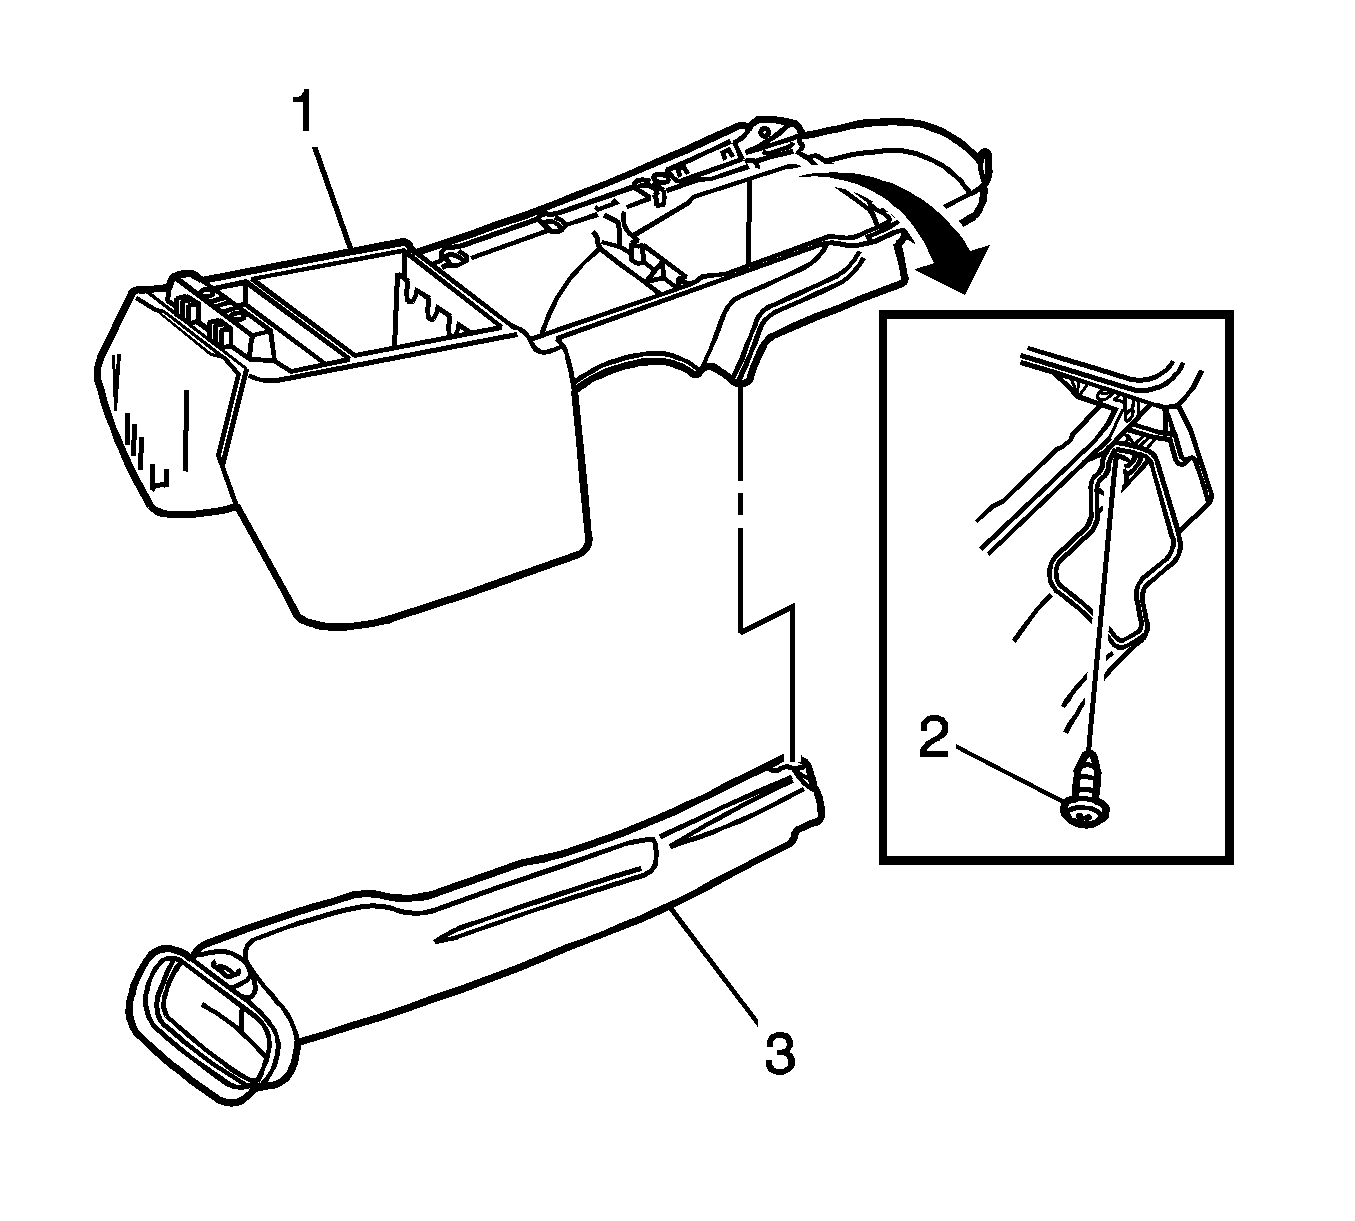
- Remove the screw (2) attaching the floor console rear air duct (3) to the floor console (1).
- Remove the floor console rear duct (3) from the floor console (1).
- Remove the console storage bin, if necessary. Refer to Front Floor Console Compartment Replacement .
- Remove the console lamp. Refer to Console Lamp Replacement in Lighting Systems.
- Remove the console compartment lamp switch. Refer to Console Compartment Lamp Switch Replacement in Lighting Systems.
Installation Procedure
- Install the console compartment lamp switch. Refer to Console Compartment Lamp Switch Replacement in Lighting Systems.
- Install the console lamp. Refer to Console Lamp Replacement in Lighting Systems.
- Install the console storage bin, if removed. Refer to Front Floor Console Compartment Replacement .
- Install the floor console rear duct (3) to the floor console (1).
- Install the screw (2) attaching the floor console rear air duct (3) to the floor console (1).
- Install the center console end panel. Refer to Center Console End Panel Replacement .
- Install the floor console armrest hinge, if removed. Refer to Front Floor Console Armrest Hinge Replacement .
- Install the floor console to the vehicle.
- Install the accessory power receptacle. Refer to Floor Console Accessory Power Receptacle Replacement in Power Outlets.
- Install the 2 screws (2) attaching the front of the console to the instrument panel assembly.
- Install the 2 nuts (1) attaching the floor console (3) to the vehicle floor
- Connect the console wiring connector (1) inside the inner console.
- Install the manual transmission shifter boot assembly (2) to the shifter, if removed.
- Install the manual transmission gear shifter knob, if removed. Refer to Transmission Control Lever Knob Replacement in Manual Transmissions - Tremac 6-Speed.
- Install the manual transmission shifter boot assembly (2) to the console making sure the retaining tabs (1) are engaged, if removed.
- Install the 4 screws (1) attaching the console (2) to the automatic shifter assembly (3), if removed.
- Install the floor console compartment. Refer to Front Floor Console Compartment Replacement .
- Install the right console trim panel. Refer to Front Floor Console Side Trim Panel Replacement - Right Side .
- Install the left console trim panel. Refer to Front Floor Console Side Trim Panel Replacement - Left Side .
- Install the console trim plate. Refer to Console Trim Plate Replacement .

Notice: Refer to Fastener Notice in the Preface section.
Tighten
Tighten the screw (2) to 2 N·m (18 lb in).

Tighten
Tighten the screws (2) to 2 N·m (18 lb in).
Tighten
Tighten the nuts (1) to 2 N·m (18 lb in).


Tighten
Tighten the screws (1) to 2 N·m (18 lb in).
