For 1990-2009 cars only
Special Tools
KM-422 Installer
Removal Procedure
- Remove the camshaft intake and exhaust sprockets. Refer to Camshaft Intake Sprocket with Actuator Replacement and Camshaft Exhaust Sprocket with Actuator Replacement.
- Remove the timing belt tensioner. Refer to Timing Belt Replacement.
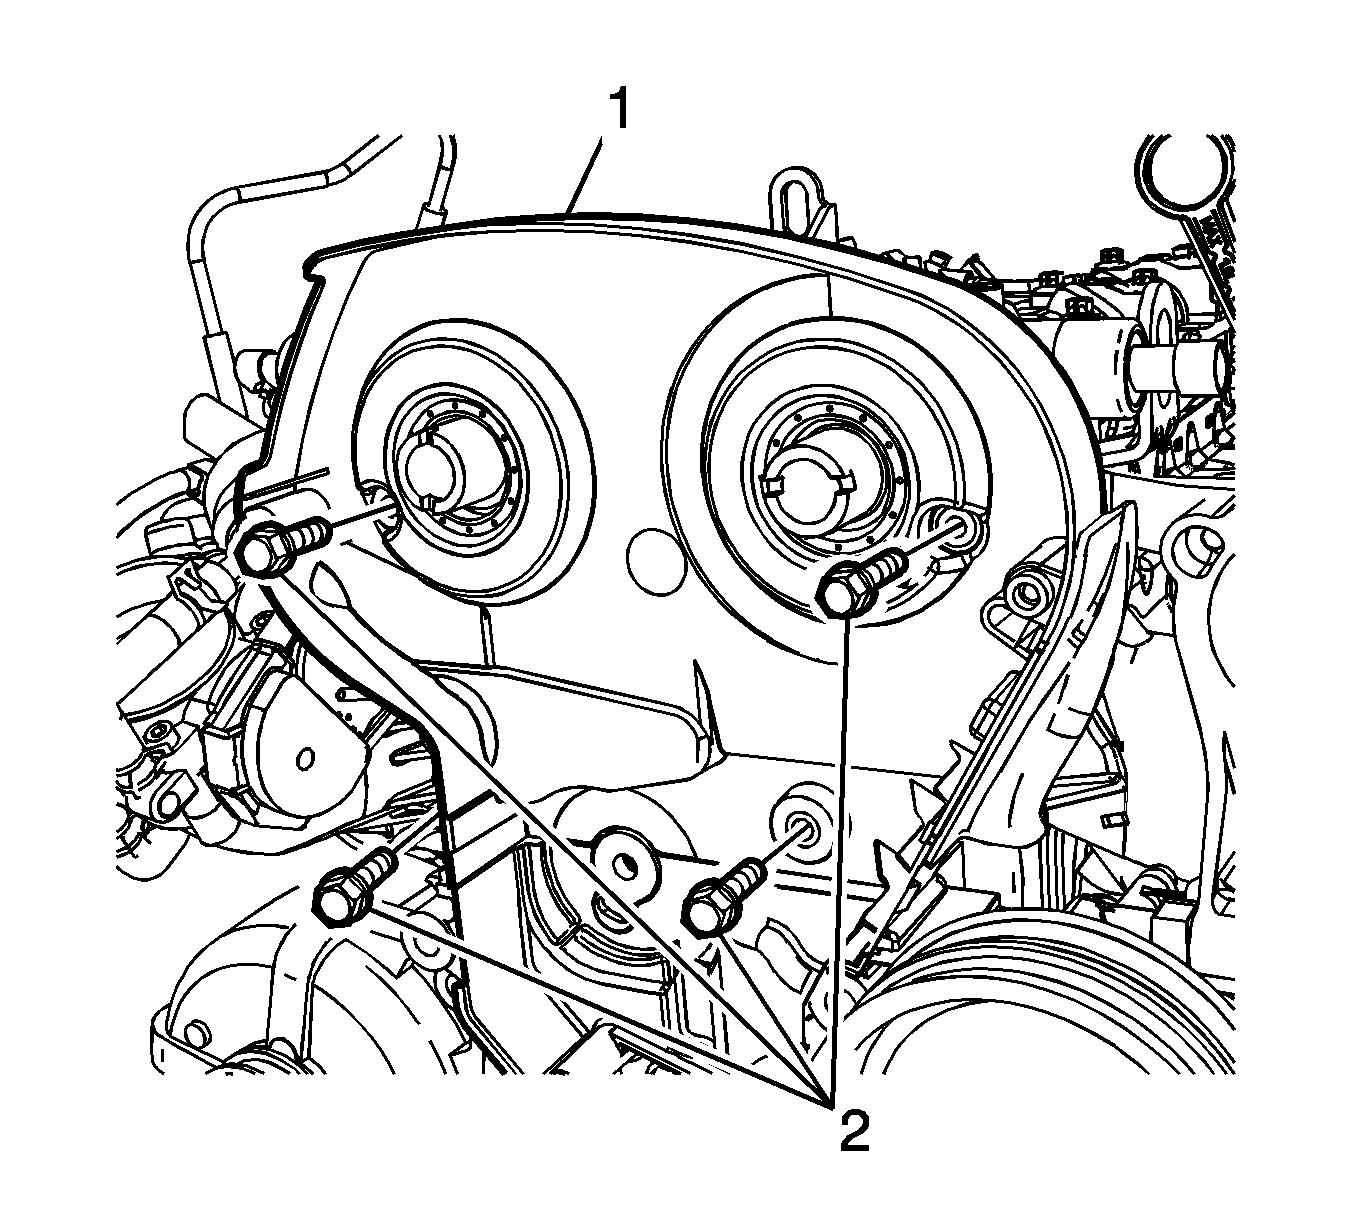
- Remove the timing belt rear cover (1).
- Remove the camshaft position solenoid valve housing.
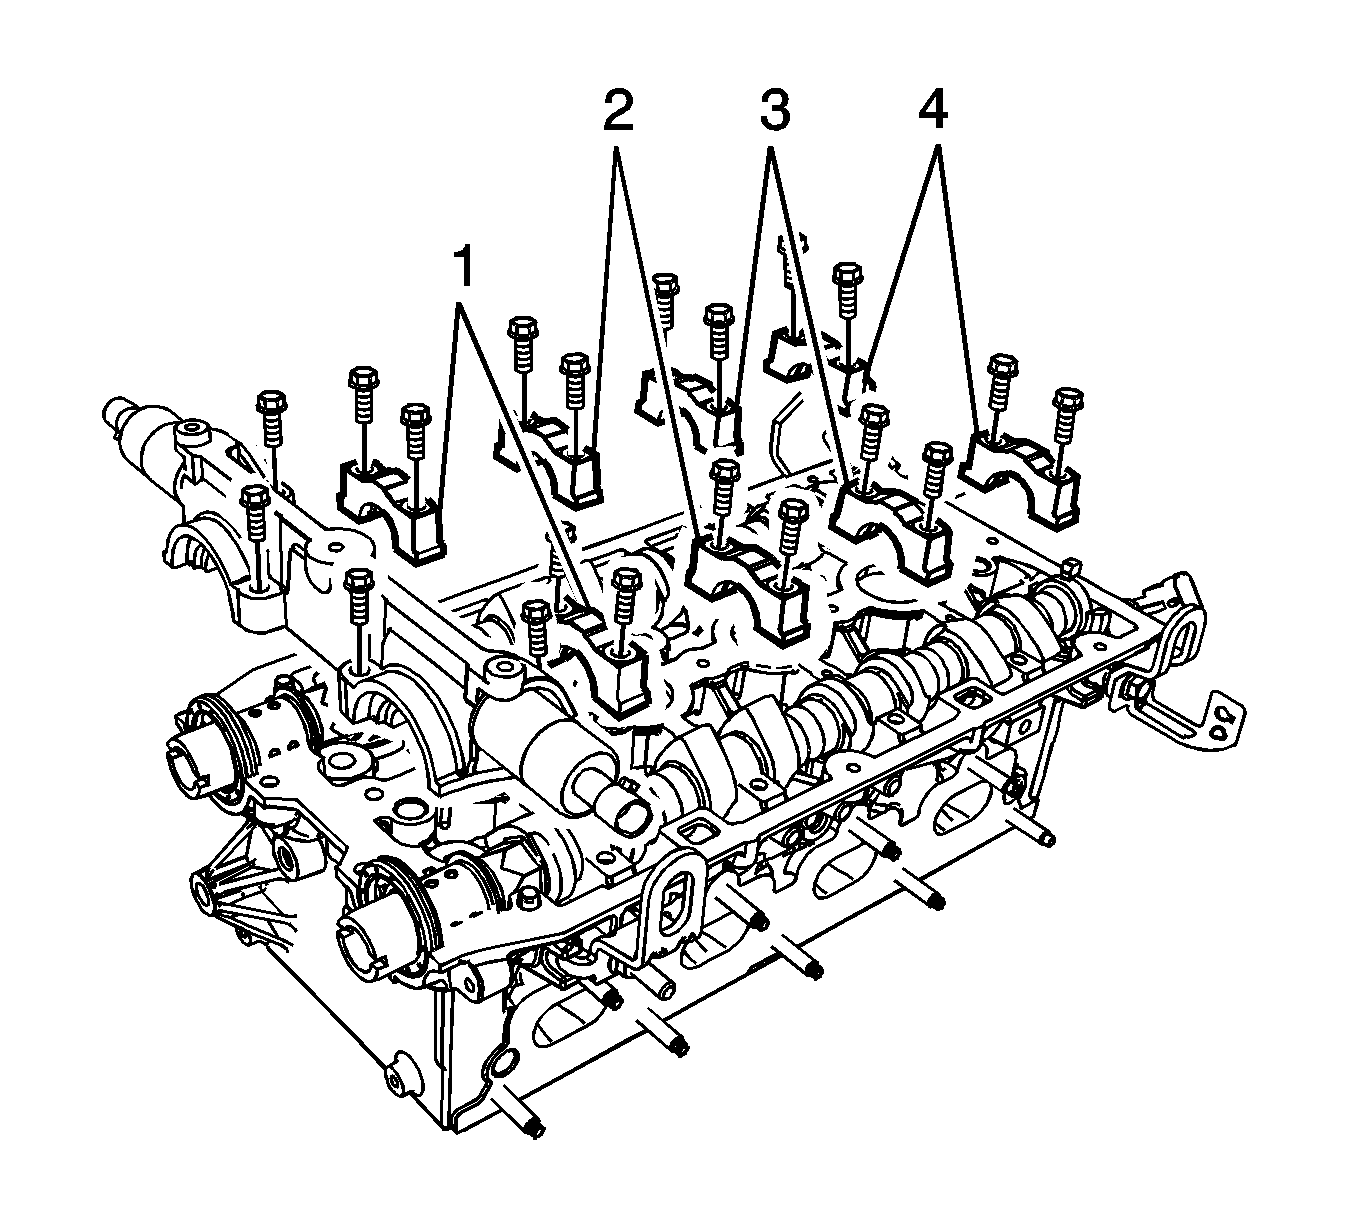
- Remove the camshaft cap bolts in sequence (1, 4, 2, 3).
- Remove the camshaft caps.
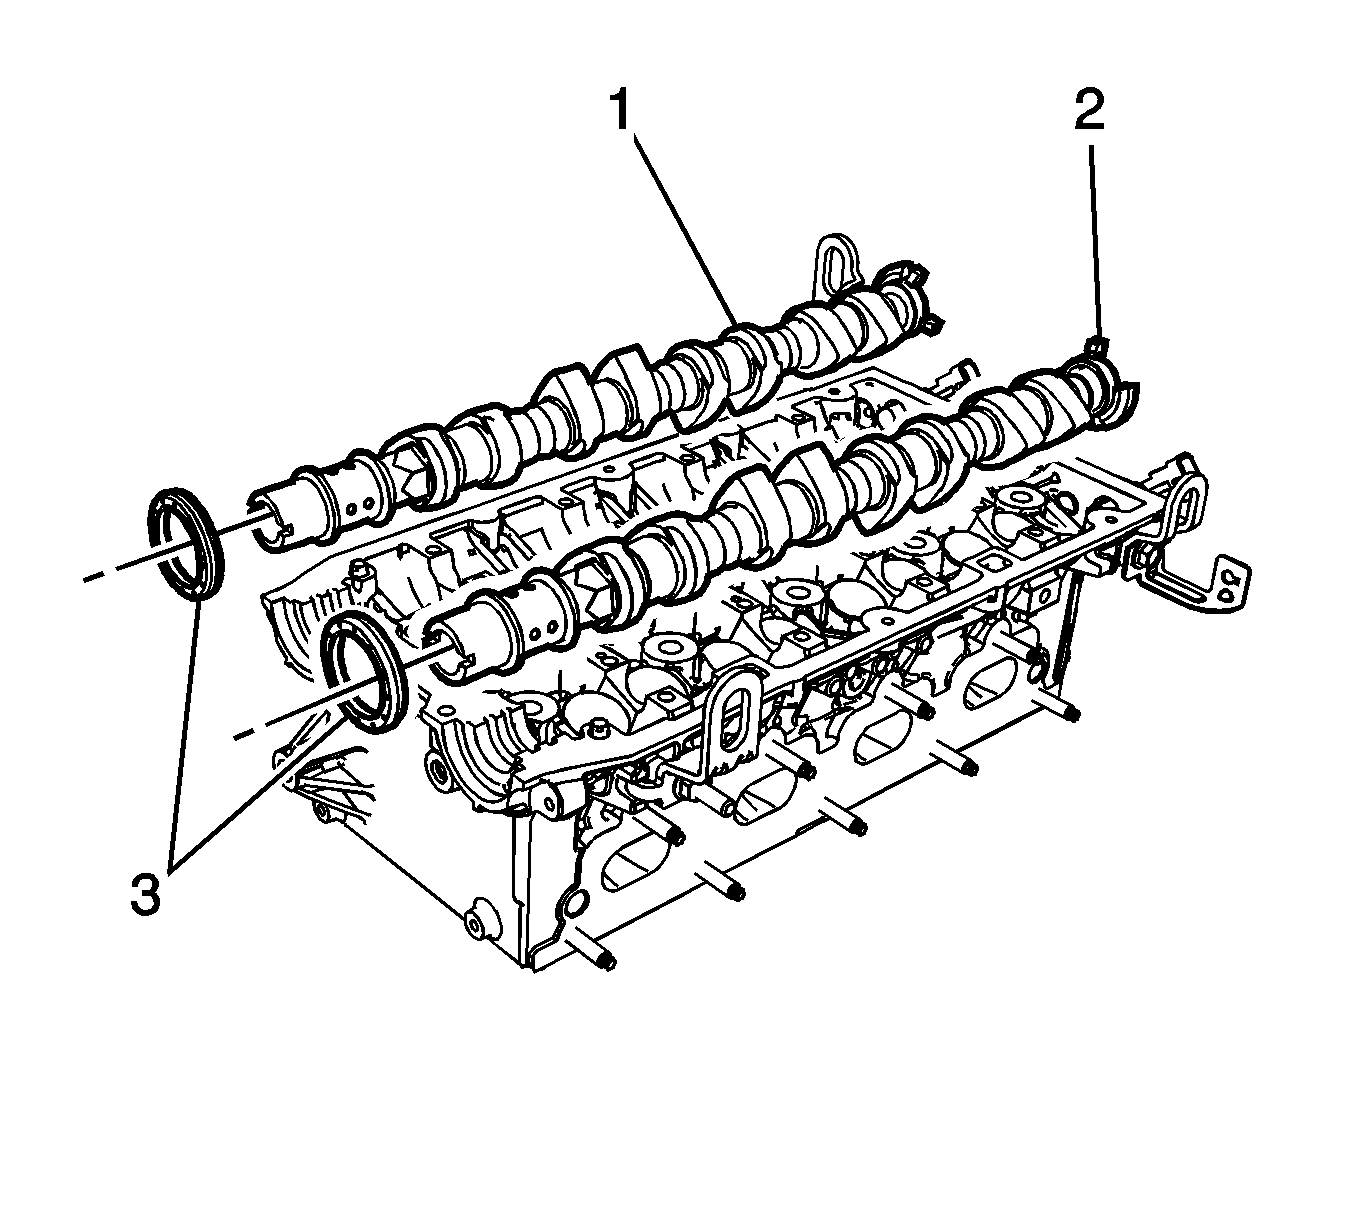
- Remove the intake (2)/exhaust (1)camshafts with the seal rings (3).
Note: Take extreme care to prevent any scratches, nicks or damage to the camshafts and caps bearing surfaces.


Installation Procedure
- Coat/Lubricate the camshaft bearing and cam surfaces with clean engine oil.
- Install the camshafts (1, 2) on the cylinder head.
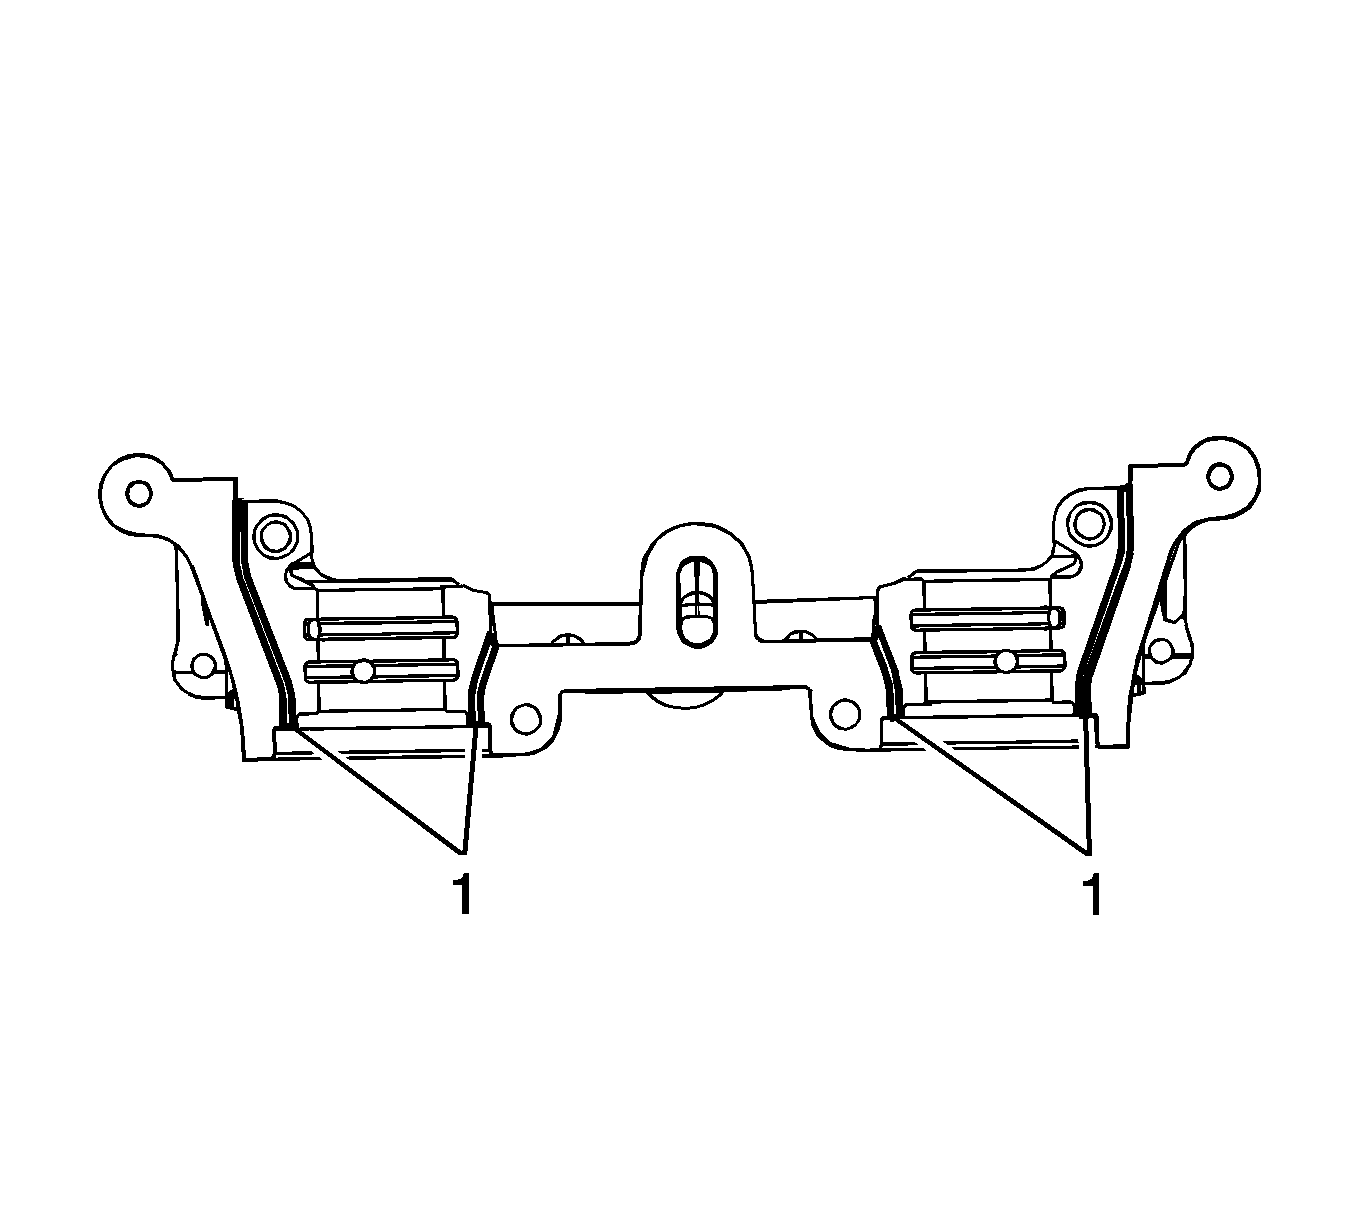
- Apply surface sealant LOCTITE 574 to sealing surfaces (1) of the 1st camshaft bearing cap thinly and evenly.
- Install the camshaft bearing caps in sequence (2, 3, 1, 4).
- Install the camshaft position solenoid valve housing.
- Install the new camshaft oil seal rings using KM-422 . Refer to Camshaft Front Oil Seal Replacement.
- Install the timing belt rear cover (1).
- Install the timing belt tensioner. Refer to Timing Belt Replacement.
- Install the camshaft intake and exhaust sprockets. Refer to Camshaft Intake Sprocket with Actuator Replacement and Camshaft Exhaust Sprocket with Actuator Replacement.

Note: It is essential to ensure that no sealant is applied outside the marked sealing areas.

Note: The grooves (1) adjacent to the sealing surfaces must remain free from sealant

Caution: Refer to Fastener Caution in the Preface section.
Tighten
Tighten the camshaft bearing cap bolts to 8 N·m (70.8 lb in).

Tighten
Tighten the timing belt rear cover bolts (2) to 6 N·m (53.1 lb in).
