Headlining Trim Panel Replacement Sedan
Caution: Do not attempt to repair or alter the head impact energy-absorbing material
glued to the headliner or to the garnish trims. If the material is damaged, replace
the headliner and/or the garnish trim. Failure to do so could result in personal injury.
Notice: Use care when working around the head curtain inflator module. Sharp tools may
puncture the curtain airbag. If the head curtain inflator module is damaged in any
way, it must be replaced.
Notice: If a vehicle is equipped with a head curtain inflator module ensure
that the inflator module and tether are undamaged. If tether or curtain airbag are
damaged in any way, they must be replaced.
Removal Procedure
- Remove the windshield garnish molding. Refer to
Windshield Garnish Molding Replacement
.
- Remove the headliner wire harness using the following procedure:
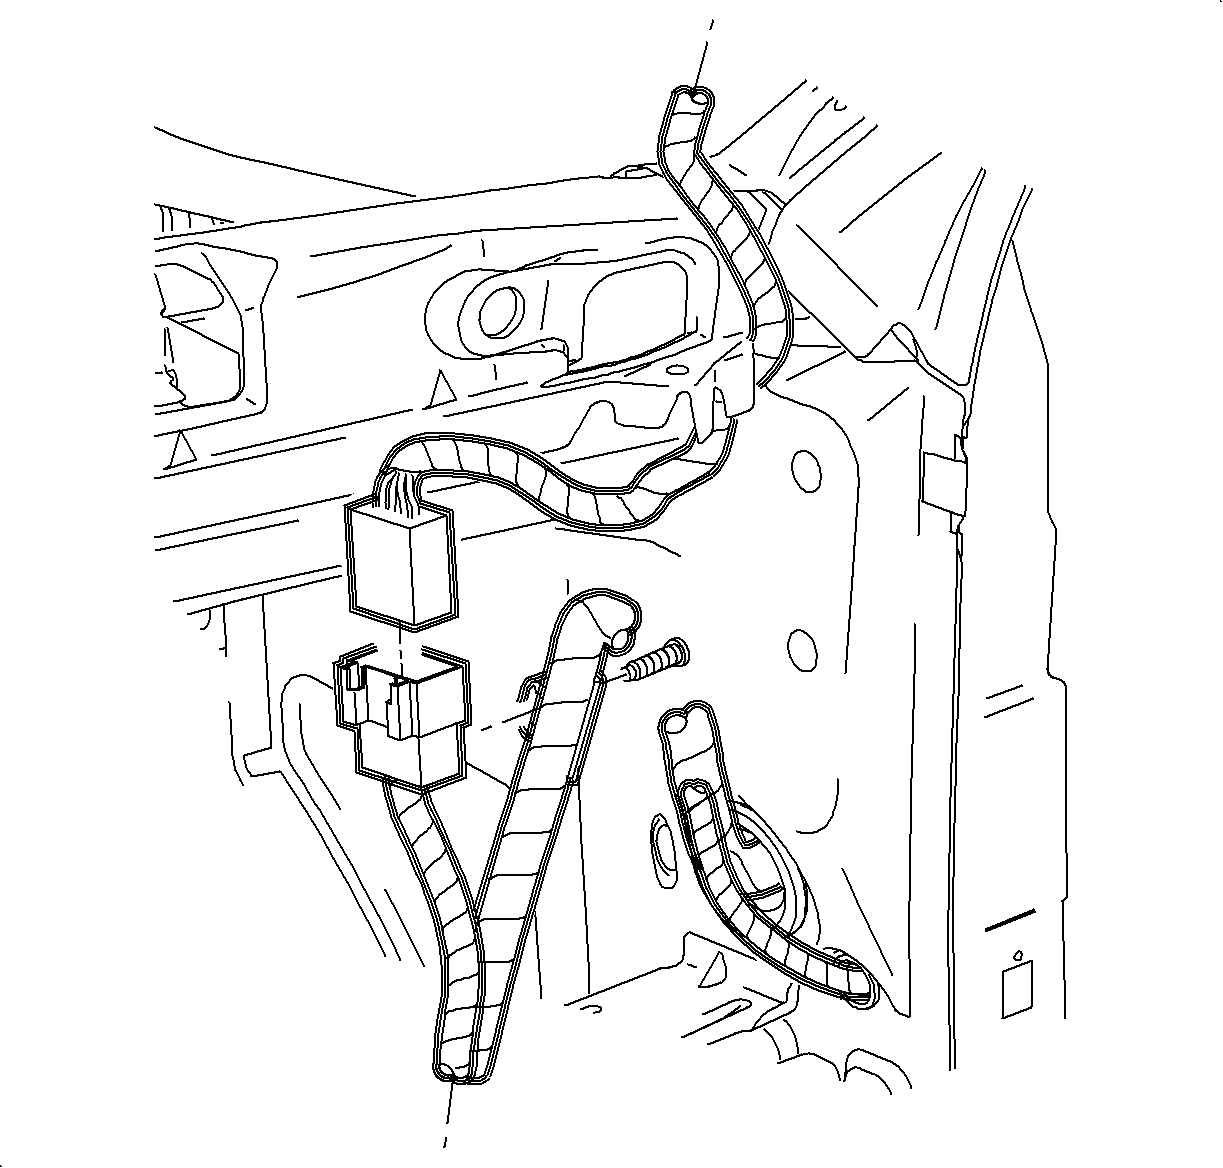
| 2.1. | Reach under the right side of the instrument panel (I/P) and disconnect the headliner harness assembly. |
| 2.2. | Attach a fish wire to the headliner harness connector to aid in later installing the harness through the I/P opening. |
| 2.3. | Remove the headliner wire harness through the I/P opening. |
| 2.4. | Remove the fish wire. |
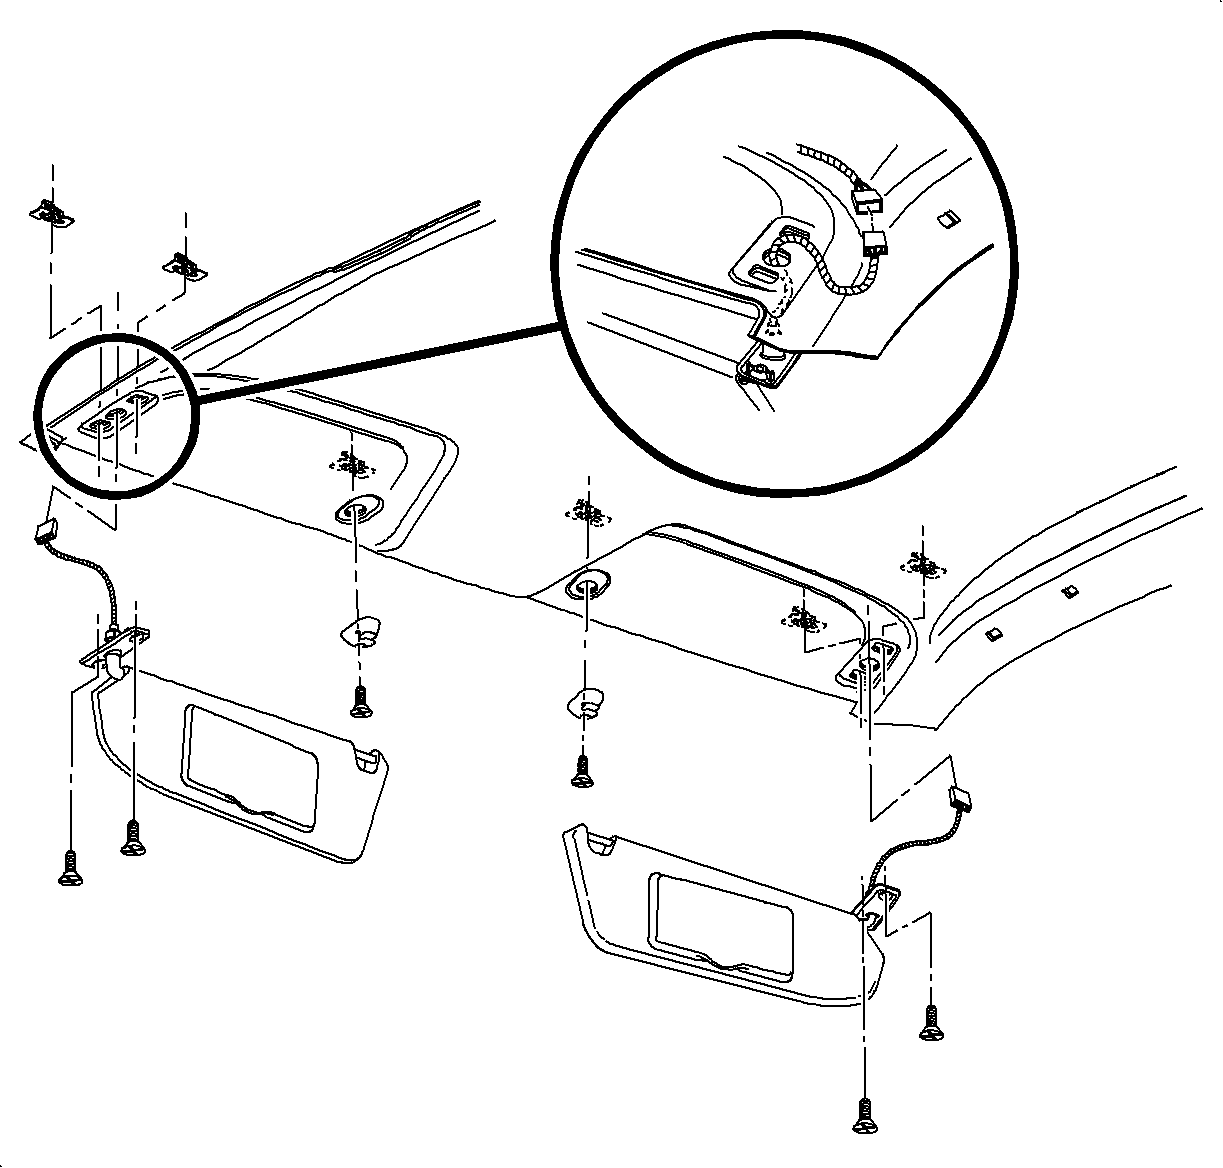
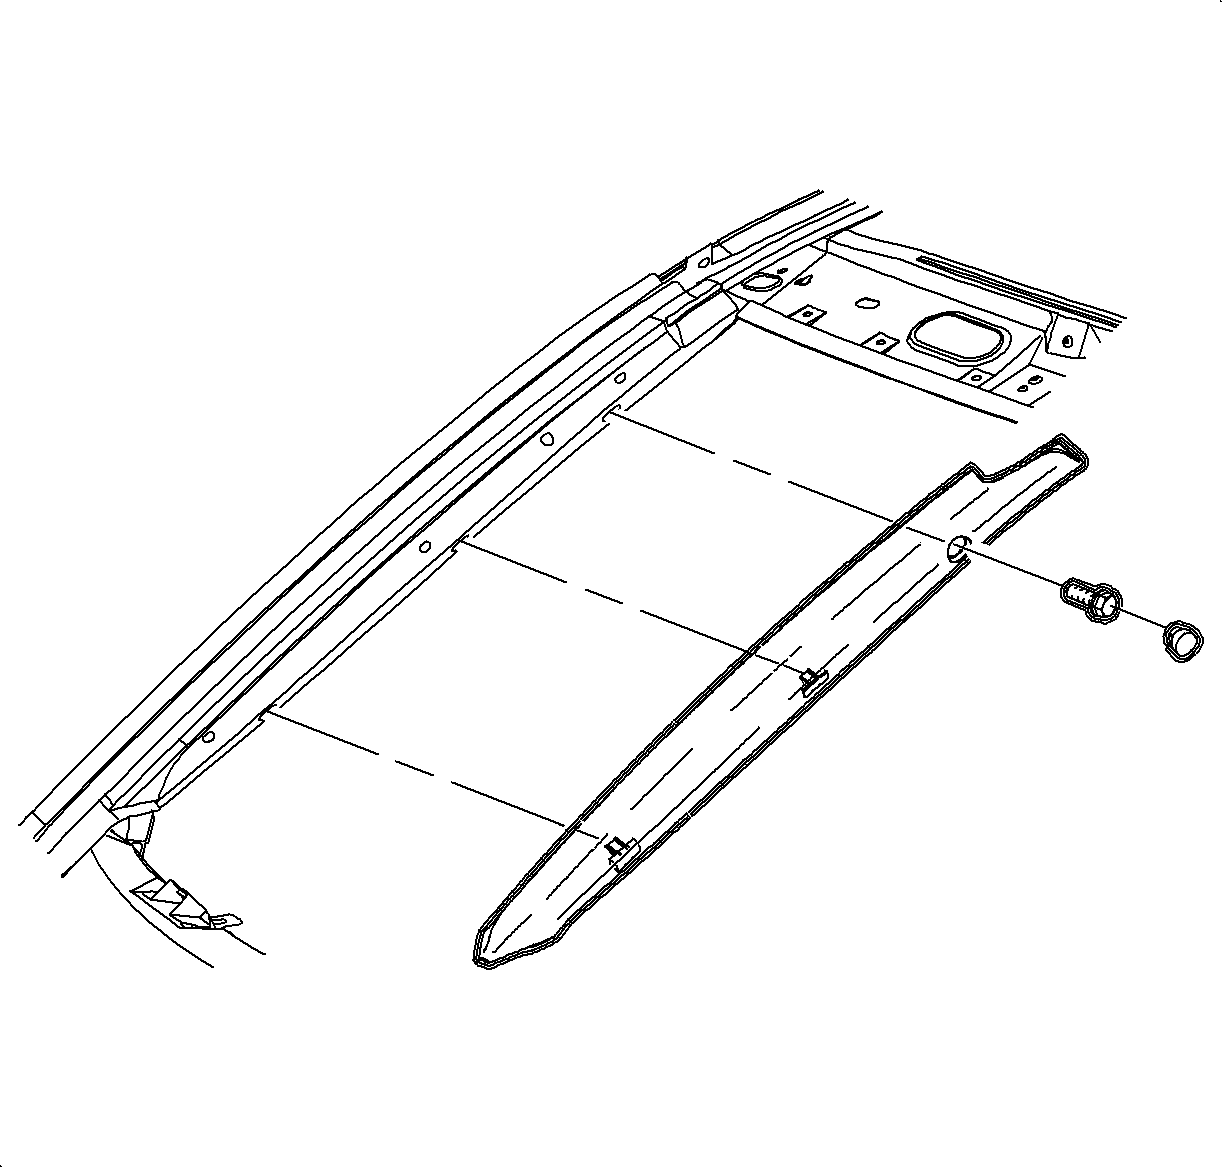
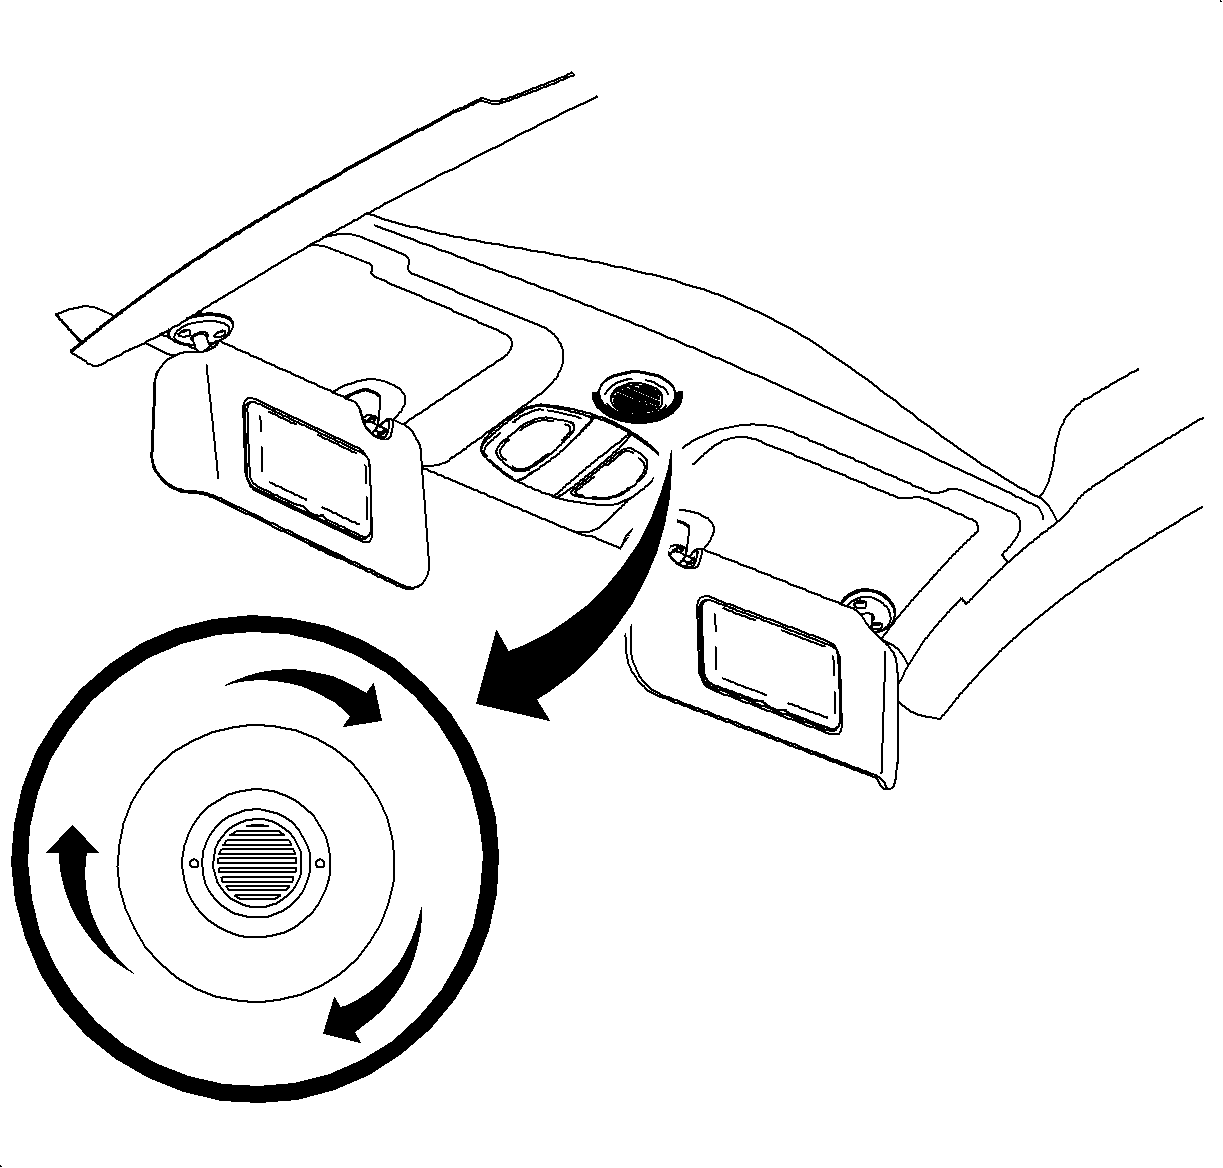
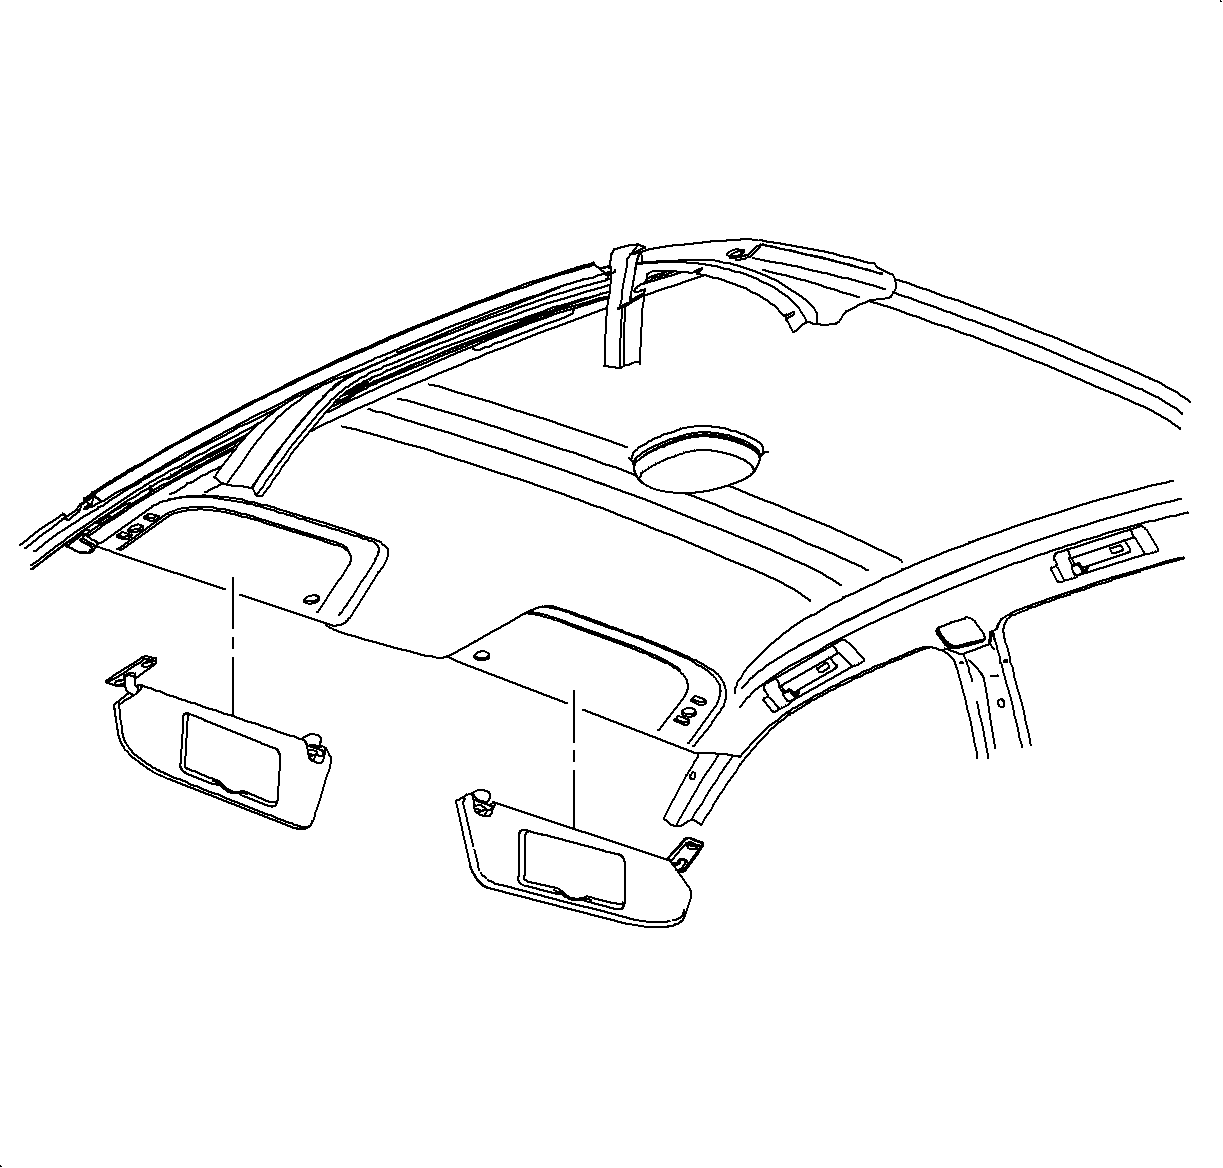
- Remove the screws from the sunshade and remove the sunshade.
- If the vehicle is equipped with an illuminated sunshade, disconnect the electrical connection. Remove the sunshade inner retainer clips.
- If equipped with a sunroof, pull around the sunroof opening to disengage the hook-and-loop fasteners.
- If equipped with a sunroof, lower headliner and disconnect the sunroof motor connection.
- Remove the assist handle by pulling down on the handle to expose the fasteners and remove the fasteners.
- Remove the CHMSL cover by gently pulling at the attaching clip locations.

- Remove the rear upper garnish molding. Refer to
Rear Upper Garnish Molding Replacement
.
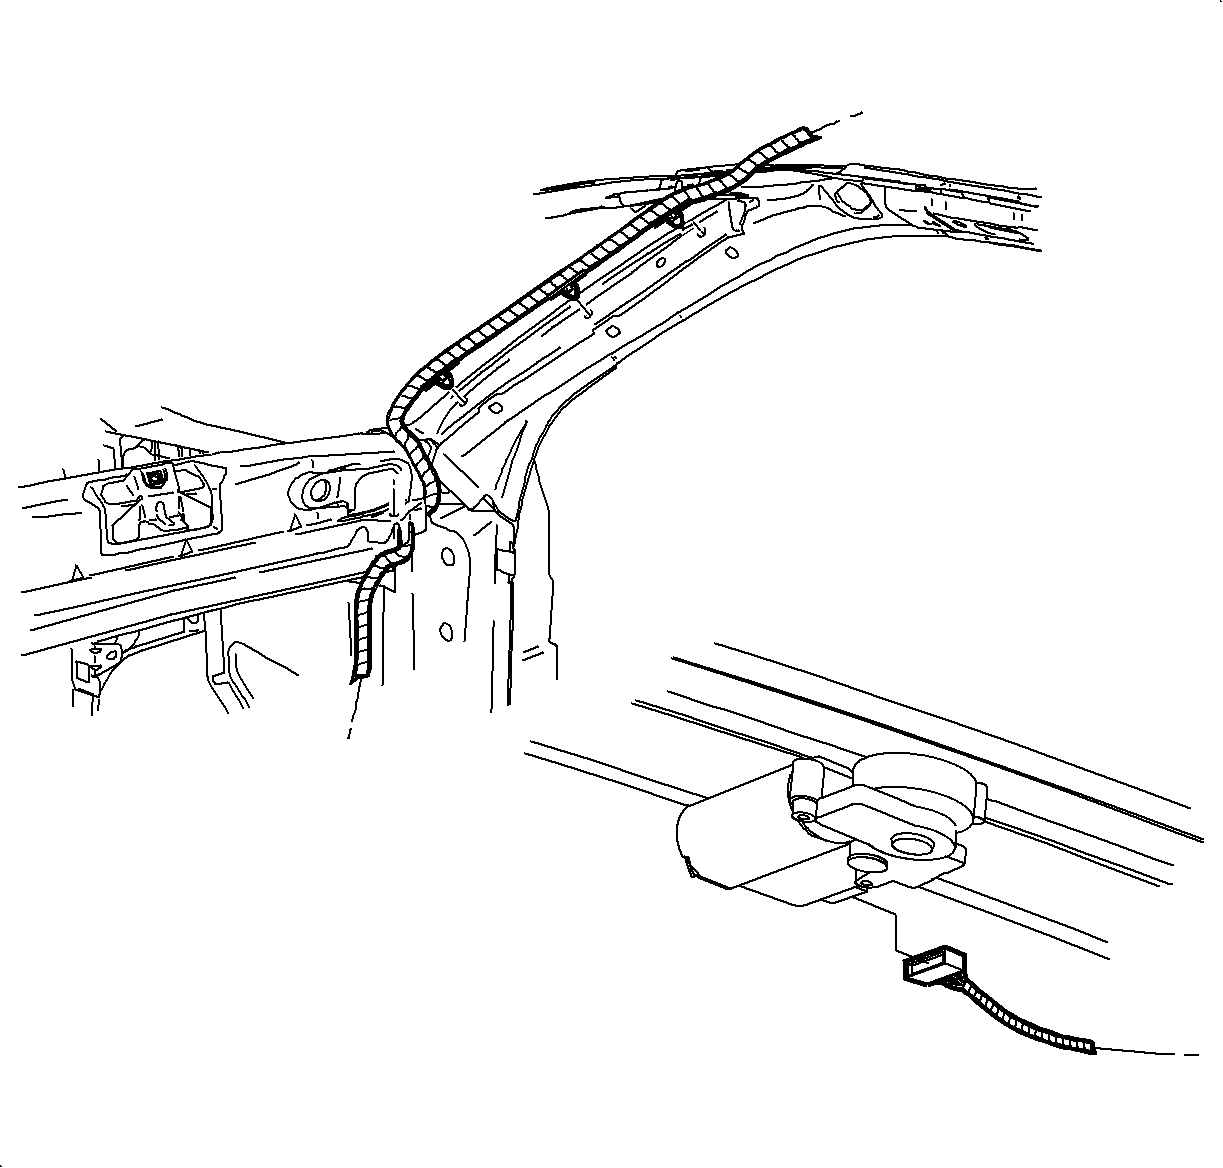
- If the vehicle is equipped with OnStar®, perform the following procedure:
| 10.1. | Disconnect the harness from the rearview mirror. |
| 10.2. | Disconnect the coaxial cables from the antennas on the front and rear glass. |
| 10.3. | Twist the microphone bezel counterclockwise to drop down from the headliner. |
| 10.4. | Disconnect the microphone harness. |
| 10.5. | Remove the right rear seat bolster. |
| 10.6. | Disconnect the harness from the rearview mirror. |
| 10.7. | Disconnect the coaxial cables from the antennas on the front and rear glass. |
| 10.8. | Twist the microphone bezel counterclockwise to drop down from the headliner. |
| 10.9. | Disconnect the microphone harness. |
| 10.11. | Disconnect the wiring harness and cables at OnStar® module under parcel shelf located in the trunk. |
| 10.12. | Pull back the carpet in the trunk and remove the OnStar® harness from the body side inner panel. |
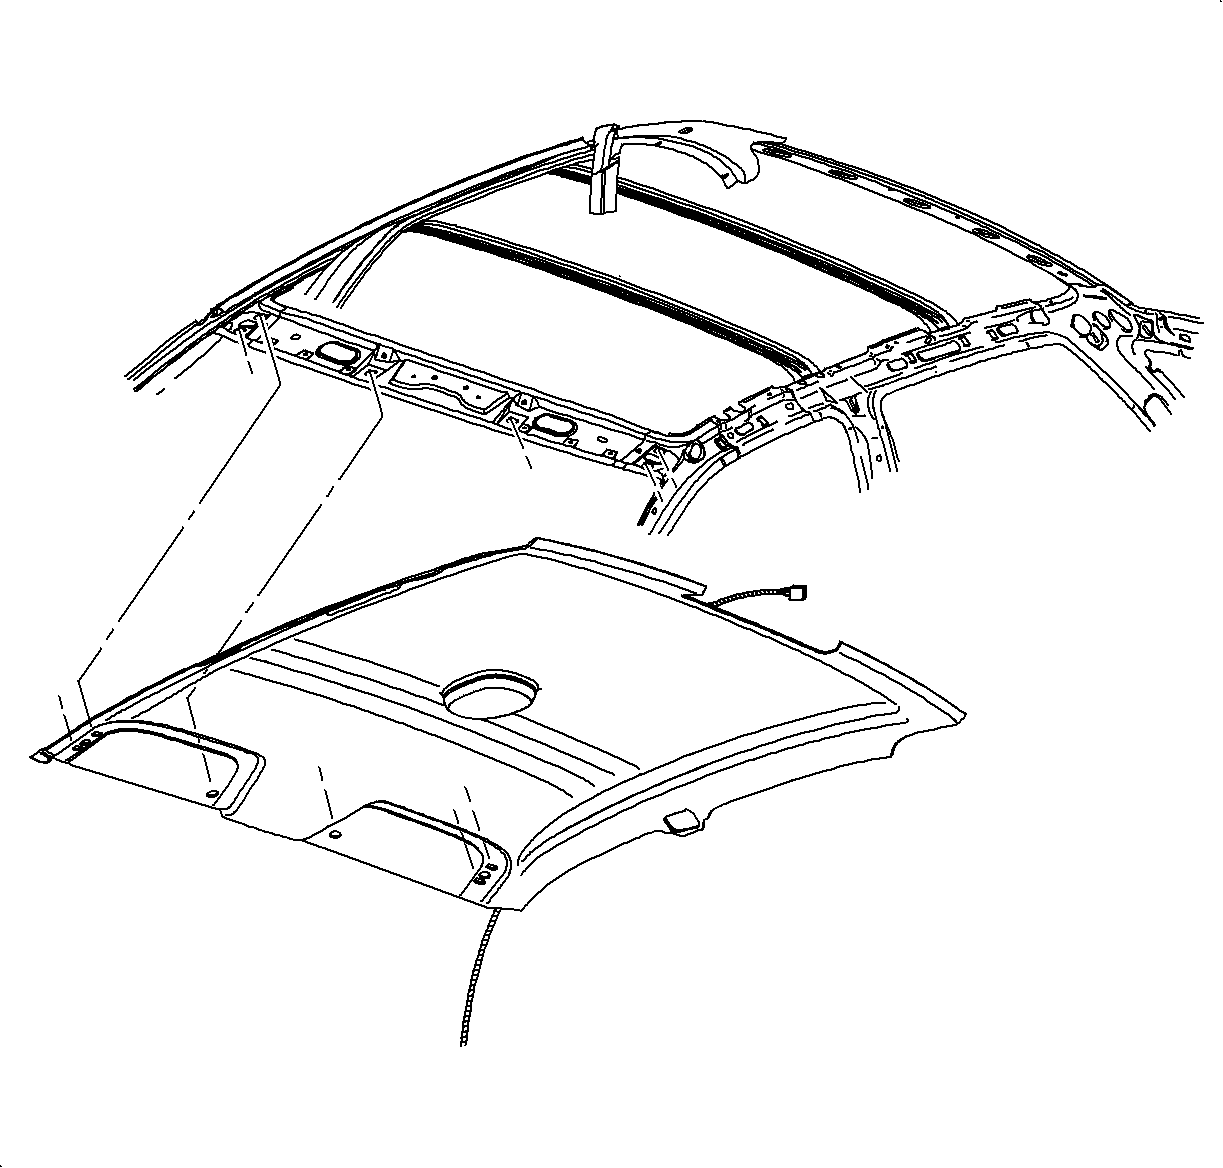
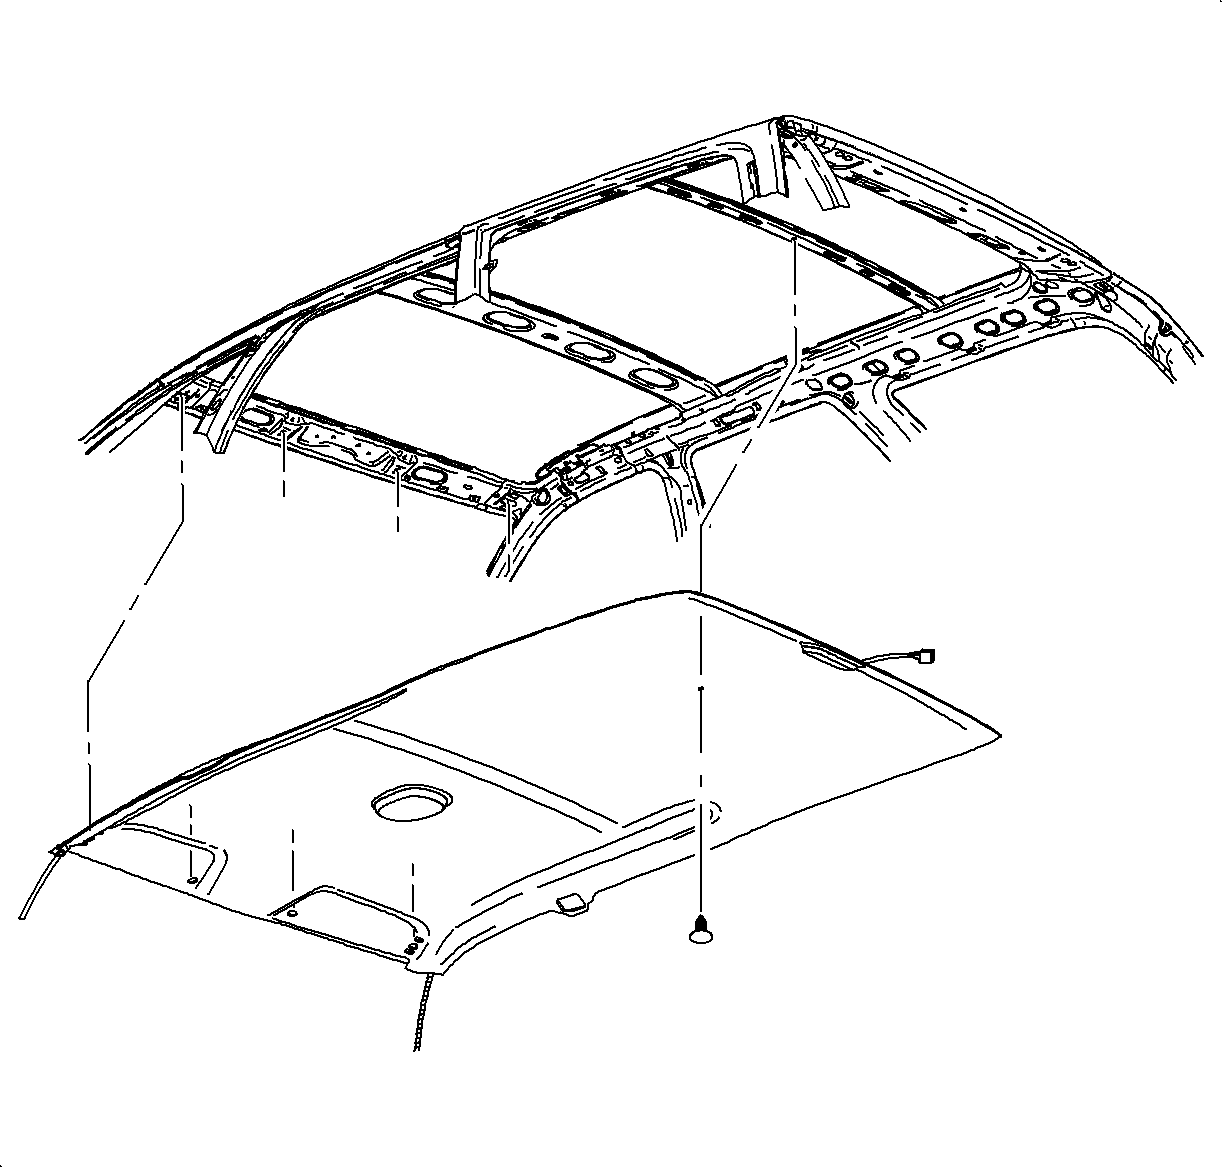
- Lower the front seat backs to the forward most position and remove the headliner from the vehicle through the passenger side rear door.
Installation Procedure
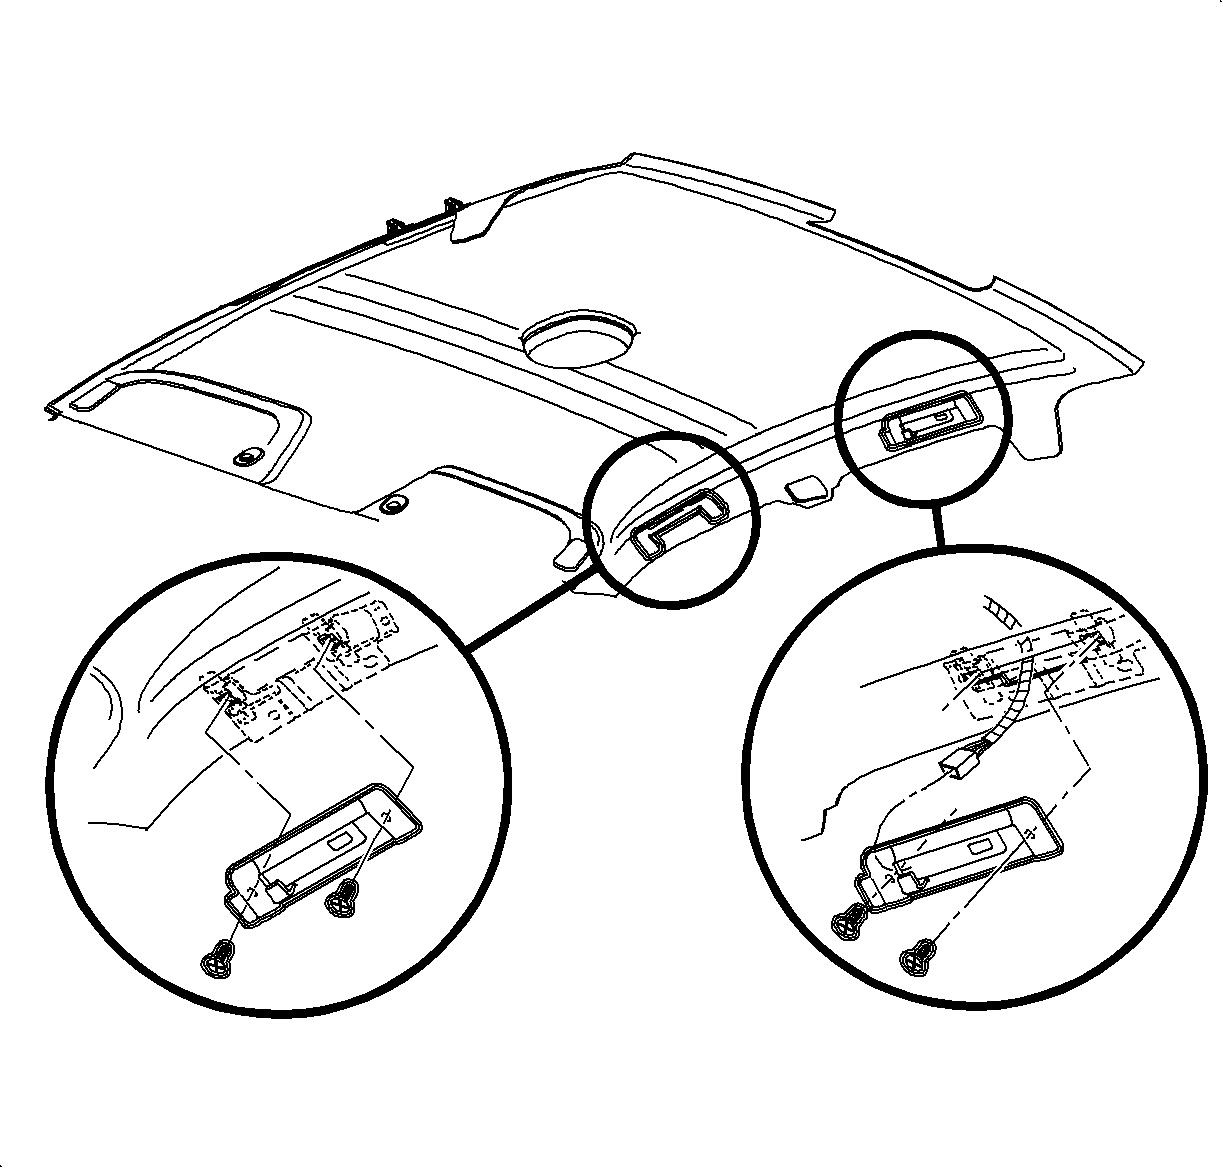
- Transfer the dome lamp to the new headliner assembly.
- Connect the dome lamp connection.
- If equipped with OnStar®, transfer the microphone and bezel to the new headliner. Connect the microphone wiring harness.
- Position the headliner to the proper location and press on the dome lamp to secure the headliner to the roof structure.
Notice: Refer to Fastener Notice in the Preface section.
- Install the inner sunshade retainer and fasteners.
Tighten
Tighten the fasteners to 15 N·m (11 lb ft).
- Connect the sunshade wiring harness if the vehicle has an illuminated sunshade.
- Install the sunshade assembly.
Tighten
Tighten the fasteners to 15 N·m (11 lb ft).
- Install the assist handle assembly. Refer to
Assist Handle Replacement
.
- If the vehicle is equipped with OnStar®, route and attach the wiring harness from the headliner to the module.
Make connections at the OnStar® module and body harness located under the right seat bolster.
- Install the right rear seat back bolster. Refer to
Rear Split Folding Seat Back Bolster Replacement
.
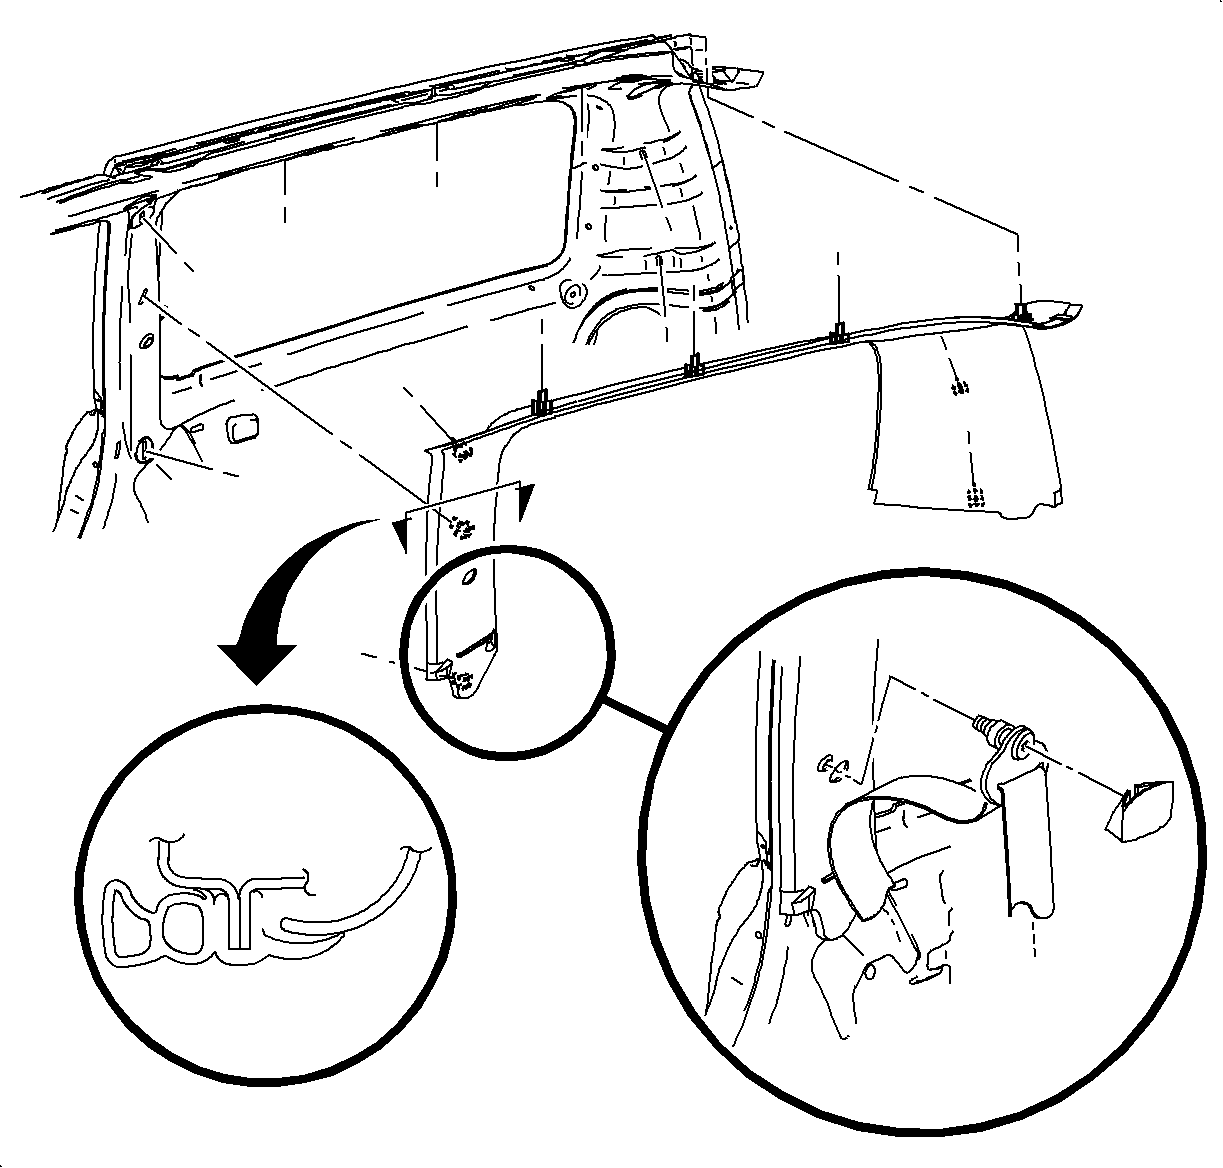
- Attach the fish wire to headliner wiring harness and route the harness through the right side of the I/P opening and under the I/P. Connect the headliner
wiring harness to the right side of the windshield pillar.
- Connect the headliner wiring harness to the body harness.

- Install the CHMSL cover.
- Connect the sunroof switch wiring harness if the vehicle is equipped with a sunroof. Install the sunroof switch.
- Press at hook-and-loop fastener attachments to secure the headliner to the sunroof module if the vehicle is equipped with a sunroof .

- Install the center pillar upper trim moldings. Refer to
Center Pillar Upper Garnish Molding Replacement
.
- Install the rear upper garnish molding. Refer to
Rear Upper Garnish Molding Replacement
.
- If the vehicle is equipped with OnStar® connect the control harness at the rearview mirror.
- Connect the coaxial cable to the GPS antenna on the windshield.
- Connect the coaxial cable to the cell phone antenna on the rear glass.
- Install the windshield garnish molding. Refer to
Windshield Garnish Molding Replacement
.
- Install the weatherstrip over the headliner assembly at all the door locations using a small flat-bladed tool.
Headlining Trim Panel Replacement Wagon
Caution: Do not attempt to repair or alter the head impact energy-absorbing material
glued to the headliner or to the garnish trims. If the material is damaged, replace
the headliner and/or the garnish trim. Failure to do so could result in personal injury.
Notice: Use care when working around the head curtain inflator module. Sharp tools may
puncture the curtain airbag. If the head curtain inflator module is damaged in any
way, it must be replaced.
Notice: If a vehicle is equipped with a head curtain inflator module ensure
that the inflator module and tether are undamaged. If tether or curtain airbag are
damaged in any way, they must be replaced.
Removal Procedure
- Remove the windshield garnish molding. Refer to
Windshield Garnish Molding Replacement
.
- Remove the headliner wire harness using the following procedure:
| 2.1. | Reach under the right side of the instrument panel (I/P) and disconnect the headliner harness assembly. |
| 2.2. | Attach a fish wire to the headliner harness connector to aid in later installing the harness through the I/P opening. |
| 2.3. | Remove the headliner wire harness through the I/P opening. |
| 2.4. | Remove the fish wire. |
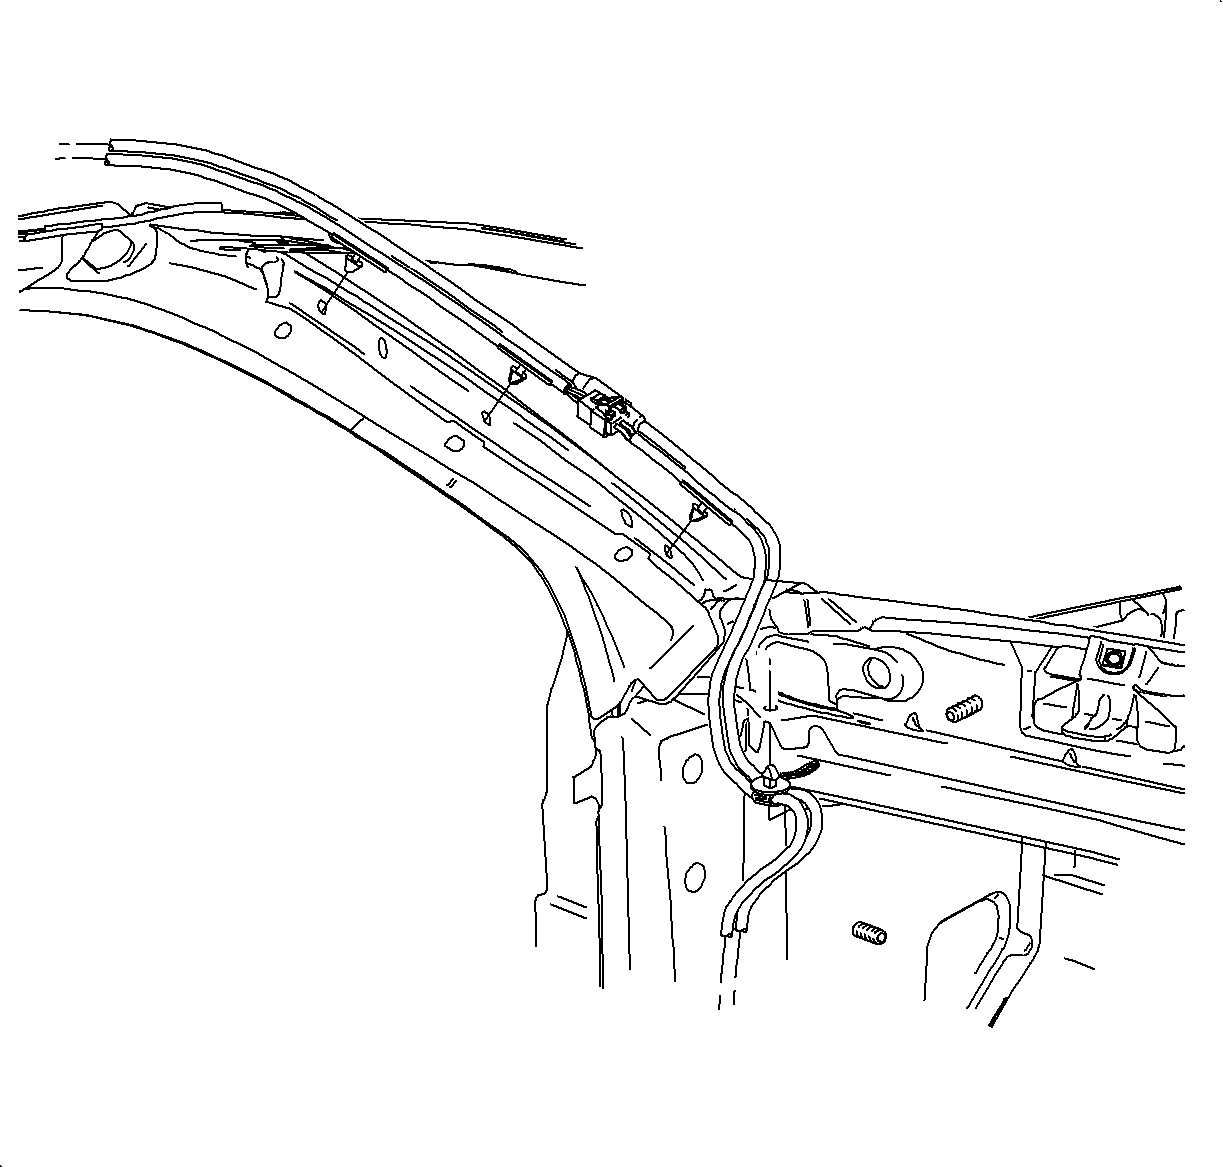
- Disconnect the antenna lead and the rear window washer hose connection from the windshield pillar.
- Remove the screws from the sunshade and remove the sunshade.
- If the vehicle is equipped with an illuminated sunshade, disconnect the electrical connection.
- If equipped with a sunroof, reach around the sunroof opening to disengage the hook-and-loop fasteners.
- If equipped with a sunroof, lower headliner and disconnect the sunroof motor connection.
- Remove the assist handle by pulling down on the handle to expose the fasteners and remove the fasteners.
- Remove the garnish molding from the rear upper corner. Refer to
Body Rear Corner Upper Garnish Molding Replacement
.
- Disconnect the electrical connector at the liftgate.
- If the vehicle is equipped with OnStar®, perform the following procedure:
| 11.1. | Disconnect the harness from the rearview mirror. |
| 11.2. | Disconnect the coaxial cable from the GPS antenna on the windshield. |
| 11.3. | Disconnect the coaxial cable from the cell phone antenna on the right rear quarter glass. |
| 11.4. | Twist the microphone bezel counterclockwise to drop down from the headliner. |
| 11.5. | Disconnect the microphone harness. |
| 11.7. | Remove the front load floor. |
| 11.8. | Disconnect the harnesses under the seat bolster and at the OnStar® module under the front load floor. |
| 11.9. | Pull back the carpeting and remove the harness from the body side attaching points. |
- If the vehicle is equipped with OnStar®, remove the upper trim moldings from the center pillar . Refer to
Center Pillar Upper Garnish Molding Replacement
.
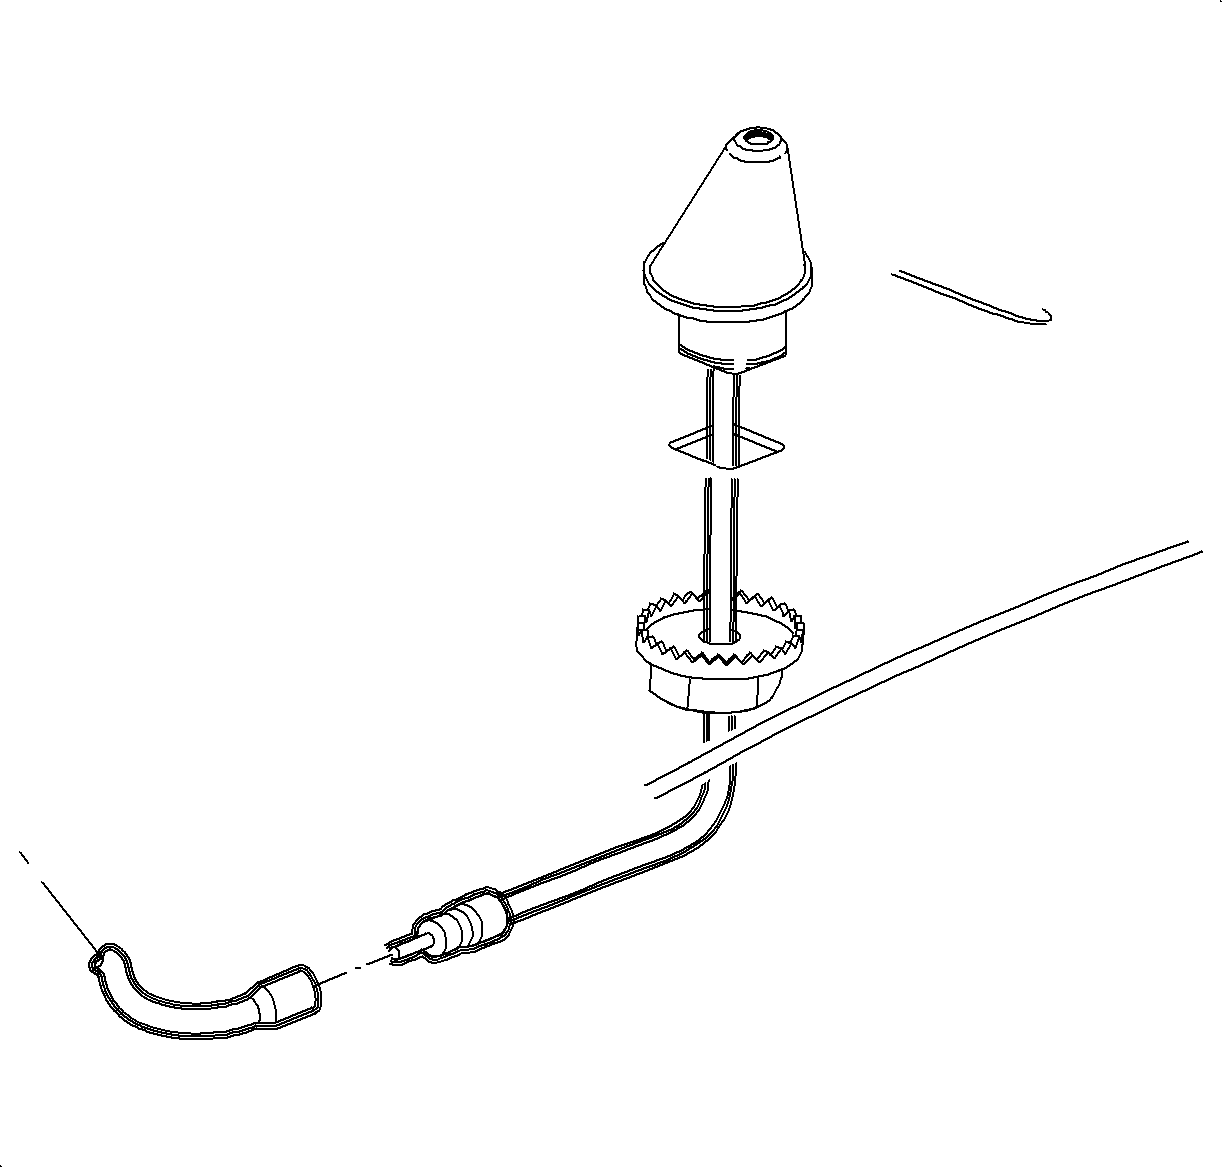
- Disengage the dome lamp hook-and-loop fastener from the roof structure by reaching in the door opening above the headliner in order to center the dome lamp.
- Remove the headliner center retainer.
- Disconnect the rear window washer hose connector at the liftgate.
- Disconnect the antenna lead to the antenna.

- Remove the headliner through the liftgate opening.
Installation Procedure
- Transfer the dome lamp to the new headliner assembly. Connect two dome lamp connections.
- Install the headliner through the liftgate opening.
- If the vehicle is equipped with OnStar®, transfer the microphone and bezel to the new headliner. Connect the microphone wiring harness.
- Position the headliner to the proper location and press on the dome lamp to secure the headliner to the roof structure.
- Install the headliner through the liftgate opening.
Notice: Refer to Fastener Notice in the Preface section.
- Install the sunshade inner retainer fasteners
Tighten
Tighten the fasteners to 15 N·m (11 lb ft).
- Connect the sunshade wiring harness if the vehicle has an illuminated sunshade.
- Install the sunshade assembly.
Tighten
Tighten the fasteners to 15 N·m (11 lb ft).
- Install the assist handle assembly.
Tighten
Tighten the fasteners to 16 N·m (12 lb ft).
- Connect the electrical harness at the liftgate.
- On vehicles equipped with OnStar®, perform the following procedure:
| 11.1. | Route and attach the wiring harness from the headliner to the module. |
| 11.2. | Make connections at the OnStar® module and body harness located under the right seat bolster. |
| 11.3. | Install the front load floor. |
- Install the right rear seat bolster. Refer to
Rear Split Folding Seat Back Replacement
.
- Install the garnish molding to the rear upper corner. Refer to
Body Rear Corner Upper Garnish Molding Replacement
.
- Attach the fish wire to headliner wiring harness and route the harness through the right side of the I/P opening and under the I/P. Connect the headliner
wiring harness to the right side of the windshield pillar.
- Connect the headliner wiring harness to the body harness.
- Install the antenna connection and the rear window washer hose connection.
- Install the headliner center retainer.
- Install the garnish molding to the upper center pillar. Refer to
Rear Upper Garnish Molding Replacement
.
- If the vehicle is equipped with OnStar®, connect the control harness at the rearview mirror.
- Connect the coaxial cable to the GPS antenna on the windshield.
- Connect the coaxial cable to the cell phone antenna on the rear glass.
- Install the windshield garnish molding. Refer to
Windshield Garnish Molding Replacement
.
- Install the weatherstrip over the headliner assembly at all the door locations using a small flat-blade tool.
