For 1990-2009 cars only
Removal Procedure
- Disable the SIR system. Refer to Disabling the SIR System in SIR.
- Disable the head curtain inflator modules, if equipped. Refer to Disabling the SIR System in SIR.
- Apply the parking brake lever.
- Remove the power window/mirror switch or storage tray.
- Adjust the front seats to the maximum forward position.
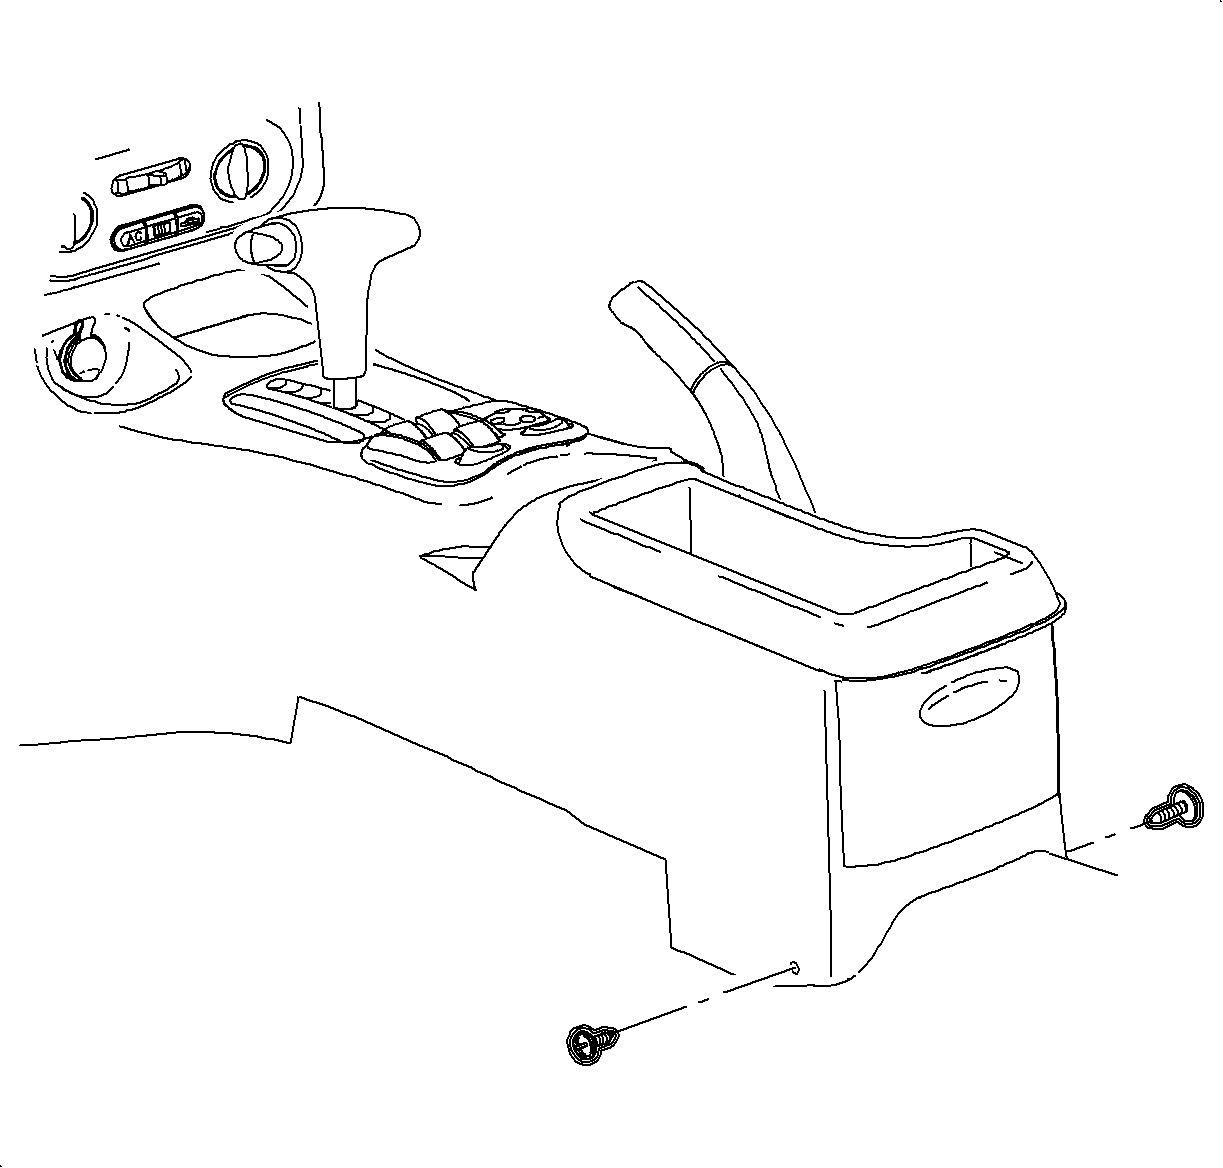
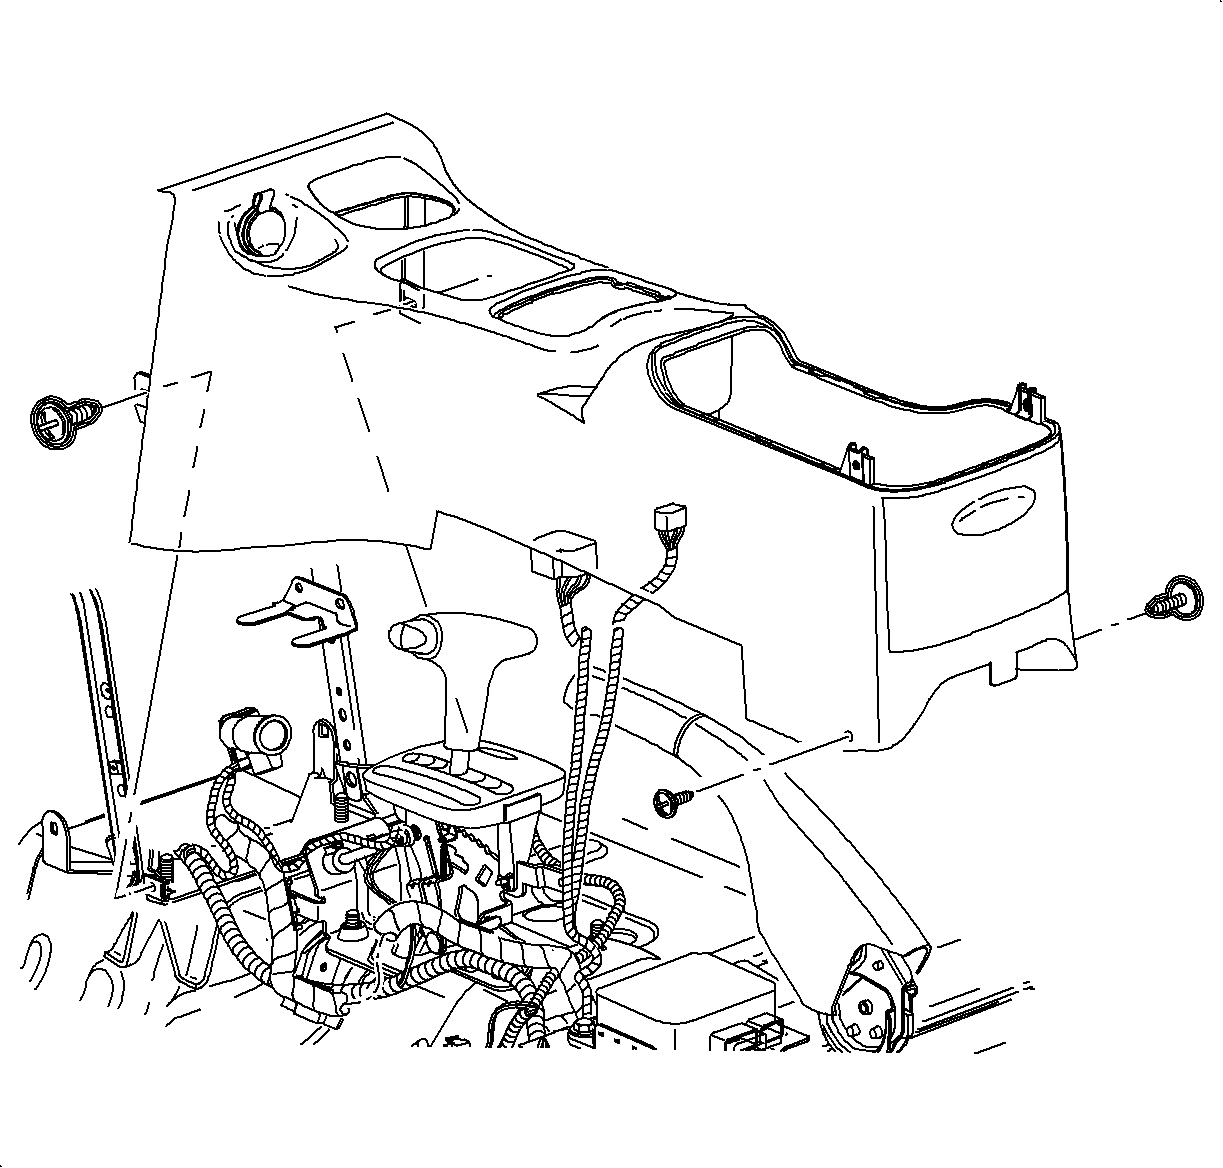
- Remove the rear console fasteners.
- Adjust the front seats to the maximum rear position.
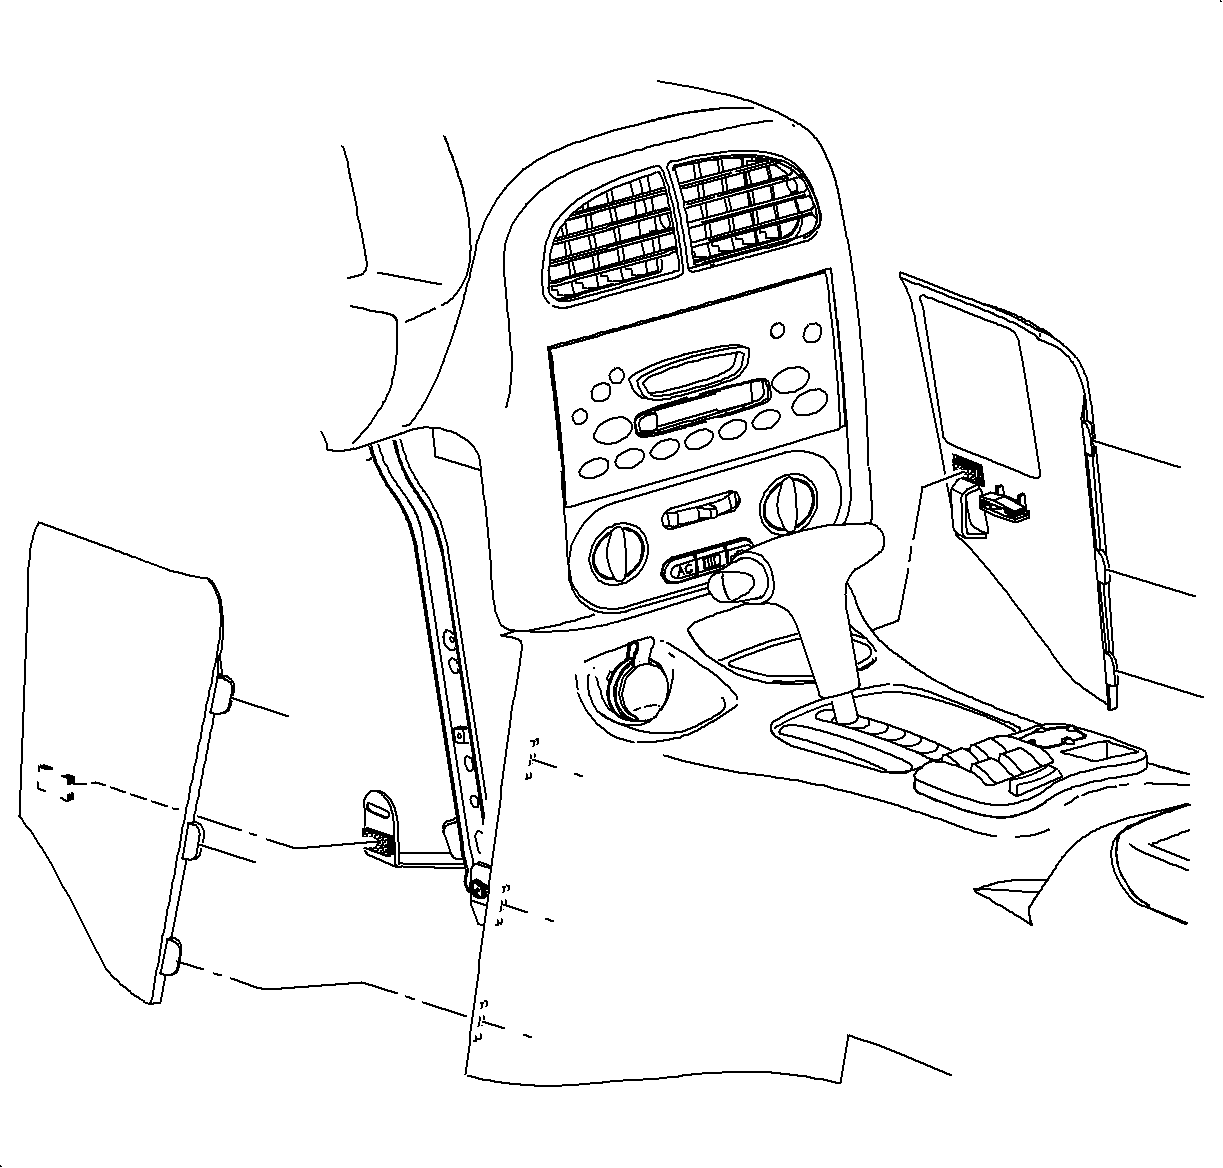
- Remove the left and right lower trim panel extensions by pulling outward at the dual lock locations.
- Rotate the panels outward to disengage the hinges from the console.
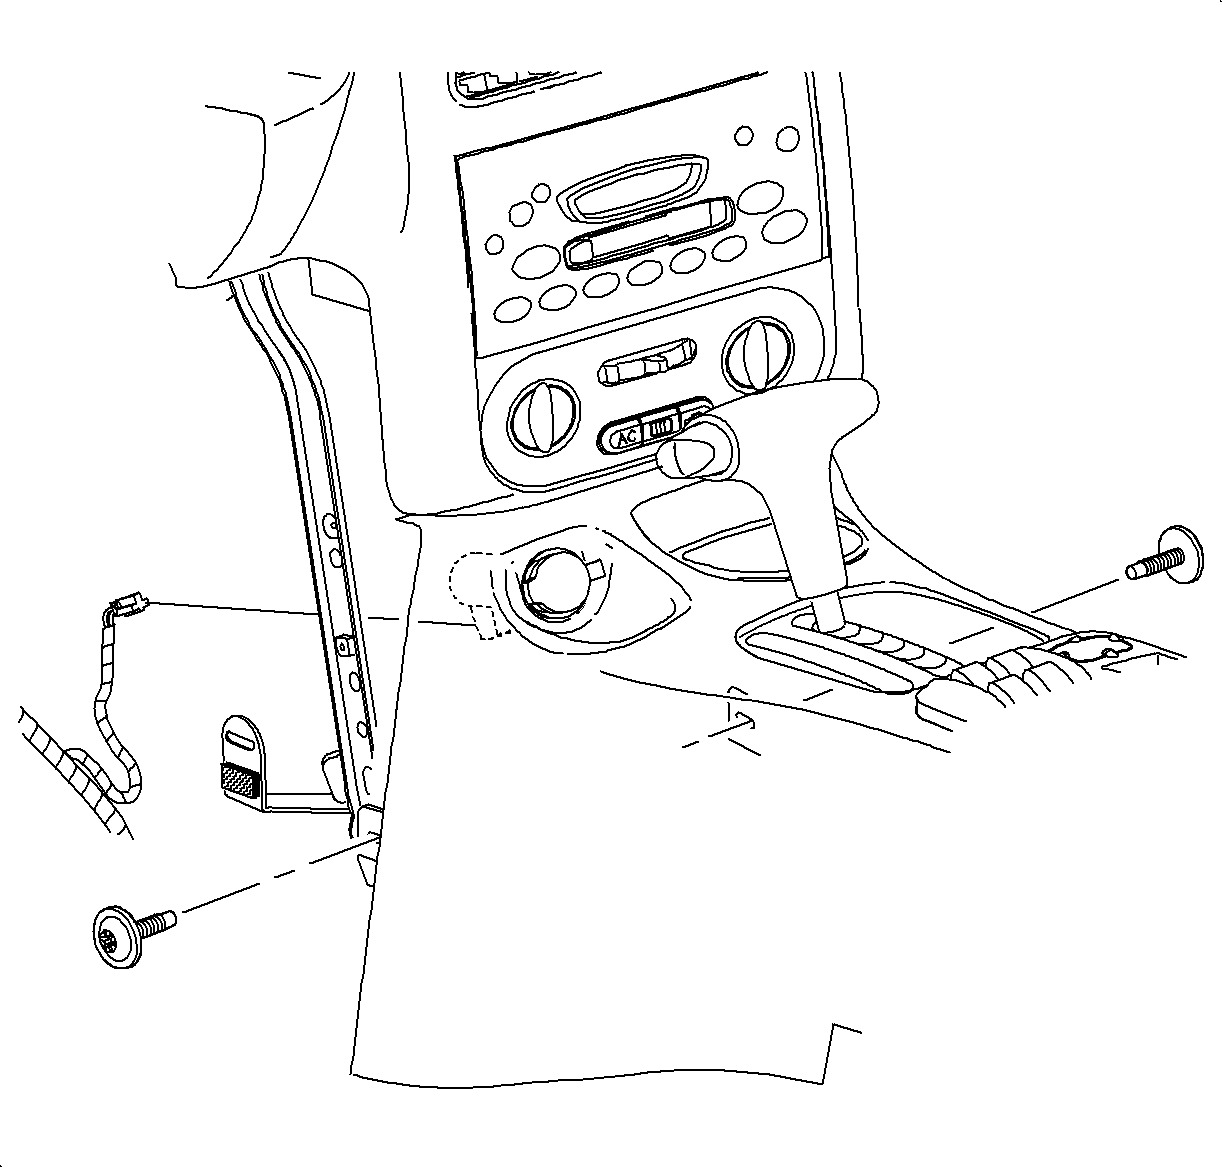
- Remove the front console fasteners.
- Move the console rearward.
- Disengage the retaining tabs and disconnect the power outlet connector.
- On automatic transaxle equipped vehicles, press and tape the gear selector button IN to clear the shifter opening.
- Select neutral for the transaxle gear on automatic transaxles.
- Maneuver the console beyond the gear selector and parking brake by lifting the rear of the console.
- Remove the console from the vehicle.
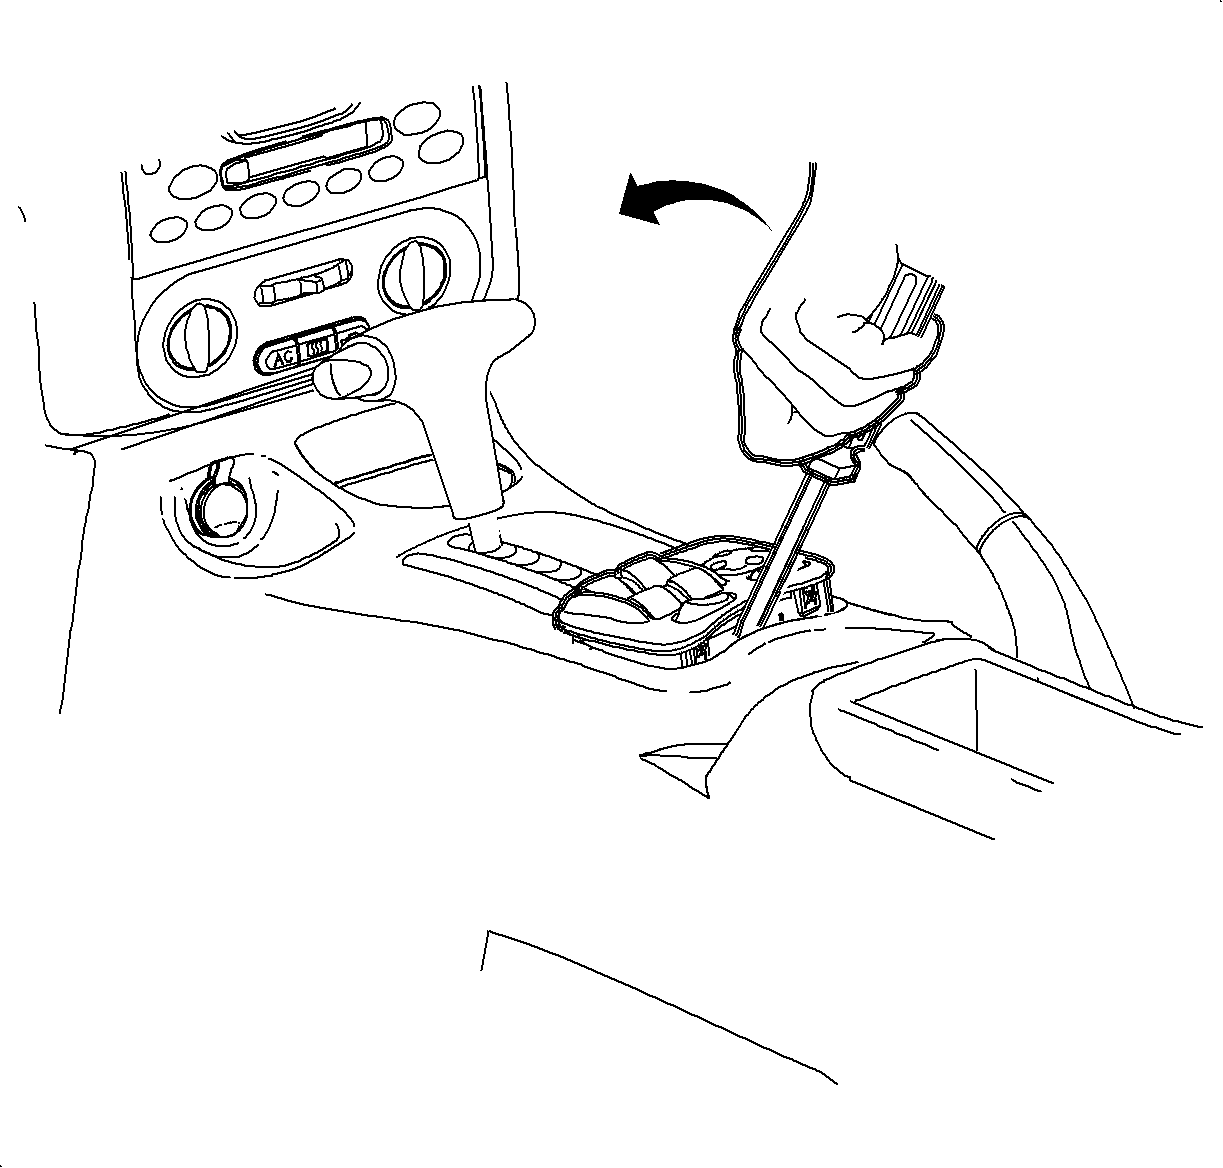
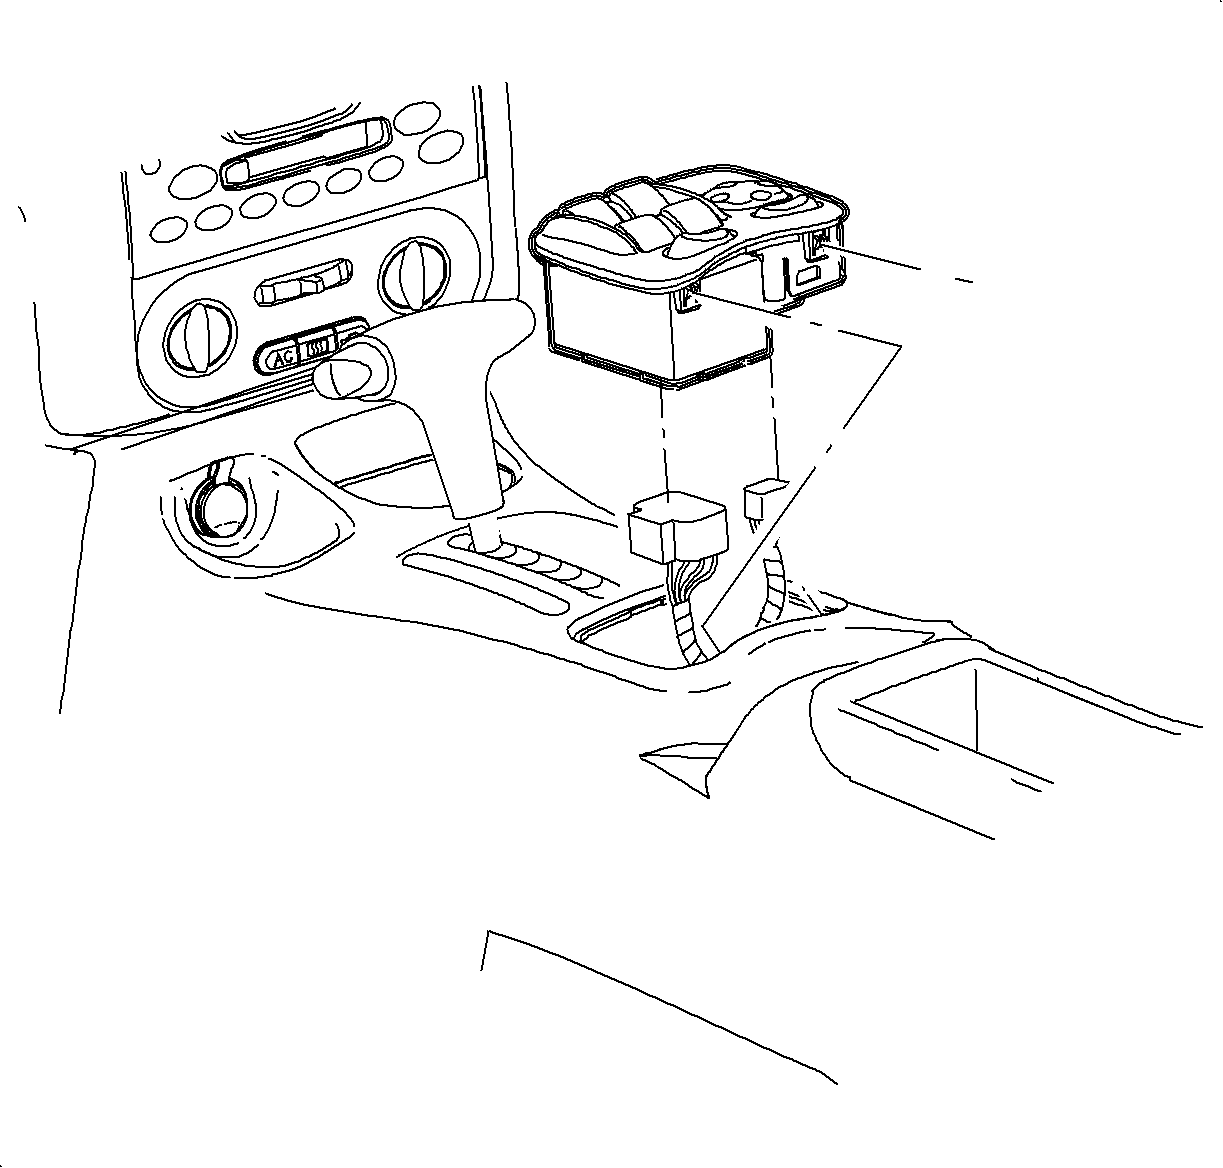
| 4.1. | Exert pressure on the rear with your hand. |
| 4.2. | Using a small flat blade screwdriver, carefully lift the switch. |
| 4.3. | Lift up and out. |
| 4.4. | Disconnect the electrical connectors by locating the retention tabs and disengaging the connectors. |
Installation Procedure
- Apply the parking brake.
- Adjust the front seats to the maximum rear position.
- Recline the driver's and passenger's seat backs as far down as possible.
- Select neutral for the transaxle gear on automatic transaxles.
- Hold the front end of the console down and he rear end up.
- Position all of the harnesses so they can be accessed.
- Maneuver the console over the gear selector lever and past the brake lever.
- Connect the power outlet electrical connector.
- On automatic transaxle equipped vehicles, remove the tape from the gear selector button.
- Install the rear console fasteners.
- Install the front console fasteners.
- Install the left and right extension panels by inserting the hinges into the console.
- Rotate closed and push in at the dual lock locations.
- Connect the power window switch connectors, if equipped.
- Install the power window switch or storage tray, depending on the equipment.
- Enable the SIR system. Refer to Enabling the SIR System in SIR.
- Enable the head curtain inflator modules, if equipped. Refer to Enabling the SIR System in SIR.


Notice: Refer to Fastener Notice in the Preface section.

Tighten
Tighten the console rear fasteners to 2.2 N·m (19 lb in).

Tighten
Tighten the console front fasteners to 2.2 N·m (19 lb in).

