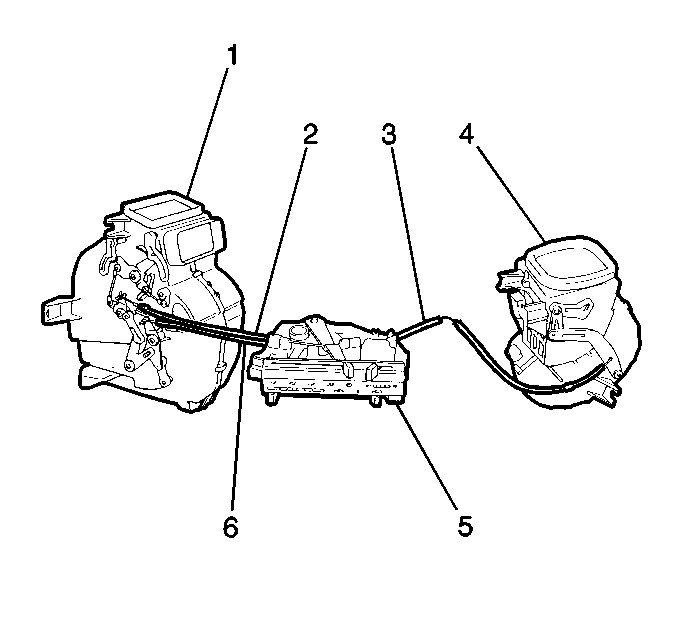
Removal Procedure
- Remove the center console trim bezel. Refer to
Instrument Panel Cluster Trim Plate Bezel Replacement
in Instrument Panel,
Gauges, and Console.
- Remove the radio. Refer to
Radio Replacement
in Entertainment.
- Grasp firmly on the heater control unit lever knobs in order to
pull the knobs out.
- Remove the 1 screw and the right-side instrument panel
(IP) cluster lower cover.
- Gently pry out the heater face plate.
- Remove the face plate illumination lamp socket.

- Remove the following cables
at the heater case and the blower case:
- Remove the 2 screws from the heater control unit.
- Disconnect the blower switch electrical connector.
- Remove the heater control unit from the IP through the radio opening.
- Remove the blower switch from the heater control unit (if necessary).
Installation Procedure

- Install the blower switch
to the heater control unit (if necessary).
- Install the heater control unit (5) to the IP.
- Connect the blower motor electrical connector.
- Install the heater control unit (5).
Secure the unit with the 2 screws.
- Install the following cables:
- Install the illumination lamp socket to the heater face plate.
- Install the IP cluster lower cover. Secure the cover with 1 screw.
- Install the heater control unit lever knobs.
- Install the radio. Refer to
Radio Replacement
in Entertainment.
- Install the center console trim bezel. Refer to
Instrument Panel Cluster Trim Plate Bezel Replacement
in Instrument Panel,
Gauges, and Console.
- Adjust the temperature, the mode, and the fresh/recirc control
cables. Refer to
Temperature Control Cable Adjustment
,
Mode Control Cable Adjustment
and
Vent Control Cable Adjustment
.


