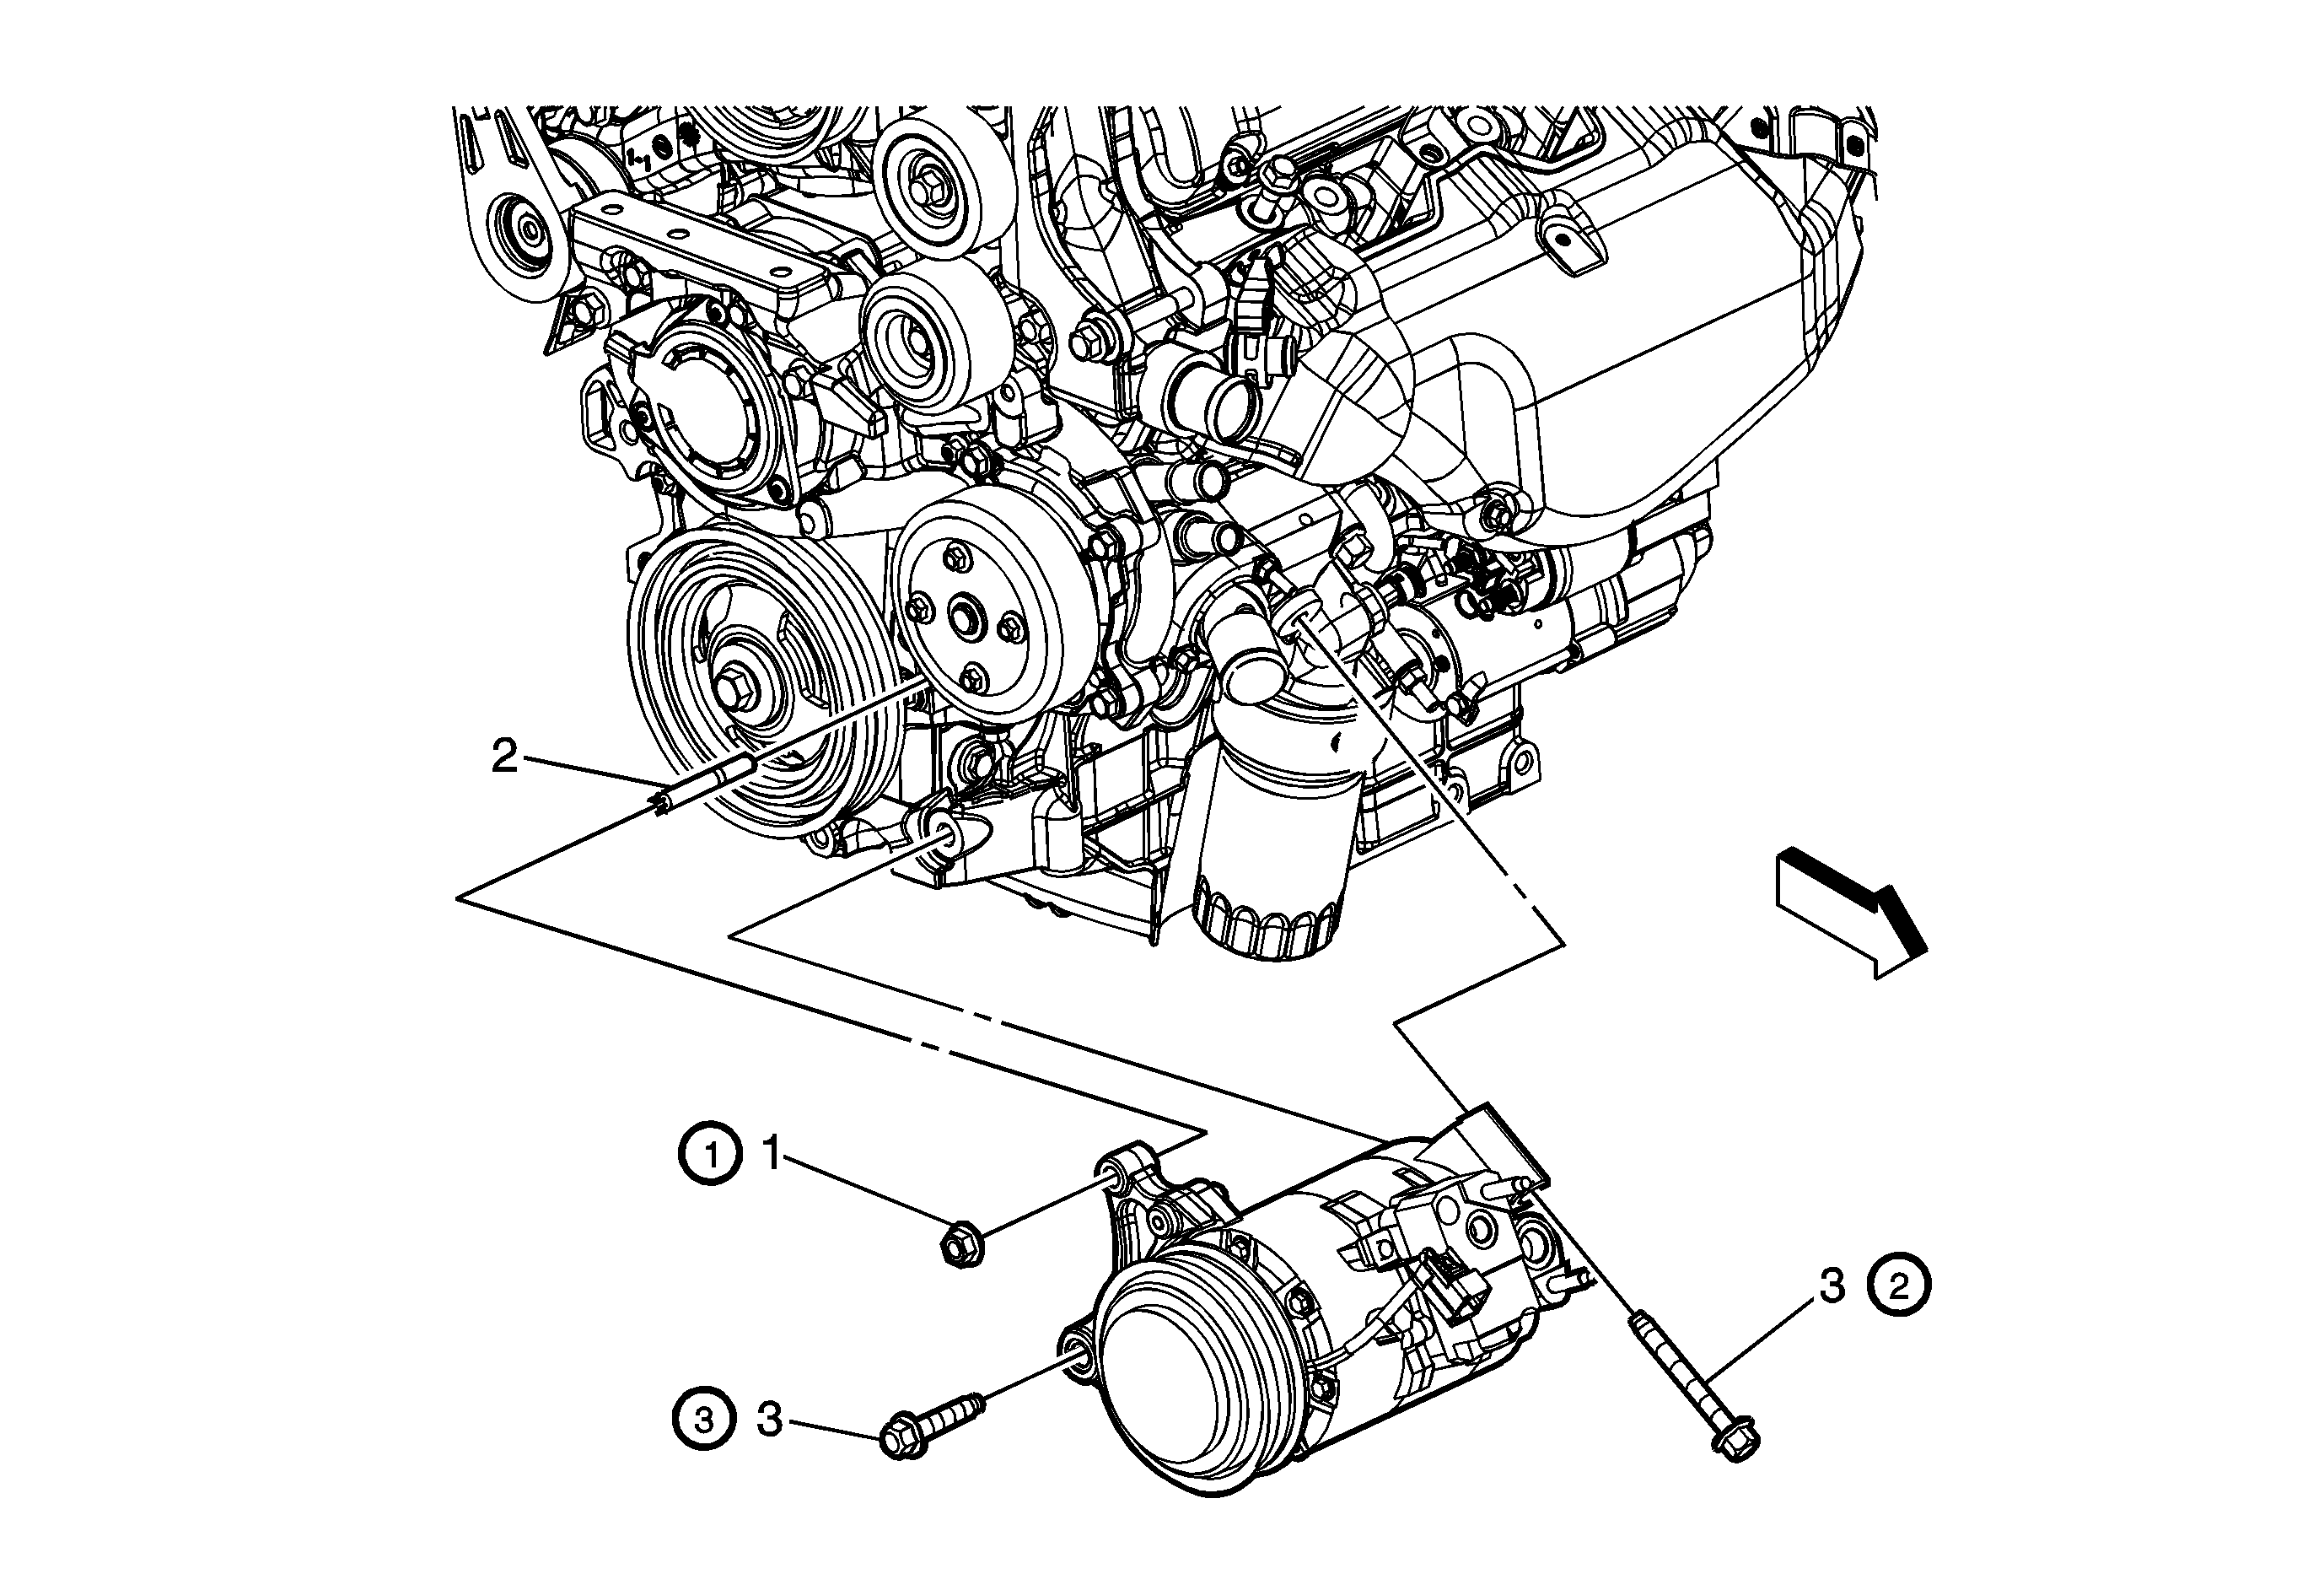
Air Conditioning Compressor Replacement LZ9

Callout | Component Name |
|---|---|
Preliminary Procedures
| |
1 | A/C Compressor Nut Note: Tighten the A/C compressor mounting nut in sequence shown in graphic. Caution: Refer to Fastener Caution in the Preface section. Tighten |
2 | A/C Compressor Stud Tighten |
3 | A/C Compressor Bolt (Qty: 2) Procedure
Tighten |
4 | A/C Compressor Procedure
Note: Install compressor bracket on new compressor. Note: Use a low viscosity, poly-alkylene glycol (PAG) oil. Use of the incorrect oil can result in compressor failure. Special ToolsJ 39400 Electronic Halogen Leak Detector |
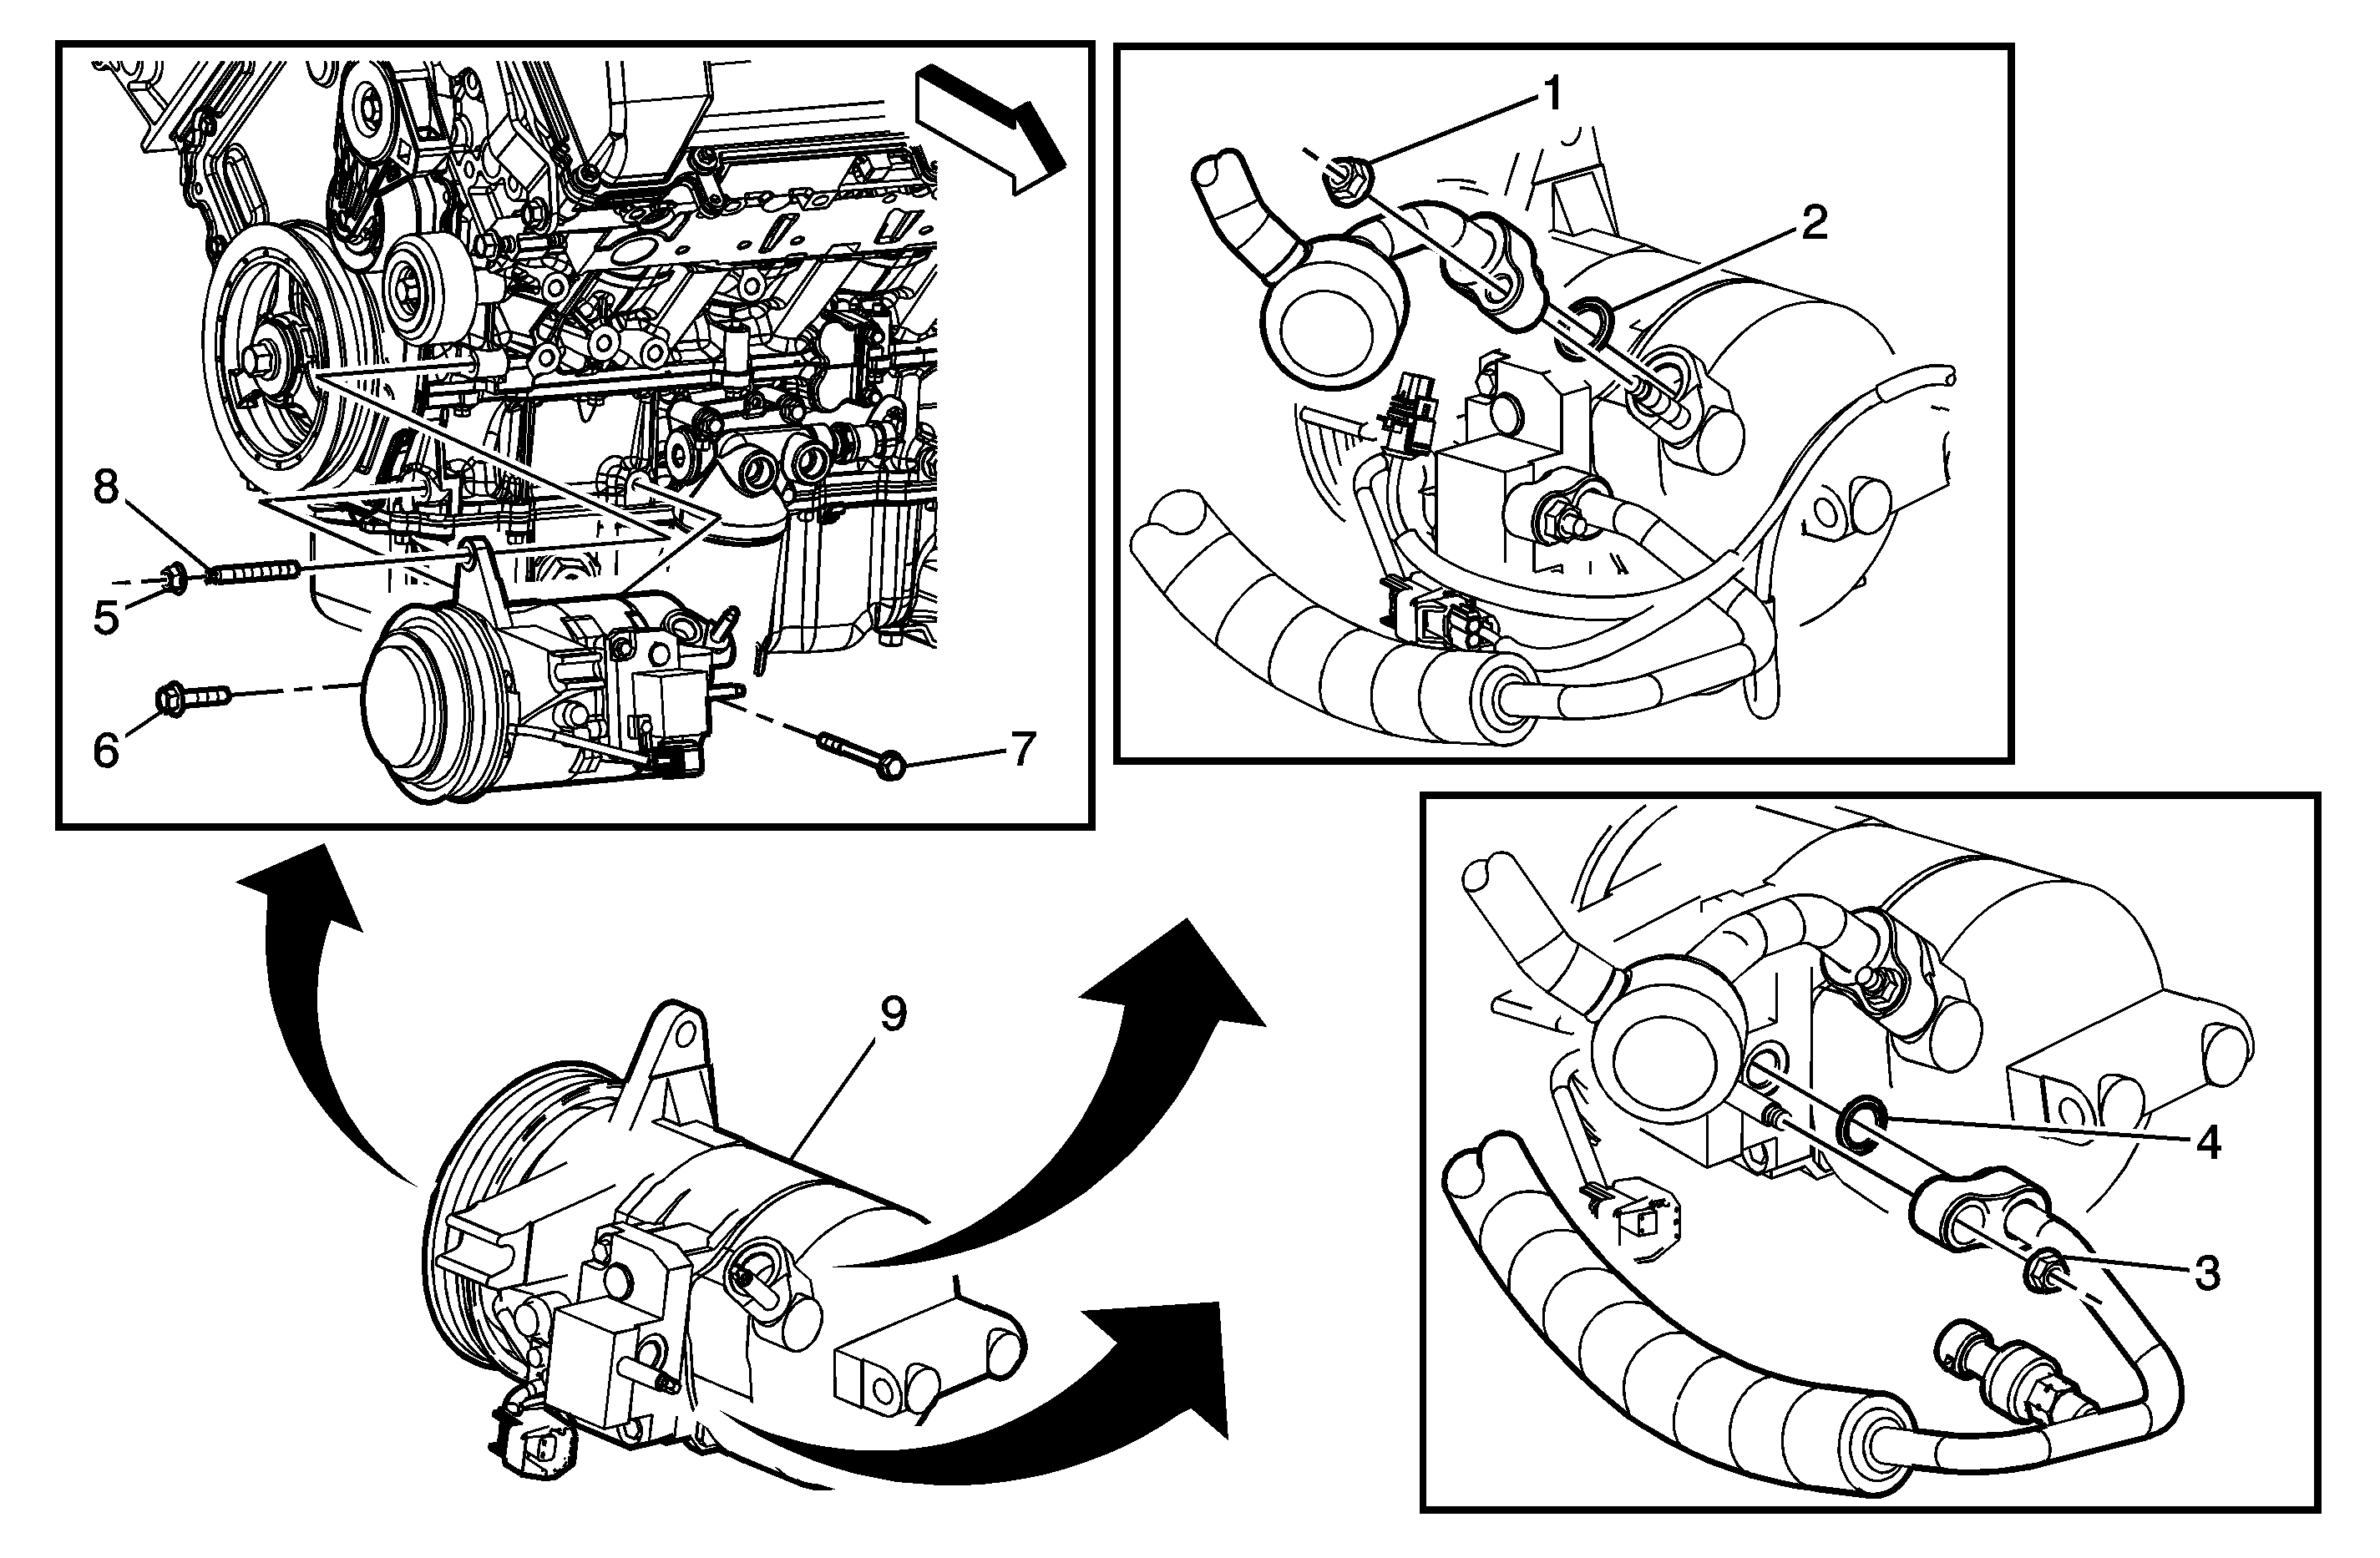
Air Conditioning Compressor Replacement LD8

Callout | Component Name |
|---|---|
Preliminary Procedure
Note: Seal the compressor suction and discharge ports after the hoses are removed in order to keep contaminants from entering the compressor and oil from draining out of the compressor during removal. | |
1 | A/C Compressor Suction Hose Retaining Nut Caution: Refer to Fastener Caution in the Preface section. Tighten |
2 | Sealing Washer ProcedureRemove and discard the sealing washer. Refer to Sealing Washer Replacement |
3 | A/C Compressor Discharge Hose Retaining Nut Tighten |
4 | Sealing Washer ProcedureRemove and discard the sealing washer. Refer to Sealing Washer Replacement |
5 | A/C Compressor Retaining Nut Tighten |
6 | A/C Compressor Front Retaining Bolt Tighten |
7 | A/C Compressor Rear Retaining Bolt Tighten |
8 | A/C Compressor Retaining Stud Tighten |
9 | A/C Compressor |
