Removal Procedure
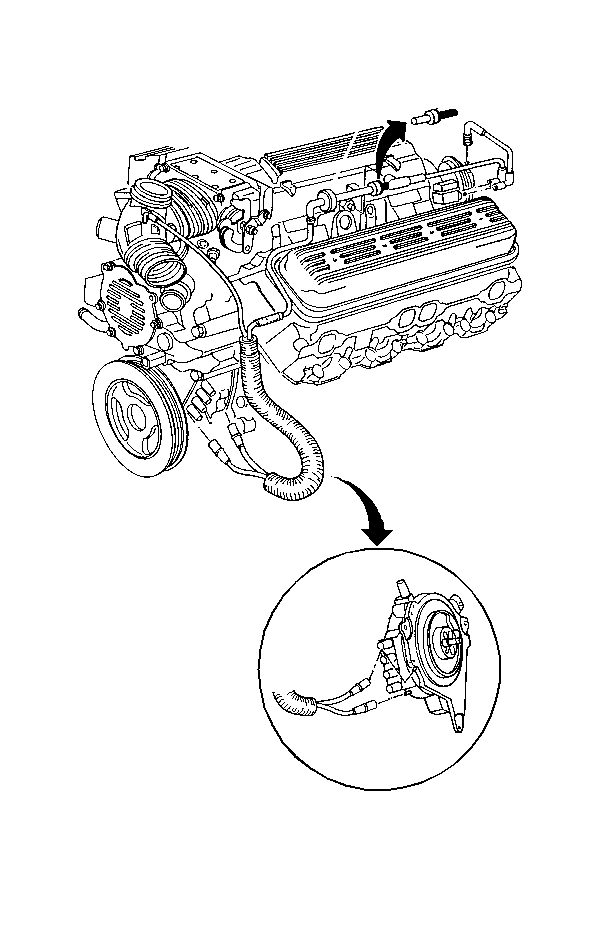
- Check the distributor ventilation system for proper operation. Refer to Distributor Ventilation System .
- Be sure that the ignition switch is in the OFF or the LOCK position.
- Remove the water pump. Refer to Water Pump Replacement .
- Remove the crankshaft balancer. Refer to Crankshaft Balancer and Hub Replacement .
- Disconnect the spark plug wire harness from the distributor. Refer to Spark Plug Wires Not Operating Properly .
- Disconnect the four-terminal PCM connector from the distributor.
- Remove the vacuum harness from the distributor. Refer to Distributor Ventilation System .
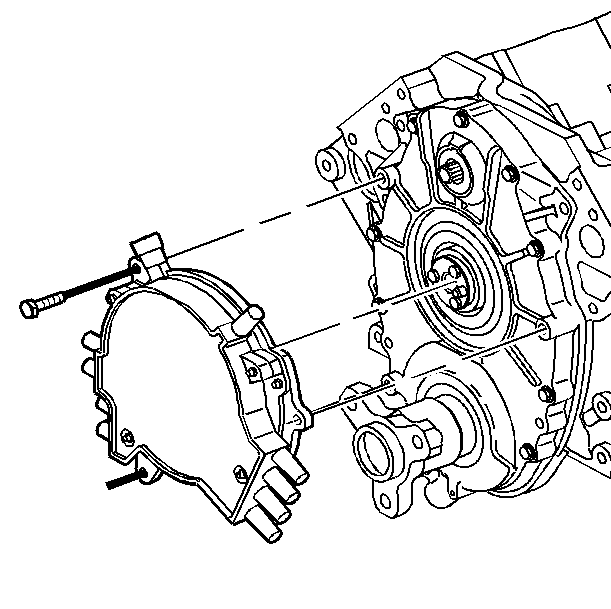
- Remove the distributor bolts/screws.
- Remove the distributor. Pull the distributor forward until the coupling disengages from the end of the camshaft.
Important: Make sure all coolant has been wiped off the distributor and the surrounding area before disconnecting any electrical connectors or the spark plug wire harness.


Installation Procedure
- Install the distributor with the new coupling shaft O-Rings.
- Do not attempt to fully seat the distributor using bolt/screws. If the distributor will not seat by hand, it is not properly aligned with the camshaft.
- Rotate the crankshaft until the engine is at the cylinder one TDC (camshaft sprocket pin at the 9 o'clock position).
- Rotate the distributor coupling until the camshaft sprocket pin slot aligns with the distributor base timing mark.
- Install the distributor using hand pressure to fully seat.
- Install the distributor bolts/screws.
- Connect the four-terminal PCM connector to the distributor.
- Connect the vacuum harness to the distributor. Refer to Distributor Ventilation System .
- Install the spark plug wire harness to the distributor. Refer to Spark Plug Wires Not Operating Properly .
- Install the crankshaft balancer. Refer to Crankshaft Balancer and Hub Replacement .
- Install the water pump. Refer to Water Pump Replacement .

Important:
• Replace the O-Rings on the coupling shaft or ignition system performance
may be affected. • Lubricate the O-Rings and the end of the camshaft with GM lubricant
P/N 9985007 or equivalent.
| 1.1. | Rotate the distributor coupling until the camshaft sprocket pin slot aligns with the camshaft sprocket pin. |
| 1.2. | Slide the distributor onto the end of the camshaft until the distributor is fully seated on the engine front cover. |
Important:
Tighten
Tighten the bolts/screws to 12 N·m (106 lb in).
Notice: Use the correct fastener in the correct location. Replacement fasteners must be the correct part number for that application. Fasteners requiring replacement or fasteners requiring the use of thread locking compound or sealant are identified in the service procedure. Do not use paints, lubricants, or corrosion inhibitors on fasteners or fastener joint surfaces unless specified. These coatings affect fastener torque and joint clamping force and may damage the fastener. Use the correct tightening sequence and specifications when installing fasteners in order to avoid damage to parts and systems.

