Special Tools
| • | J 25034-C Power Steering Pump Pulley Remover |
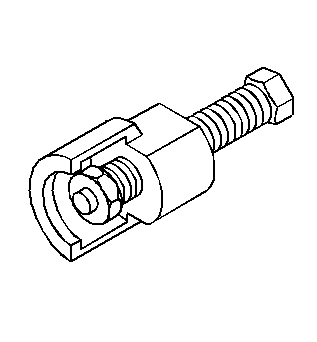
| • | J 42188 Ball Joint Separator |
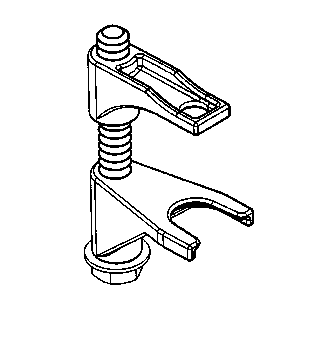
| • | J 39580 Engine Support Table |
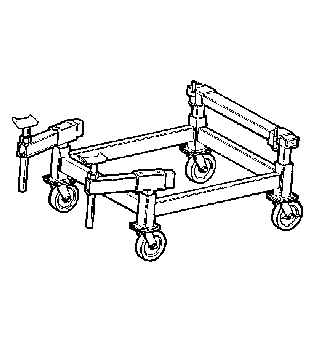
| • | J 39580-500 Engine Support Table Top |
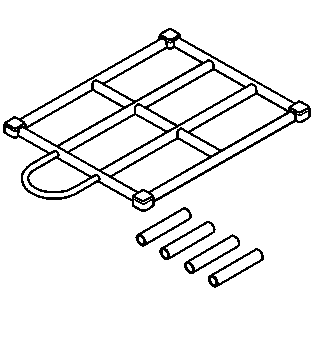
| • | J 41798 Engine Lifting Brackets |
| • | J 42203 Driveline Support |
| • | J 25033-C Power Steering Pump Pulley Installer |
| • | J 36660-A Torque Angle Meter |
Removal Procedure
Important: The steps in the following procedure are in a specific order. Follow these steps in this order and do not ignore any details .
- Recover the air conditioning (A/C) refrigerant. Refer to Refrigerant Recovery and Recharging .
- Remove the radiator. Refer to Radiator Replacement .
- Remove the break pressure modulator valve (BPMV) bracket. Refer to Brake Pressure Modulator Valve Bracket Replacement .
- Reposition the brake pipes.
- Remove the accessory drive belt. Refer to Drive Belt Replacement - Accessory .
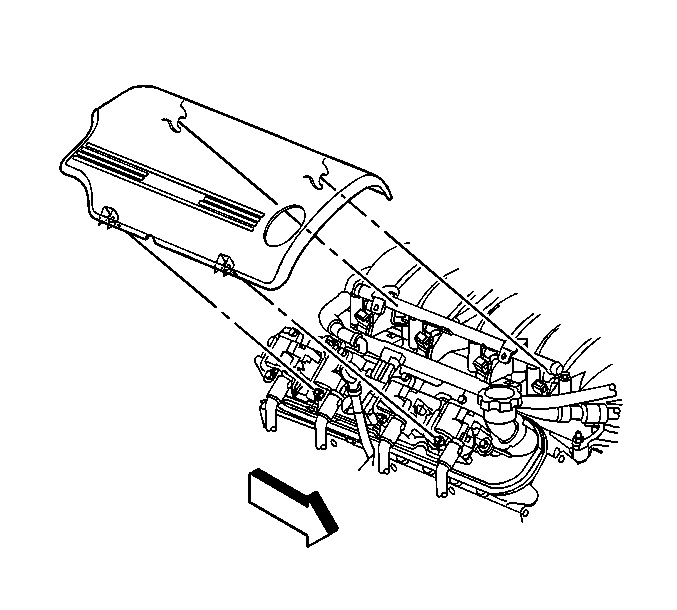
- Remove the right fuel injection rail cover.
- Relieve the fuel system pressure. Refer to Fuel Pressure Relief .
- Disconnect the evaporative emission (EVAP) canister purge hose at the fuel line.
- Remove the fuel feed hose. Refer to Fuel Hose/Pipes Replacement - Engine Compartment .
- Remove the radiator hoses from the water pump.
- Remove the heater hoses from the water pump.
- Disconnect the following electrical connectors from the engine:
- Remove the generator. Refer to Generator Replacement .
- Remove the power brake booster vacuum hose.
- Remove the intermediate steering shaft bolt to the steering gear.
- Remove the intermediate steering shaft from the steering gear and position it to the left onto the frame rail.
- Remove the front tires and wheels. Refer to Tire and Wheel Removal and Installation .
- Remove the intermediate pipe. Refer to Intermediate Pipe Replacement .
- Remove the driveline tunnel close-out panel bolts.
- Remove the driveline tunnel close-out panel.
- Remove the starter motor. Refer to Starter Motor Replacement .
- On 7.0L engine, remove the oil inlet hose to oil pan bolt (3) and disconnect the hose (2) from the oil pan.
- If the engine failed and debris was created, remove the oil tank inlet hose and discard. Refer to Oil Tank Inlet Hose Replacement .
- Remove the oil tank outlet hose to oil pan bolt (2) and disconnect the hose (3) from the oil pan.
- If the engine failed and debris was created, remove the oil tank outlet hose and discard. Refer to Oil Tank Outlet Hose Replacement .
- Remove the transmission lines from the rear of the oil pan.
- Remove the transmission lines from the front of the oil pan.
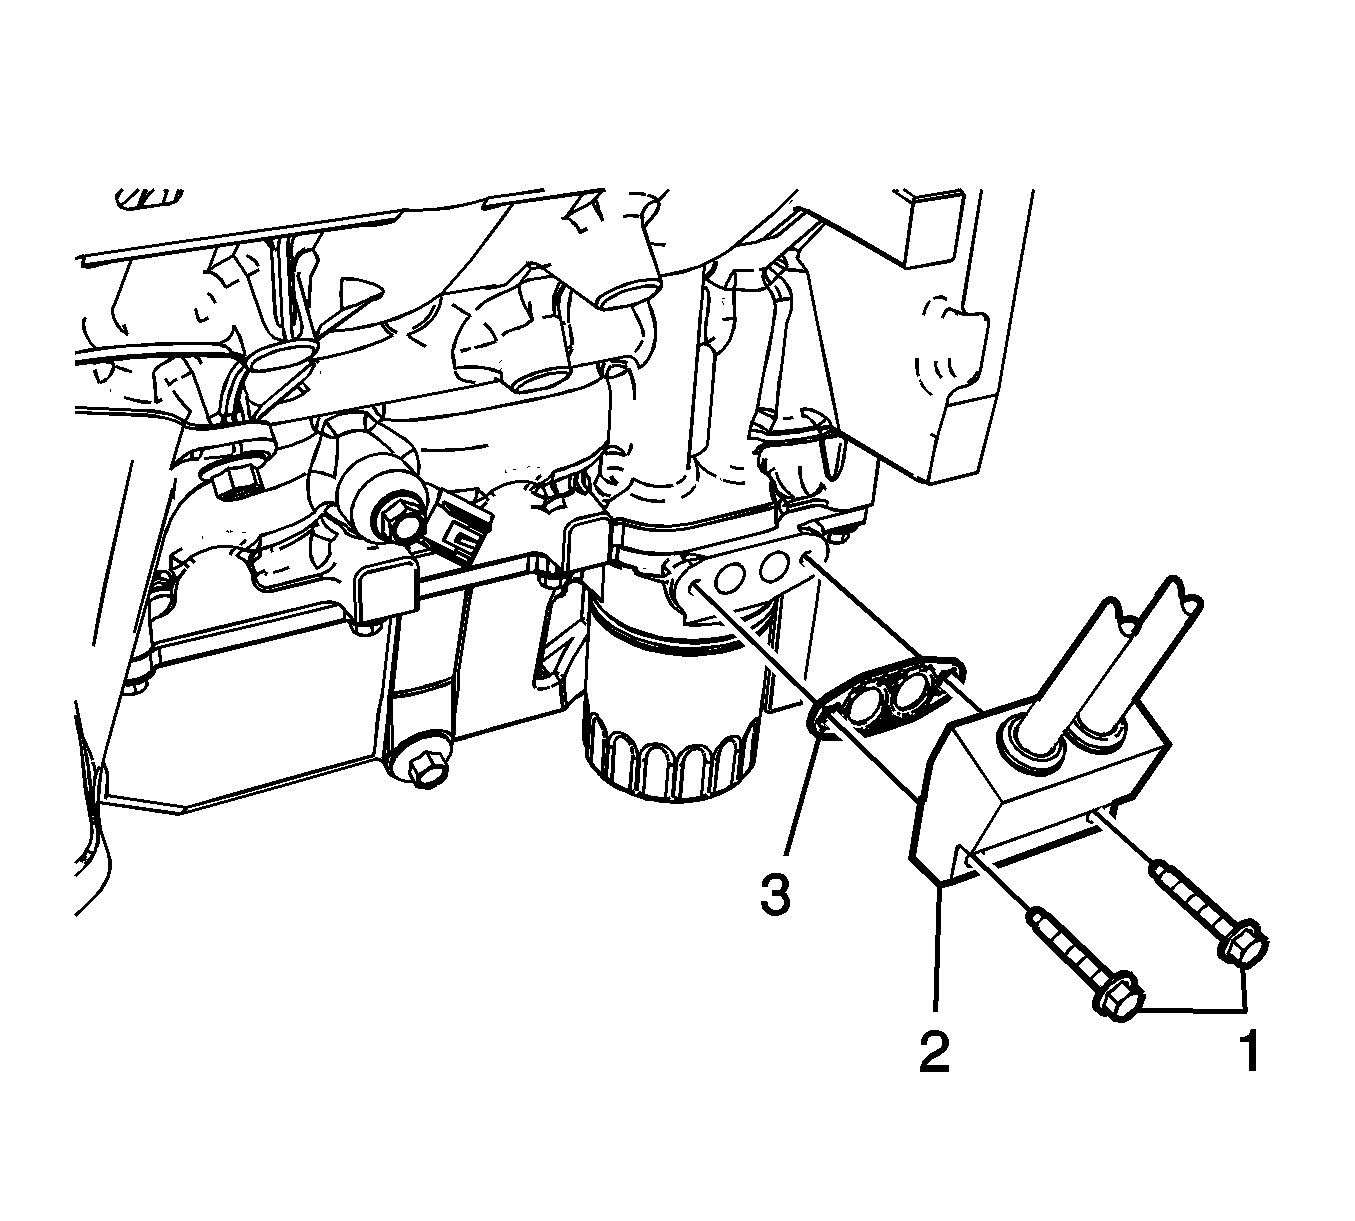
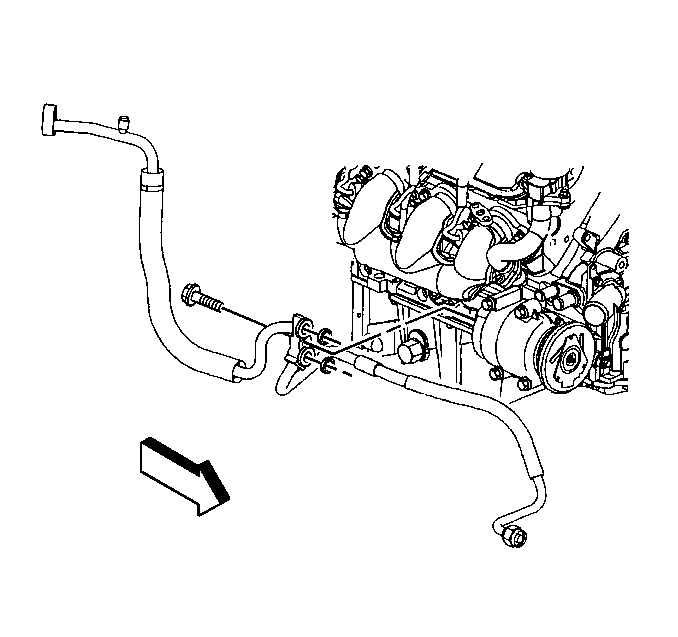
- Remove the 2 oil cooler bolts (1) and separate the oil cooler (2) from the pan.
- If the engine failed and debris was created, remove the oil cooler hoses and discard. Refer to Engine Oil Cooler Hose/Pipe Replacement .
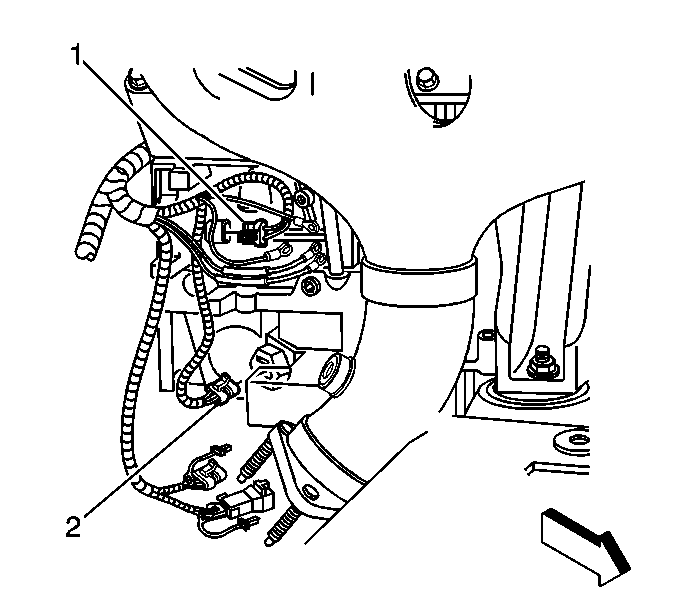
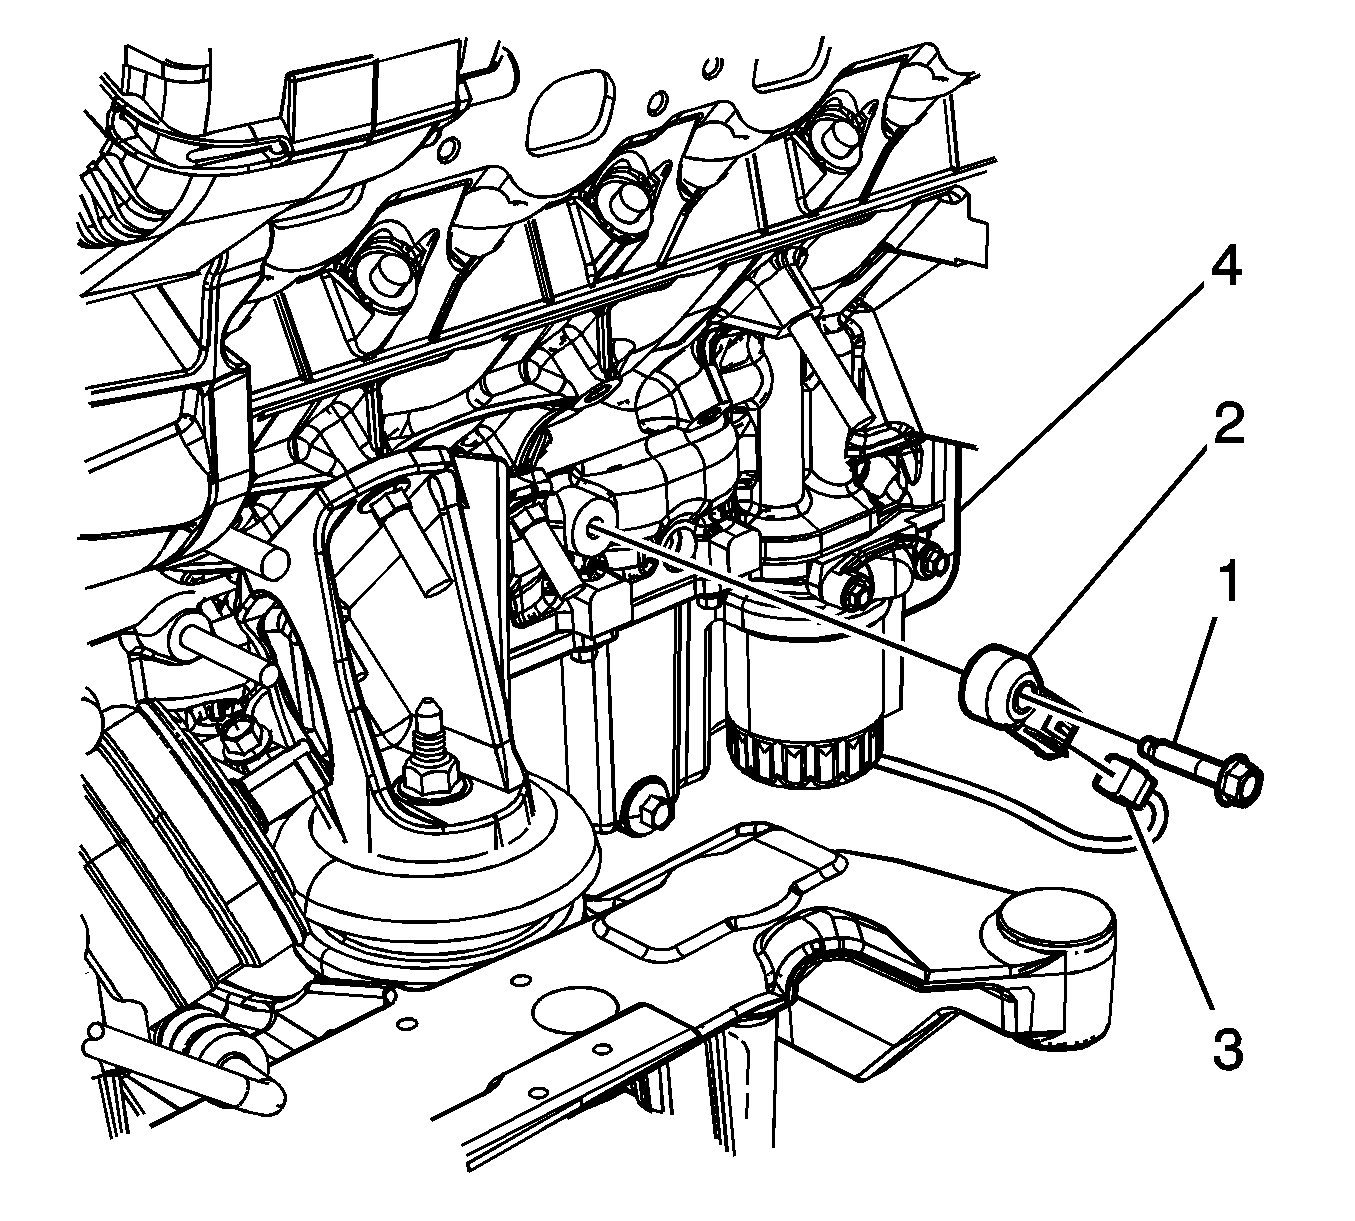
- On all engines, disconnect the crankshaft position (CKP) sensor electrical connector (1).
- Disconnect the oil level sensor electrical connector (2).
- Disconnect the right heated oxygen sensor (HO2S) electrical connector.
- Remove the A/C compressor and condenser hose bolt at the compressor.
- Separate the A/C compressor and condenser hose from the A/C compressor.
- If equipped, disconnect the engine oil temperature sensor (3) electrical connector.
- Disconnect the left HO2S electrical connector.
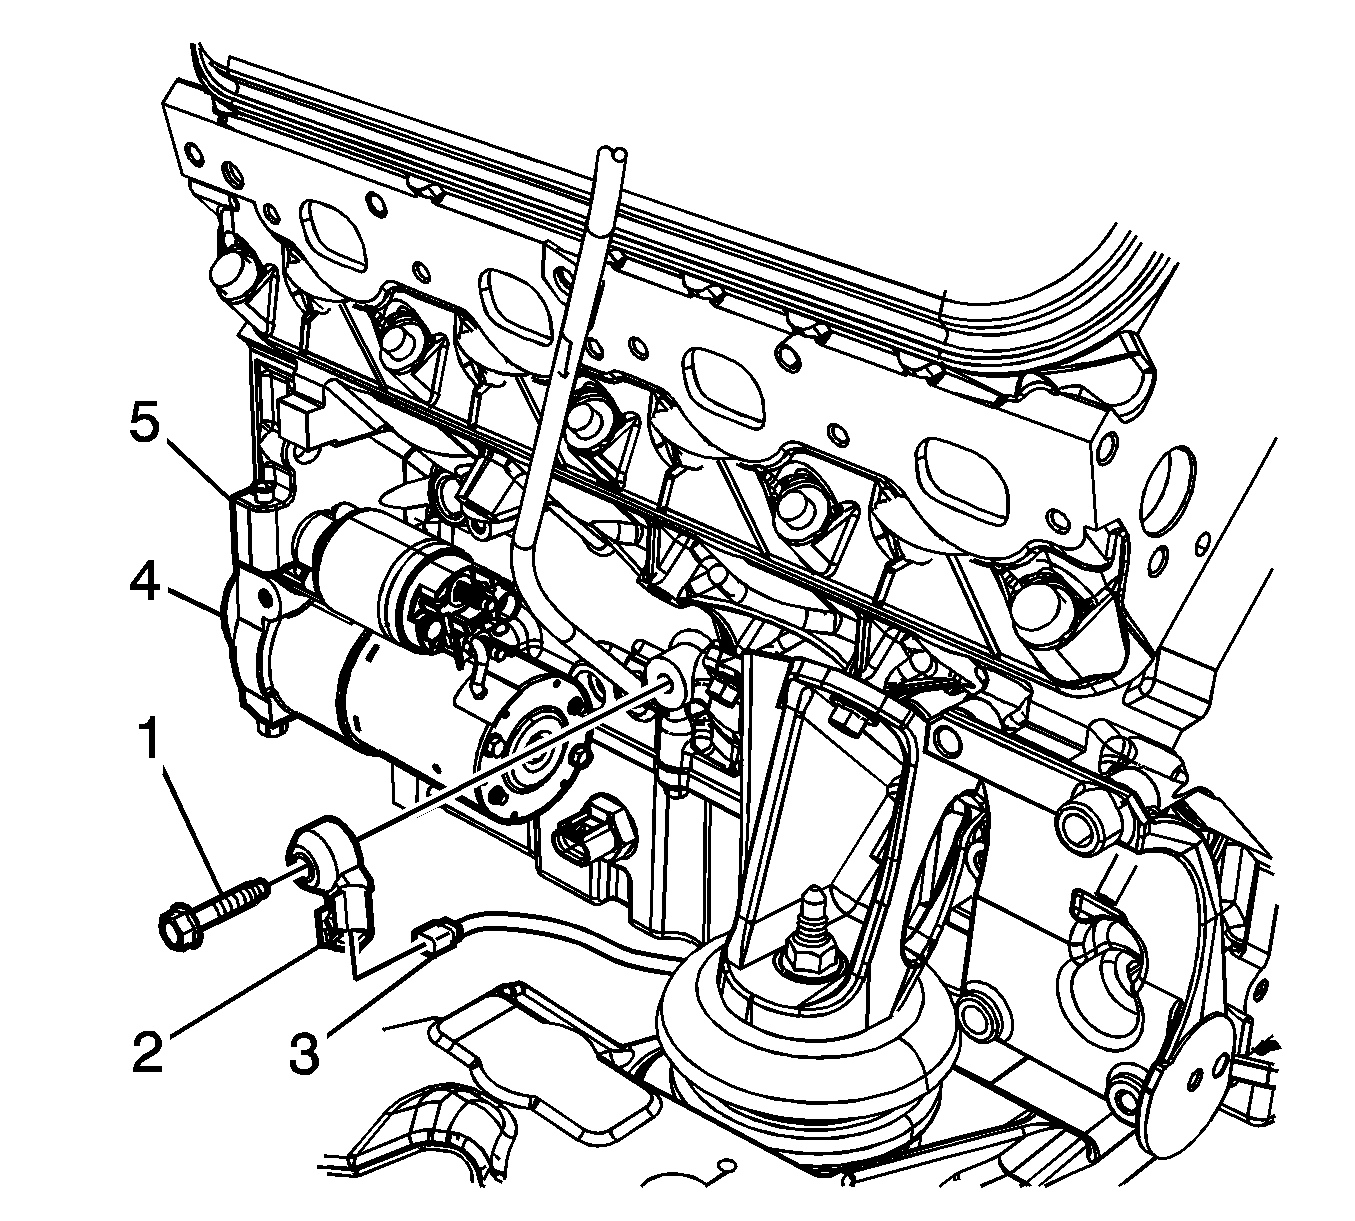
- Remove the ground strap bolt.
- Disconnect the wheel speed sensor electrical connectors.
- If equipped with real time damping (RTD) disconnect the following electrical connectors:
- Unclip the transmission wire harness from the crossmember.
- Disconnect the electronic variable orifice (EVO) control connector clips from the crossmember.
- Remove the transmission harness clip bolts from the engine block.
- Unclip the transmission wire harness from the engine wire harness.
- Remove the stabilizer shaft. Refer to Stabilizer Shaft Replacement .
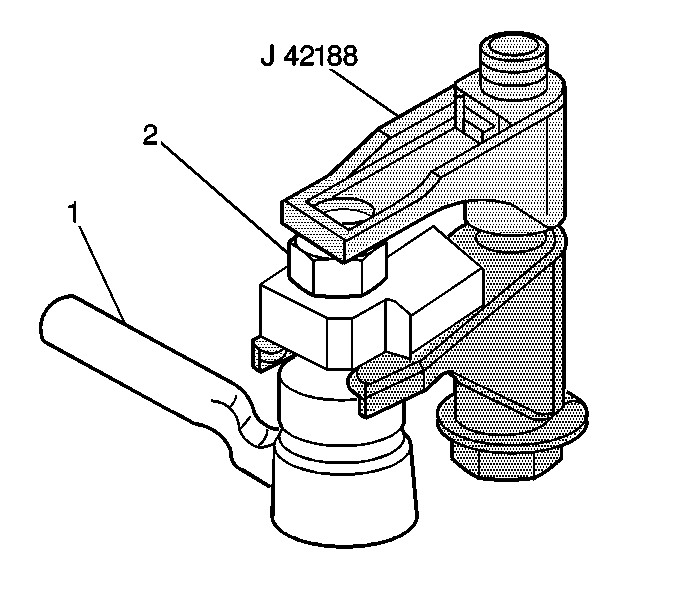
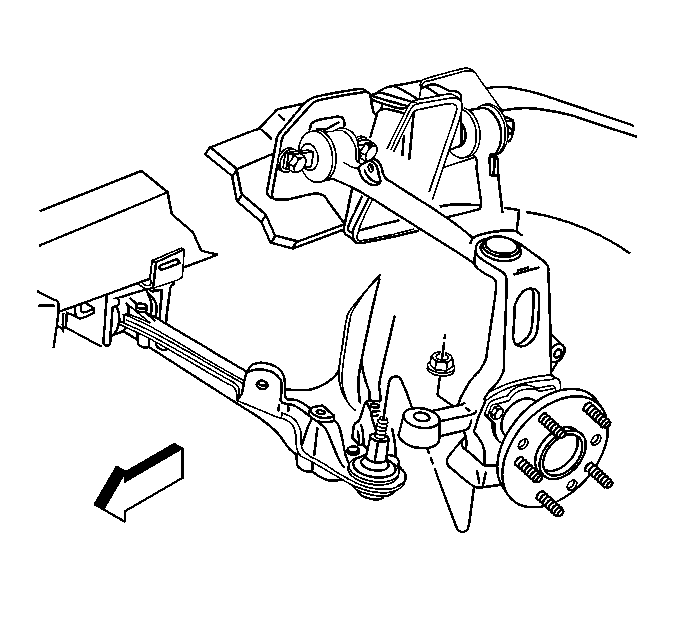
- Loosen, do not remove, the steering knuckle nut (2) from the lower control arm ball stud.
- Install the J 42188 between the steering knuckle and the lower control arm ball stud.
- Tighten the nut on the J 42188 until the steering knuckle and the lower control arm ball stud separate.
- Disconnect the antilock brake system (ABS) electrical connector clips from the crossmember, if equipped.
- Remove the front transverse leaf spring. Refer to Front Transverse Spring Replacement .
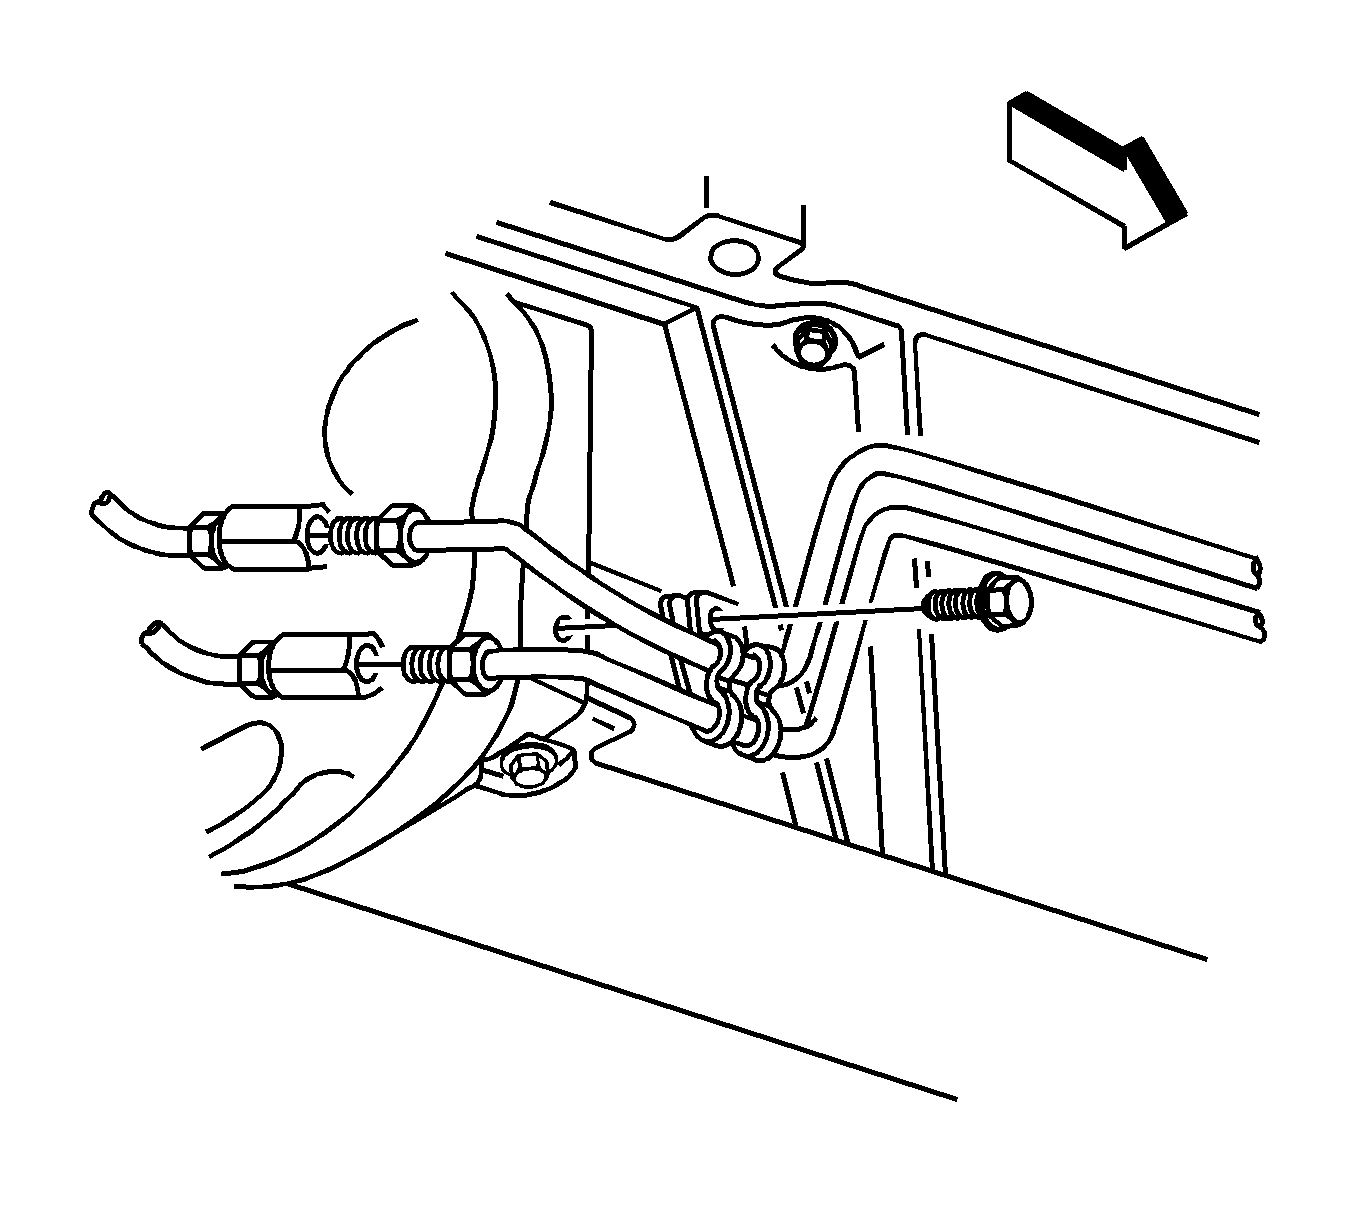
- Disconnect the automatic transmission fluid cooler pipe clip from the front of the engine oil pan, if equipped.
- Disconnect the front automatic transmission fluid cooler pipes from the rear pipes.
- Disconnect the automatic transmission cooler pipe clip at the right transmission cover, if equipped.
- With automatic transmission vehicles, use the following steps:
- If equipped with an automatic transmission, remove the flywheel housing plug.
- If equipped with an automatic transmission perform the following:
- Remove bolts attaching the transmission wire harness bracket to the flywheel housing.
- Remove the transmission wire harness from its mounting location, rearward toward the driveline support.
- Lay the harness on the driveline support.
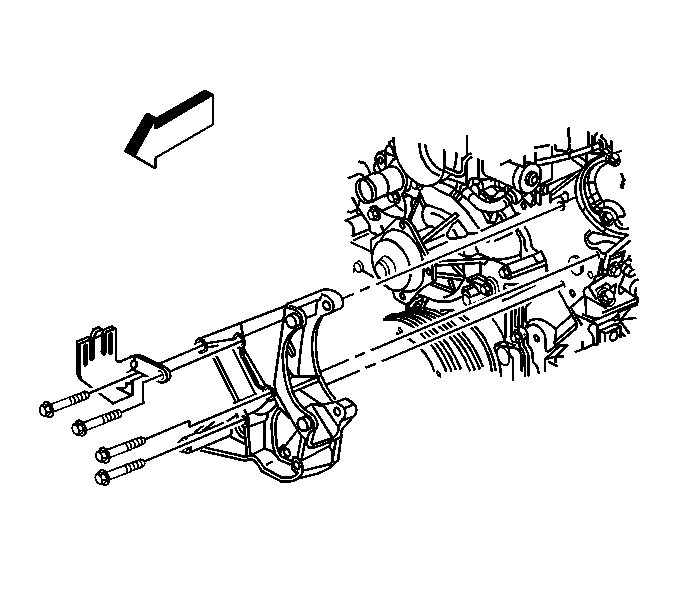
- Install the J 42203 to the close-out panel flange.
- If equipped with a manual transmission, disconnect the clutch actuator hose from the master cylinder hose.
- Install the J 42203 to the close-out panel flange.
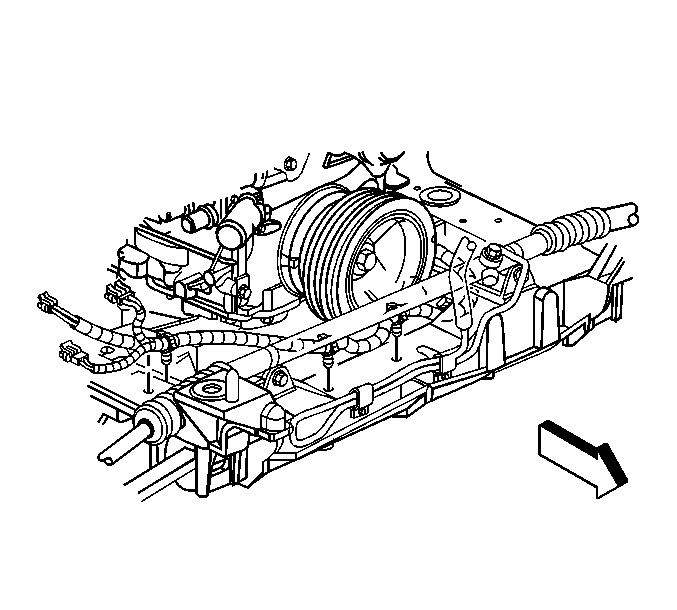
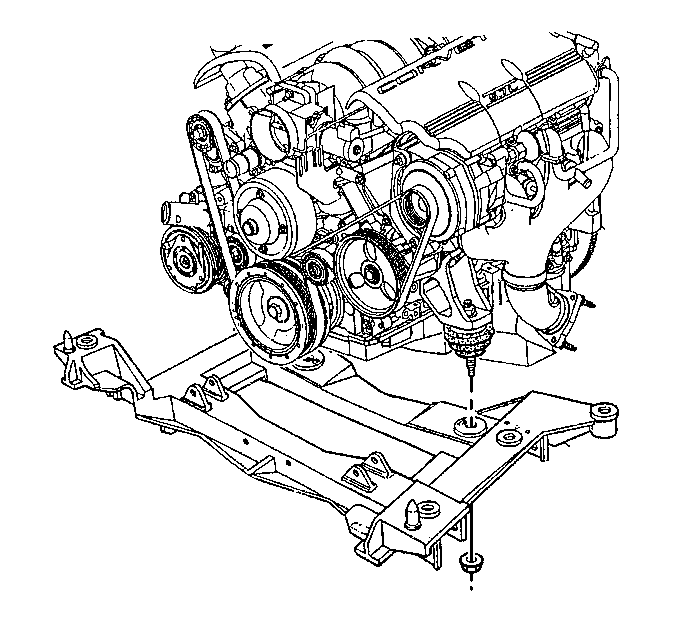
- Slowly lower the vehicle onto the J 39580 and the J 39580-500 .
- Support the engine and crossmember on the J 39580 and the J 39580-500 .
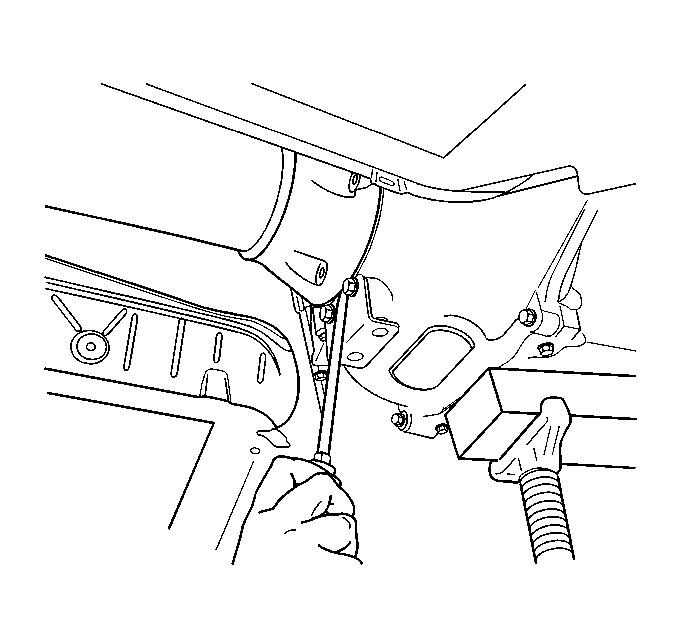
- Using HAND TOOLS ONLY, remove the front and rear crossmember nuts.
- Partially raise the vehicle.
- Disconnect the manifold absolute pressure (MAP) sensor electrical connector.
- Disconnect the camshaft position (CMP) sensor electrical connector.
- Remove the ground strap bolt.
- Remove the ground strap from the left rear cylinder head.
- Disconnect the engine oil pressure sensor electrical connector from the back of the engine.
- Disconnect the electrical connector (2) for the knock sensor, left side.
- Disconnect the electrical connector (2) for the knock sensor, right side.
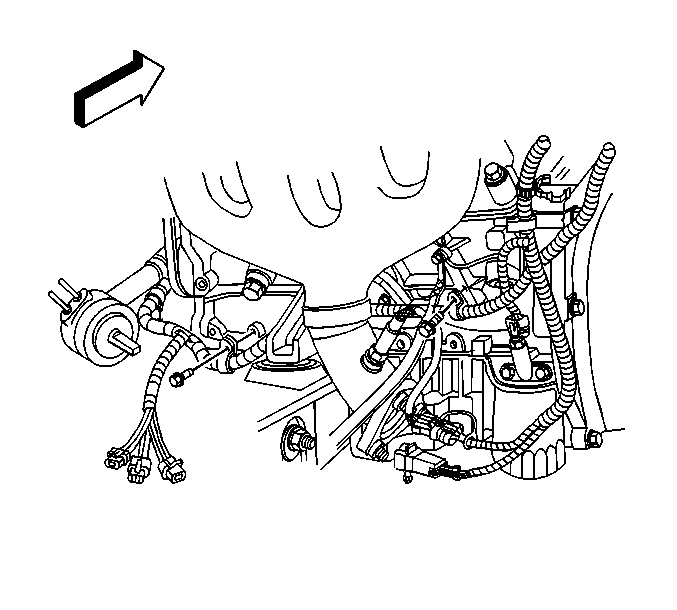
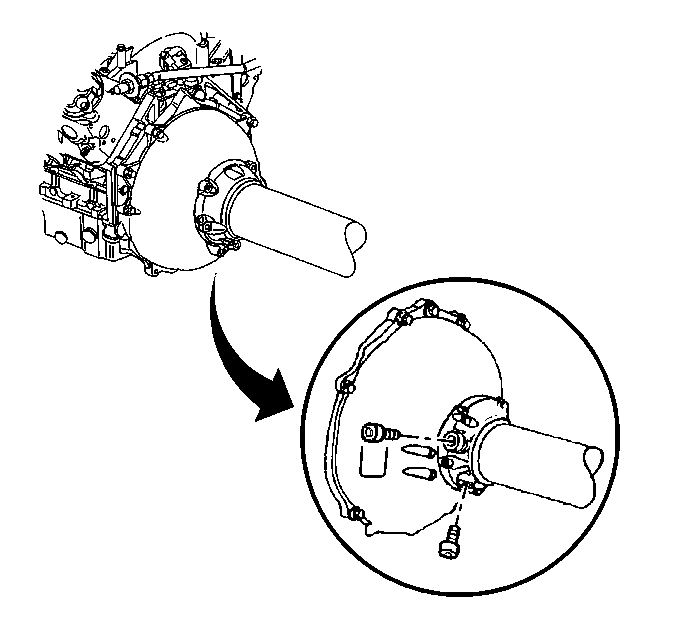
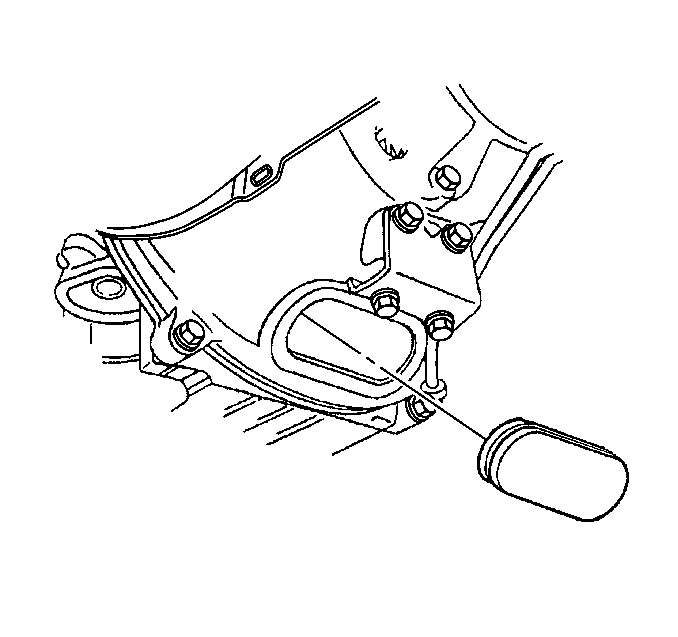
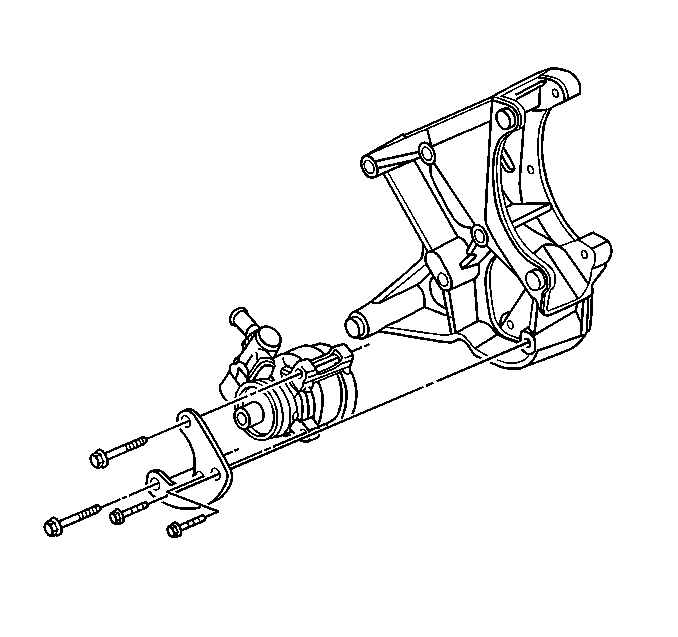
- Remove the driveline support bolts.
- Insert a flat-bladed screwdriver, or similar tool, between the edge of the driveline support and the flywheel housing, then separate the flywheel housing from the driveline support.
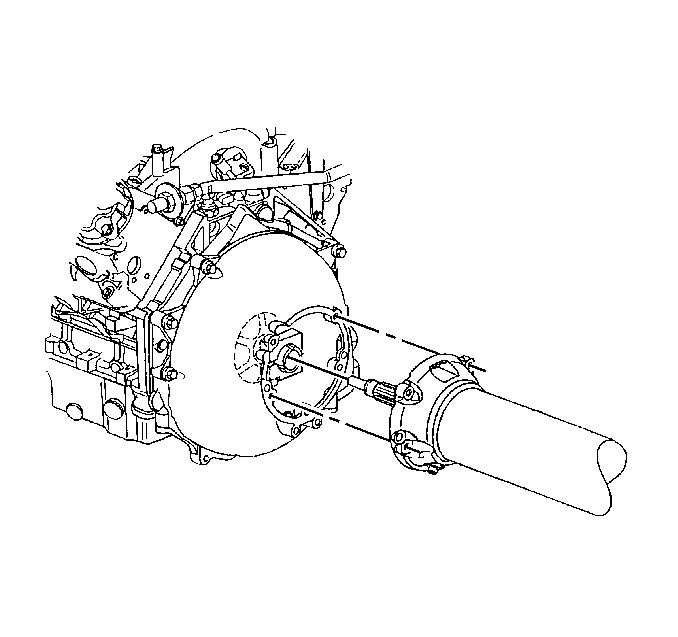
- Slowly pull the engine away from the propeller shaft.
- As soon as the propeller input shaft clears the flywheel housing, slowly raise the vehicle.
- Slide the engine and crossmember forward in order to clear the propeller shaft spline.
- Remove the electronic brake control module (EBCM). Refer to Electronic Brake Control Module Replacement .
- Raise the vehicle completely off of the engine and crossmember.
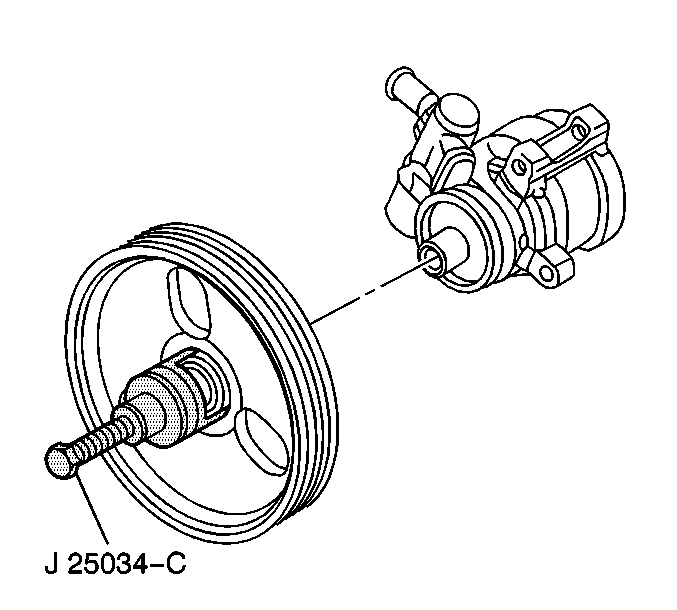
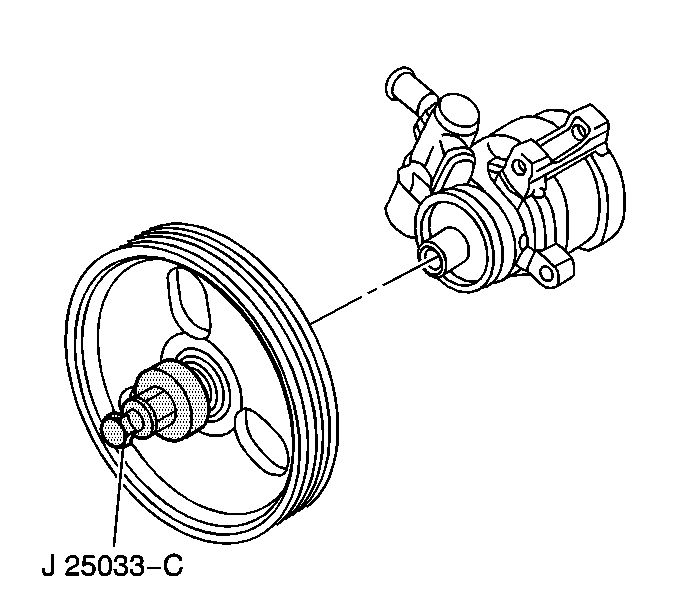
- Remove the power steering pump pulley hub cap, if necessary.
- Using the J 25034-C remove the power steering pump pulley.
- Remove the power steering pump bolts.
- Remove the power steering pump brace.
- Remove the power steering pump, with reservoir, from the engine, and reposition them to the crossmember.
- Remove the power steering pump assembly. Refer to Power Steering Pump Replacement .
- Remove the generator bracket bolts.
- Remove the generator bracket and power steering pump bracket.
- Install the J 41798 to the engine.
- Remove the spark plugs. Refer to Spark Plug Replacement .
- Remove the engine mount nuts.
- Using a engine hoist and the J 41798 slowly raise the engine.
- Remove the engine from the crossmember.
- Remove the flywheel housing bolts.
- Remove the flywheel housing from the engine block.
- Install the engine onto an engine stand and prepare for disassembly.
- Remove the engine hoist.
- Remove the J 41798 from the engine.
- Remove the engine mount bracket bolts.
- Remove the engine mount brackets from the engine block.
- On 7.0L engine, if the engine failed and debris was created, the engine oil tank must be cleaned and the oil tank hoses and engine oil cooler must be replaced:

Important: Cap the hoses and inlets when separating the cooling system components, this prevents dirt and other contaminants from entering the cooling system.
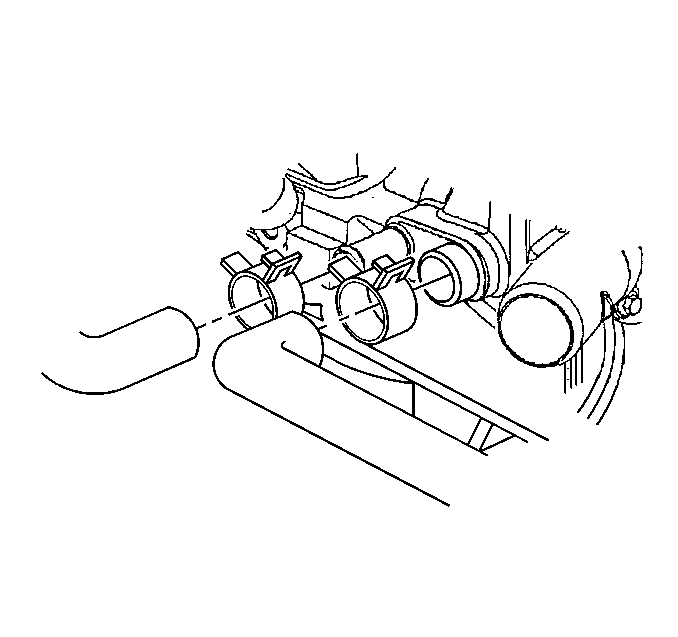
| • | The fuel injectors |
| • | The ignition coil main harness connectors |
| • | The EVAP solenoid |
| • | The electric throttle motor |
| • | The engine coolant temperature (ECT) sensor |
| • | The A/C compressor |
Discard the oil seal (1).
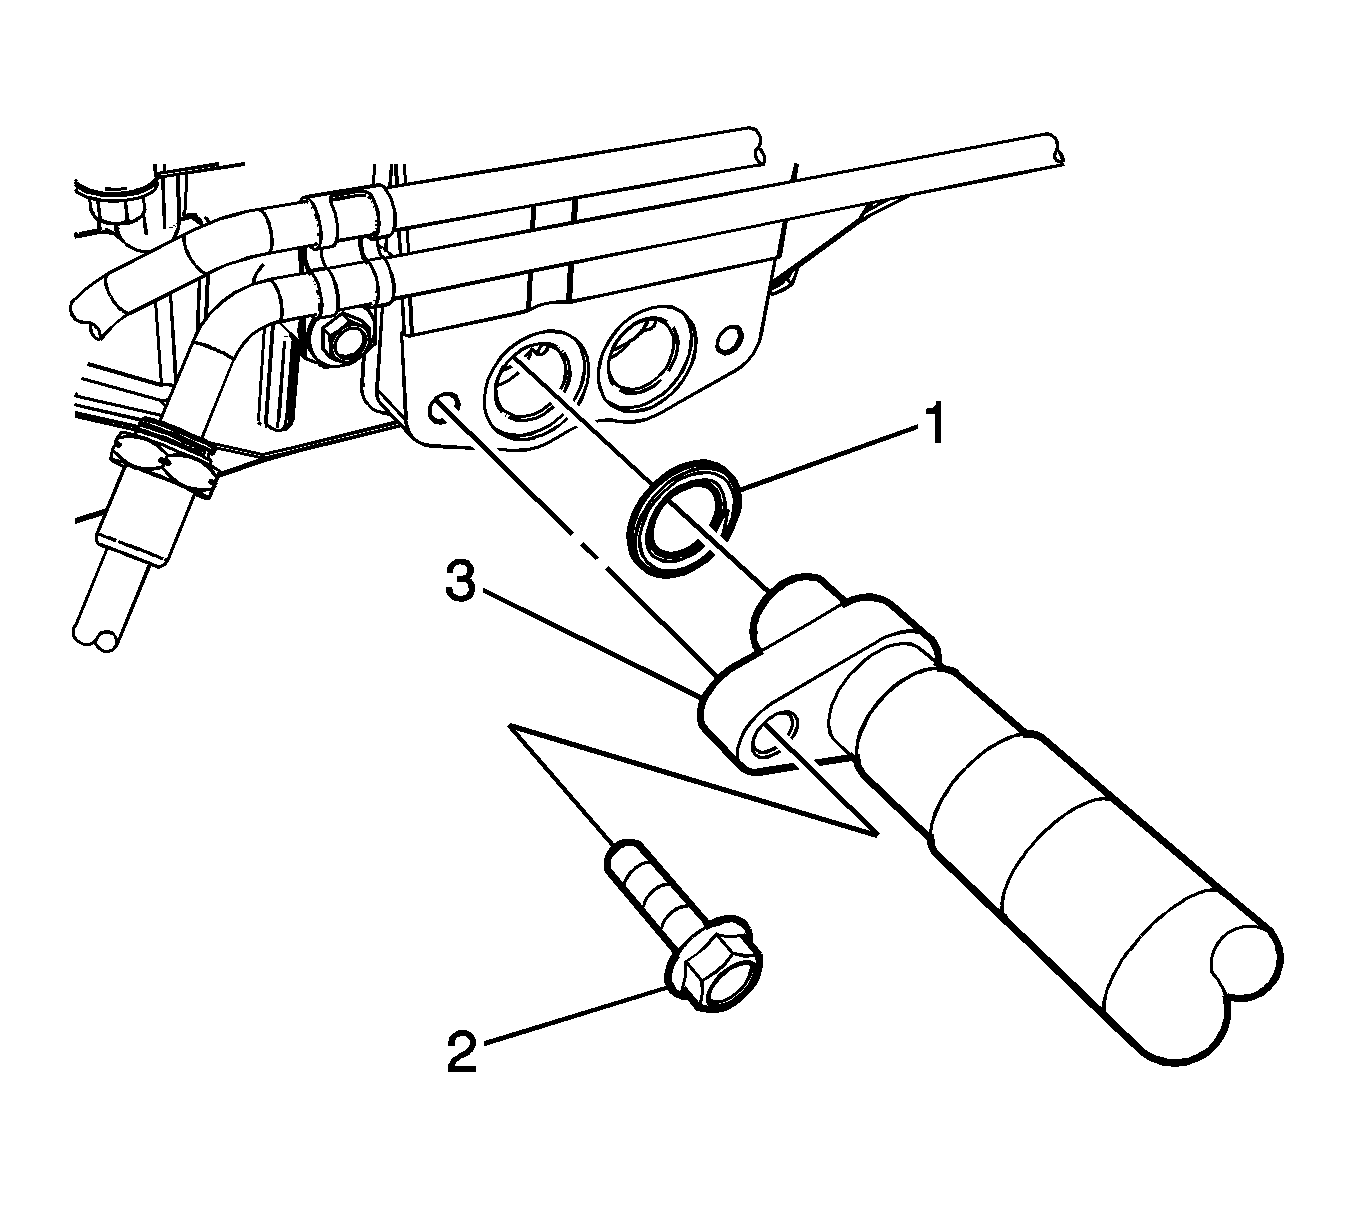
Discard the oil seal (1).
Discard the oil cooler seal (3).

Remove the ground straps (1 and 2) from the engine block.
| • | Shock absorber damper |
| • | Position sensor pigtail |
Notice: Refer to Fastener Notice in the Preface section.
Important: Failure to use the minimum fastener length specified will prevent proper retention of the propeller shaft during disassembly.
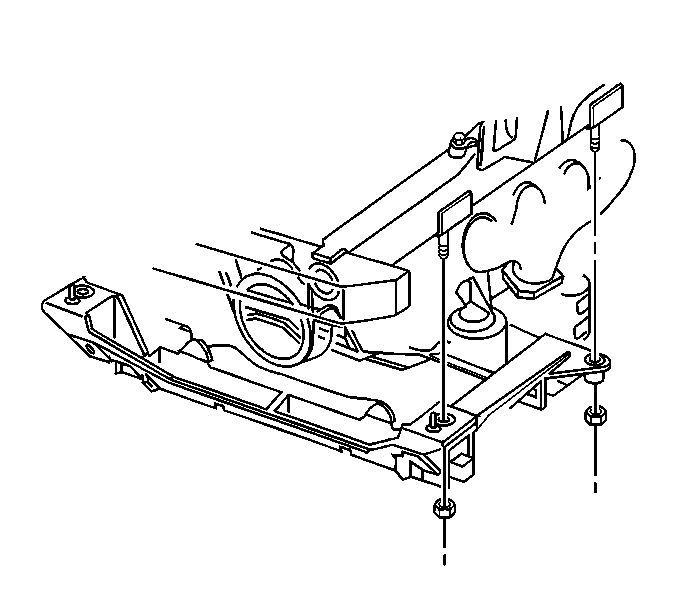
| 53.1. | Remove the 2 driveline support hole plug bolts. |
| 53.2. | Install a M10.0-1.5 x 55 mm bolt or longer in each plug location. |
Tighten
Tighten the M10 bearing support bolts to 35 N·m (26 lb ft).
| 55.1. | Orientate the prop shaft hub clamp for access to the bolt. |
| 55.2. | Position the clamp bolt facing downward. |
| 55.3. | Loosen the prop shaft hub clamp bolt. |
Secure if necessary.
Important: The weight of the engine should never be supported by the J 42203 .

Important: The weight of the engine should never be supported by the J 42203 .
Important: Visually inspect the transmission wiring harness to ensure detachment from the engine.
Important: Visually inspect the wiring harness clearances while raising the vehicle.
Important: It is not necessary to open the power steering system during the engine removal procedure.
Notice: Avoid engine damage. Debris in the engine oil tank, oil tank hoses and engine oil cooler may be pulled back into the engine causing severe engine damage. You must clean the engine oil tank, and replace the engine oil hoses and engine oil cooler.
| 100.1. | Remove the engine oil tank. Refer to Oil Tank Replacement . |
| 100.2. | Disassemble the engine oil tank. Refer to Oil Tank Disassemble . |
| 100.3. | Clean and inspect the engine oil tank. Refer to Oil Tank Cleaning and Inspection . |
| 100.4. | Assemble the engine oil tank. Refer to Oil Tank Assemble . |
| 100.5. | Replace the engine oil cooler. Refer to Auxiliary Engine Oil Cooler Replacement . |
Installation Procedure
- Prepare the engine for installation.
- Install the engine mount brackets to the engine block.
- Install the engine mount bracket bolts.
- Install the J 41798 to the engine.
- Using an engine hoist and the J 41798 raise the engine slightly.
- Remove the engine from the engine stand.
- Install the flywheel housing to the engine block.
- Install the flywheel housing bolts.
- Using an engine hoist and the J 41798 lower the engine onto the crossmember.
- Install the engine mount nuts.
- Install the spark plugs. Refer to Spark Plug Replacement .
- Remove the J 41798 from the engine.
- Install the A/C compressor bracket.
- Install the generator bracket and power steering pump bracket.
- Install the generator bracket bolts until snug.
- Tighten the generator bracket bolts in the following order:
- Install the power steering pump, with reservoir, to the generator bracket.
- Install the power steering pump brace.
- Install the power steering pump bolts.
- Using the J 25033-C install the power steering pump pulley.
- Install the power steering pump pulley hub cap, if necessary.
- Install the EBCM. Refer to Electronic Brake Control Module Replacement .
- Roll the engine and crossmember underneath the vehicle.
- Partially lower the vehicle onto the engine and crossmember.
- Install the ground strap and ground strap bolt to the rear of the left cylinder head.
- Connect the engine oil pressure sensor electrical connector.
- Connect the MAP sensor electrical connector.
- Connect the CMP sensor electrical connector.
- Reconnect the electrical connector (2) for the knock sensor, left side.
- Reconnect the electrical connector (2) for the knock sensor, right side.
- Vehicles equipped with a manual transmission, slide the engine and crossmember rearward. Do not force the engine onto the propeller spline.
- Position the engine to the proper height and angle in order to install the propeller input shaft.
- Insert the propeller input shaft into the clutch driven plate hub while maintaining the proper angle, DO NOT force. Rotate the shaft slightly to bring the 2 splines into alignment, if necessary.
- Slowly seat the flywheel housing to the driveline.
- Install the driveline support bolts.
- Connect the master cylinder hose to the clutch actuator hose.
- Vehicles equipped with an automatic transmission, slide the engine and crossmember rearward. Do not force the engine onto the propeller spline.
- Position the engine to the proper height and angle in order to install the propeller input shaft.
- Install the driveline support bolts.
- Hand tighten the flywheel hub collar bolt.
- Lower the vehicle onto the crossmember and align the dowels.
- By HAND, install new crossmember nuts until snug.
- Raise and suitably support the vehicle.
- Remove the J 39580 and the J 39580-500 .
- Remove the J 42203 from the vehicle.
- Route the transmission wire harness into place.
- Install the transmission wire harness bracket bolts.
- Vehicles equipped with an automatic transmission, remove the previously installed M10-1.5 x 55 mm bolts from the front of the driveline support.
- Install 2 plugs in the driveline support.
- Connect the front automatic transmission fluid cooler pipes to the rear pipes, if equipped.
- Install the automatic transmission cooler pipe clamp bolt, at the transmission cover, if equipped.
- Install the automatic transmission fluid cooler pipe clamp bolt, at the oil pan, if equipped.
- Install the front transverse leaf spring. Refer to Front Transverse Spring Replacement .
- Install the lower control arm stud to the steering knuckle.
- Install a NEW steering knuckle nut.
- Tighten the steering knuckle nut to 20 N·m (15 lb ft) to seat the ball joint stud.
- Torque the steering knuckle nut an additional 210 degrees using J 36660-A .
- Check the steering knuckle nut for a final torque of 55 N·m (41 lb ft)
- Connect the ABS electrical connector clips to the crossmember, if equipped.
- Install the front stabilizer shaft. Refer to Stabilizer Shaft Replacement .
- Clip the transmission wire harness the engine wire harness, at the white tape.
- Install the transmission wire harness clip bolts to the engine block.
- Tighten the transmission wire harness clip bolt, near the harness ground, to 32 N·m (23 lb ft).
- Tighten the transmission wire harness clip bolt, near the oil pan, to 25 N·m (18 lb ft).
- Install the EVO electrical connector clips to the crossmember.
- Clip the transmission wire harness to the crossmember.
- If equipped with RTD connect the following electrical connectors:
- Position the ground straps (1, 2) to the engine block.
- Install the engine ground strap bolt.
- Connect the left HO2S electrical connector.
- If equipped, connect the engine oil temperature sensor (3) electrical connector.
- Install the AC compressor and condenser hose to the A/C compressor.
- Install the A/C compressor and condenser hose bolt at the compressor.
- Connect the right front HO2S sensor electrical connector.
- Connect the oil level sensor (2) electrical connector.
- Connect the CKP sensor (1) electrical connector.
- On 7.0L engine, using a new oil cooler seal (3), install the oil cooler (2) and 2 bolts.
- If the oil cooler hoses were discarded install new hoses. Refer to Engine Oil Cooler Hose/Pipe Replacement .
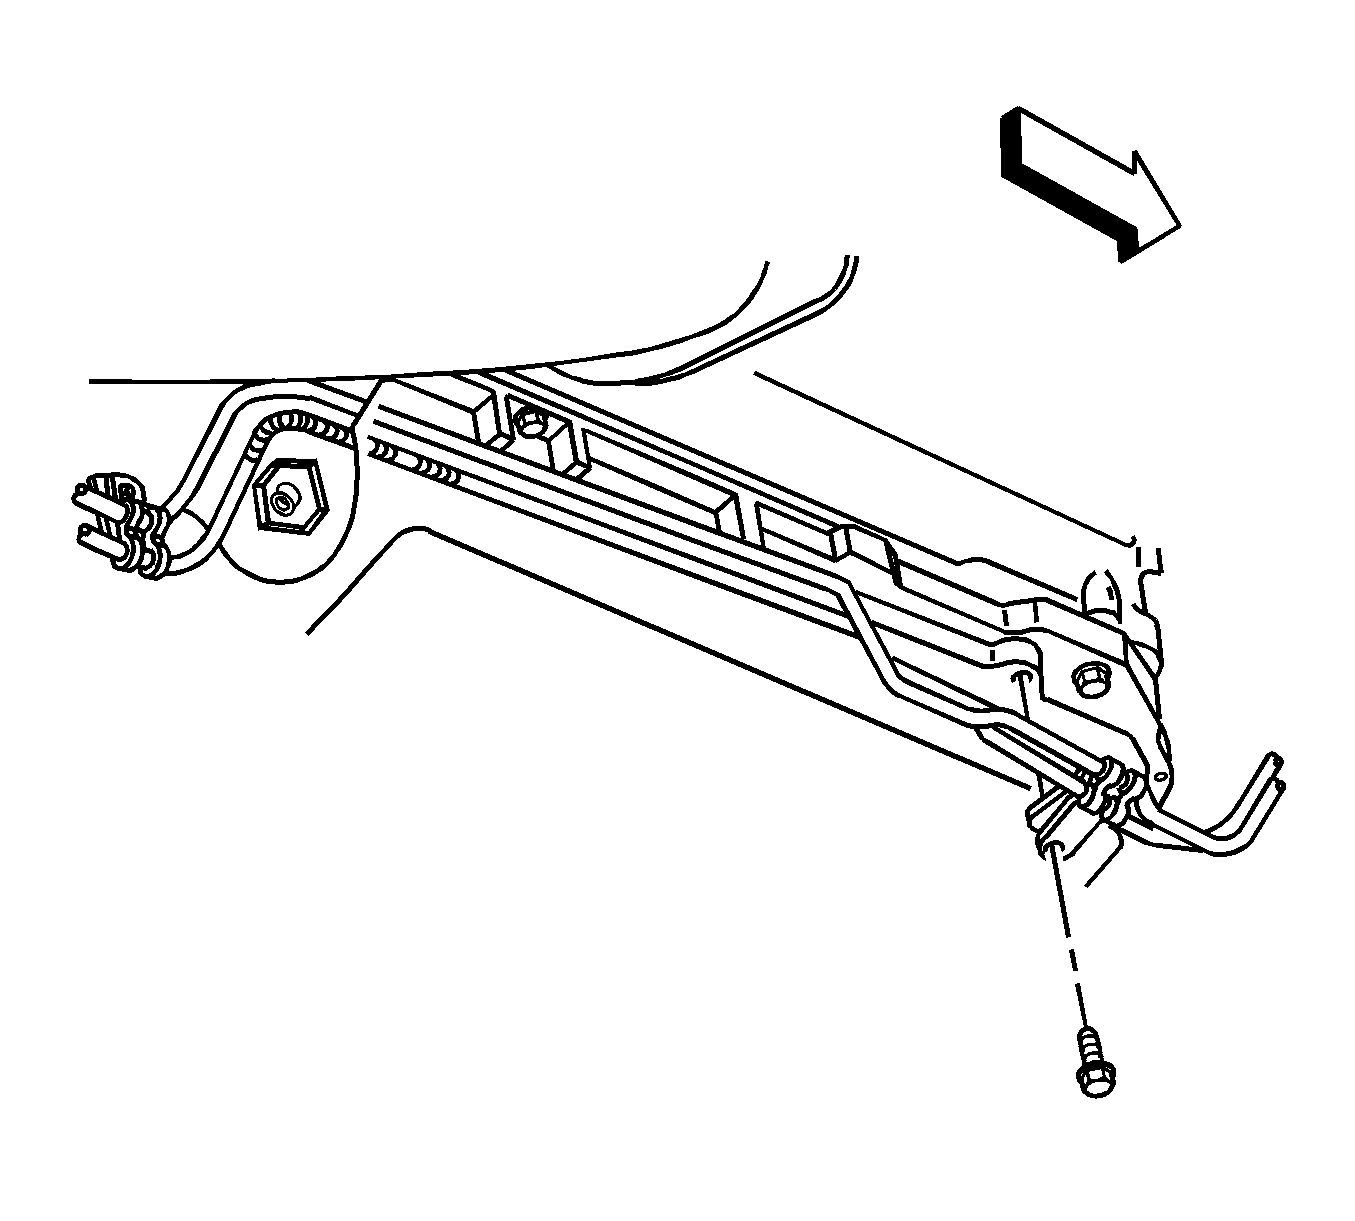
- Install the front transmission cooler line retainer and bolt.
- Install the rear transmission cooler lines retainer and bolt.
- Using a new oil seal (1) install the oil tank outlet hose (3) and bolt (2) to the oil pan.
- If the oil tank outlet hose was discarded install a new hose. Refer to Oil Tank Outlet Hose Replacement .
- Using a new oil seal (1) install the oil tank inlet hose (2) and bolt (3) to the oil pan.
- If the oil tank inlet hose was discarded install a new hose. Refer to Oil Tank Inlet Hose Replacement .
- On all engines, install the starter motor. Refer to Starter Motor Replacement .
- Install the driveline close-out panel.
- Install the driveline close-out panel bolts.
- Install the intermediate pipe. Refer to Intermediate Pipe Replacement .
- Install the front tires and wheels. Refer to Tire and Wheel Removal and Installation .
- Lower the vehicle.
- Install the intermediate steering shaft to the steering gear.
- Install the intermediate steering shaft bolt.
- Install the power brake booster vacuum hose.
- Install the generator. Refer to Generator Replacement .
- Connect the following electrical connectors to the engine:
- Install the heater hoses to the water pump.
- Install the radiator hoses to the water pump.
- Install the fuel feed hose. Refer to Fuel Hose/Pipes Replacement - Engine Compartment .
- Connect the EVAP emission canister purge hose at the fuel line.
- Install the right fuel injection rail cover.
- Install the accessory drive belt. Refer to Drive Belt Replacement - Accessory .
- Install the BPMV bracket. Refer to Brake Pressure Modulator Valve Bracket Replacement .
- Install the radiator. Refer to Radiator Replacement .
- Recharge the A/C system. Refer to Refrigerant Recovery and Recharging .
- Program the transmitters. Refer to Transmitter Programming .
- Bleed the clutch hydraulic system, if equipped. Refer to Hydraulic Clutch Bleeding .
- Perform the CKP system variation learn procedure. Refer to Crankshaft Position System Variation Learn .
- Fill the crankcase with the proper quantity and grade of engine oil. Refer to Approximate Fluid Capacities and Fluid and Lubricant Recommendations .
- Disable the ignition system.
- Crank the engine several times. Listen for any unusual noises or evidence that parts are binding.
- Enable the ignition system.
- Start the engine and listen for unusual noises.
- Check the vehicle oil pressure gage and confirm that the engine has acceptable oil pressure.
- Stop the engine and add oil to the engine oil tank as needed to bring the oil level to the FULL mark (approximately 2.4 liters (2.5 quarts).
- Start the engine and run the engine speed at about 1,000 RPM until the engine has reached normal operating temperature.
- Listen for sticking lifters and other unusual noises.
- Inspect for fuel, oil, and/or other coolant leaks while the engine is running.
- With automatic transmission vehicles perform the following steps:
- Install the engine flywheel housing inspection plug.
- Perform a final inspection for the proper engine oil and coolant levels.
Important: The steps in the following procedure are in a specific order. Follow these steps in this order and ignore no details.
Tighten
Tighten the engine mount bracket bolts to 50 N·m (37 lb ft).
Tighten
Tighten the flywheel housing bolts to 50 N·m (37 lb ft).
Tighten
Tighten the engine mount nuts to 65 N·m (48 lb ft).
| 16.1. | Inner power steering pump reservoir bracket bolt |
| 16.2. | Upper generator bracket bolt |
| 16.3. | Outer power steering pump reservoir bracket bolt |
| 16.4. | Lower generator bracket bolt |
Tighten
Tighten the generator bracket bolts to 50 N·m (37 lb ft).
Tighten
Tighten the power steering pump bolts to 25 N·m (18 lb ft).
Tighten
Tighten the ground strap bolt to 32 N·m (24 lb ft).
Tighten
Tighten the driveline support bolts to 50 N·m (37 lb ft).
Important: DO NOT tighten the flywheel hub collar bolt at this time.
Tighten
Tighten the driveline support bolts to 50 N·m (37 lb ft).
Important: Use only hand tools when tightening or torquing crossmember nuts.
Tighten
Tighten the crossmember nuts to 110 N·m (81 lb ft).
Tighten
Tighten the transmission wire harness bracket bolts to 50 N·m (37 lb ft).
Tighten
Tighten the driveline support plugs to 50 N·m (37 lb ft).
Tighten
Tighten the automatic transmission fluid cooler pipes to 25 N·m (18 lb ft).
Tighten
Tighten the automatic transmission fluid cooler pipe clamp bolt, at the transmission cover, to 2.2 N·m (22 lb in).
Tighten
Tighten the automatic transmission fluid cooler pipe clamp bolt, at the oil pan, to 12 N·m (106 lb in).
Tighten
Tighten
| • | Position sensor pigtail |
| • | Shock absorber damper |
Tighten
Tighten the engine wire harness ground bolt to 32 N·m (23 lb ft).
Tighten
Tighten the A/C compressor and condenser hose bolt, at the compressor, to 27 N·m (20 lb ft).
Tighten
Tighten the oil cooler bolts to 12 N·m (106 lb in).
Tighten
Tighten the transmission cooler line retainer and bolts to 12 N·m (106 lb in).
Tighten
Tighten the transmission cooler line retainer and bolts to 12 N·m (106 lb in).
Tighten
Tighten the outlet hose to oil pan bolt to 22 N·m (16 lb ft).
Tighten
Tighten the inlet hose to oil pan bolt to 22 N·m (16 lb ft).
Tighten
Tighten the driveline close-out panel bolts to 12 N·m (106 lb in).
Tighten
Tighten the intermediate steering shaft bolt to 48 N·m (35 lb ft).
| • | The fuel injectors |
| • | The ignition coil main harness connectors |
| • | The EVAP solenoid |
| • | The electric throttle motor |
| • | The ECT sensor |
| • | The A/C compressor |
If necessary, install an oil pressure gage and measure the engine oil pressure.
| 113.1. | Shut off the engine. |
| 113.2. | Allow the engine to cool to room temperature. |
| 113.3. | Raise the vehicle. |
| 113.4. | Tighten the prop shaft hub collar bolt. |
Tighten
Tighten the propeller shaft hub collar bolt to 125 N·m (92 lb ft).
