Removal Procedure
Caution: Unless directed otherwise, the ignition and start switch must be in the OFF or LOCK position, and all electrical loads must be OFF before servicing any electrical component. Disconnect the negative battery cable to prevent an electrical spark should a tool or equipment come in contact with an exposed electrical terminal. Failure to follow these precautions may result in personal injury and/or damage to the vehicle or its components.
- Disconnect the negative battery cable. Refer to Battery Negative Cable Disconnection and Connection in Engine Electrical.
- Disable the supplemental inflatable restraint (SIR). Refer to Disabling the SIR System in SIR.
- Remove the air intake duct. Refer to one of the following procedures:
- Remove the air cleaner assembly. Refer to Air Cleaner Assembly Replacement in Engine Controls 4.8L, 5.3L and 6.0L.
- Remove the grille. Refer to Grille Replacement in Exterior Trim.
- Remove the front bumper. Refer to Front Bumper Replacement in Bumpers.
- Remove the inflatable restraint front end discriminating sensor. Refer to Inflatable Restraint Front End Discriminating Sensor Replacement in SIR.
- Remove the headlamps. Refer to Headlamp Assembly or Headlamp Bulb Replacement in Lighting Systems.
- Remove the park/turn signal lamp assemblies. Refer to Parking and Turn Signal Lamp Replacement in Lighting Systems.
- Remove the hood latch release bracket and reposition the release cable. Refer to Hood Primary and Secondary Latch Replacement .
- Remove the tie bar, if equipped. Refer to Front End Upper Tie Bar Replacement .
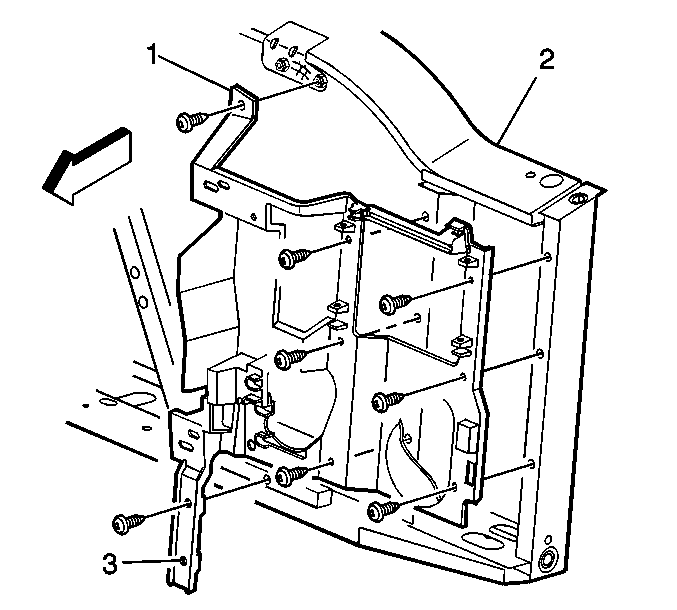
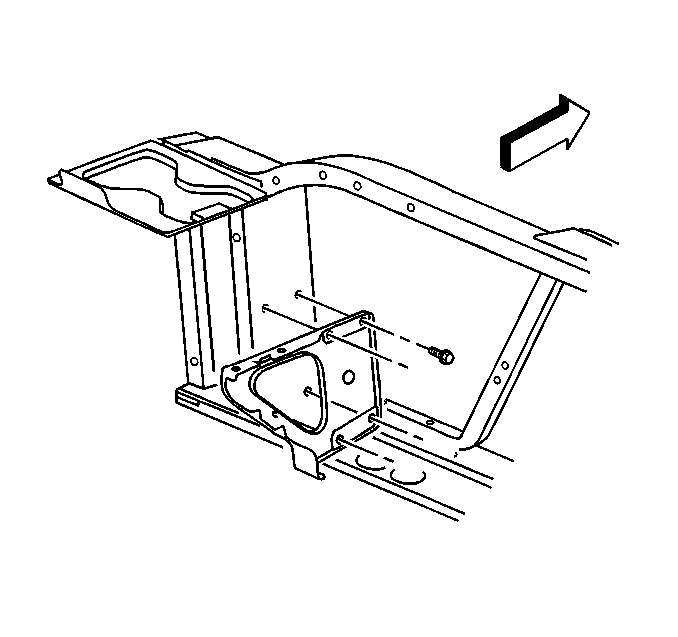
- Unscrew the headlamp housing support (1) from the tie bar (2). The 15 series lower mounting position is shown. The 25 series mounting position is similar.
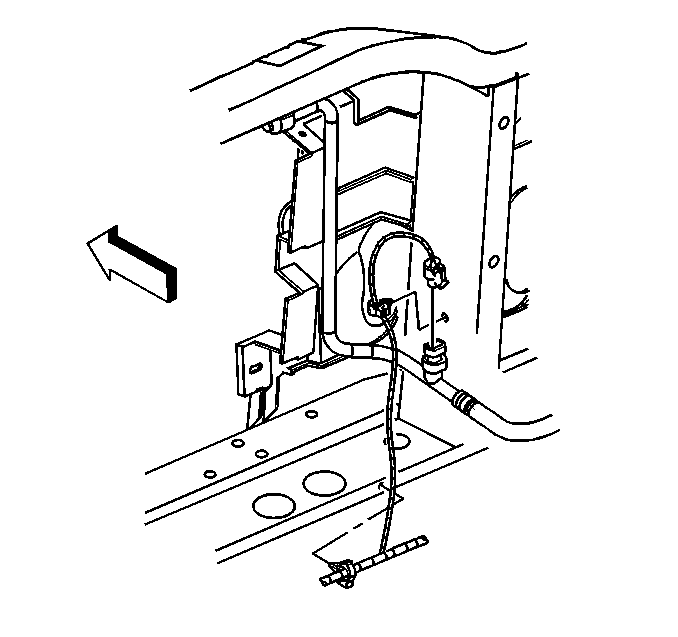
- Disconnect the horn electrical connector.
- Remove the radiator. Refer to Radiator Replacement in Engine Cooling.
- Remove the auxiliary transmission oil cooler (if equipped). Refer to Transmission Fluid Auxiliary Cooler Replacement in Automatic Transmission-4L80-E.
- Remove the air baffles. Refer to Radiator Air Baffle Assemblies and Deflectors in Engine Cooling.
- Remove the power steering cooler mounting bolts and reposition the cooler.
- Disconnect the electrical connector from the automatic recirculation switch.
- Remove the A/C condenser, if equipped. Refer to Condenser Replacement in Heating, Ventilation, and Air Conditioning.
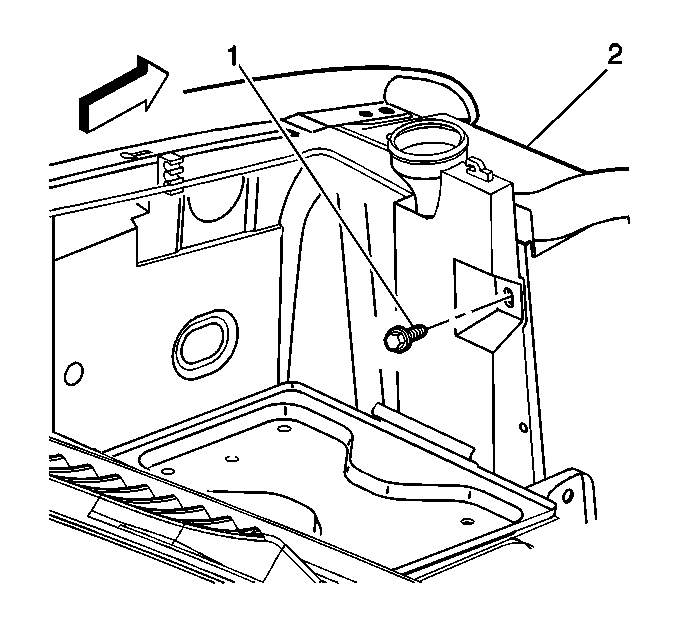
- Remove the upper washer reservoir bolt (1) from the tie bar (2).
- Remove the battery tray. Refer to Battery Tray Replacement in Engine Electrical.
- Remove the lower washer reservoir bolt (1) from the tie bar (2).
- Remove the battery tray support.
- Remove the air cleaner mounting bracket. Refer to Air Cleaner Bracket Replacement .
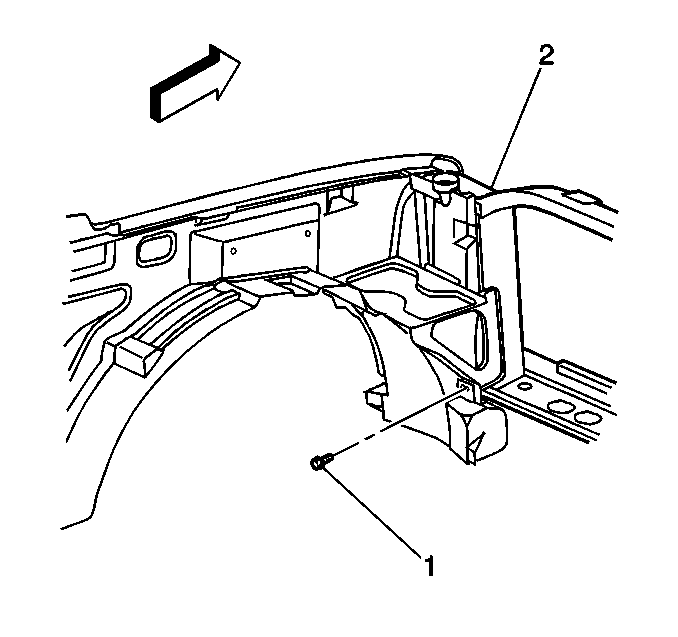
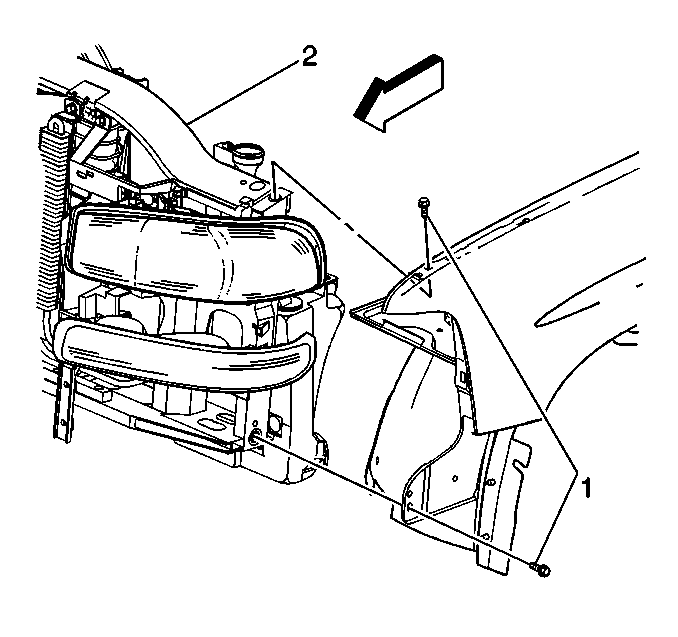
- Remove the front upper and lower fender bolts (1) from the tie bar/radiator support (2). The left fender is shown, the right is similar. Refer to Front Fender Replacement - Left Side and to Front Fender Replacement - Right Side .
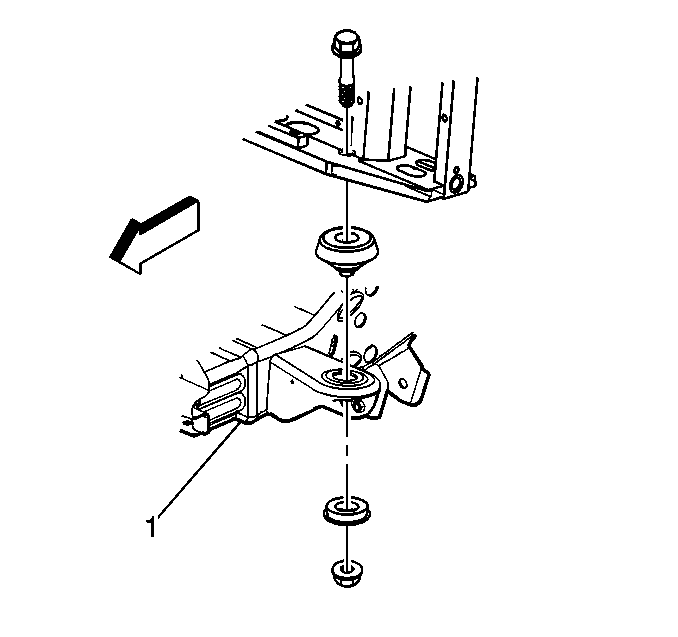
- Remove the lower radiator support nut and bolt at the frame (1).
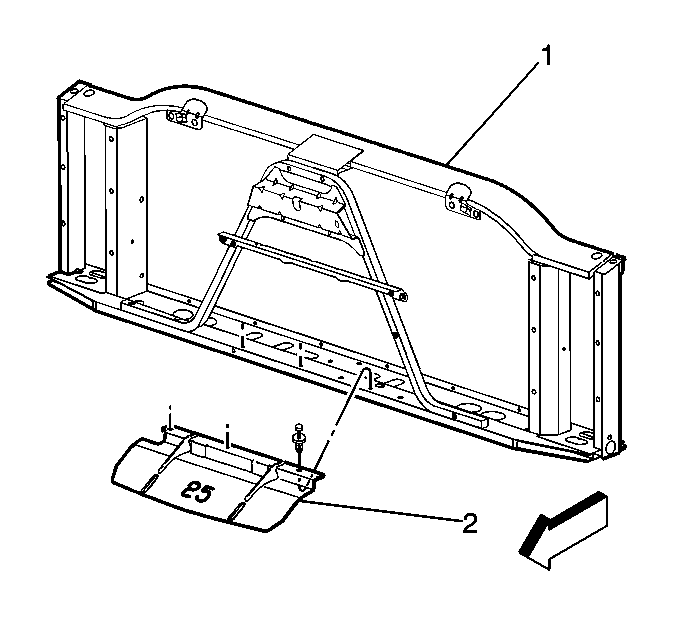
- Remove the radiator support baffle (2).
- Remove the radiator support (1) from the frame.
- Remove the horn(s) from the radiator support. Refer to Horn Replacement in Horns.
| • | Air Cleaner Outlet Resonator Replacement in Engine Controls - 4.3L |
| • | Air Cleaner Resonator Outlet Duct Replacement in Engine Controls - 4.8L, 5.3L and 6.0L |
Installation Procedure
- Install the horn(s) onto the radiator support. Refer to Horn Replacement in Horns.
- Position the radiator support (1) onto the frame.
- Install the radiator support baffle (2).
- Install the lower radiator support nut and bolt at the frame (1).
- Install the front upper and lower fender bolts (1) to the tie bar/radiator support (2). The left fender is shown, the right is similar. Refer to Front Fender Replacement - Left Side and Front Fender Replacement - Right Side .
- Install the battery tray support.
- Install the battery tray. Refer to Battery Tray Replacement in Engine Electrical.
- Install the Air Cleaner Mounting Bracket. Refer to Air Cleaner Bracket Replacement .
- Install the lower washer reservoir bolt (1) to the tie bar (2).
- Install the upper washer reservoir bolt (1) to the tie bar (2).
- Install the A/C condenser, if equipped. Refer to Condenser Replacement in Heating, Ventilation, and Air Conditioning.
- Connect the electrical connector to the automatic recirculation switch.
- Reposition the power steering cooler and install the mounting bolts.
- Install the air baffles. Refer to Radiator Air Baffle Assemblies and Deflectors .
- Install the auxiliary transmission oil cooler (if equipped). Refer to Transmission Fluid Auxiliary Cooler Replacement in Automatic Transmission-4L80-E.
- Install the radiator. Refer to Radiator Replacement in Engine Cooling.
- Connect the horn electrical connector. Refer to Horn Replacement in Horns.
- Install the headlamp housing support (1) to the tie bar (2). The 15 series lower mounting position is shown. The 25 series mounting position is similar.
- Install the tie bar, if equipped. Refer to Front End Upper Tie Bar Replacement .
- Install the hood latch release bracket and cable. Refer to Hood Primary and Secondary Latch Replacement .
- Install the park/turn signal lamp assemblies. Refer to Parking and Turn Signal Lamp Replacement in Lighting Systems.
- Install the headlamps. Refer to Headlamp Assembly or Headlamp Bulb Replacement in Lighting Systems.
- Install the inflatable restraint front end discriminating sensor. Refer to Inflatable Restraint Front End Discriminating Sensor Replacement in SIR.
- Install the front bumper. Refer to Front Bumper Replacement in Bumpers.
- Install the grille. Refer to Grille Replacement in Exterior Trim.
- Install the air cleaner assembly. Refer to one of the following procedures:
- Install the air intake duct. Refer to one of the following procedures:
- Enable the SIR. Refer to Enabling the SIR System in SIR.
- Connect the negative battery cable. Refer to Battery Negative Cable Disconnection and Connection in Engine Electrical.


Notice: Use the correct fastener in the correct location. Replacement fasteners must be the correct part number for that application. Fasteners requiring replacement or fasteners requiring the use of thread locking compound or sealant are identified in the service procedure. Do not use paints, lubricants, or corrosion inhibitors on fasteners or fastener joint surfaces unless specified. These coatings affect fastener torque and joint clamping force and may damage the fastener. Use the correct tightening sequence and specifications when installing fasteners in order to avoid damage to parts and systems.
Tighten
Tighten the radiator support nut to 70 N·m (52 lb ft).

Tighten
Tighten the front fender bolts to 25 N·m (18 lb ft).

Tighten
Tighten the battery tray support bolts to 9 N·m (80 lb in).

Tighten
Tighten the washer reservoir bolt to 9 N·m (80 lb in).

Tighten
Tighten the reservoir bolt to 9 N·m (80 lb in).


Tighten
Tighten the screws to 9 N·m (80 lb in).
| • | Air Cleaner Assembly Replacement in Engine Controls - 4.3L |
| • | Air Cleaner Assembly Replacement in Engine Controls - 4.8L, 5.3L and 6.0L |
| • | Air Cleaner Outlet Resonator Replacement in Engine Controls - 4.3L |
| • | Air Cleaner Resonator Outlet Duct Replacement in Engine Controls - 4.8L, 5.3L and 6.0L |
