Sunroof Module Assembly Replacement C3Y
Removal Procedure
- Cycle the sunshade to the fully open position.
- Remove the front sunroof window. Refer to Sunroof Window Replacement - Front .
- Remove the 2nd or 3rd sunroof window. Refer to Sunroof Window Replacement - Middle .
- Remove the rear sunroof window. Refer to Sunroof Window Replacement - Rear .
- Remove the sunroof finishing lace. Refer to Sunroof Opening Trim Finish Lace Replacement .
- Partially remove and lower the headliner. Refer to Headlining Trim Panel Replacement .
- Remove the sunshade. Refer to Sunroof Sunshade Replacement .
- Disconnect the electrical connectors from the motors.
- Disconnect the front and rear drain hoses from the drain spigots located in each corner.
- Remove the bolts (2) in the rear of the sunroof module first, then the bolts (1).
- Remove the front right and left center bolts (1) that secure the sunroof module to the roof ring.
- With the aid of an assistant support the module, remove the four corner screws (2).
- Lower and remove the sunroof module through the roof opening.
- Remove the sunroof module motor. Refer to Sunroof Motor/Actuator Replacement .
- Remove the sunroof sunshade motor. Refer to Sunroof Sunshade Motor/Actuator Replacement .
- Remove the sunroof window seal from the sunroof module. Refer to Sunroof Window Seal Replacement .
Important: A new sunroof module does not include the windows, motors, sunshade, or the finishing lace as components. Install the old components to the new sunroof module.
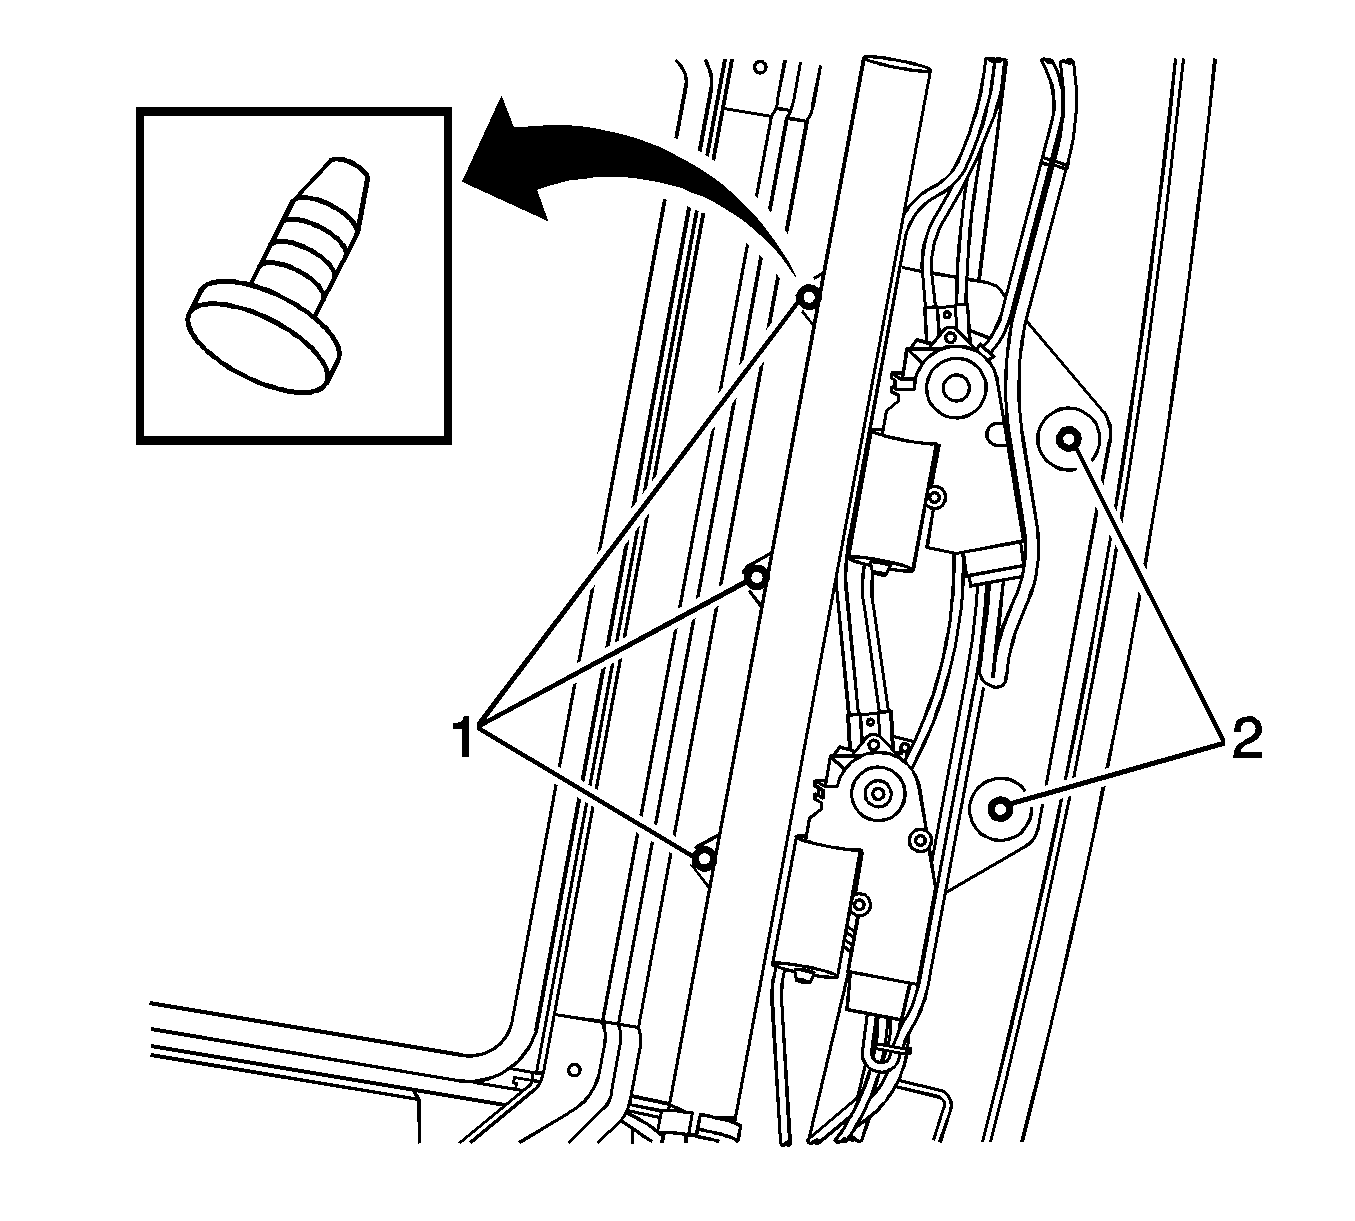
The shade must be full closed position to expose the bolts (1).
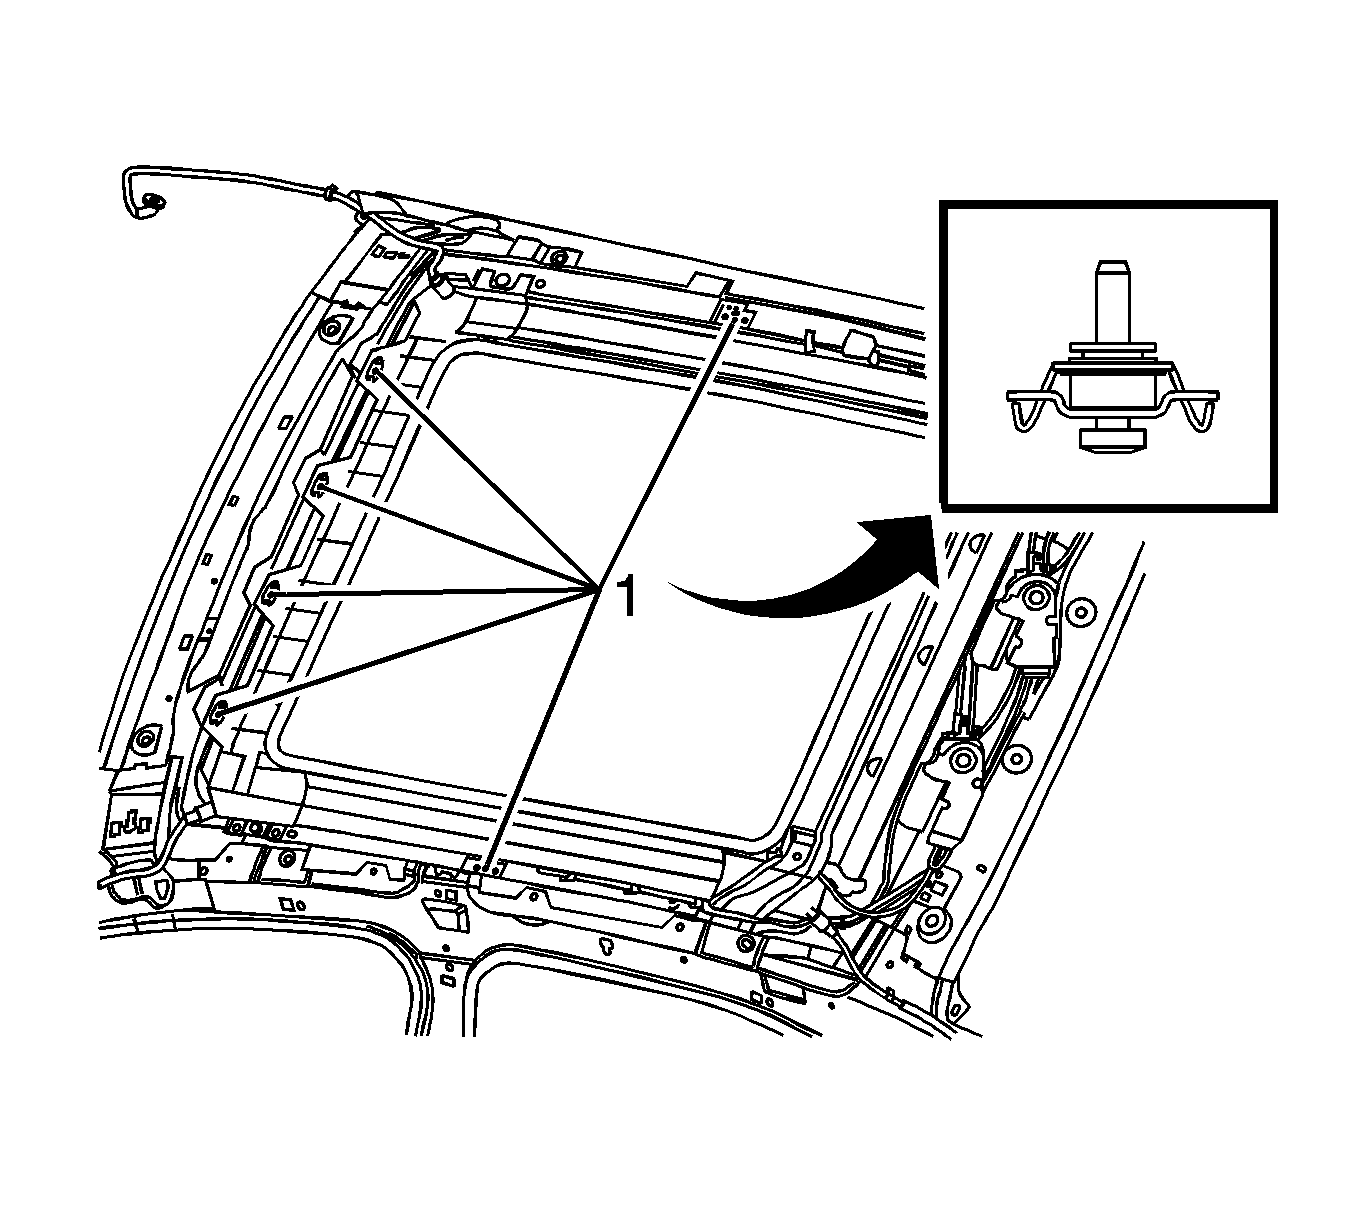
Important: DO NOT remove the four corner screws until last. DO NOT remove the nut just the TORX™ bit screws (1), the nut is used for height adjustment.
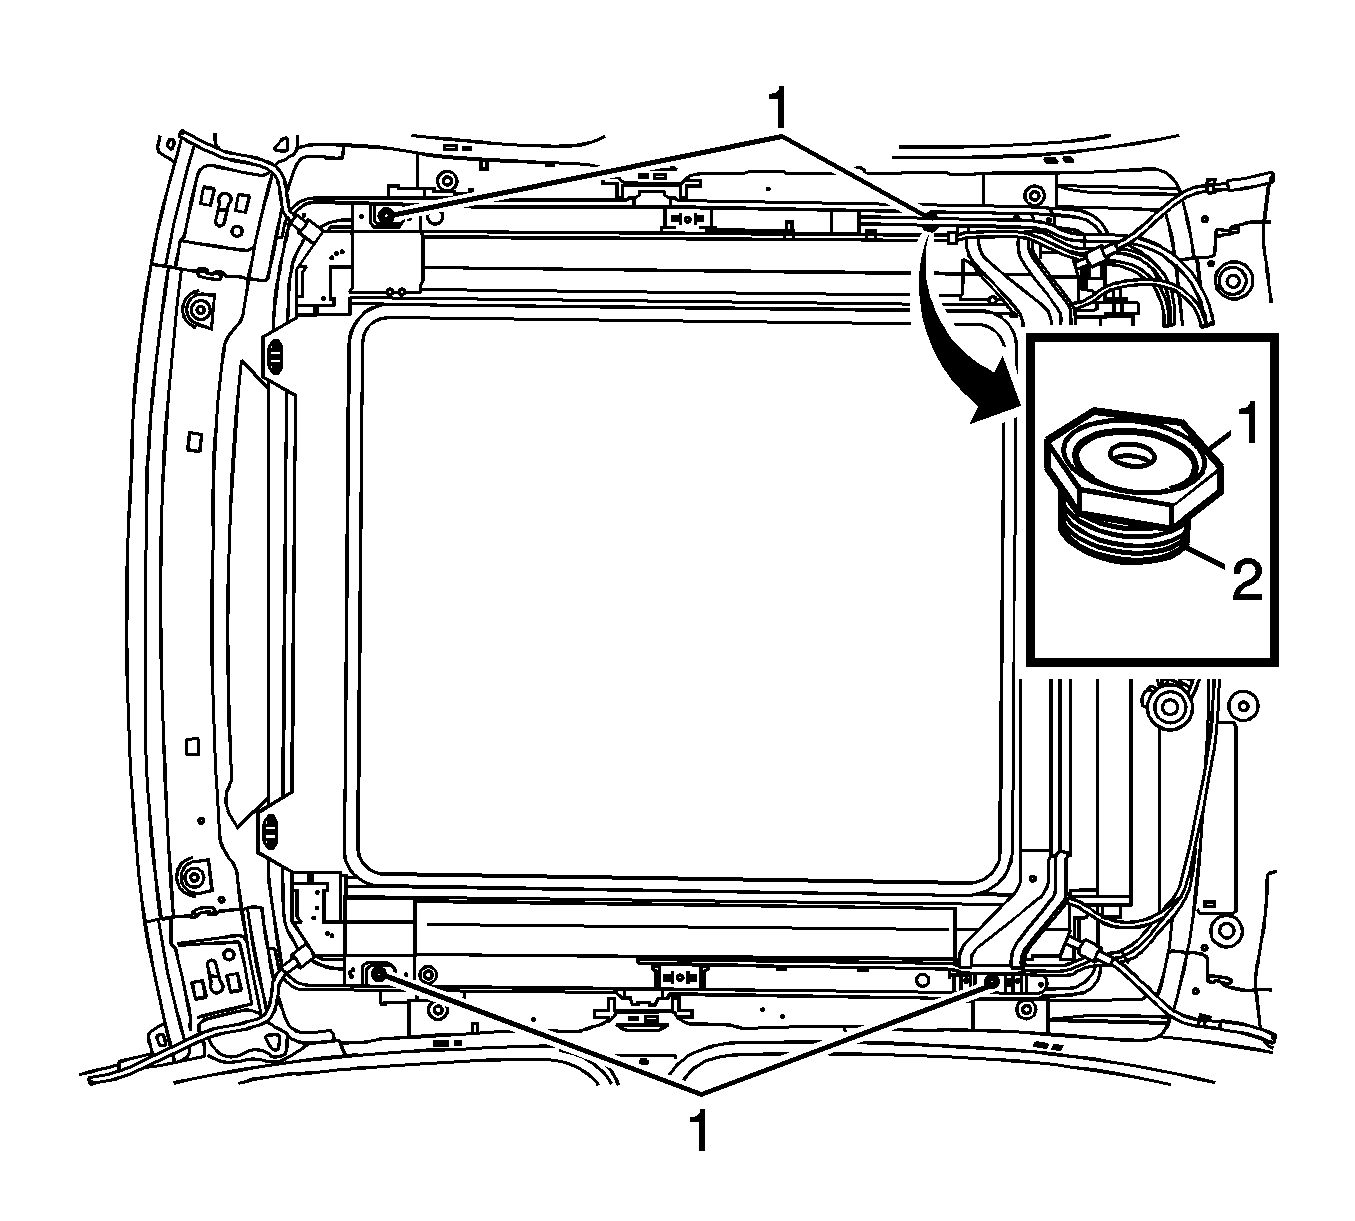
Important: Perform the remaining steps on the bench.
Installation Procedure
- Install the sunroof window seal to the sunroof module. Refer to Sunroof Window Seal Replacement .
- Install the sunroof sunshade motor. Refer to Sunroof Sunshade Motor/Actuator Replacement .
- Install the sunroof module motor. Refer to Sunroof Motor/Actuator Replacement .
- Load the sunroof module down through the roof opening.
- Install the corner screws (2), with the aid of an assistant.
- Install the bolts (1) that secure the sunroof module to the roof ring.
- Connect the electrical connectors to the motors, cycle the sunshade to fully closed position.
- Install the bolts (2) in the rear of the sunroof module first, then install bolts (1).
- Connect the front and rear sunroof drain hoses from the drain spigot located in each corner.
- Install the sunshade. Refer to Sunroof Sunshade Replacement .
- Raise and install the headliner. Refer to Headlining Trim Panel Replacement .
- Install the sunroof finishing lace. Refer to Sunroof Opening Trim Finish Lace Replacement .
- Cycle the sunroof window to the fully vent position.
- Install the front sunroof window. Refer to Sunroof Window Replacement - Front .
- Install the 2nd or 3rd sunroof window. Refer to Sunroof Window Replacement - Middle .
- Install the rear sunroof window. Refer to Sunroof Window Replacement - Rear .
- Sunroof module adjustment. Refer to Sunroof Module Adjustment .
- Perform the Initialization/Teach procedure. Refer to Sunroof Motor/Actuator Initialization/Teach Process .
- Inspect the sunroof for proper operation.
- Close the sunshade.
Install the sunroof in the opening.
Notice: Refer to Fastener Notice in the Preface section.

Important: Do NOT remove the four corner screws until last. Do NOT remove the nut just the TORX™ bit screws (1), the nut is used for height adjustment.
Tighten
Tighten the bolts to 10 N·m (89 lb in).

Tighten
Tighten the bolts to 10 N·m (89 lb in).

Important : The shade must be closed to expose the bolts (1) holes.
Tighten
Tighten the bolts to 10 N·m (89 lb in).
Important: If the sunshade spring releases, Refer to Reinstall within this cell.
Sunroof Module Assembly Replacement CF5
Removal Procedure
- Remove the sunroof window. Refer to Sunroof Window Replacement .
- Remove the sunshade panel. Refer to Sunroof Sunshade Replacement .
- Remove the sunroof finishing lace. Refer to Sunroof Opening Trim Finish Lace Replacement .
- Lower the headliner. Perform the headliner replacement removal step 1 thru 21. Refer to Headlining Trim Panel Replacement.
- Disconnect the front sunroof drain hoses from the drain spigot.
- Disconnect the rear sunroof drain hoses from the drain spigot.
- Remove the bolts that secure the sunroof module motor base to the roof.
- Remove the push-pin fastener securing the rear sunroof water gutter to the roof.
- With the aid of an assistant, remove the four bolts that secure the module to the roof ring.
- If you are replacing the sunroof module assembly, remove the sunroof motor/actuator. Refer to Sunroof Motor/Actuator Replacement .
Important: A new sunroof module assembly does not include the sunroof window, the motor, the sunshade, or the finishing lace as components. You must install the old components to the new sunroof module assembly.
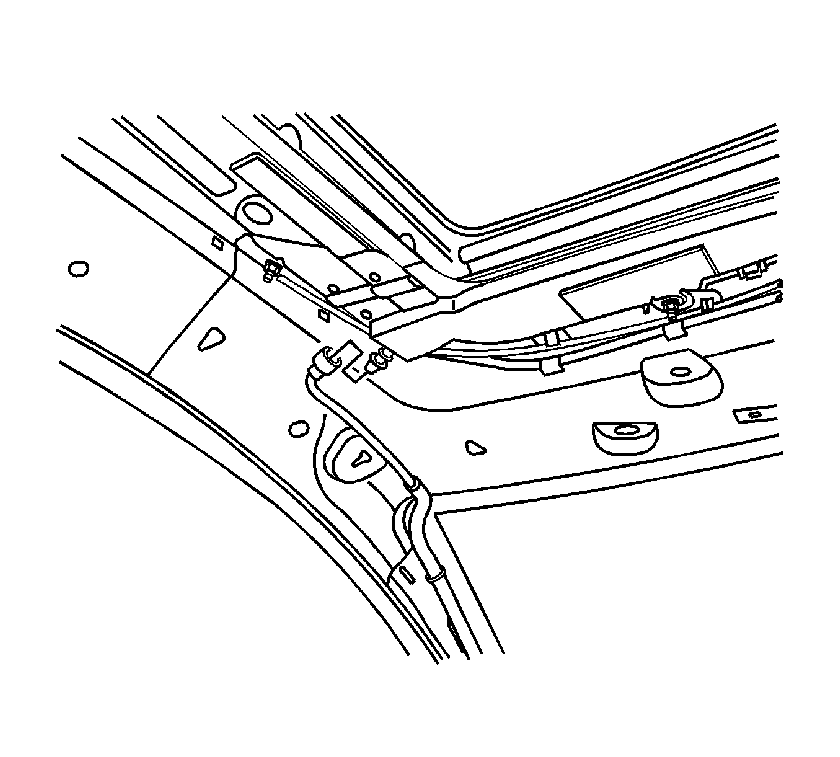
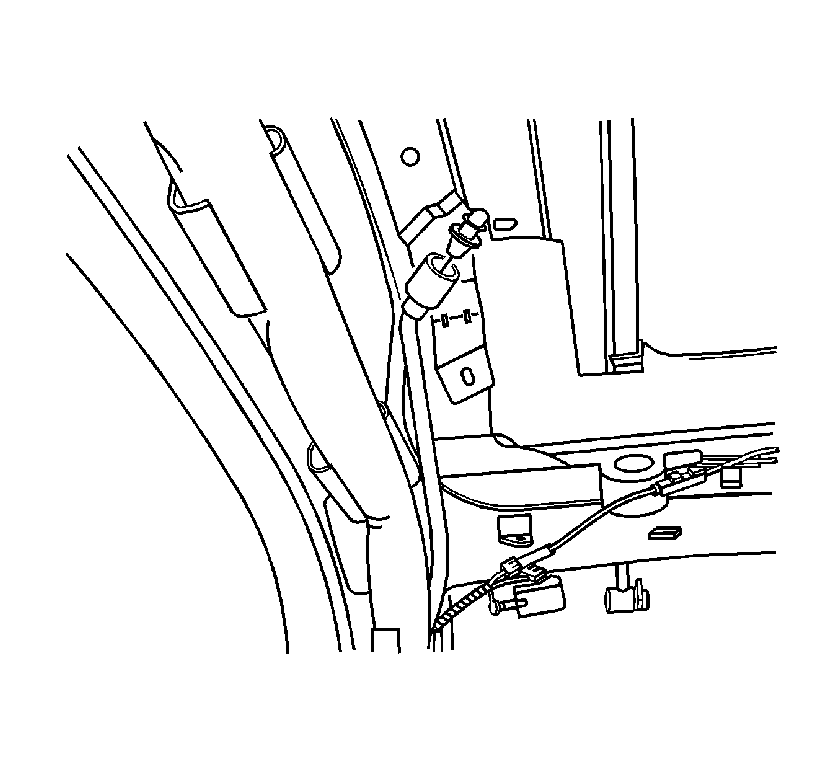
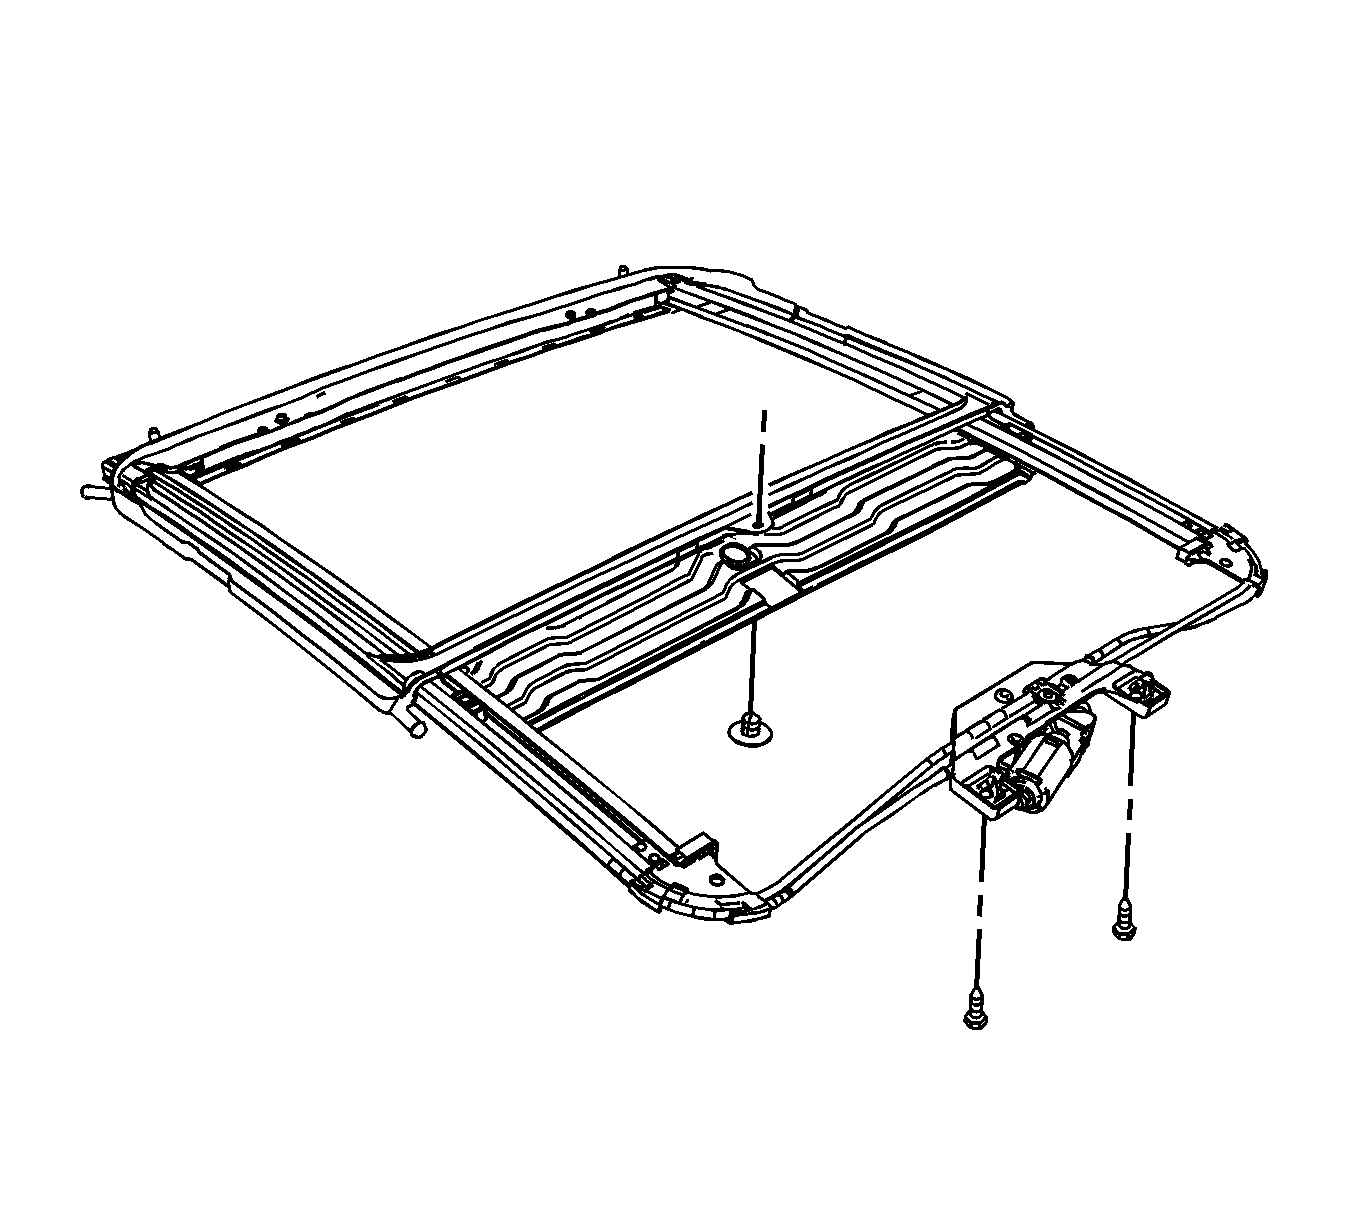
Important: Remove the sunroof module fasteners in the order indicated below, from back to front.
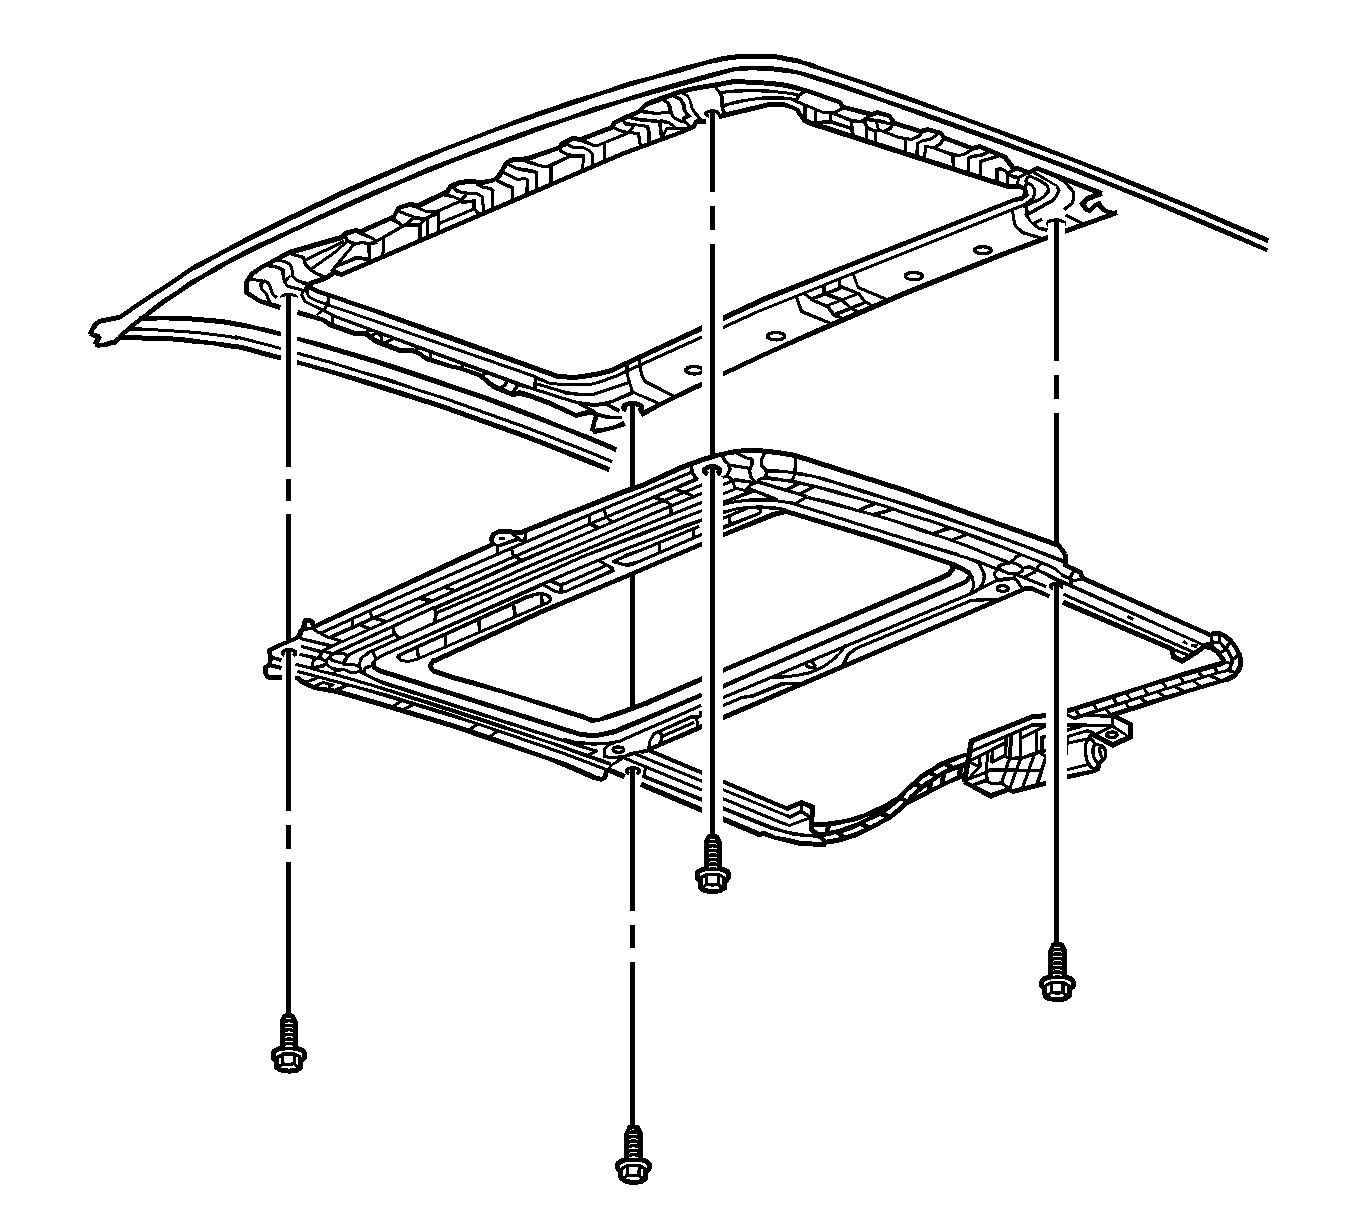
Lower and remove the sunroof module assembly out through the passenger side door.
Installation Procedure
- If you are replacing the sunroof module assembly, install the sunroof motor/actuator. Refer to Sunroof Motor/Actuator Replacement .
- With the aid of an assistant, position the sunroof module assembly to the roof ring.
- Install the four bolts which secure the sunroof module assembly to the roof ring.
- Using the access hole in the sunroof module cross bar, install the push-pin fastener which secures the rear sunroof water gutter to the roof.
- Install the 2 bolts which secure the sunroof motor base to the roof.
- Connect the front and rear drain hoses to the drain spigots.
- Install the sunshade. Refer to Sunroof Sunshade Replacement .
- Raise and install the headliner. Perform the headliner replacement install steps 5 thru 24. Refer to Headlining Trim Panel Replacement.
- Install the sunroof window. Adjust as necessary. Refer to Sunroof Window Replacement .
- Initialize the sunroof motor. Refer to Sunroof Motor/Actuator Initialization/Teach Process .
- Install the sunroof finishing lace. Refer to Sunroof Opening Trim Finish Lace Replacement .
- Inspect the sunroof for proper operation.

Notice: Refer to Fastener Notice in the Preface section.
Tighten
Tighten the bolts to 10 N·m (89 lb in).

Tighten
Tighten the bolts to 2 N·m (18 lb in).

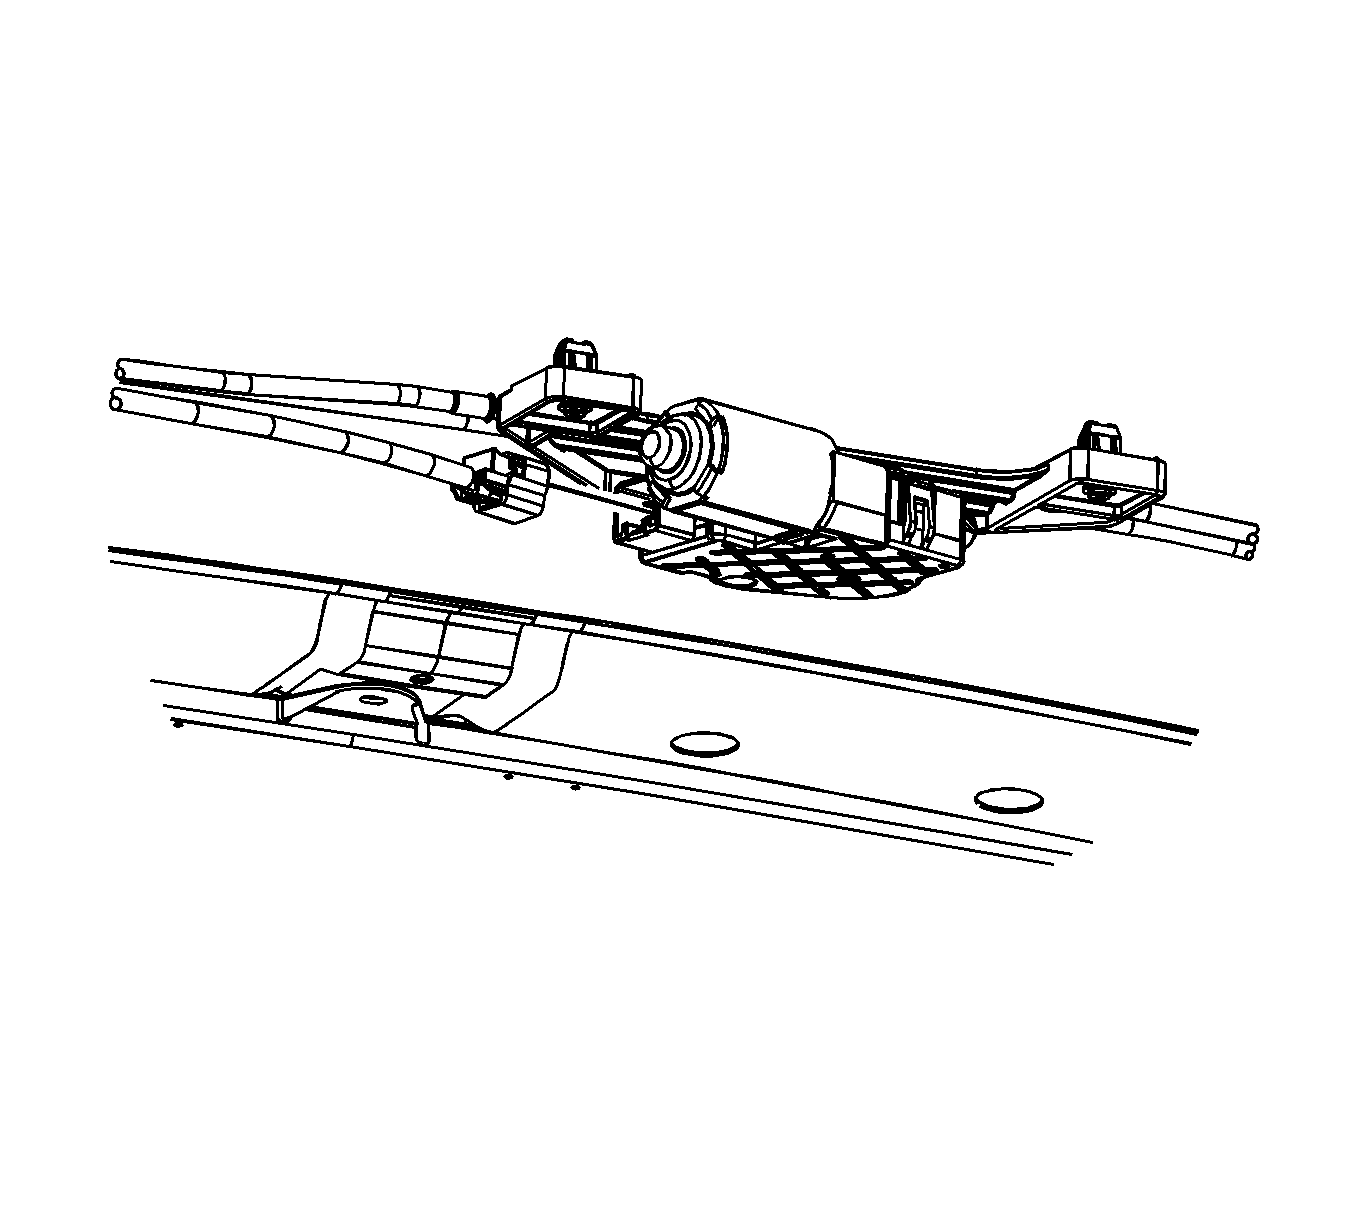
Verify that the electrical connector is connected to the sunroof motor/actuator.
