For 1990-2009 cars only
Removal Procedure
- Open the doors.
- Remove both front seats. Refer to Bucket Seat Replacement in Seats.
- Remove the center console. Refer to Console Replacement in Instrument Panel, Gauges, and Console.
- Remove the rear seat back. Refer to Rear Seat Back Replacement in Seats.
- Remove both of the quarter trim panels. Refer to Quarter Upper Trim Panel Replacement .
- Remove both of the windshield pillar garnish moldings. Refer to Windshield Pillar Garnish Molding Replacement .
- Remove both of the shoulder belts to headlining escutcheons. Refer to Seat Belt Replacement - Driver or Passenger in Seat Belts.
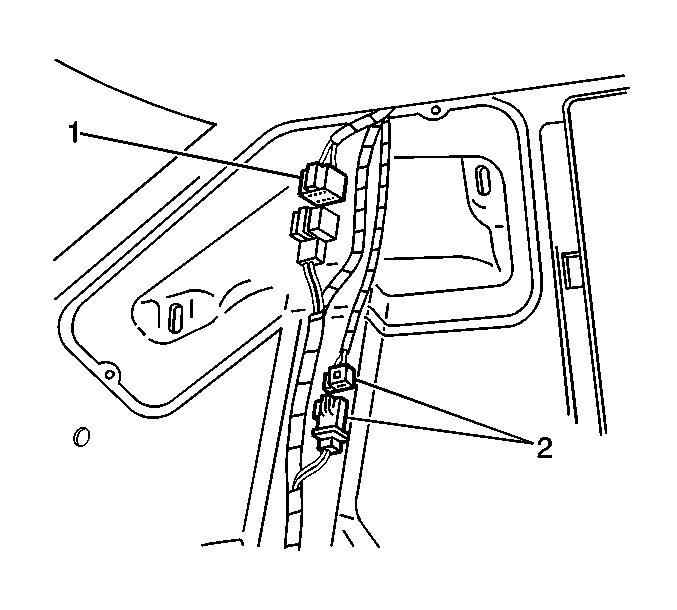
- Disconnect the left rear quarter electrical connectors (1, 2).
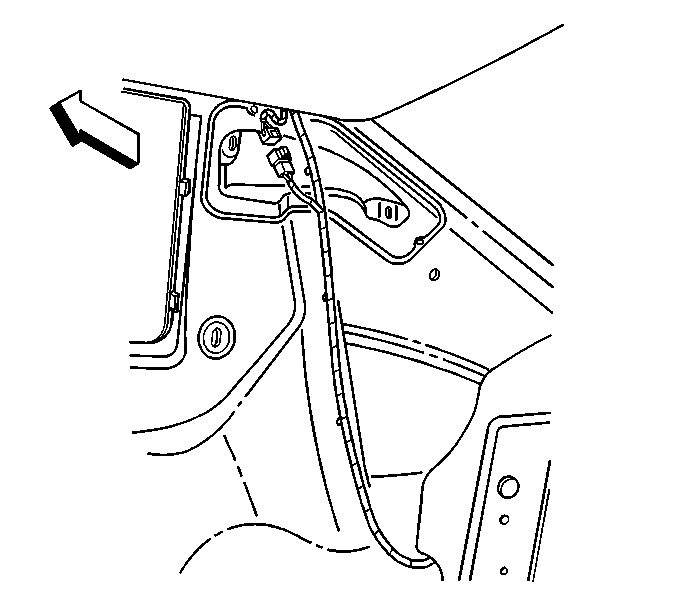
- Disconnect the right rear quarter electrical connectors.
- Remove the roof mounted courtesy lamps. Refer to Roof Rail Rear Courtesy Lamp Replacement in Lighting Systems.
- Remove the sunshades. Refer to Sunshade Replacement .
- Remove the overhead console. Refer to Roof Console Replacement .
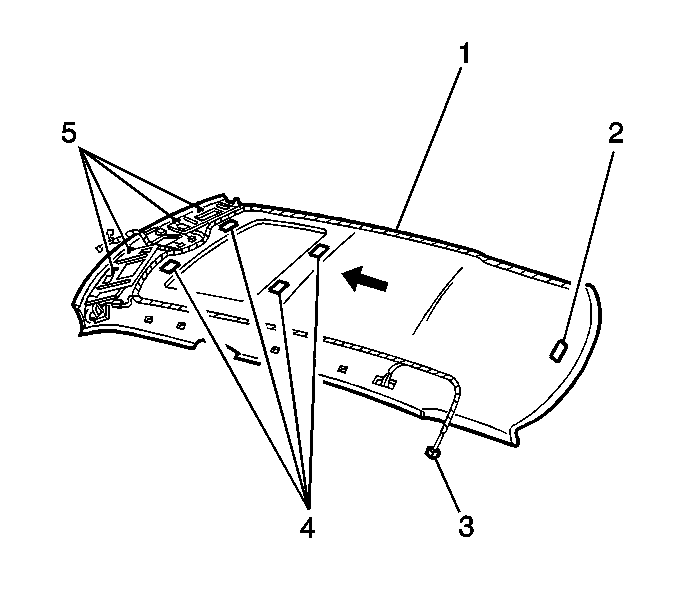
- Pull down at the attachments in order to detach the hook and loop.
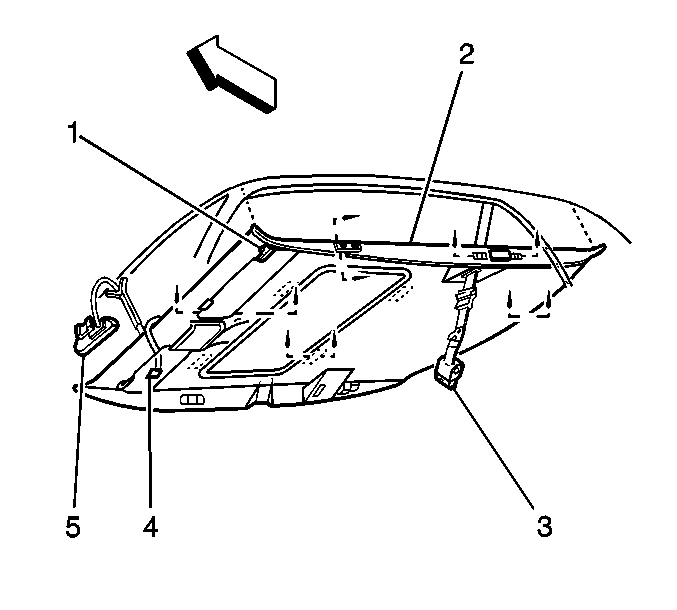
- With the aid from an assistant, remove the headliner (2) through the right front door.


Notice: Use care when removing and installing the headliner. If reusing the headliner lay the headliner down flat on a clean surface. Excessive bending will damage the headliner.
Installation Procedure
- Complete the following steps with the aid of an assistant:
- Install the interior roof mounted courtesy lamps. Refer to Roof Rail Rear Courtesy Lamp Replacement in Lighting Systems.
- Install the sunshades. Refer to Sunshade Replacement .
- Connect the left rear quarter electrical connectors (1, 2).
- Connect the right rear quarter electrical connectors.
- Install both of the shoulder belt to headlining escutcheons. Refer to Seat Belt Replacement - Driver or Passenger in Restraints.
- Install both of the windshield pillar garnish moldings. Refer to Windshield Pillar Garnish Molding Replacement .
- Install the quarter trim panels. Refer to Quarter Upper Trim Panel Replacement .
- Install the rear seat back. Refer to Rear Seat Back Replacement in Seats.
- Ensure not to leave imprints into the headliner while securing the hook and loop attachment.
- Install the center console. Refer to Console Replacement in Instrument Panel, Gages, and Console.
- Install both front seats. Refer to Bucket Seat Replacement in Seats.
- Close the doors.

Important: Do not pinch the vanity mirror wires (1) when you install the sunshades and support fasteners.
| 1.1. | Install the headliner (2) into the vehicle. |
| 1.2. | Ensure the mirror and rain sense electrical connectors are visible. |
| 1.3. | Engage the locator magnet at the rear of the headliner. |
| 1.4. | Firmly engage the hook and loop attachments at the center of the headliner. |
| 1.5. | Attach the sunshade supports (5). Refer to Sunshade Replacement . |


Important: With the palm of your hand, press the headliner (1) firmly at the hook and loop attachments (4) in order to secure.
