Removal Procedure
Tools Required
| • | J 8001 Dial Indicator Set |
| • | J 3289-20 Bench Mount |
| • | J 37107-1 Remover Screw |
| • | J 6125-1B Slide Hammer |
| • | J 37337 Support and Fixture Tools |
- Drain the oil from the transmission. Refer to Oil Drain and Fill .
- Remove the transmission from the vehicle. Refer to Transmission Removal .
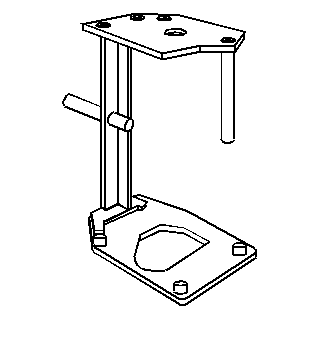
- Install the J 37337 support and fixture tools and the J 3289-20 Bench Mount.
- Rotate the transmission vertically.
- Remove the vehicle speed sensor. Refer to Vehicle Speed Sensor .
- Remove the gearshift assembly from the transmission. Refer to Transmission Control Replacement .
- Remove the reverse idler cover and the gasket. Refer to Reverse Idler Gear Cover Gasket .
- Pierce the sealing plug. Use a center punch.
- Remove the reverse gear idler shaft. Use J 37107-1 and J 6125-1B .
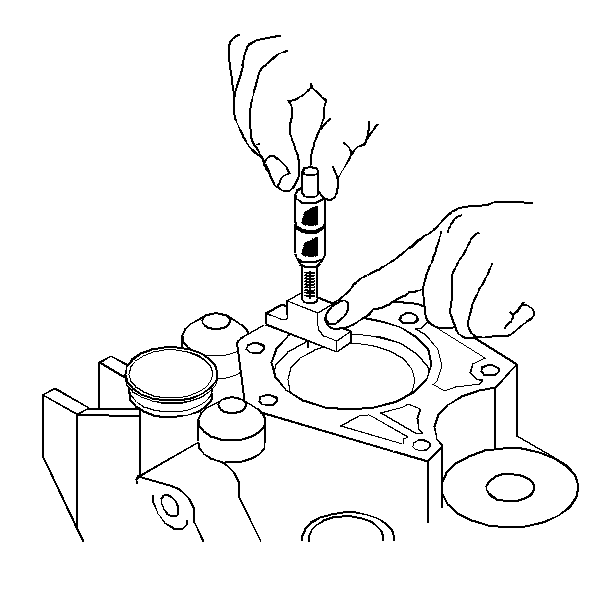
- Measure the output shaft end play. Complete the following steps:
- Remove the following parts:
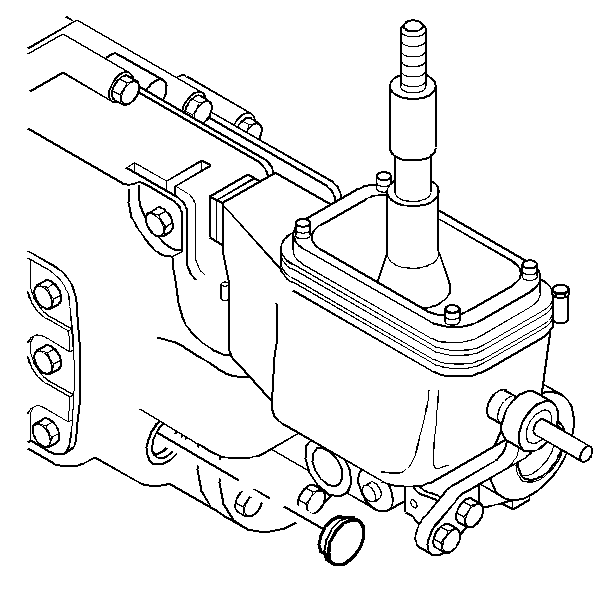
Remove the 30 mm sealing plug. Use J 37107-1 and J 6125-1B .
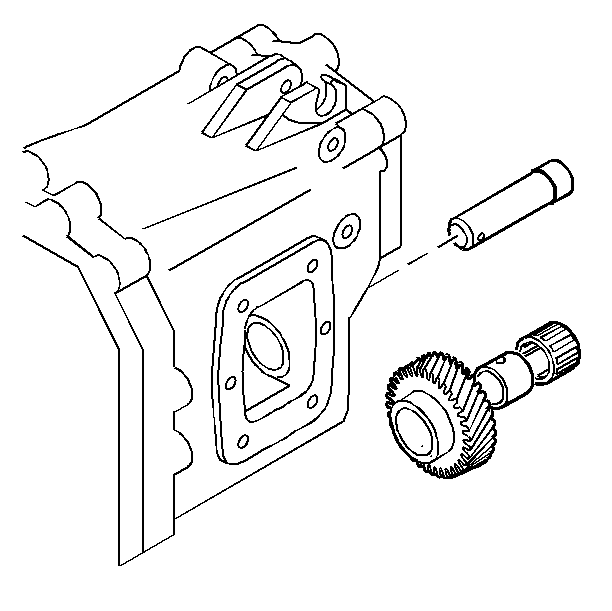
Remove the reverse idler gear and the bearings from the case.
Important: If the end play is not correct, check the installation of the selective shim. The shim may have to be changed to a different thickness, or the mainshaft output bearing may not be completely seated in the case.
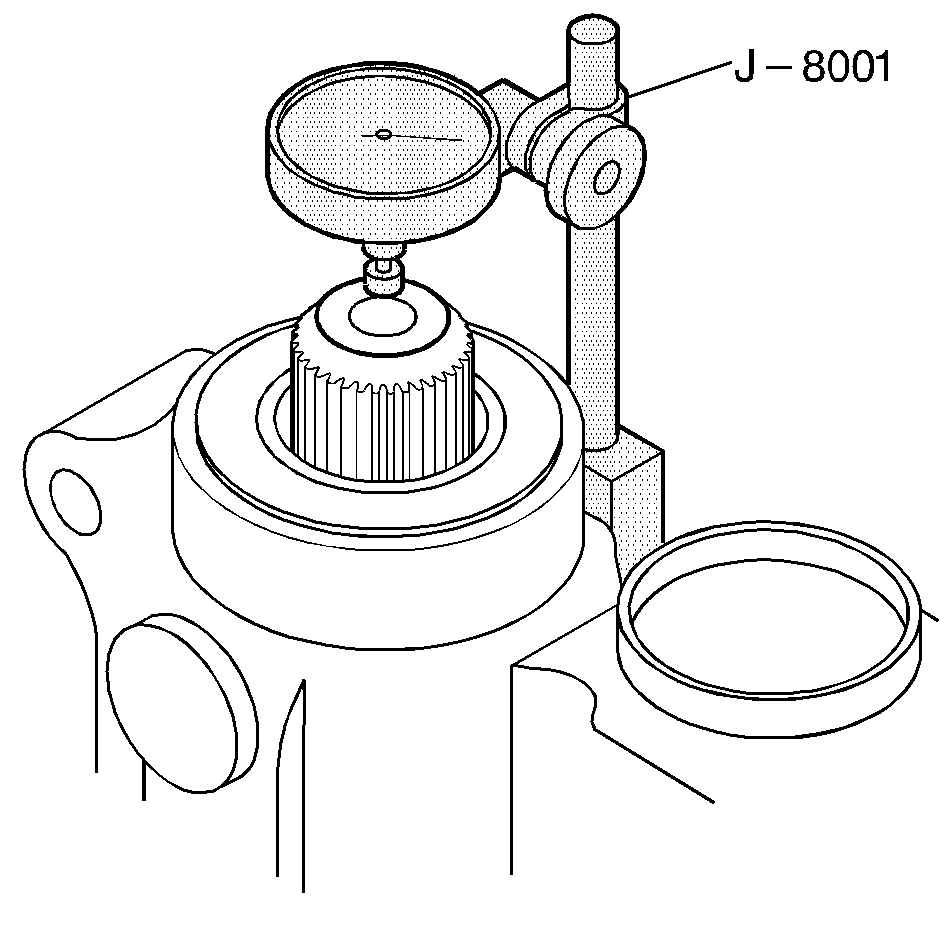
| 10.1. | Use J 8001 . |
| 10.2. | Wrap a shop towel around a pry bar and carefully place it under the reverse gear. |
The dial indicator should read be 0.00 mm (0.00 in) to 0.40 mm (0.16 in).
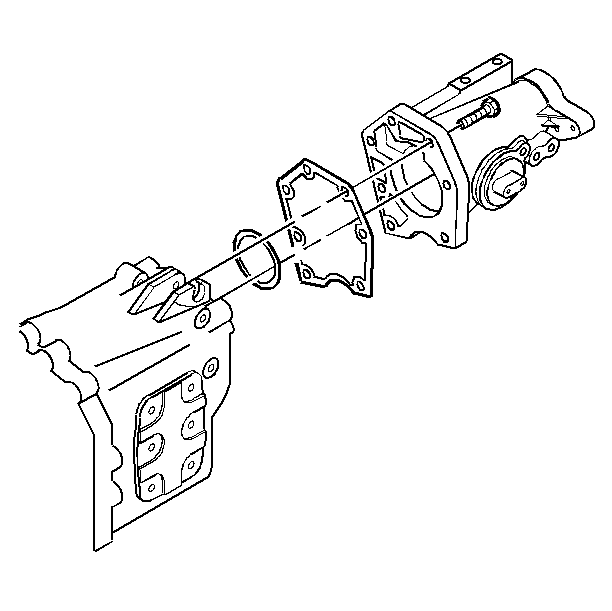
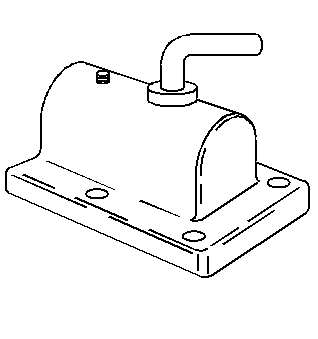
| 11.1. | Seven bolts and seven spring washers |
| 11.2. | The extension housing |
| 11.3. | The gasket |
| 11.4. | The selective shim |
Installation Procedure
| • | J 21359-A Extension Housing Seal Installer |
| • | J 8001 Dial Indicator Set |
- Install the following parts:
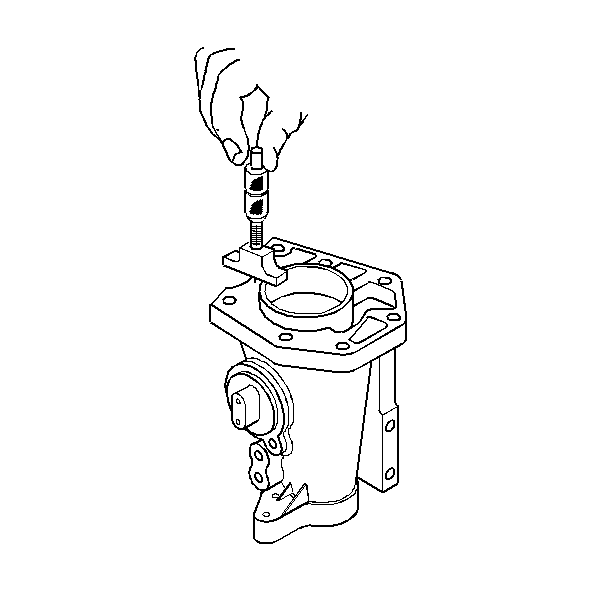
- Measure the output shaft end play. Complete the following steps:
- Install the following parts:
- Install the reverse idler gear cover and a new gasket. Refer to Reverse Idler Gear Cover Gasket .
- Install a new 30 mm sealing plug.
- Install the gearshift assembly to the transmission. Refer to Transmission Control Replacement .
- Install the vehicle speed sensor. Refer to Vehicle Speed Sensor .
- Remove the support fixture from the transmission.
- Install the transmission in the vehicle. Refer to Transmission Installation .
- Fill the transmission with oil. Refer to Oil Drain and Fill .
| 1.1. | The selective shim |
| 1.2. | A new gasket |
| 1.3. | The extension housing |
| 1.4. | The seven bolts with seven spring washers |
Tighten
The bolts to 25 N·m(18 Ib ft).
Notice: Use the correct fastener in the correct location. Replacement fasteners must be the correct part number for that application. Fasteners requiring replacement or fasteners requiring the use of thread locking compound or sealant are identified in the service procedure. Do not use paints, lubricants, or corrosion inhibitors on fasteners or fastener joint surfaces unless specified. These coatings affect fastener torque and joint clamping force and may damage the fastener. Use the correct tightening sequence and specifications when installing fasteners in order to avoid damage to parts and systems.
| 1.4. | Use a crisscross pattern torquing sequence. |
Do not use an impact wrench.
Important: If the end play is not correct, check the installation of the selective shim. The shim may have to be changed to a different thickness, or the mainshaft output bearing may not be completely seated in the case.
| 2.1. | Use J 8001 . |
| 2.2. | Wrap a shop towel around a pry bar and carefully place it under the reverse gear. |
The dial indicator should read be 0.00 mm (0.00 in) to 0.40 mm (0.16 in).
| 3.1. | Install the reverse idler gear and the bearings into the case. |
Install the parts with the case in the upright position.
Do not force the parts into the case.
| 3.2. | Slide the reverse idler gear shaft through the case and the gear. |
Make sure the retaining bolt hole lines up with the cover bolt hole.
Tighten
Tighten the bolts to 25 N·m (18 lb ft).
Use a crisscross pattern torquing sequence.
Do not use an impact wrench.
Use the J 21359-A Extension Housing Seal Installer.
Tighten
Tighten the retaining bolts to 25 N·m (18 lb ft).
Clean and Inspect
- Clean all metal parts in a suitable solvent. Air dry all the parts.
- Remove all gasket material and debris from the parts.
- Measure the distance from the case to the top of the main shaft output bearing. Complete the following steps:
- Measure the distance from the top of the support ring down to the seating surface of the rear extension housing gasket. Complete the following steps:
- Record the difference between the two measurements.
| 3.1. | First remove the old shims from the top of the bearing. |
| 3.2. | Make sure the bearing is completely seated in the case. |
| 3.3. | Use a depth micrometer. |
| 3.4. | Record the measurement. |
| 4.1. | A new gasket must be installed for this measurement. |
| 4.2. | Use a depth micrometer. |
The clearance needed in order to compress the gasket is 0.05--0.10 mm (0.002--0.004 in).
| 4.3. | Record the measurement. |
Subtract 0.05--0.10 (0.002--0.004 in) for compressed gasket allowance, from the difference.
Select a shim equal to the final difference. Refer to Shim Size Specifications .
